
1. Introduction
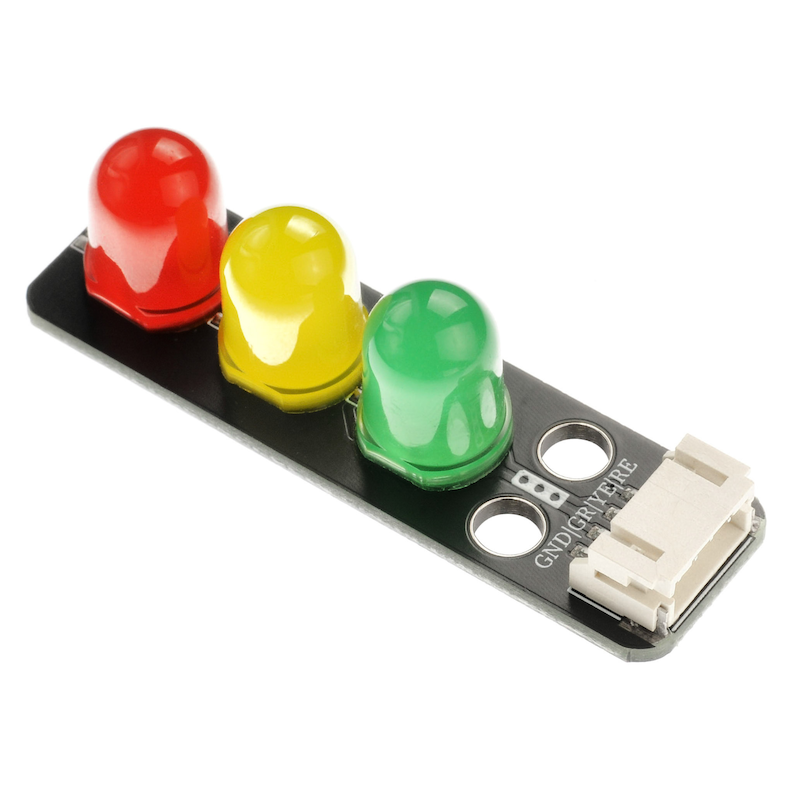
LED is an abbreviation for Light Emitting Diode, made of a mixture of compounds, namely Gallium (Ga), Arsenic (AS), and Phosphorus (P).Gallium phosphide diodes emit red light, gallium phosphide diodes emit green light, silicon carbide diodes emit yellow light.The reverse breakdown voltage of an LED is 5V. Its positive伏安特性曲线太陡,模块上板载了限流电阻,以便在使用时控制流过管道的电流。The traffic light is equipped with 3 different colored LED lights, which can be controlled by manipulating the corresponding pins to turn the lights on and off.
2. Schematic
Signal light - HS-F05-L schematicClick to view
Module Parameters
Pin Name | description |
|---|---|
GND | GND (Power Input) |
GR | Green Lead Pin |
YE | Traffic light lead |
RE | Red light lead |
Power Supply Voltage: 3.3V / 5V
Connection Method: PH2.0 4P Terminal
Installation Method: Double Screw Fixed
4, Circuit Board Size

5 of Arduino IDE example program
Attention: If prompted with an error message about the library file during program upload, please import the library file first!
Arduino IDE Library Download and Import Tutorial:Click to view
Example program (UNO development board):
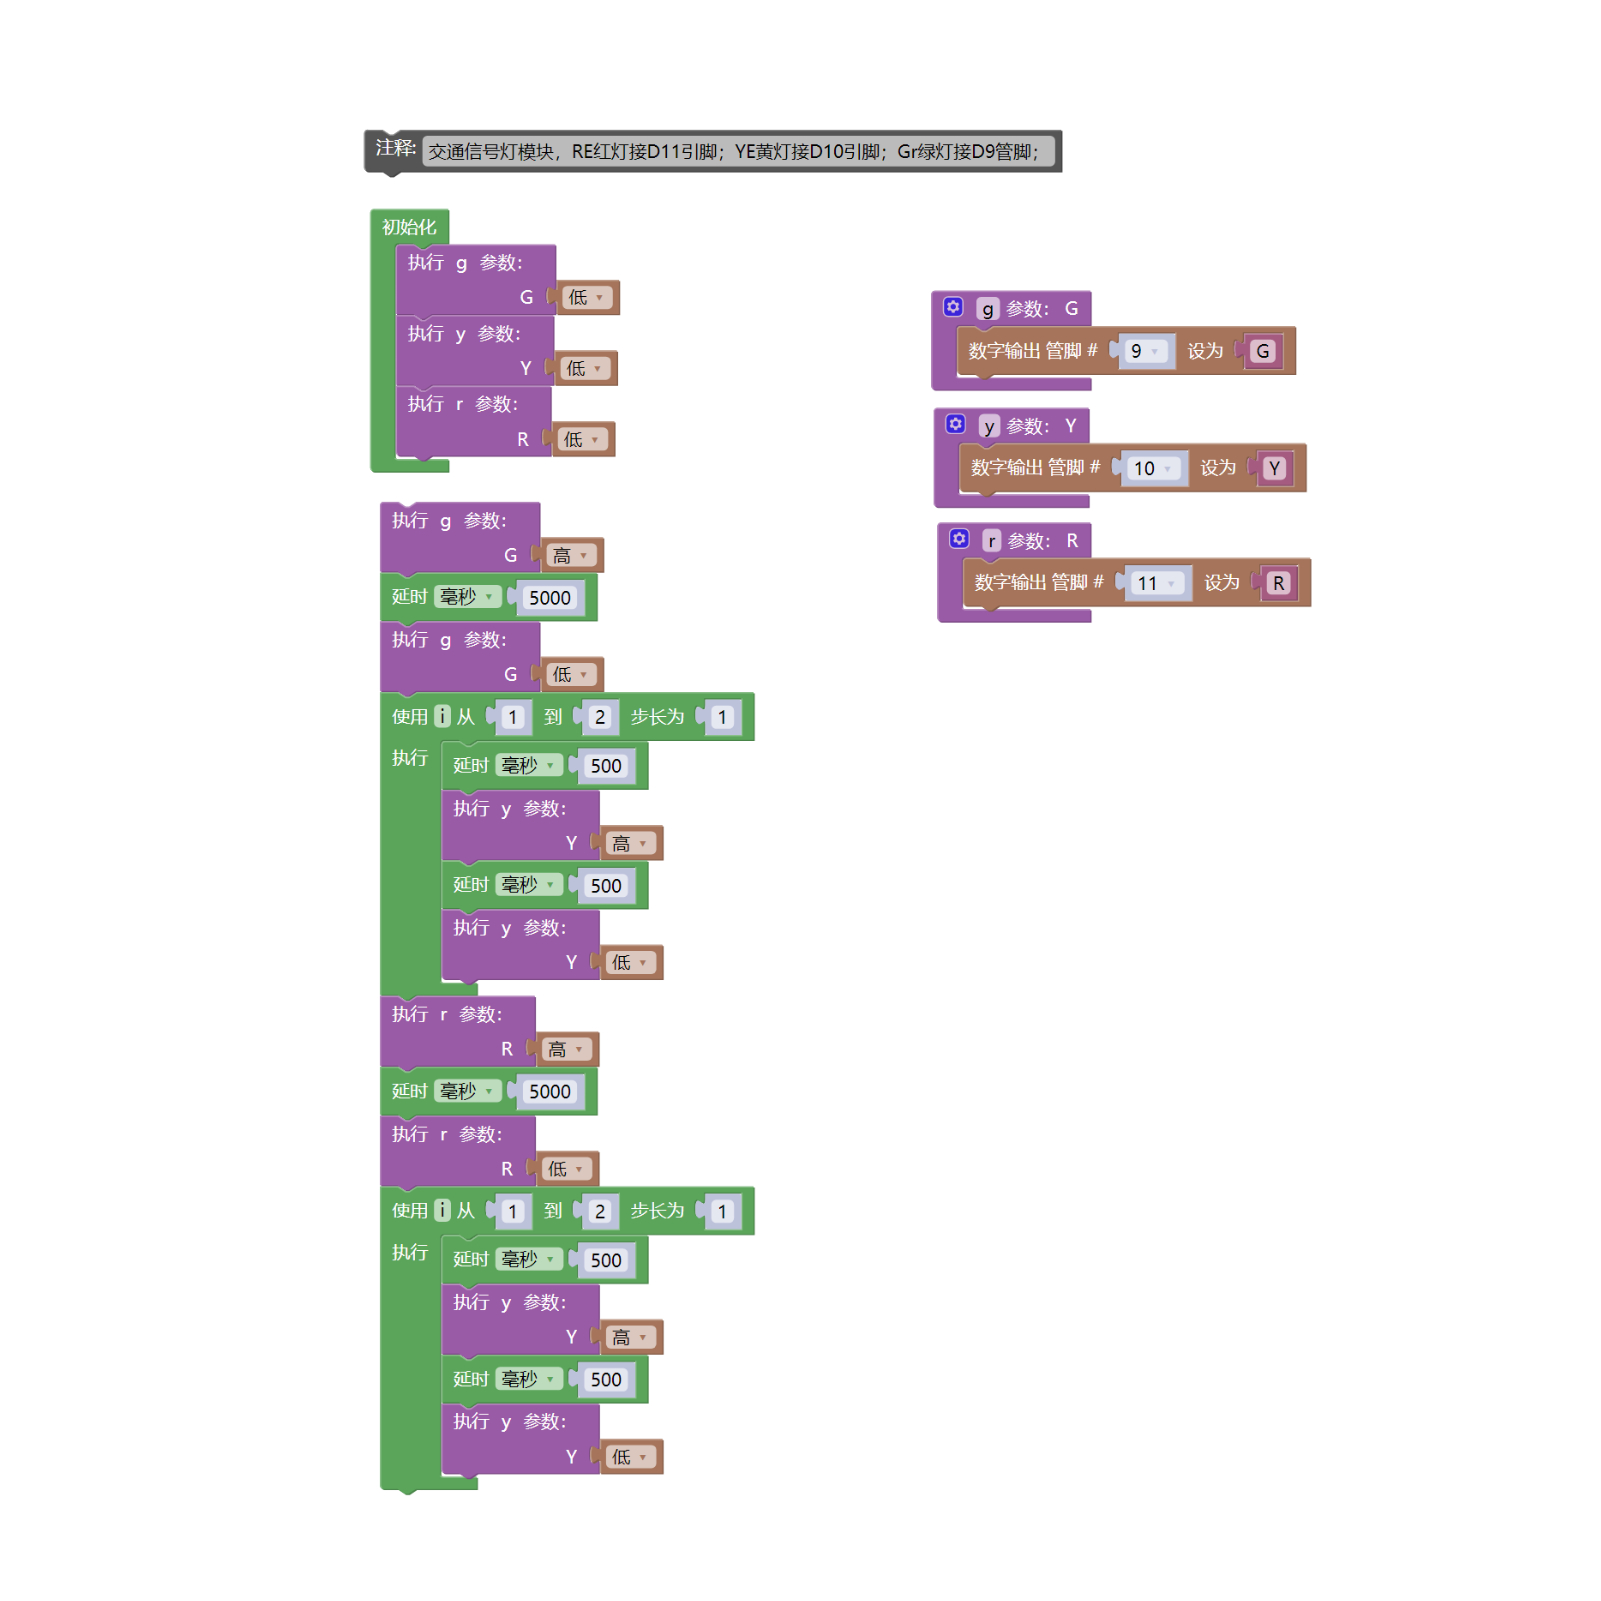
//交通信号灯模块,RE红灯接D11号引脚;YE黄灯接D10号引脚;Gr绿灯接D9号管脚;
void setup() {
 g(LOW);//绿灯灭
 y(LOW);//黄灯灭
 r(LOW);//红灯灭
 pinMode(9, OUTPUT);//设置数字9口为输出
 pinMode(10, OUTPUT);//设置数字10口为输出
 pinMode(11, OUTPUT);//设置数字11口为输出
}
void loop() {
 g(HIGH);//绿灯亮
 delay(5000);//延时5s
 g(LOW);//绿灯灭
 for (int i = 1; i <= 2; i = i + (1)) {//for循环 黄灯间隔隔0.5s闪烁两次
 delay(500);
 y(HIGH);
 delay(500);
 y(LOW);
 }
 r(HIGH);//红灯亮
 delay(5000);//延时5s
 r(LOW);//红灯灭
 for (int i = 1; i <= 2; i = i + (1)) {//for循环 黄灯间隔隔0.5s闪烁两次
 delay(500);
 y(HIGH);
 delay(500);
 y(LOW);
 }
}
void g(boolean G) {//绿灯亮灭函数
 digitalWrite(9, G);
}
void y(boolean Y) {//黄灯亮灭函数
 digitalWrite(10, Y);
}
void r(boolean R) {//红灯亮灭函数
 digitalWrite(11, R);
}
6, ESP32 Python Example (for Mixly IDE/Misashi)
Choose the development board Python ESP32 [ESP32 Generic(4MB)] and upload in code mode
Attention: If prompted with an error message about the library file during program upload, please import the library file first!
Download and import tutorial for Mixly IDE ESP32 library:Click to view
Example program (ESP32-Python):
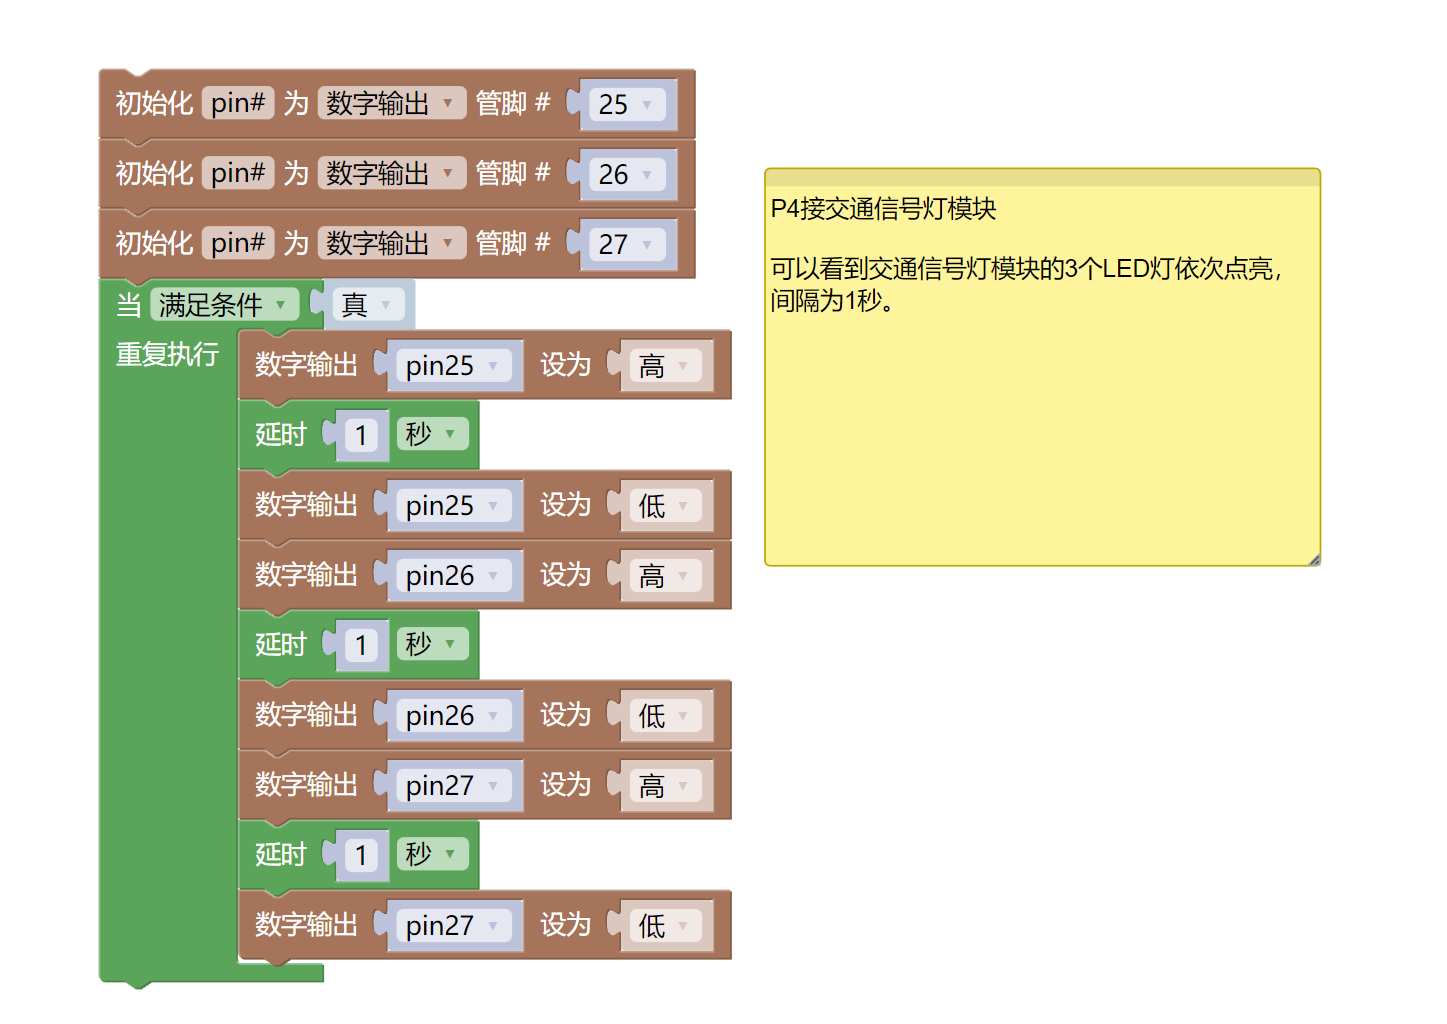
import machine
import time
pin25 = machine.Pin(25, machine.Pin.OUT)
pin26 = machine.Pin(26, machine.Pin.OUT)
pin27 = machine.Pin(27, machine.Pin.OUT)
while True:
pin25.value(1)
time.sleep(1)
pin25.value(0)
pin26.value(1)
time.sleep(1)
pin26.value(0)
pin27.value(1)
time.sleep(1)
pin27.value(0)
7, Mixly example program (graphical language)
Example program (UNO development board):Click to download
Attention: If prompted with an error message about the library file during program upload, please import the library file first!
Download and import tutorial of Mixly IDE Arduino library:Click to view
Example Program (ESP32 Development Board):Click to download
Attention: If prompted with an error message about the library file during program upload, please import the library file first!
Download and import tutorial for Mixly IDE ESP32 library:Click to view
8. Setting up the Test Environment
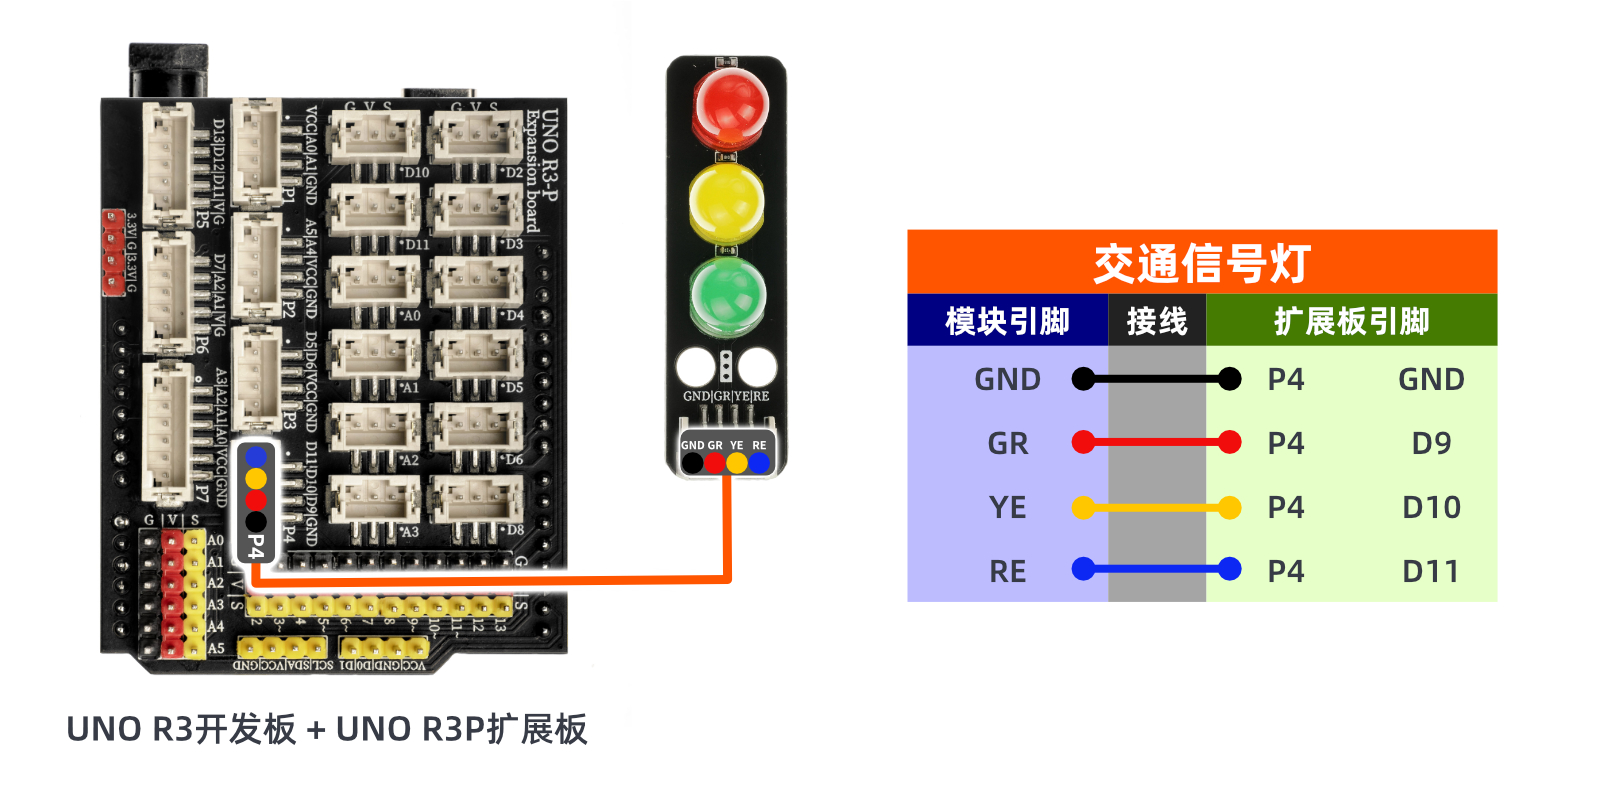
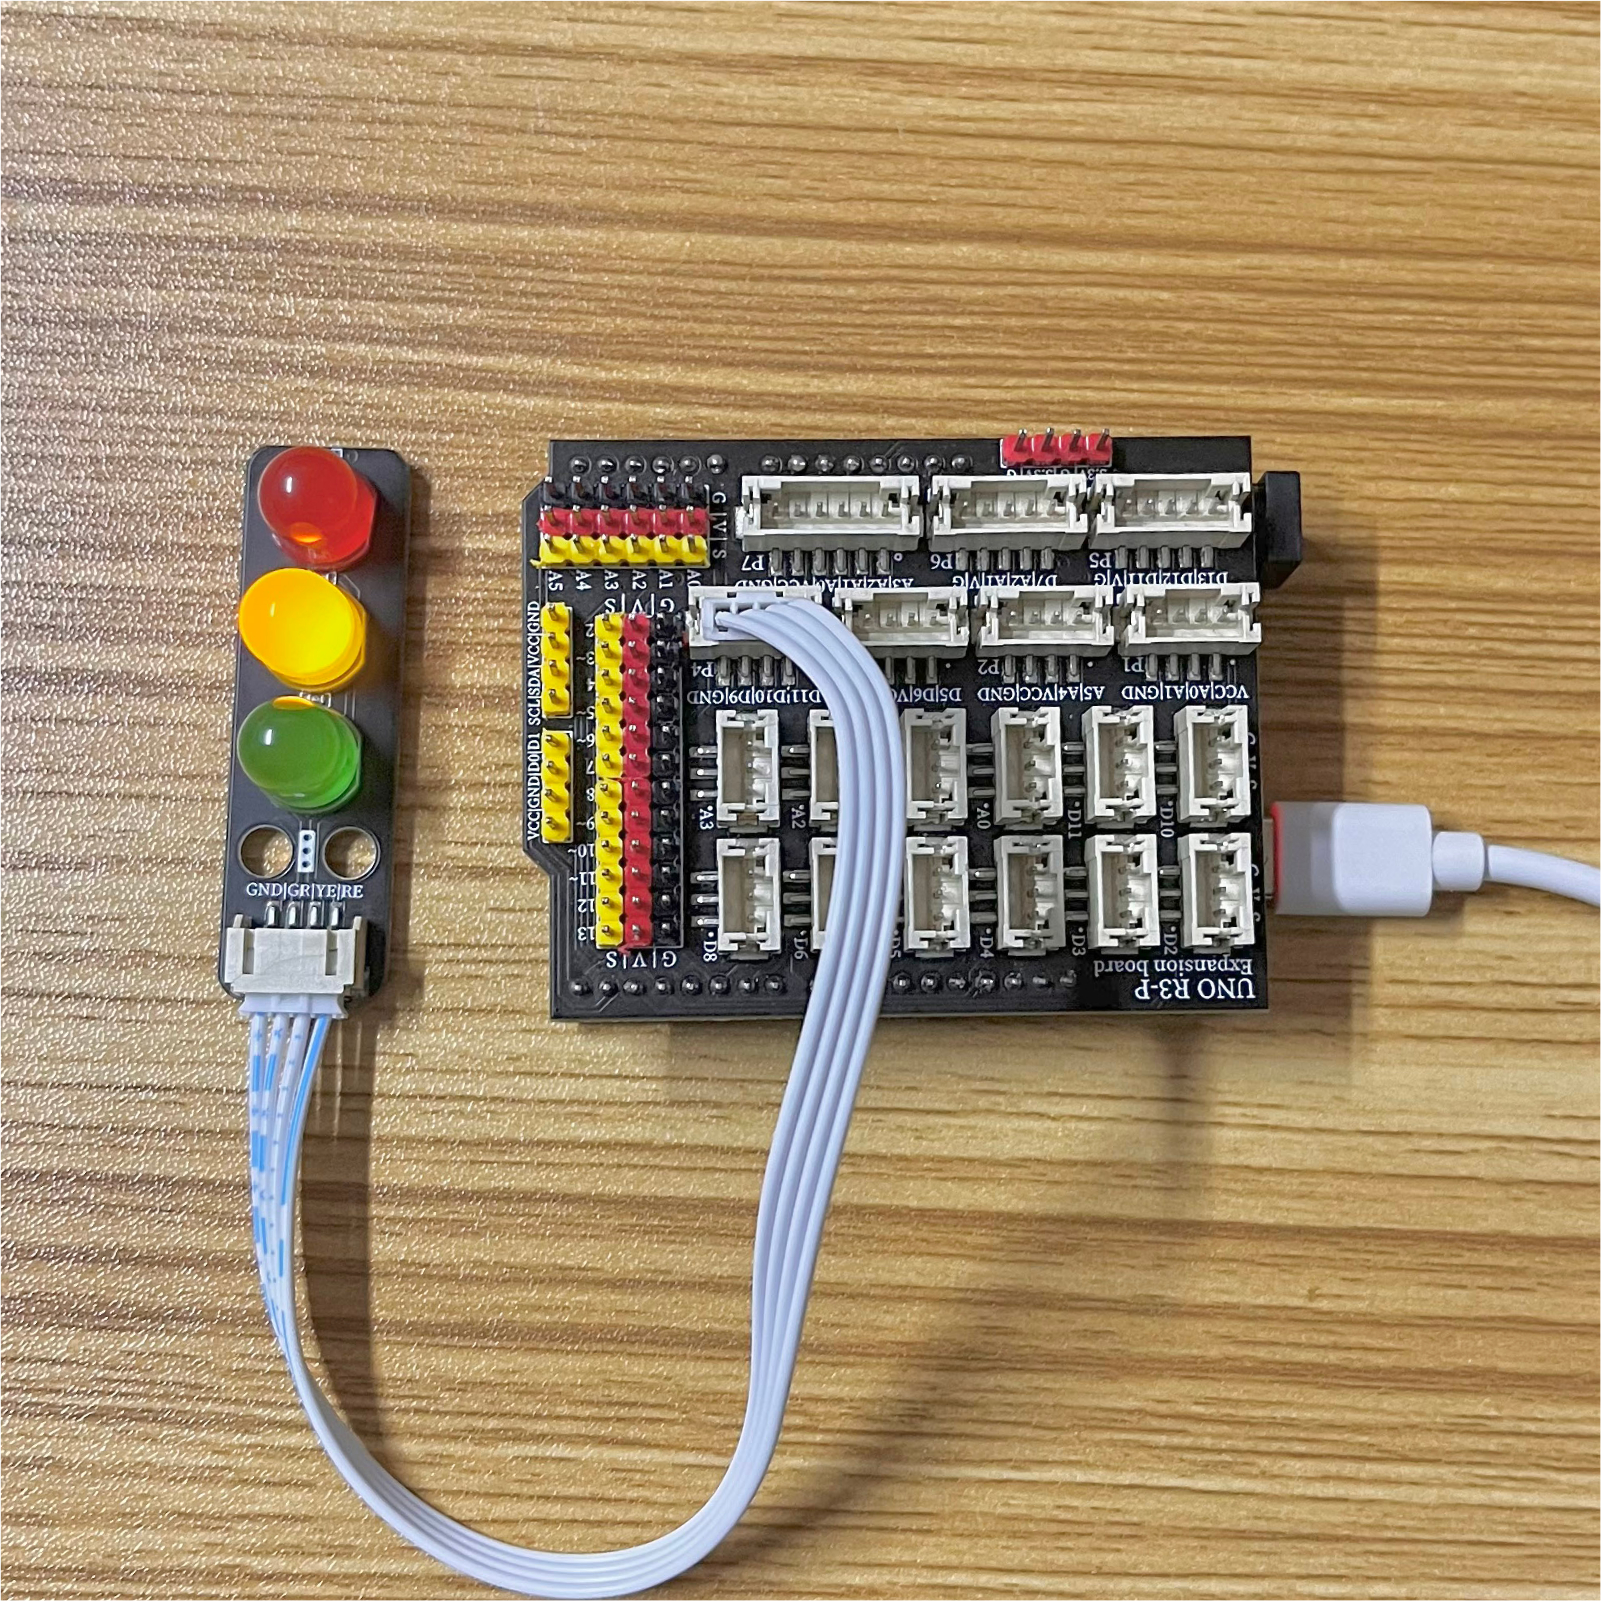
Arduino UNO Test Environment Setup
Prepare Components:
HELLO STEM UNO R3 DEVELOPMENT BOARD *1
HELLO STEM UNO R3 P EXPANSION BOARD *1
USB TYPE-C DATA CABLE *1
Traffic Signal Module (HS-F05L) *1
PH2.0 4P Dupont wire*1
Circuit wiring diagram:
ESP32 Test Environment Setup
Prepare Components:Pending update...
Circuit wiring diagram:Pending update...
9, Video tutorial
Arduino UNO video tutorial:Click to view
ESP32 Python Video Tutorial:to be updated
10, Test conclusion
Arduino UNO test results:
After the device is connected and the above program is burned to the Arduino UNO development board, the red, green, and yellow lights will alternate on and off, achieving the effect of a traffic light.
ESP32 Python test conclusion:
After the device is connected to the wire, upload the above program to the ESP32 development board, and then open the serial monitor.Red, green, and yellow lights will alternate on and off, achieving the effect of traffic lights.