1. Introduction
Water atomization module working voltage DC 3.3-5V, current 300mA, power 2W, frequency 108KHz, using dedicated frequency atomization chip.Turn on the switch to start atomizing immediately, the atomized mist output is large.You can also control the on and off of the atomizer through the high and low levels of the development board (microcontroller).The principle of micro-porous atomization: The ultrasonic micro-porous atomization plate is made by bonding a metal microporous plate with a piezoelectric ceramic plate, which drives the metal microporous plate to vibrate through the piezoelectric ceramic plate, and then the liquid is decomposed into mist through the metal microporous plate to achieve the atomizing function.The atomization effect is directly related to the performance of metal microporous plates, the size of the aperture of the metal micropores determines the particle size of the atomized liquid, and the performance of the metal material and the conical section structure of the micropore determine the spray height of the atomized water vapor.The electroceramic atomized crystal chip, when activated by an electrical signal, generates a high-frequency resonance oscillation of 1.7MHZ or 2.4MHZ, throwing water away from the surface to produce a natural drifting mist without heating or chemicals.
2. Schematic
Water Atomization Module-HS-F22-L Schematic - Click to View
Module Parameters
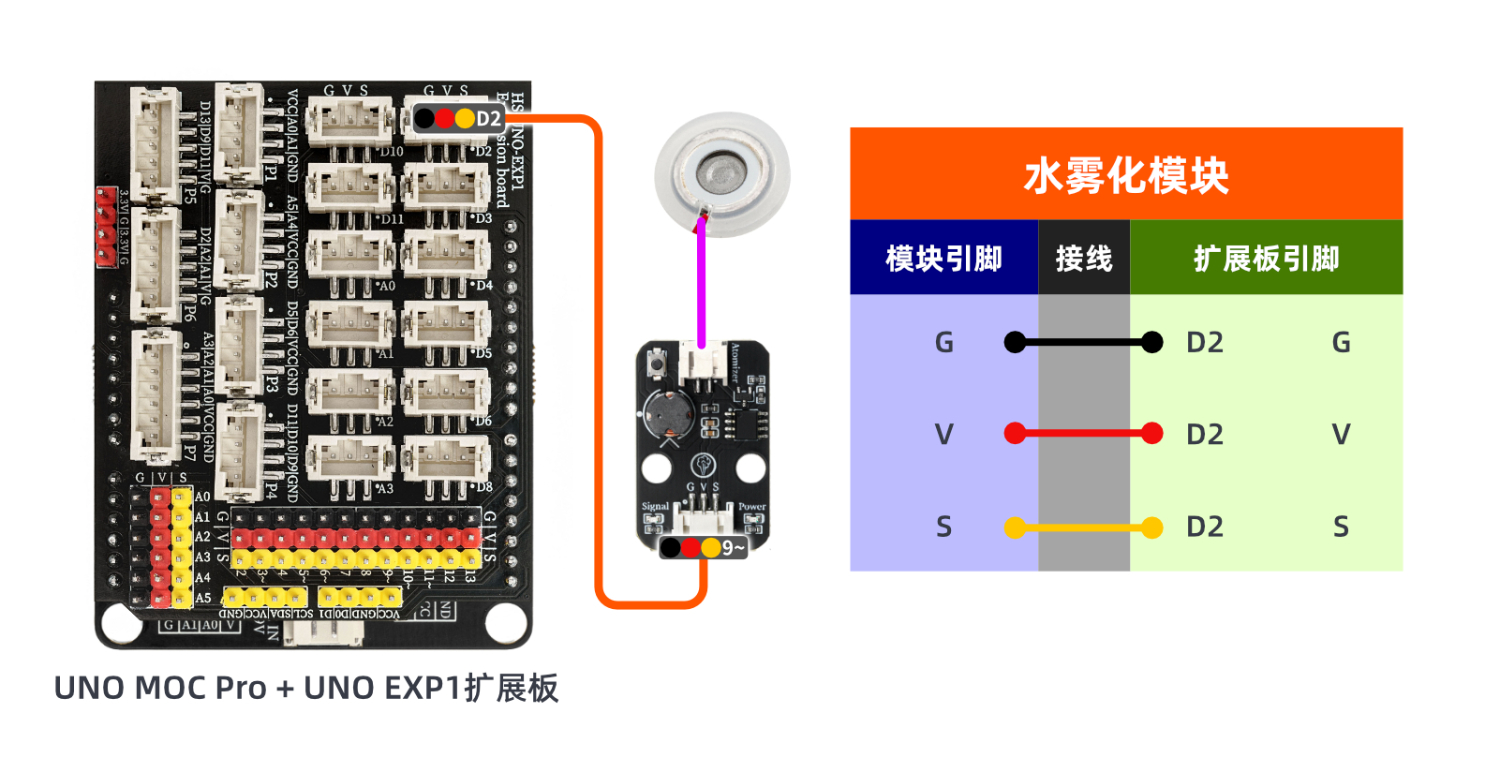
Pin Name | description |
|---|---|
G | GND (Negative Power Input) |
V | VCC (Positive Power Input) |
S | Signal Pin |
Power Supply Voltage: 3.3V / 5V
Connection method: PH2.0 terminal wire
Installation method: 6562 shaft pin + 32123 half-axis sleeve fixed
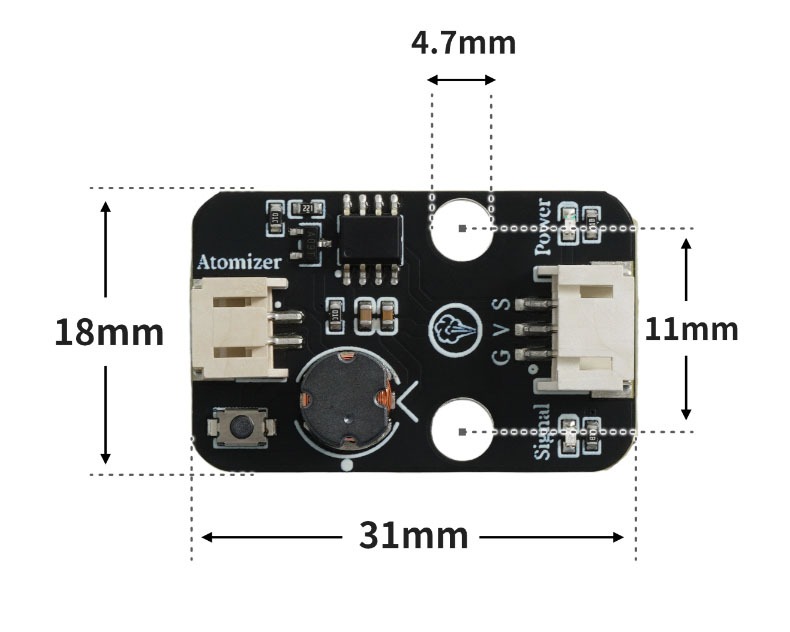
4, Circuit Board Size
5. Example program
MiciMixly example program:HS-F22-L-mixly click to download
Arduino UNO example program:HS-F22-L-arduino click to download
6, Test Environment Setup
Arduino UNO Test Environment Setup
Prepare Components:
UNO-R3 Development Board *1
UNO-R3 P Expansion Board *1
USB TYPE-C DATA CABLE *1
Humidification module (HS-F22L) *1
PH2.0 3P dual headed terminal line *1
Circuit wiring diagram:
7, Video tutorial
8, Test
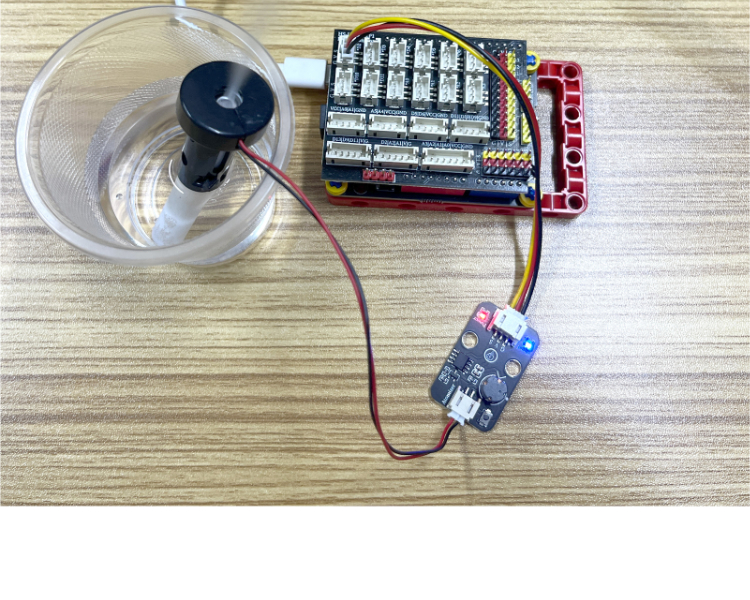
Arduino UNO test results:
After connecting the device, upload the program to the Arduino UNO development board and insert the fog stick, you will find that water vapor is continuously produced.