1. Introduction
Note: The UNO development performance is not enough to drive the e-ink screen.
2. Schematic
2.66-inch E-Ink Display (Black and White) - HS-F30-PL SchematicClick to view
Module Parameters
Pin Name | description |
|---|---|
G | GND (Negative Power Input) |
V | VCC (Positive Power Input) |
SDA | SPI data pin |
SCL | SCL serial clock pin |
CS | Chip select pin |
DC | Data pin |
RST | external reset pin |
BUSY | busy state output pin |
Supply voltage: 3.3V
Connection method: PH2.0 4P terminal wire
Resolution: 152(H) X 296(V) pixel
Driver chip: SSD1680
Installation method: Modular fixed
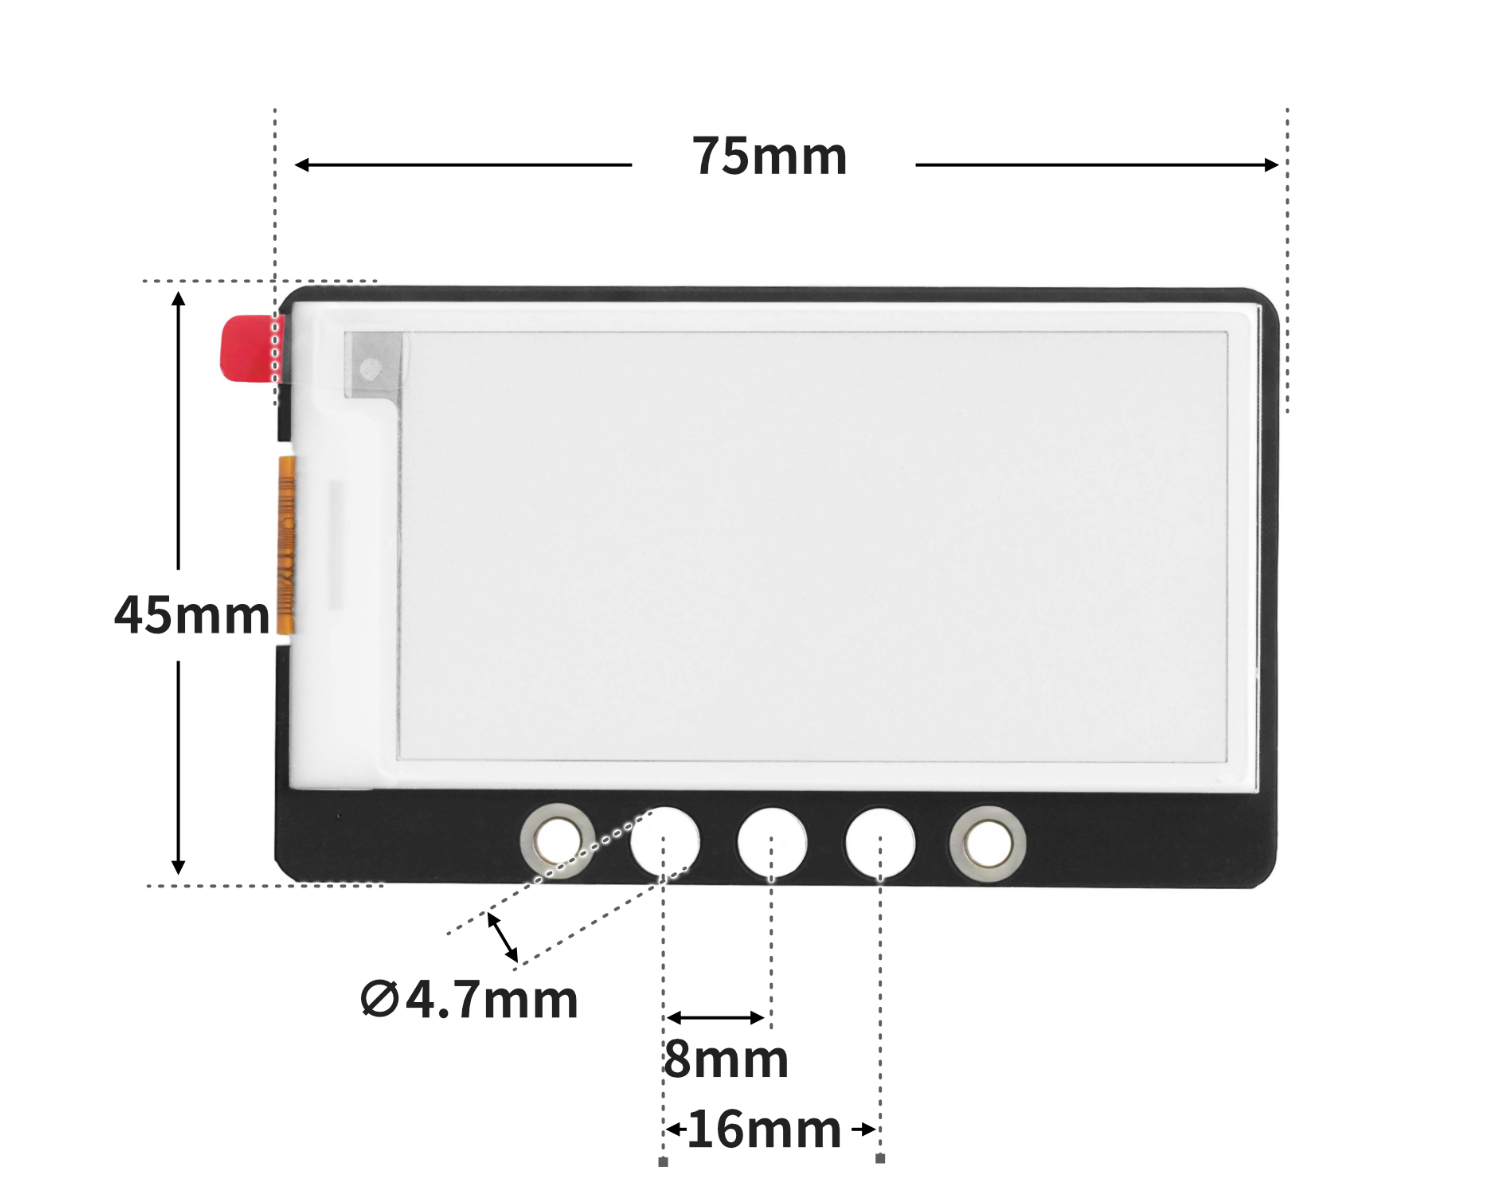
4, Circuit Board Size
5 of Arduino IDE example program
Attention: If prompted with an error message about the library file during program upload, please import the library file first!
Arduino IDE Library Download and Import Tutorial:Click to view
Example Program (ESP32 Development Board):
#include "DEV_Config.h"
#include "EPD.h"
#include "GUI_Paint.h"
#include <stdlib.h>
void setup(){
EPD_SetPin(13,14,15,26,27,25);
DEV_Module_Init();
EPD_2IN66_Init();
DEV_Delay_ms(500);
UBYTE *BlackImage;
UWORD Imagesize = ((EPD_2IN66_WIDTH % 8 == 0)? (EPD_2IN66_WIDTH / 8 ): (EPD_2IN66_WIDTH / 8 + 1)) * EPD_2IN66_HEIGHT;
if((BlackImage = (UBYTE *)malloc(Imagesize)) == NULL) {
printf("Failed to apply for black memory...\r\n");
while(1);
}
Paint_NewImage(BlackImage, EPD_2IN66_WIDTH, EPD_2IN66_HEIGHT, 270, WHITE);
Paint_Clear(WHITE);
Paint_DrawString_EN(0, 20, "1234", &Font8,BLACK,WHITE );
Paint_DrawString_EN(0, 60, "1234", &Font8,BLACK,WHITE );
EPD_2IN66_Display(Paint.Image);
}
void loop(){
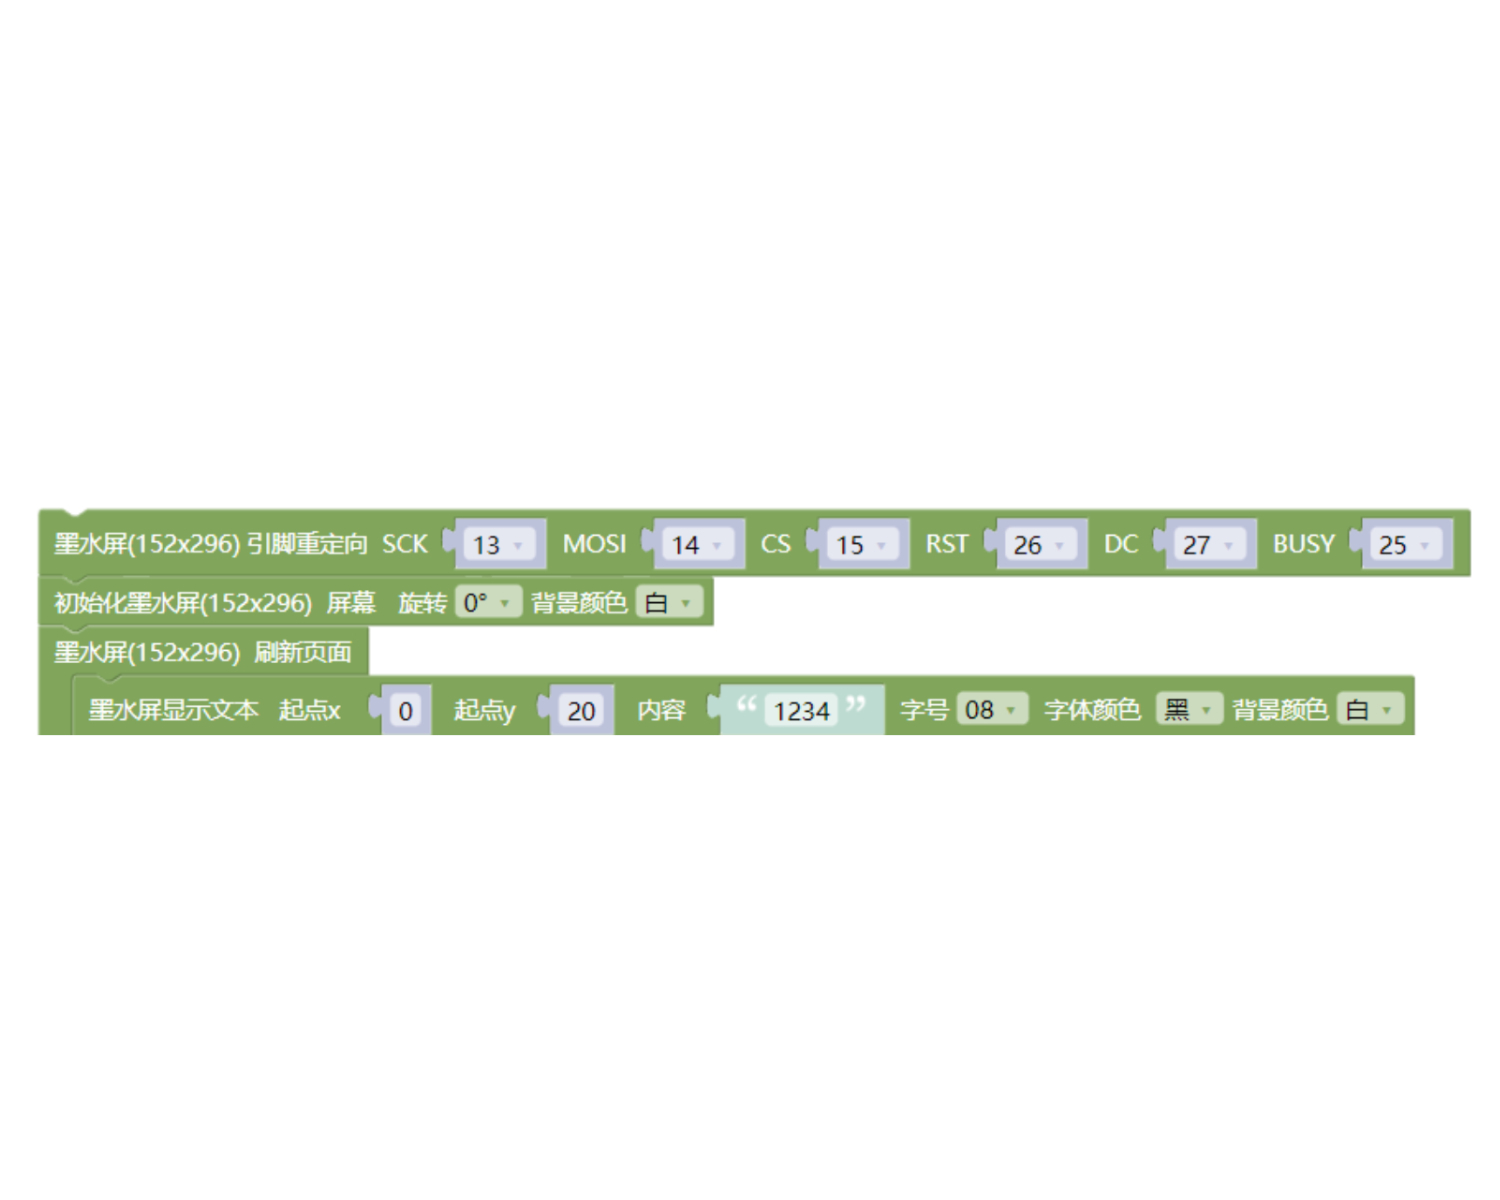
}6, Miciqi Mixly Example Program (Graphical Language)
Sample Program (ESP32 Development Board - C Language Version):Click to download
Attention: If prompted with an error message about the library file during program upload, please import the library file first!
Download and import tutorial for Mixly IDE ESP32 library:Click to view
Sample Program (ESP32-S3 Development Board - C Language Version):Click to download
Attention: If prompted with an error message about the library file during program upload, please import the library file first!
Download and import tutorial for Mixly IDE ESP32 library:Click to view

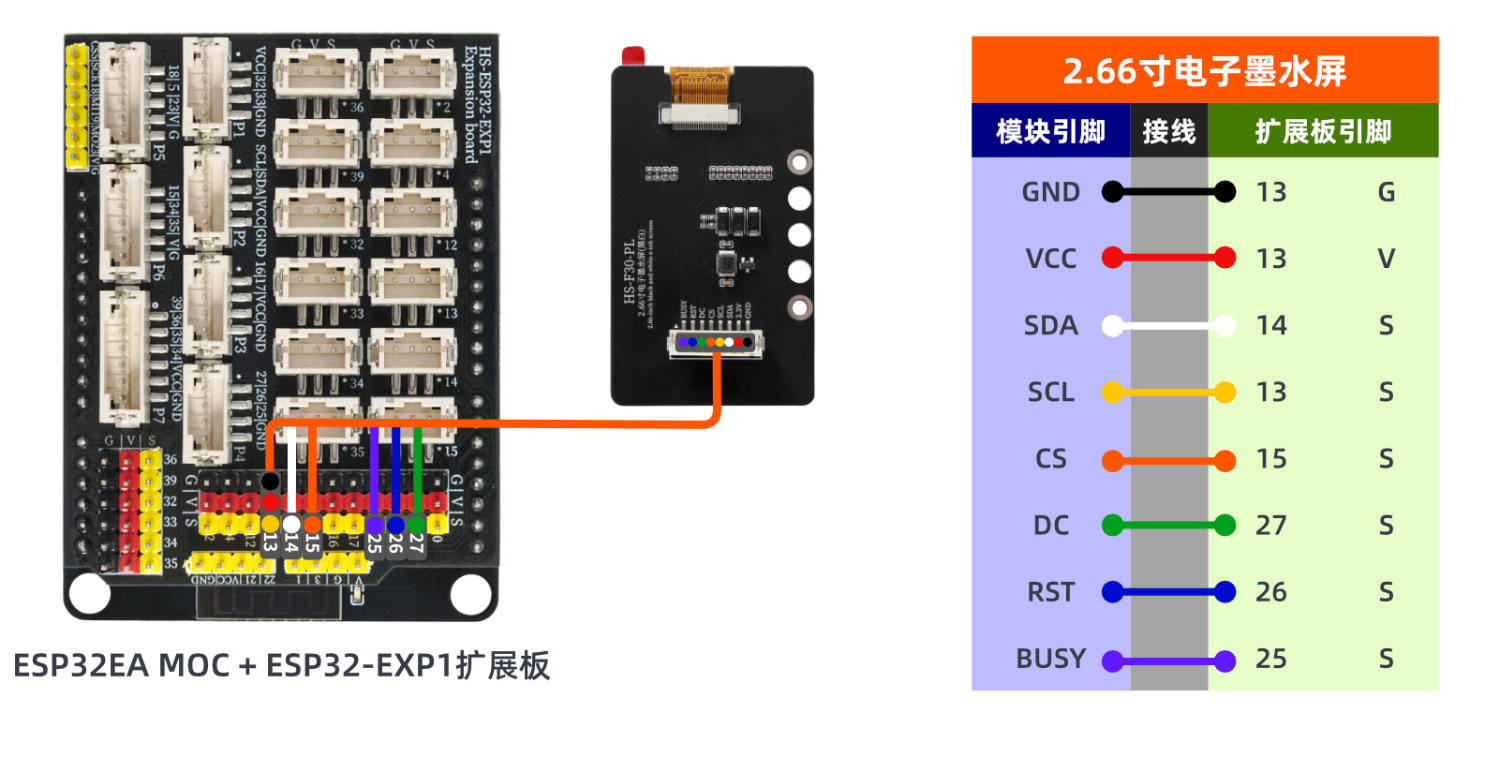
7, Test Environment Setup
Arduino ESP32 Test Environment Setup
Prepare Components:
ESP32 Development Board *1
ESP32 EXP1 Expansion Board *1
USB TYPE-C DATA CABLE *1
HS-F30-L Weighing Sensor*1
PH2.0 8P PH2.0 to Dupont Wire *1
Circuit wiring diagram:
Arduino ESP32S3 Test Environment Setup
Prepare Components:Pending update...
Circuit wiring diagram:Pending update...
8. Video tutorial
Video tutorial:Pending update...
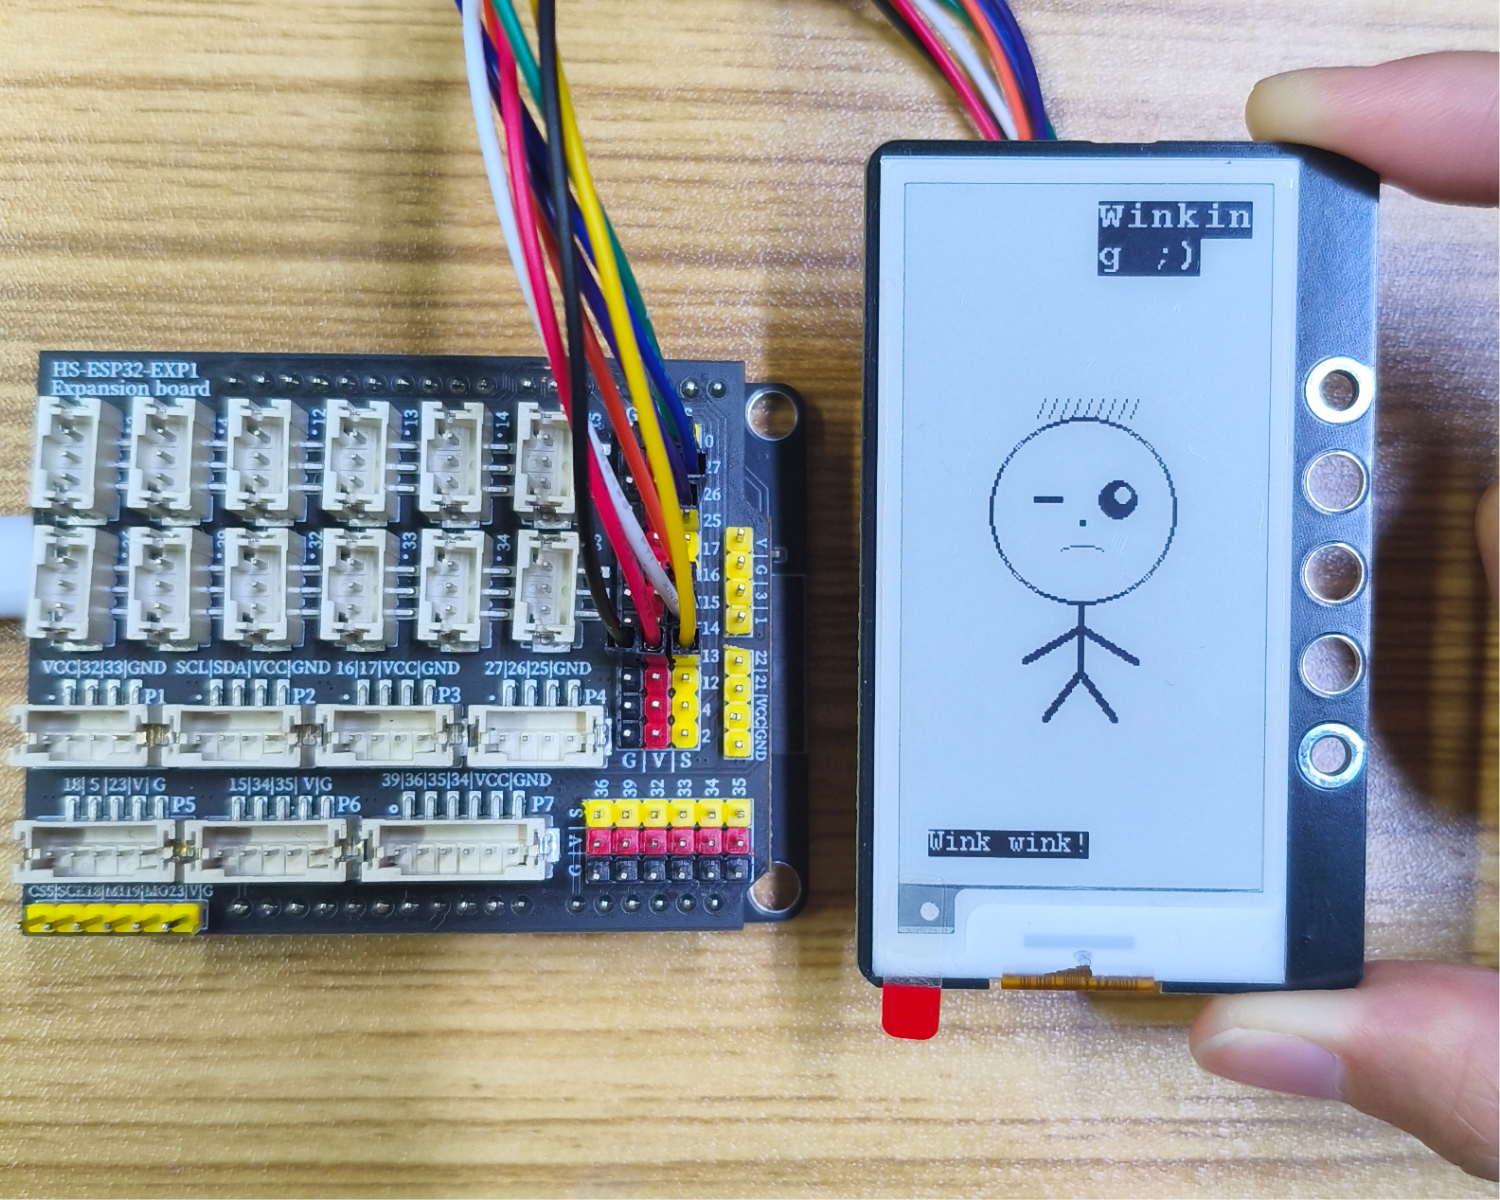
9, test result
ESP32 Test Results:
Enter the code, then place the object on the inductive scale, and the weight of the object can be read through the computer serial port.