
1. Introduction
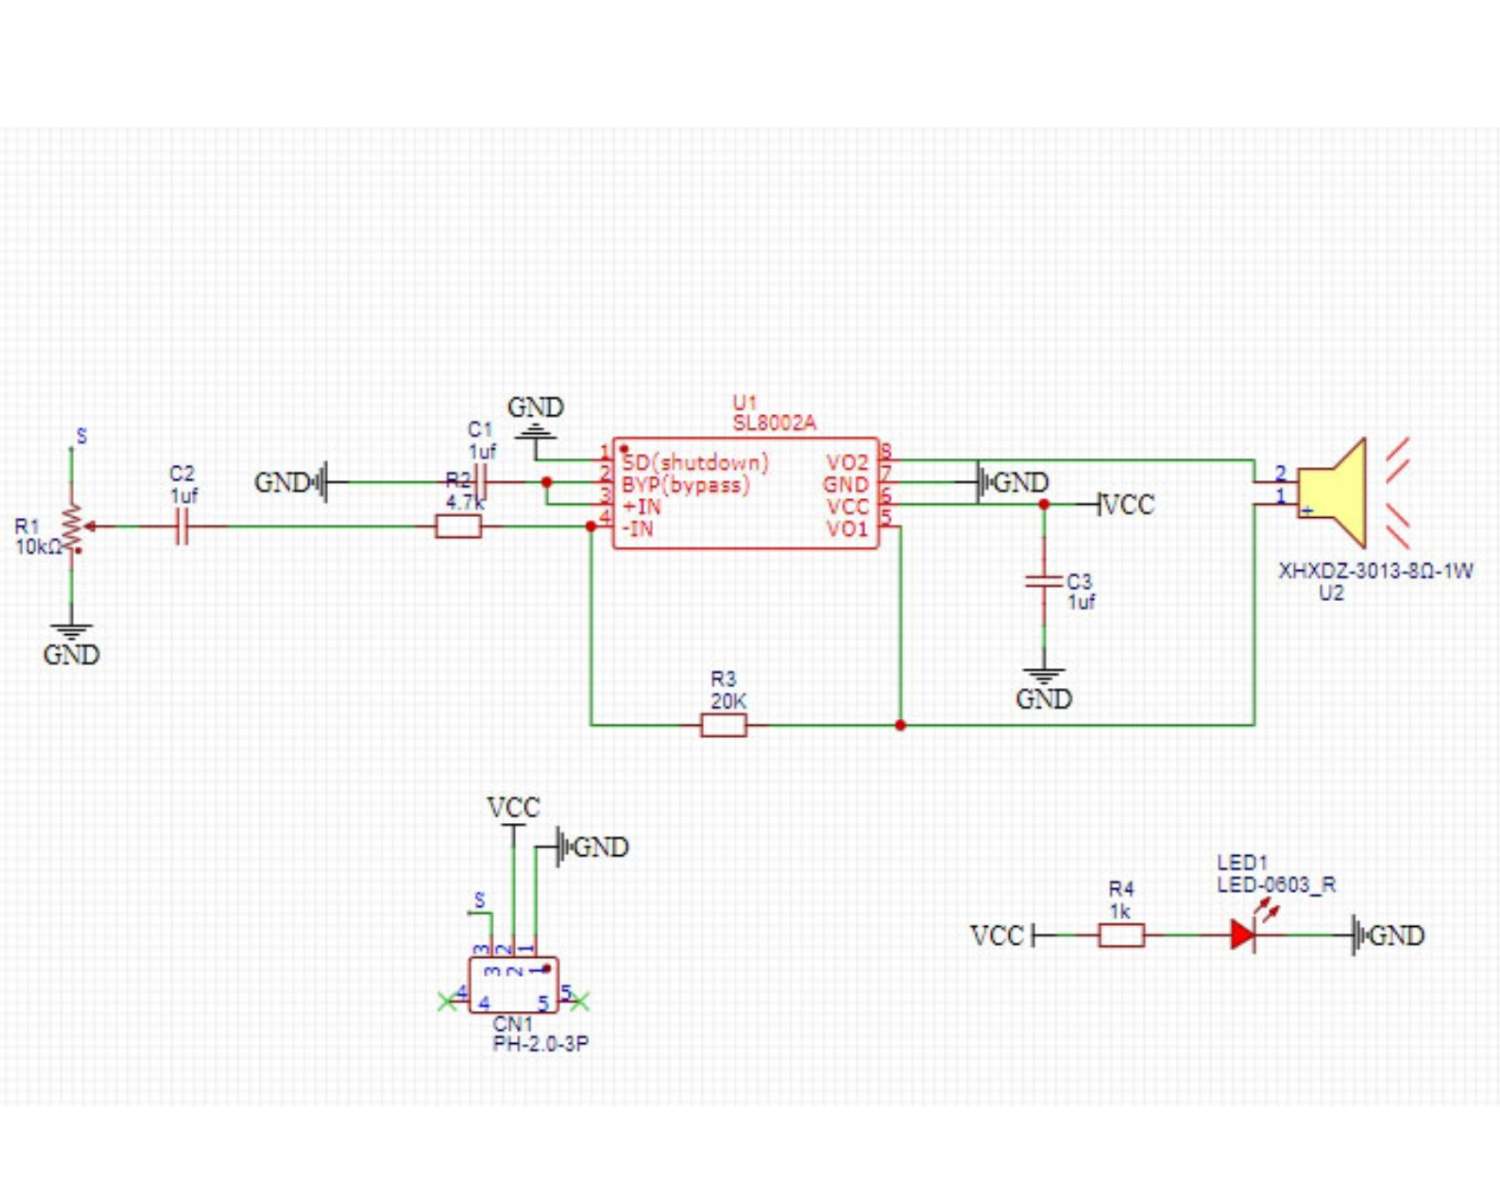
2. Schematic
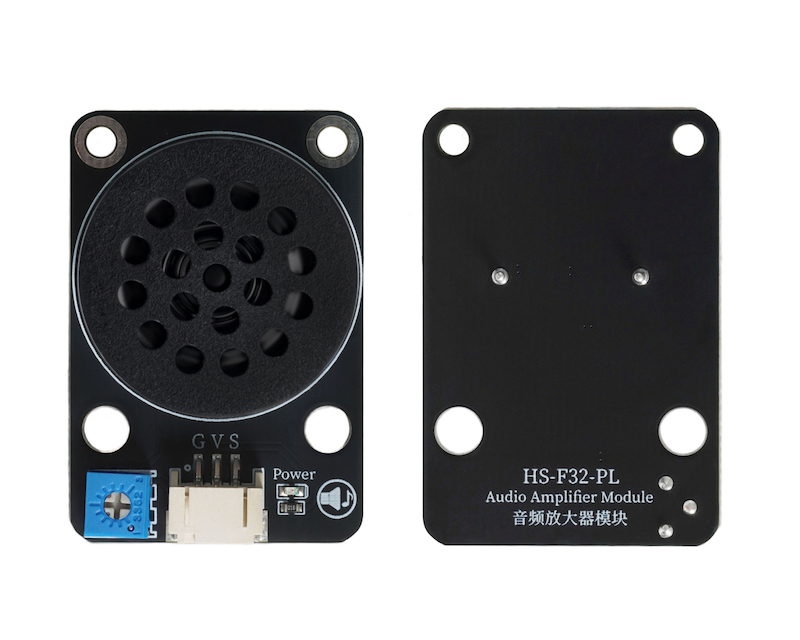
Module Parameters
Pin Name | description |
|---|---|
G | GND (Negative Power Input) |
V | VCC (Positive Power Input) |
S | Digital Signal Pin |
Power Supply Voltage: 3.3V / 5V
Connection method: PH2.0 3P terminal
Installation method: double screws or LEGO brick fixation
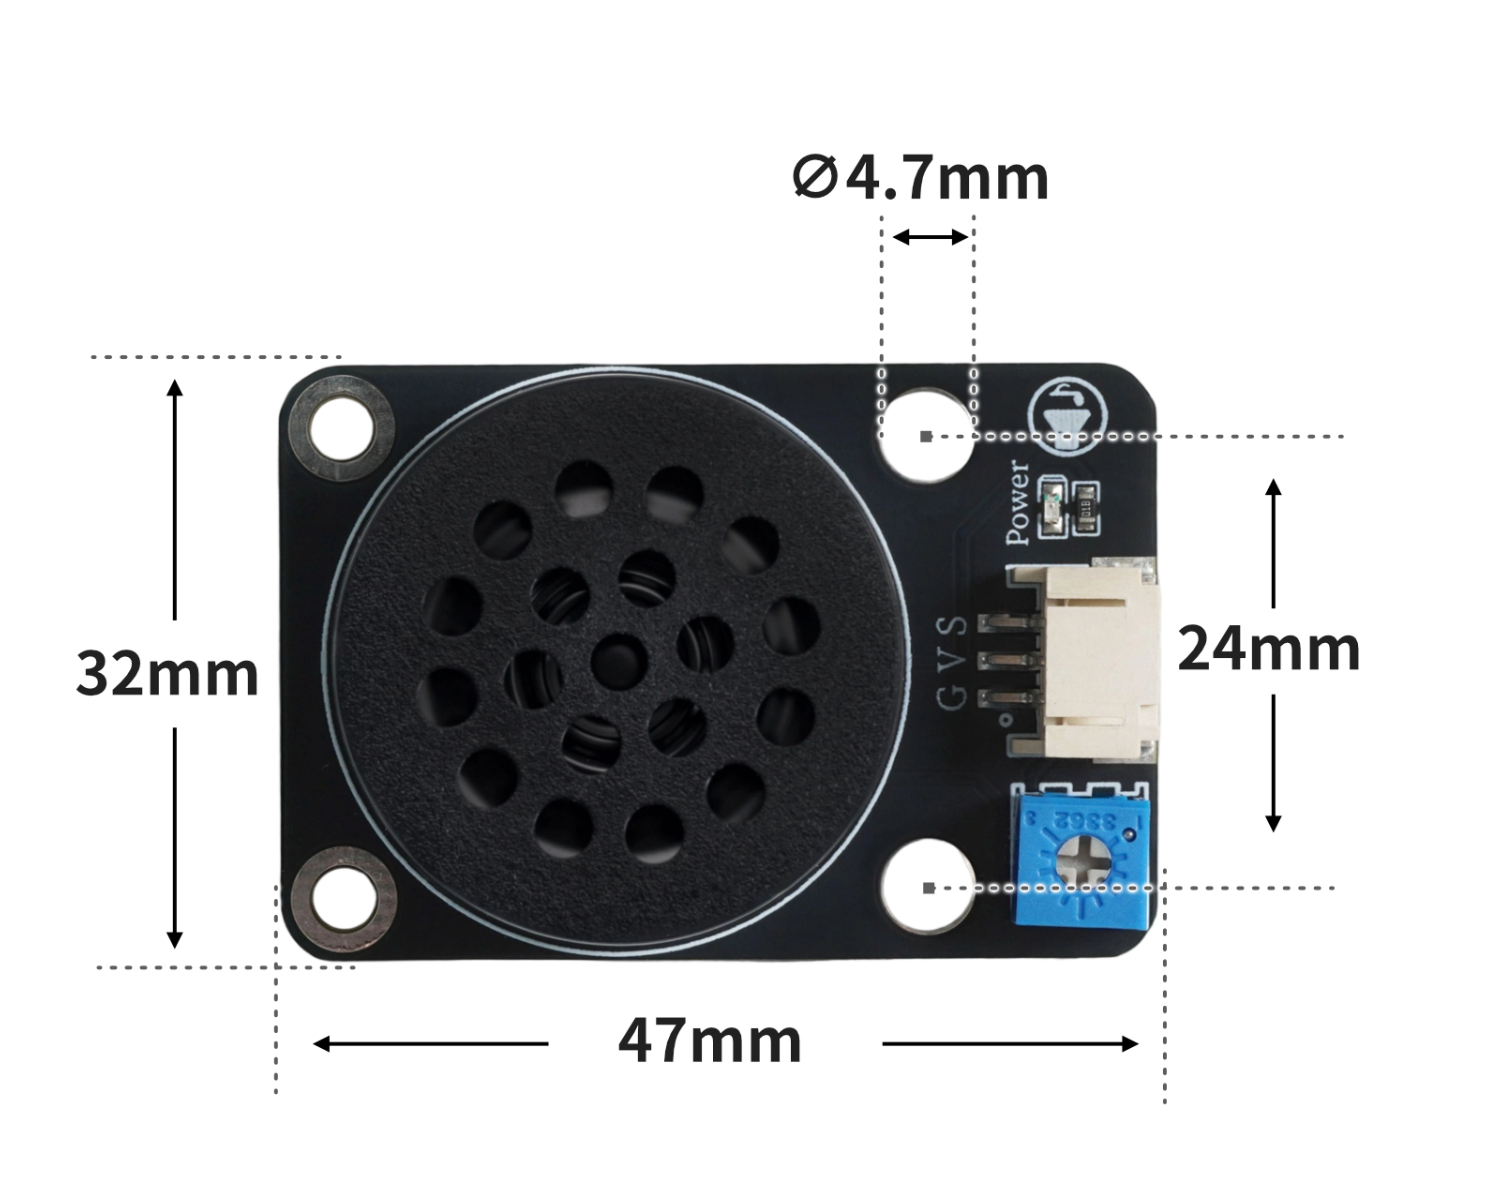
4, Circuit Board Size
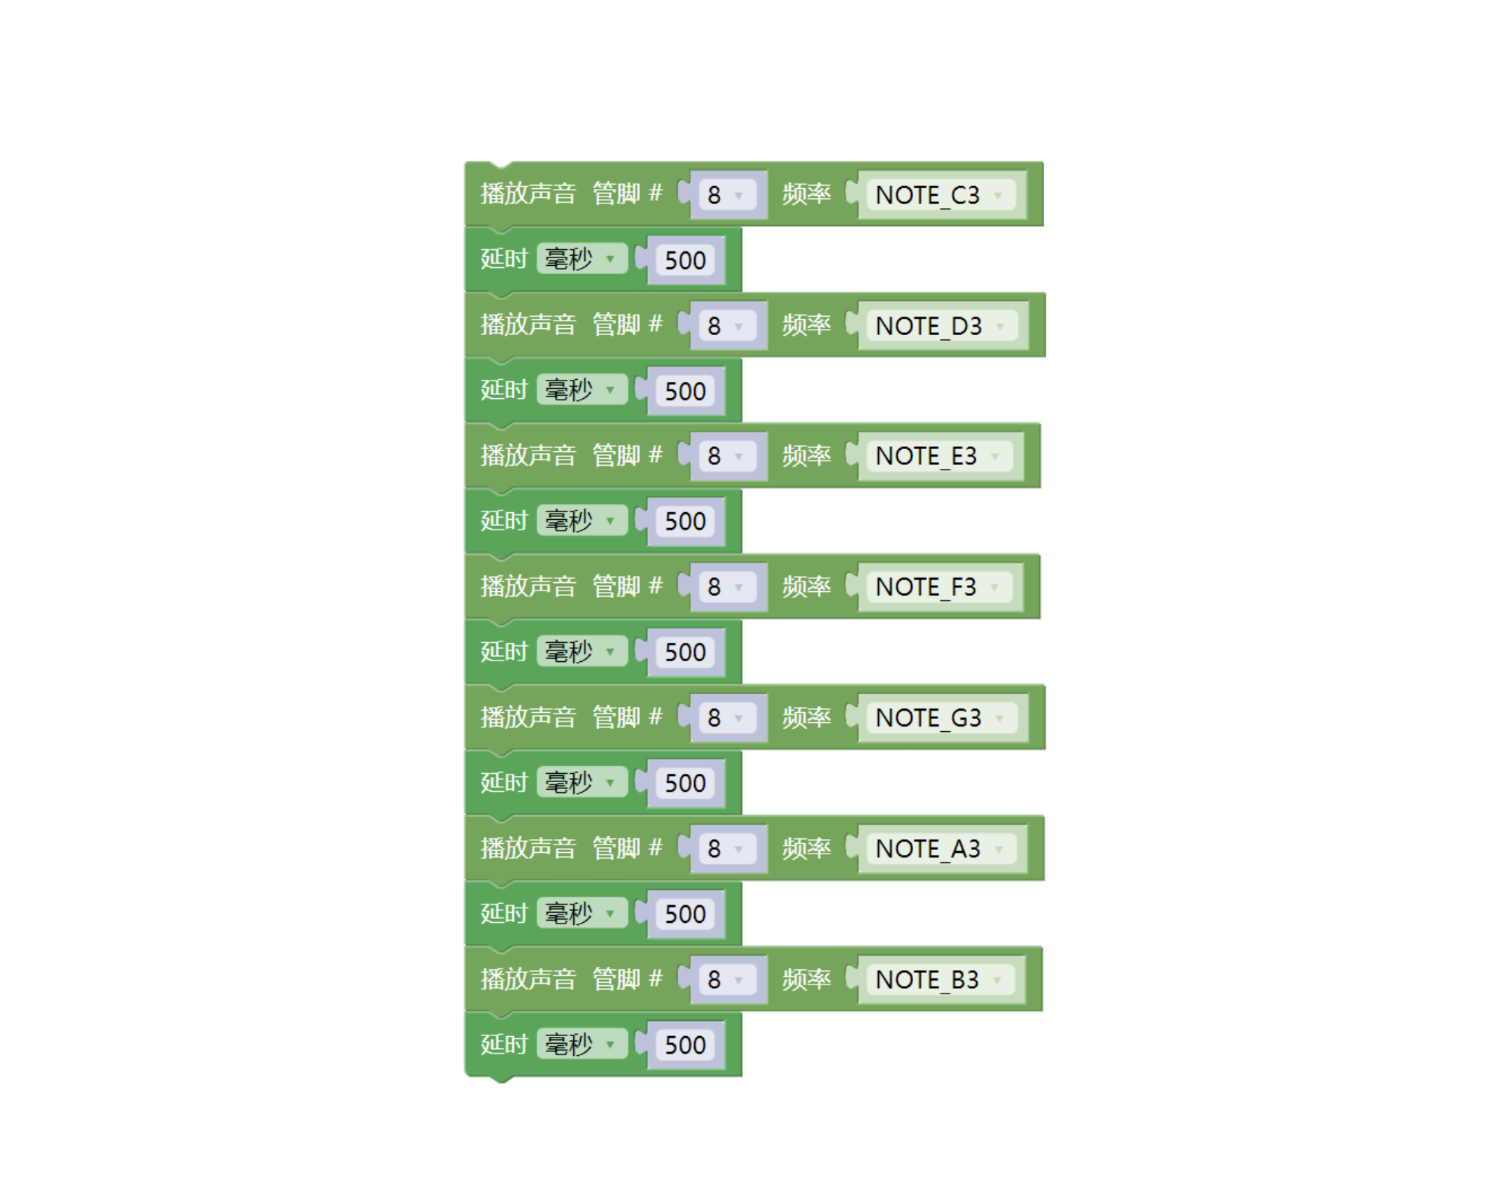
5 of Arduino IDE example program
Arduino UNO Example (for Mixly IDE, Arduino IDE):
void setup(){
pinMode(8, OUTPUT);
}
void loop(){
tone(8,131);
delay(500);
tone(8,147);
delay(500);
tone(8,165);
delay(500);
tone(8,175);
delay(500);
tone(8,196);
delay(500);
tone(8,220);
delay(500);
tone(8,247);
delay(500);
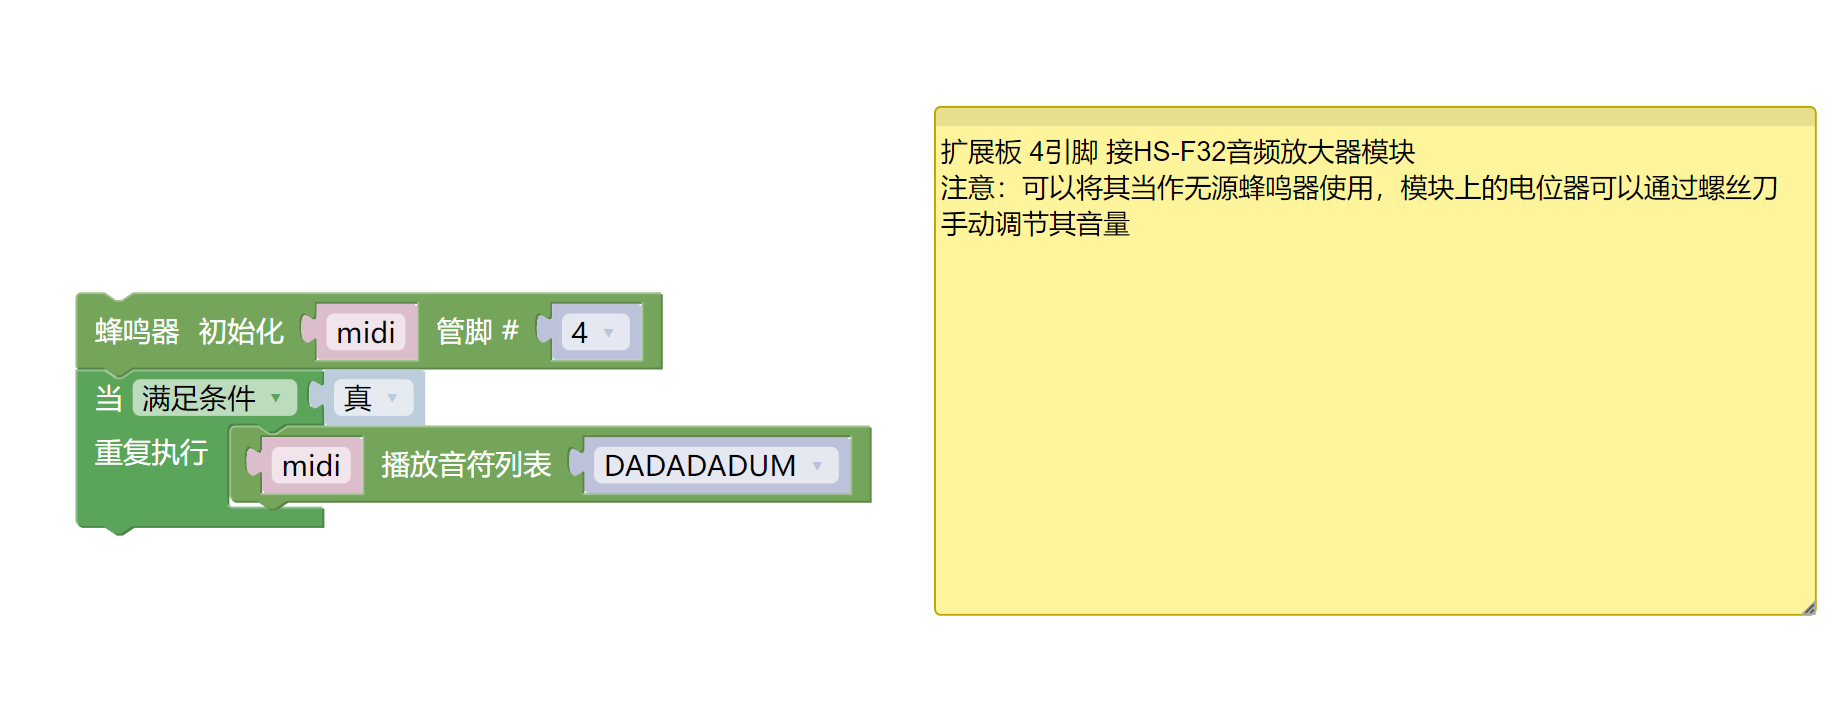
}ESP32 Python Example (for Mixly IDE / Micskit)
(Choose the Python ESP32 [ESP32 Generic(4MB)] to switch to code mode upload):
import music


midi = music.MIDI(4)
while True:
    midi.play(midi.DADADADUM)
6, Miciqi Mixly Example Program (Graphical Language)
Arduino UNO Graphical Example Program:Click to download
ESP32 Python Graphical Example Program:Click to download
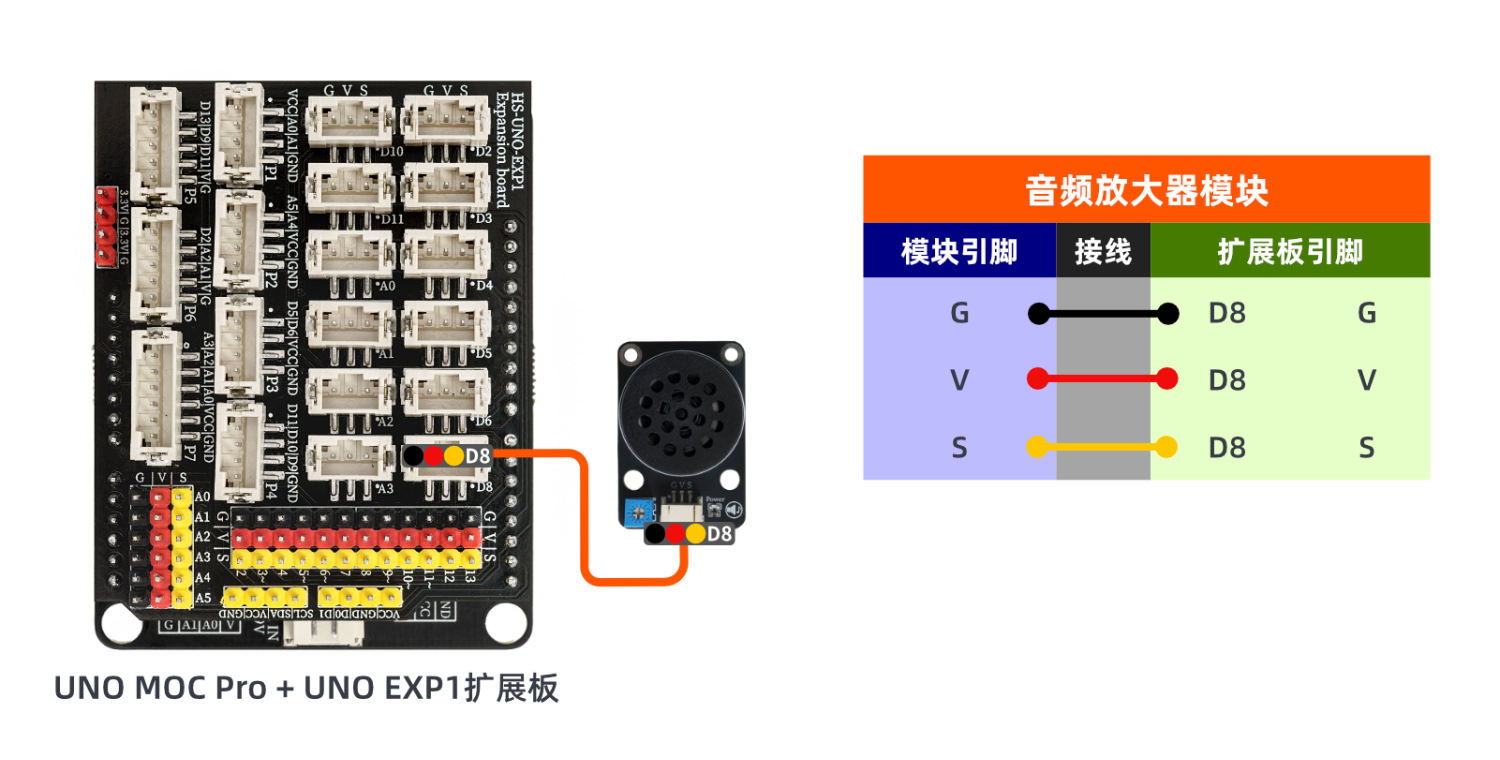
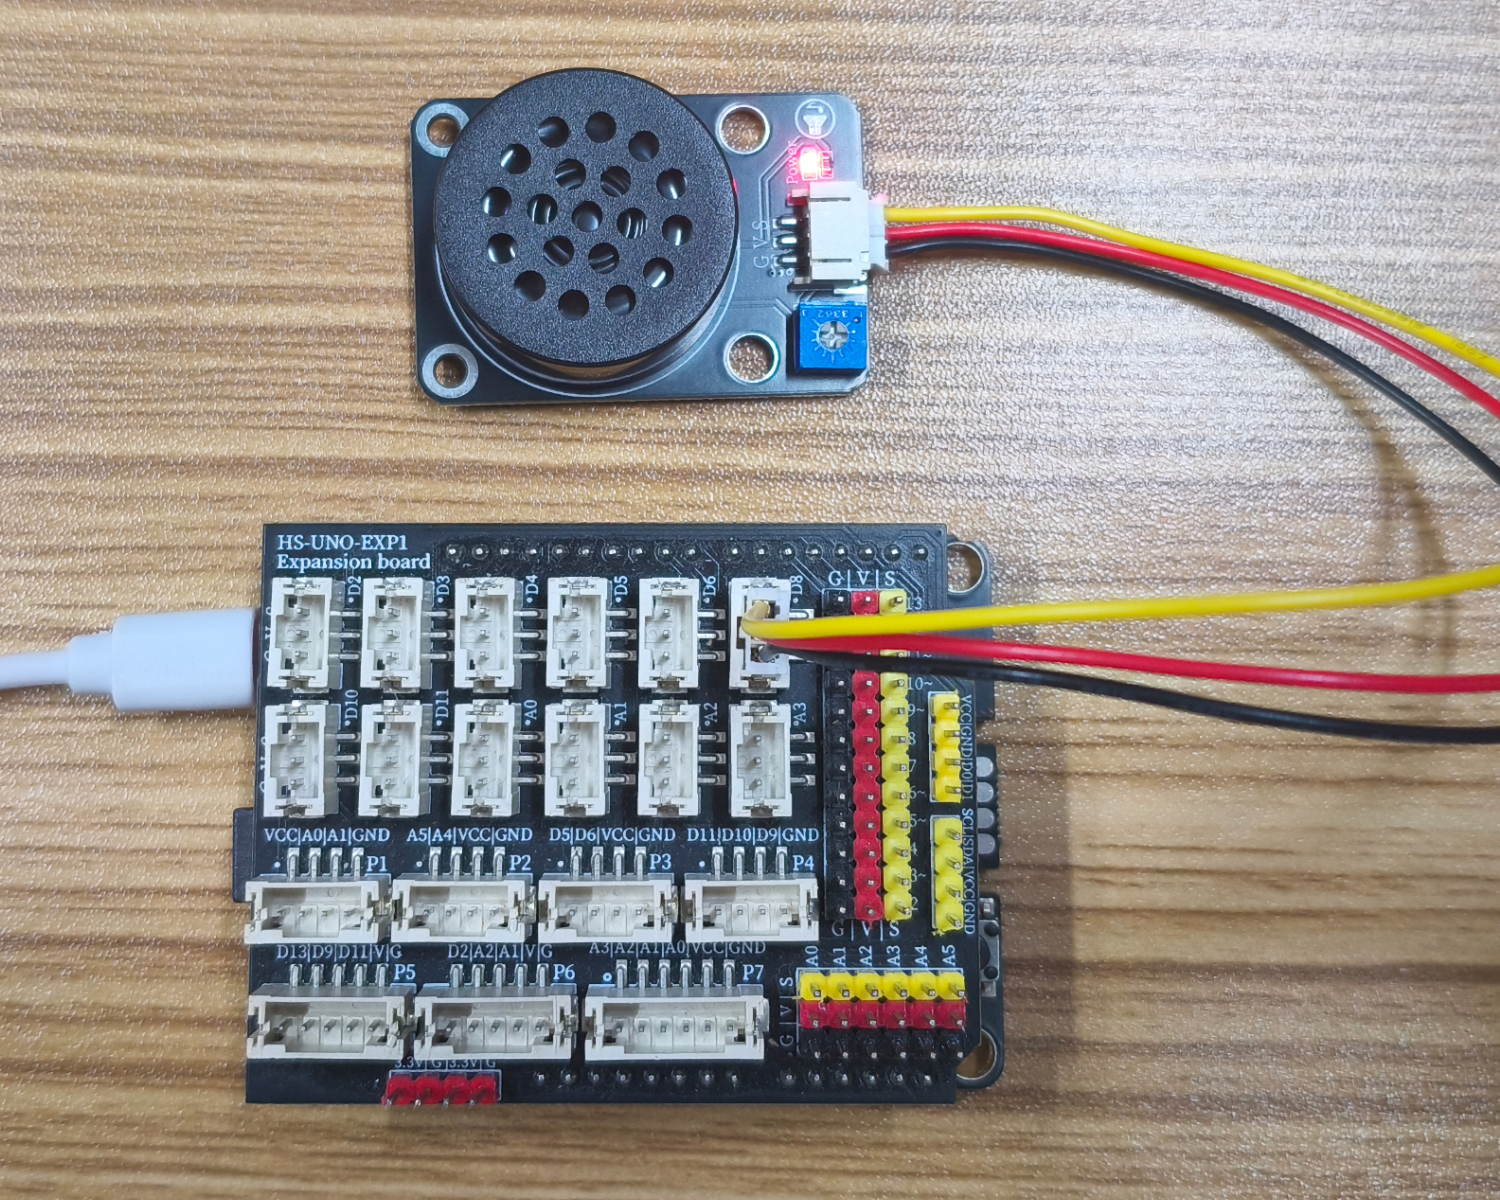
7, Test Environment Setup
Arduino UNO Test Environment Setup
Prepare Components:
HELLO STEM UNO R3 DEVELOPMENT BOARD *1
HELLO STEM UNO R3 P EXPANSION BOARD *1
USB TYPE-C DATA CABLE *1
Audio Amplifier Module (HS-F32-PL) *1
PH2.0 3P Dual Head Terminal Line *1
Circuit wiring diagram:
ESP32 Python test environment setup
8. Video tutorial
Arduino UNO video tutorial:
ESP32 Python Video Tutorial:
9. Test conclusion
Arduino UNO Test Conclusion:
After connecting the device lines, after burning the above program to the Arduino UNO development board, you will hear the buzzer emit different frequencies of sound.
ESP32 Python test conclusion:After the device is connected and the program is burned into the ESP32 development board, you will hear the buzzer emit sounds of different frequencies.