1. Introduction
2. Schematic

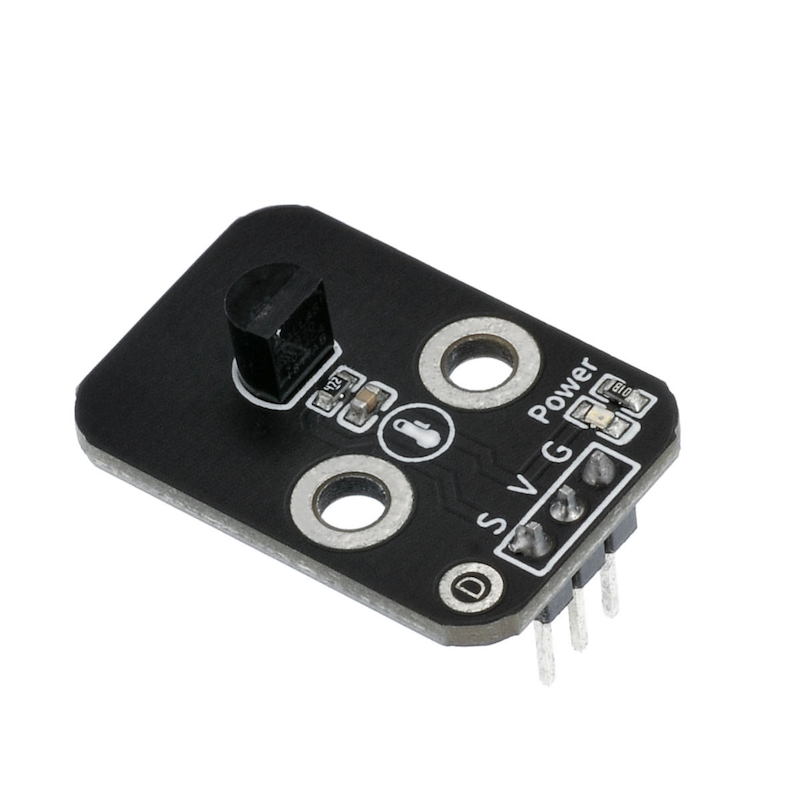
Digital temperature sensor-HS-S24A-L schematicClick to view
Module Parameters
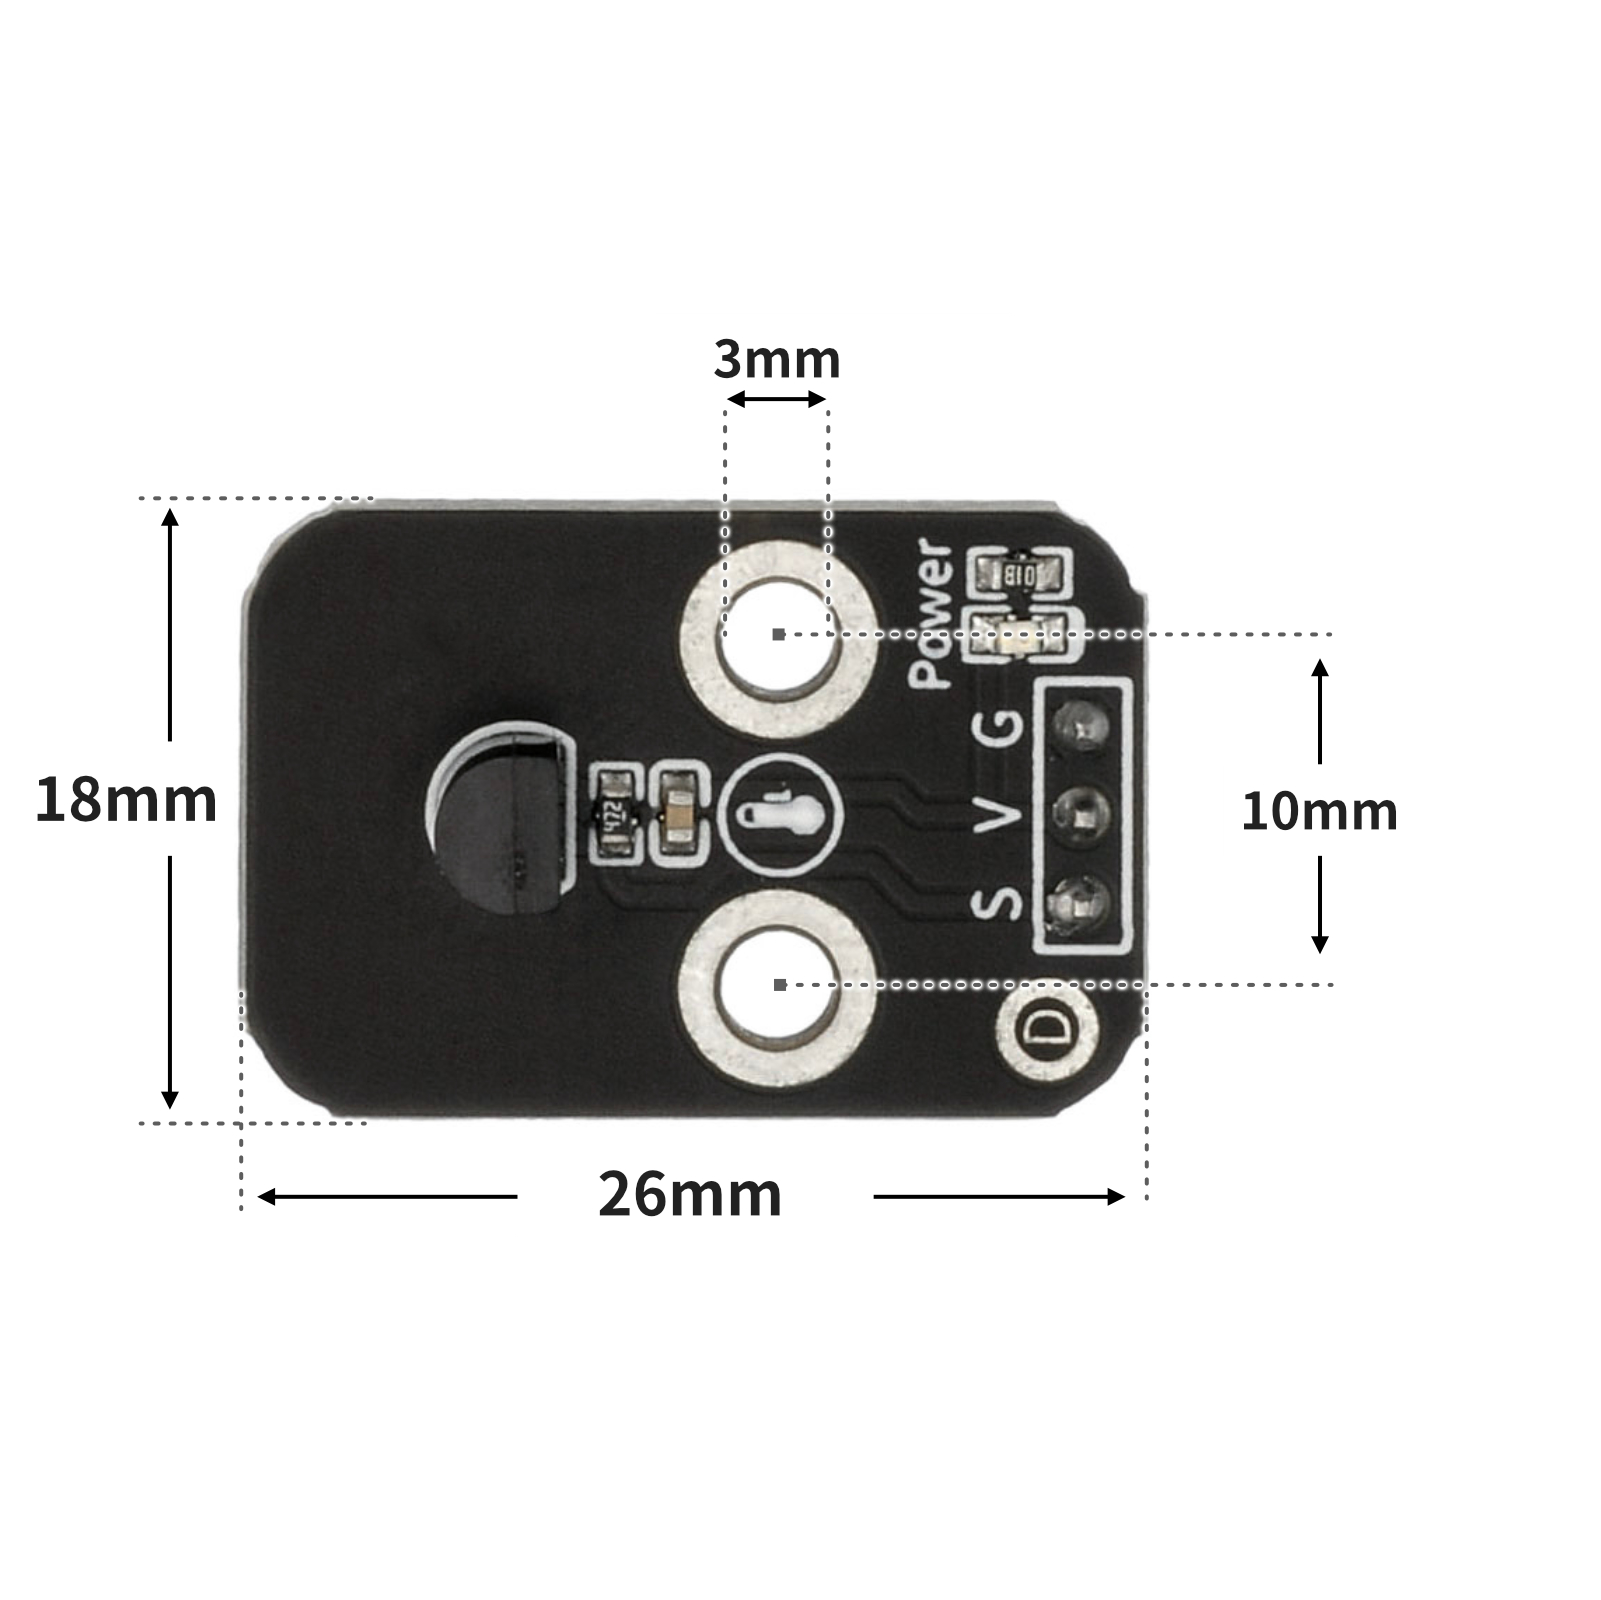
Pin Name | description |
|---|---|
G | GND (Negative Power Input) |
V | VCC (Positive Power Input) |
S | Digital Signal Pin |
Power Supply Voltage: 3.3V / 5V
Connection Type: 2.54mm Header
Installation Method: Double Screw Fixed
4, Circuit Board Size
5 of Arduino IDE example program
Attention: If prompted with an error message about the library file during program upload, please import the library file first!
Arduino IDE Library Download and Import Tutorial:Click to view
Example program (UNO development board):
#include <OneWire.h>
#include <DallasTemperature.h>

OneWire oneWire_13(13);
DallasTemperature sensors_13(&oneWire_13);
DeviceAddress insideThermometer;

float ds18b20_13_getTemp(int w) {
  sensors_13.requestTemperatures();
  if(w==0) {
    return sensors_13.getTempC(insideThermometer);
  }
  else {
    return sensors_13.getTempF(insideThermometer);
  }
}

void setup(){
  Serial.begin(9600);
  sensors_13.getAddress(insideThermometer, 0);
  sensors_13.setResolution(insideThermometer, 9);
}

void loop(){
  //DS18B20读取温度\nDS18B20连接在D6管脚,串口打印出温度值\n注:如果使用的DS18B20是散件,则需要在电源线和信号线之间并联一个5K左右的电阻
  Serial.println(String("温度:") + String(ds18b20_13_getTemp(0)) + String("℃"));
  Serial.println(String("温度:") + String(ds18b20_13_getTemp(1)) + String("℉"));
  Serial.println("");
  delay(1000);

}
6, ESP32 Python Example (for Mixly IDE/Misashi)
Choose the development board Python ESP32 [ESP32 Generic(4MB)] and upload in code mode
Attention: If prompted with an error message about the library file during program upload, please import the library file first!
Download and import tutorial for Mixly IDE ESP32 library:Click to view
Example program (ESP32-Python):
from machine import Pin
import time
class OneWire:
    def __init__(self, pin):
        self.pin = pin
        self.pin.init(Pin.OPEN_DRAIN, Pin.PULL_UP)
        self.pin.value(1)
    def reset(self):
        self.pin.value(0)
        time.sleep_us(480)
        self.pin.value(1)
        time.sleep_us(60)
        present = not self.pin.value()
        time.sleep_us(420)
        return present
    def writebit(self, value):
        self.pin.value(0)
        if value:
            time.sleep_us(10)
            self.pin.value(1)
            time.sleep_us(55)
        else:
            time.sleep_us(65)
            self.pin.value(1)
            time.sleep_us(5)
    def readbit(self):
        self.pin.value(0)
        time.sleep_us(2)
        self.pin.value(1)
        time.sleep_us(15)
        value = self.pin.value()
        time.sleep_us(45)
        return value
    def writebyte(self, value):
        for i in range(8):
            self.writebit((value >> i) & 1)
    def readbyte(self):
        value = 0
        for i in range(8):
            value |= self.readbit() << i
        return value
    def readinto(self, buf):
        for i in range(len(buf)):
            buf[i] = self.readbyte()
class DS18B20:
    def __init__(self, onewire):
        self.ow = onewire
        self.buf = bytearray(9)
    def convert_temp(self):
        self.ow.reset()
        self.ow.writebyte(0xCC)
        self.ow.writebyte(0x44)
        time.sleep_ms(750)
    def read_temp(self):
        self.ow.reset()
        self.ow.writebyte(0xCC)
        self.ow.writebyte(0xBE)
        self.ow.readinto(self.buf)
        temp = self.buf[0] | (self.buf[1] << 8)
        if temp & 0x8000:
            temp = -((temp ^ 0xffff) + 1)
        return temp / 16

def ds18b20_get_temp(w=0):
    sensor.convert_temp()
    t = sensor.read_temp()
    if w == 1:
        t = t * 9 / 5 + 32
    return t

ds_pin = Pin(12)
ow = OneWire(ds_pin)
sensor = DS18B20(ow)


while True:
    print(ds18b20_get_temp(1))
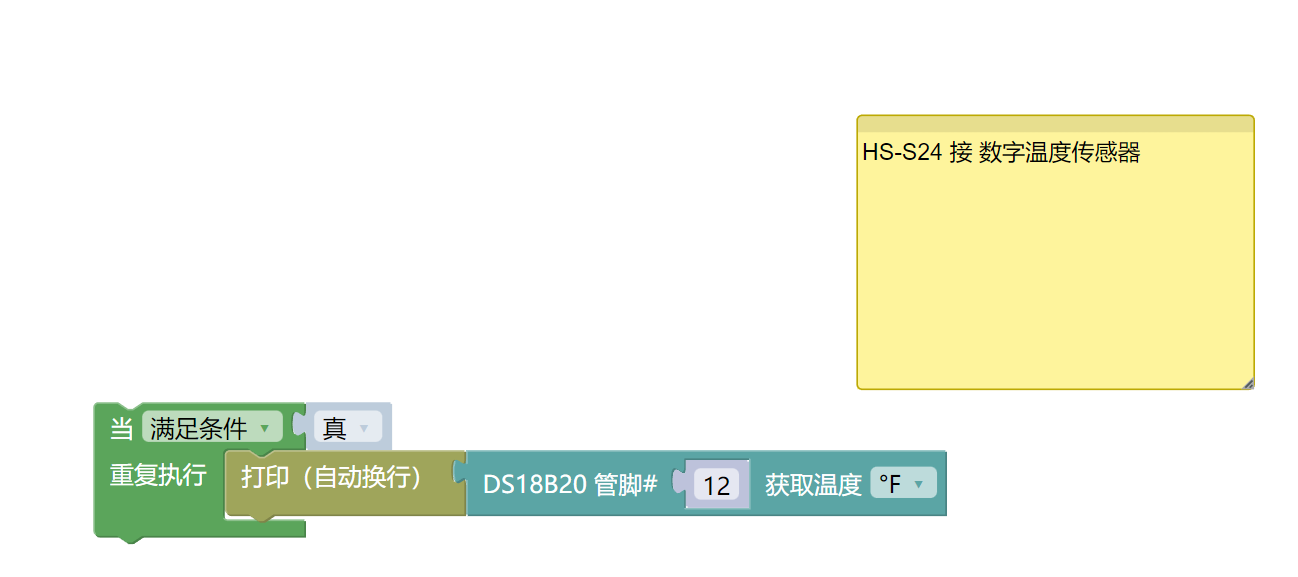
7, Mixly example program (graphical language)
Example program (UNO development board):Click to download
Attention: If prompted with an error message about the library file during program upload, please import the library file first!
Download and import tutorial of Mixly IDE Arduino library:Click to view
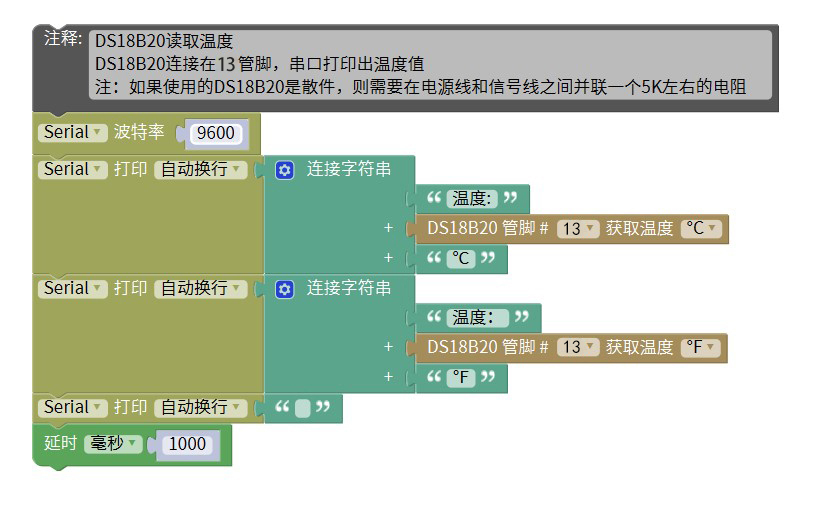
Example Program (ESP32 Development Board):Click to download
Attention: If prompted with an error message about the library file during program upload, please import the library file first!
Download and import tutorial for Mixly IDE ESP32 library:Click to view
8. Setting up the Test Environment
Arduino UNO Test Environment Setup
Prepare Components:
HELLO STEM UNO R3 PRO DEVELOPMENT BOARD *1
USB TYPE-C DATA CABLE *1
Digital Temperature Sensor (HS-S24A) *1
1P female to female DuPont wire *3 pieces or 3P female to female DuPont wire *1 piece
Circuit wiring diagram:

ESP32 Test Environment Setup
Prepare Components:Pending update...
Circuit wiring diagram:Pending update...
9, Video tutorial
Video tutorial:Click to view
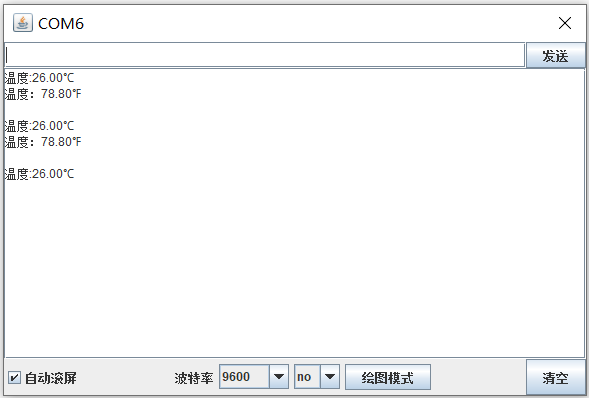
10, Test results
Arduino UNO test results:
After the device is connected to the line, burn the above program to the U+ program card, open the serial port monitor, set the baud rate to 9600, and you can see the serial port print the current ambient temperature.