

1. Introduction
Data format: 8-bit humidity integer data + 8-bit humidity decimal data + 8-bit temperature integer data + 8-bit temperature decimal data + 8-bit parity bit.
The data transmission process: the master sends a start signal - > DHT responds with a signal - > DHT notifies the master that it is ready to receive the signal - > DHT sends the ready data - > DHT ends the signal - > DHT internally retests the environmental temperature and humidity, records the next data, and the master starts sending the signal.
Obtained through this process, the controller of the data collected each time is always the last DHT data.If we want to get real-time data, the master can collect two consecutive data, but officially, it is not recommended to read DHT continuously multiple times.If the interval time between each read exceeds 5 seconds, it is sufficient to obtain accurate data.The DHT needs 1 second to stabilize when powered on.
2. Schematic
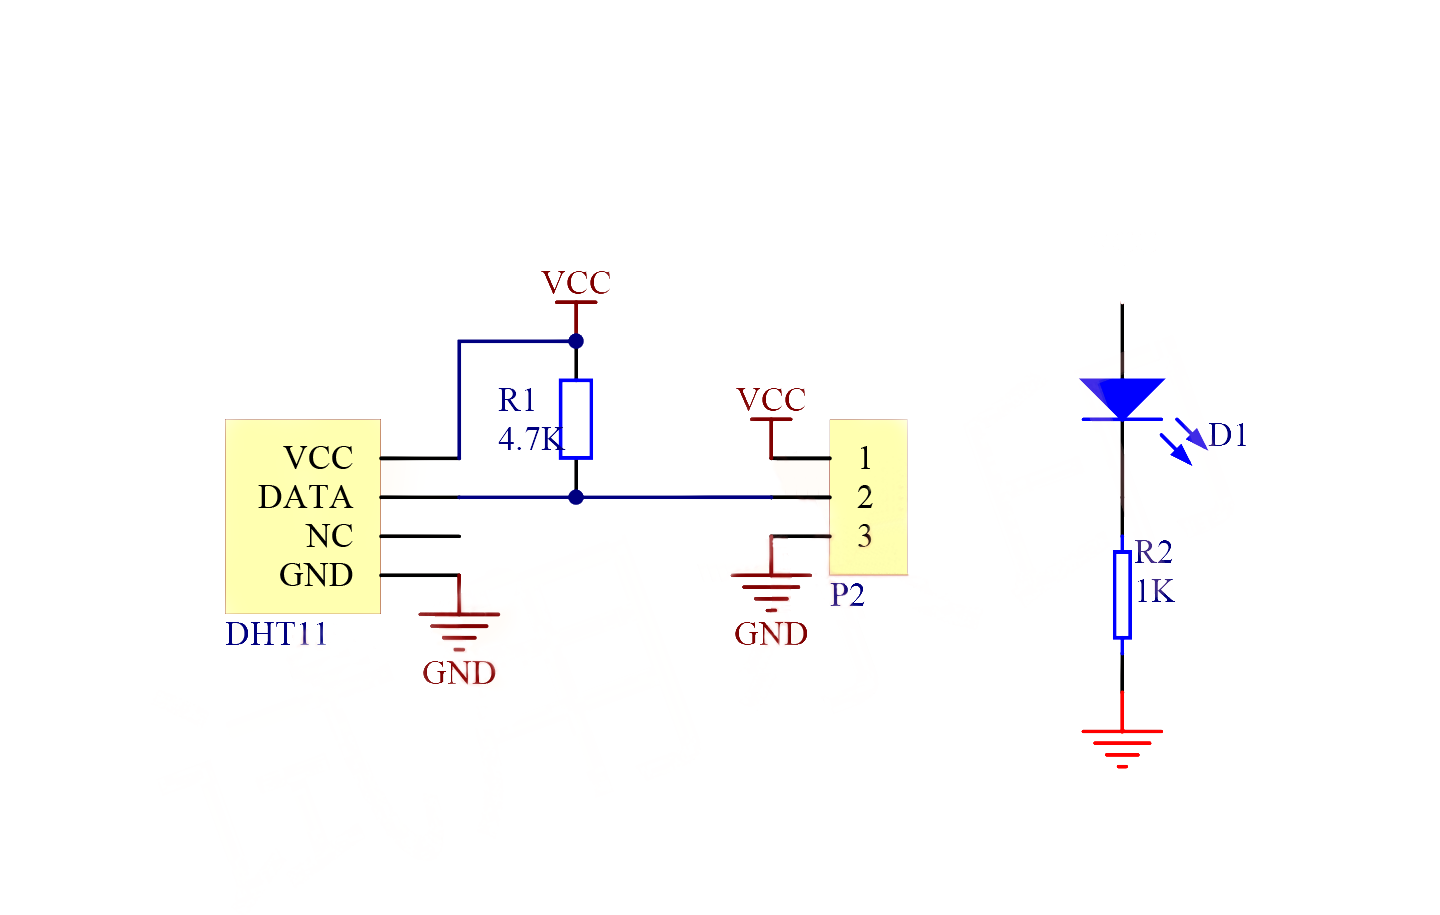
Module Parameters
Pin Name | description |
|---|---|
G | GND (Negative Power Input) |
V | VCC (Positive Power Input) |
S | Digital Signal Pin |
Power Supply Voltage: 3.3V / 5V
Connection method: PH2.0 terminal wire
Installation Method: Double Screw Fixed
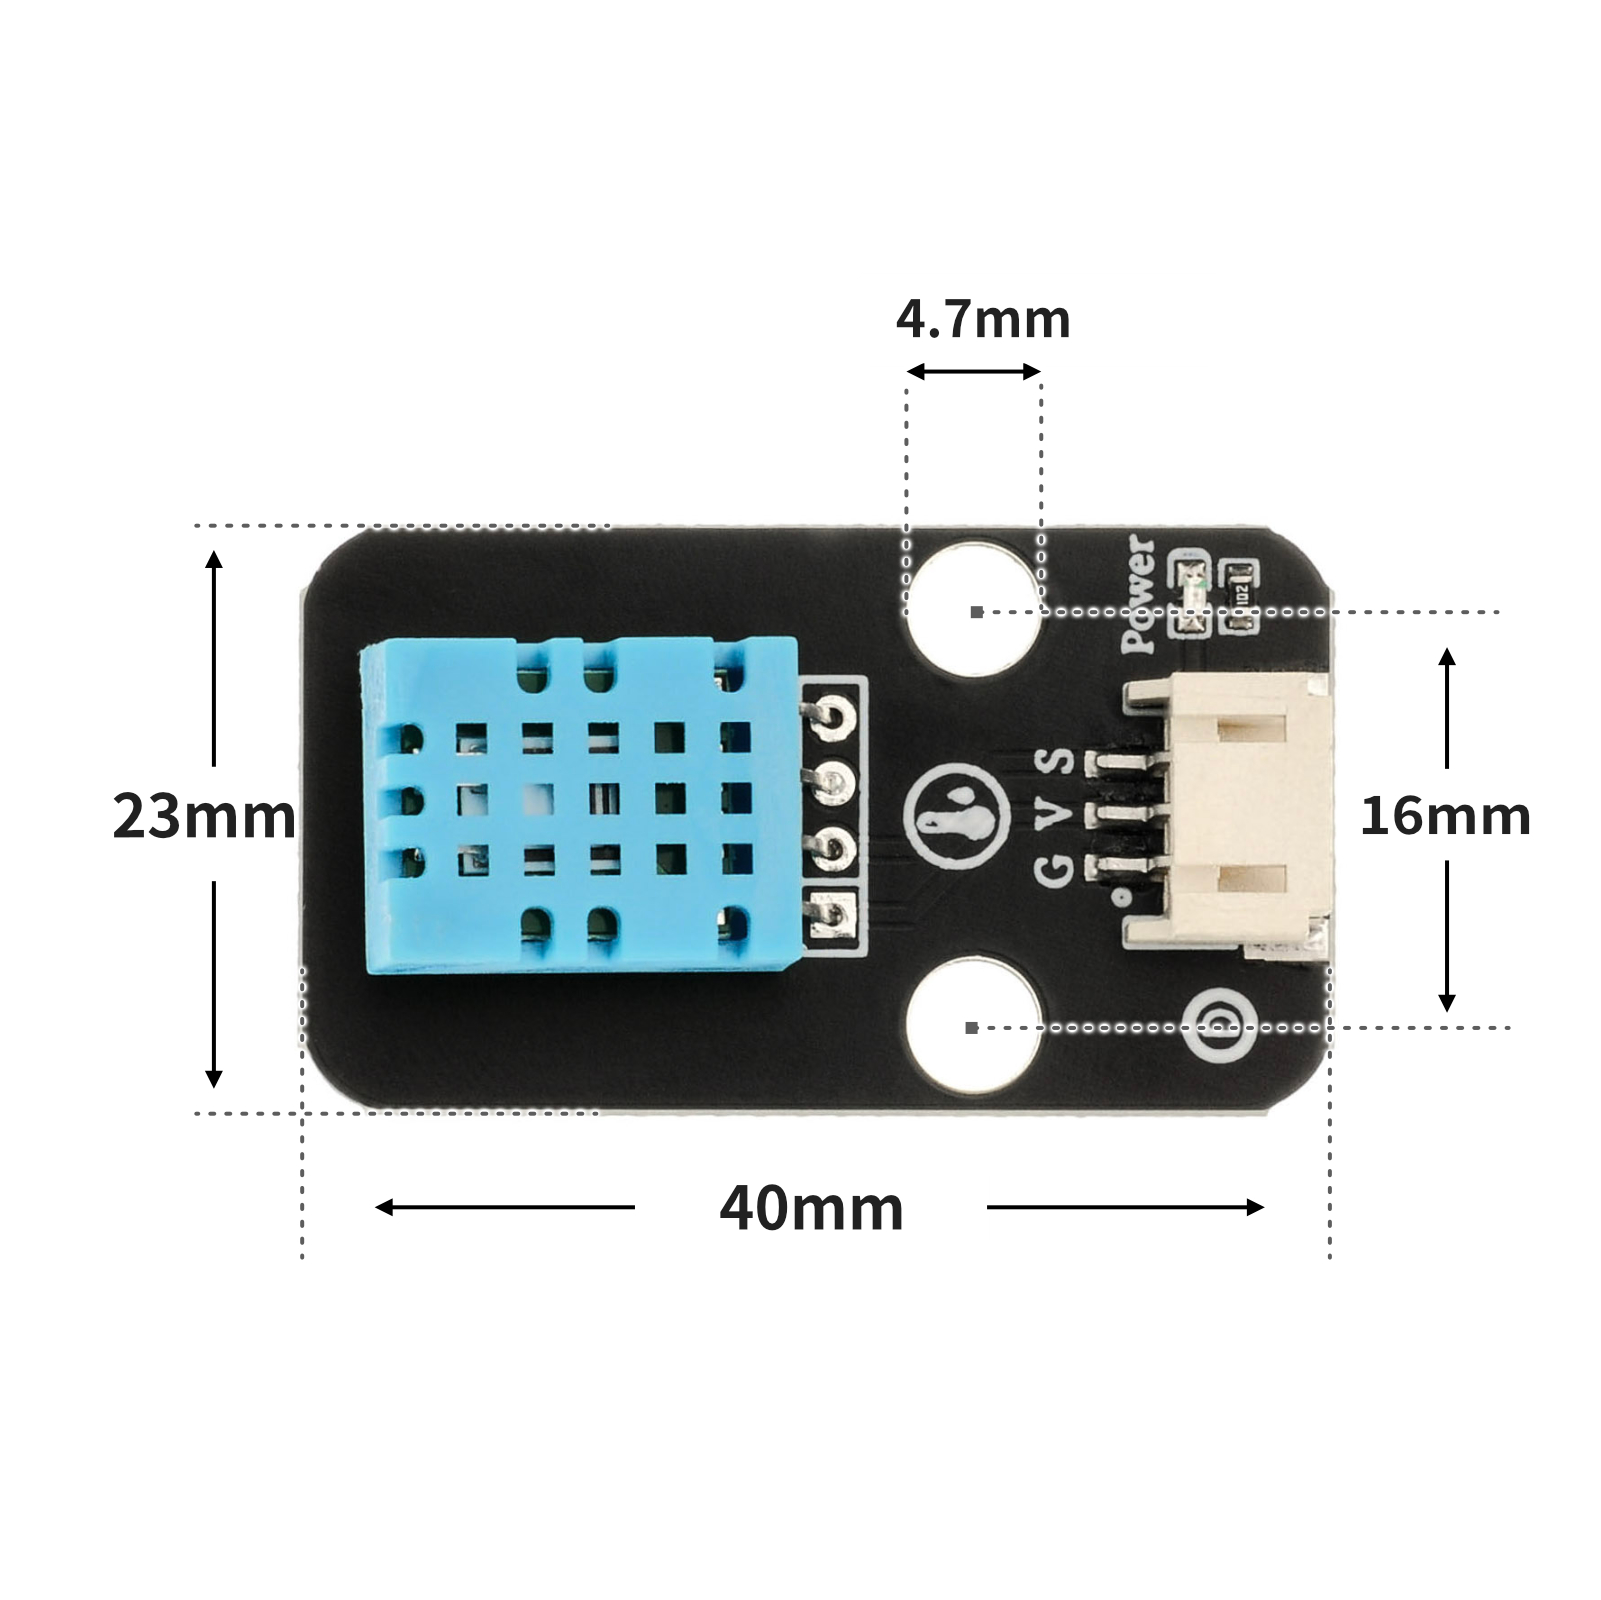
4, Circuit Board Size
5 of Arduino IDE example program
Arduino UNO Graphical Example Program:
//DHT11传感器接引脚D6
#include <DHT.h>//调用温dht湿度库

volatile float wendu = 0;//设置温度变量
volatile float shidu = 0;//设置湿度变量
DHT dht6(6, 11);//定义温湿度传感器引脚

void setup() {
  Serial.begin(9600);//设置波特率

  dht6.begin();//启动
}

void loop() {


  delay(2000);//延时2秒
  shidu = dht6.readHumidity();//将湿度读取为摄氏度(默认值)赋给变量
  wendu = dht6.readTemperature();//将温度读取为摄氏度(默认值)赋给变量
  Serial.print(wendu);//串口打印温度
  Serial.print("℃");
  Serial.print("                         ");
  Serial.print(shidu);//串口打印湿度
  Serial.println("%");

}
ESP32 Python Example (for Mixly IDE / Micskit)
(Choose the Python ESP32 [ESP32 Generic(4MB)] to switch to code mode upload):
import machine
import dhtx
import time
# 2引脚接温湿度传感器 获取当前温度和湿度
while True:
print(dhtx.DHT11(2).temperature(),end ="")
print('℃ ',end ="")
print(dhtx.DHT11(2).humidity(),end ="")
print('% ')
time.sleep_ms(200)
6, Miciqi Mixly Example Program (Graphical Language)
Arduino UNO Graphical Example Program:Click to download
ESP32 Python Graphical Example Program:Click to download

7, Test Environment Setup
Arduino UNO Test Environment Setup
Prepare Components:
HELLO STEM UNO R3 DEVELOPMENT BOARD *1
HELLO STEM UNO R3 P EXPANSION BOARD *1
USB TYPE-C DATA CABLE *1
Humidity and temperature sensor (HS-S26L) *1
PH2.0 3P Dual Head Terminal Line *1
Circuit wiring diagram:
ESP32 Python test environment setup
8, Add DHT11 Arduino library file
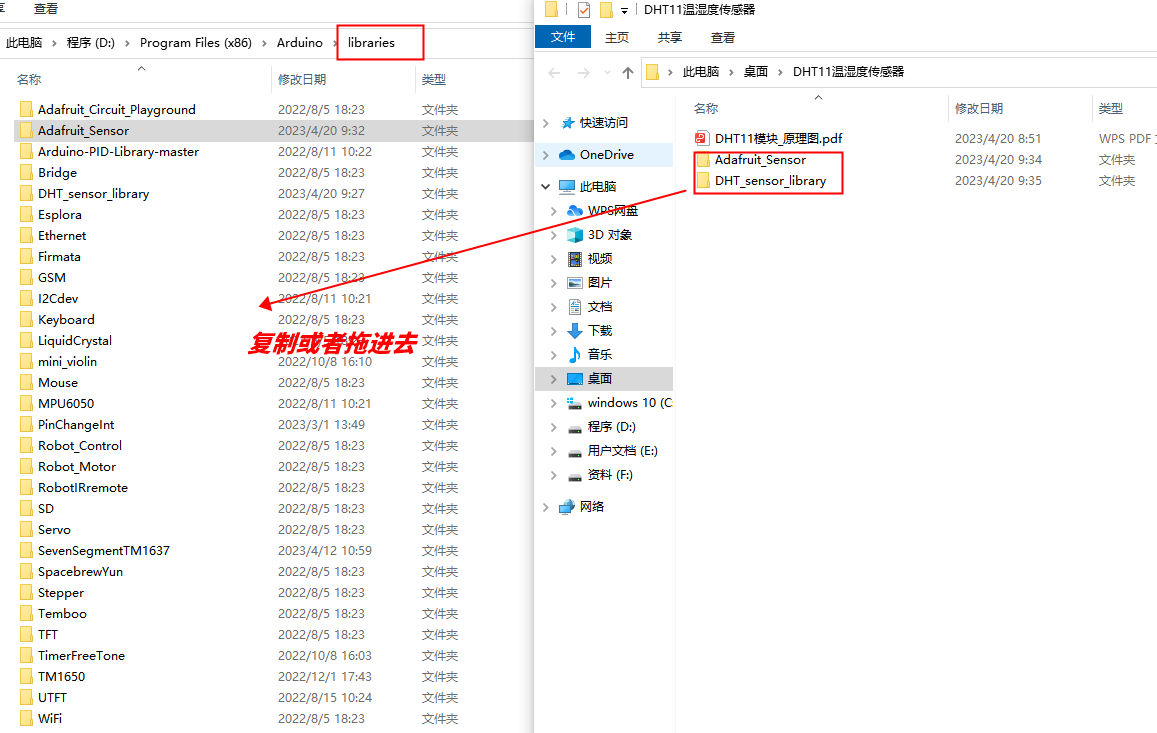
First find the Arduino library folder:
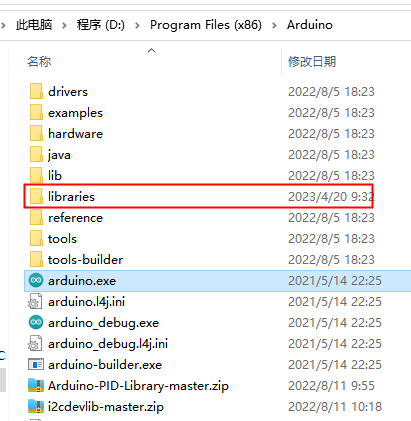
Copy the library file to the libraries folder in the Arduino IDE software directory and it's done:
Library file:Click to download
9, Video tutorial
Arduino UNO video tutorial:Click to view
ESP32 Python Video Tutorial:
10, Test conclusion
Arduino UNO Test Conclusion:
After the device is connected and the wires are in place, upload the above program to the development board, and then open the serial port monitor. You will see the current temperature and humidity data displayed in the window.
ESP32 Python test conclusion:After the device is connected and the wires are in place, upload the above program to the development board, and then open the serial port monitor. You will see the current temperature and humidity data displayed in the window.