
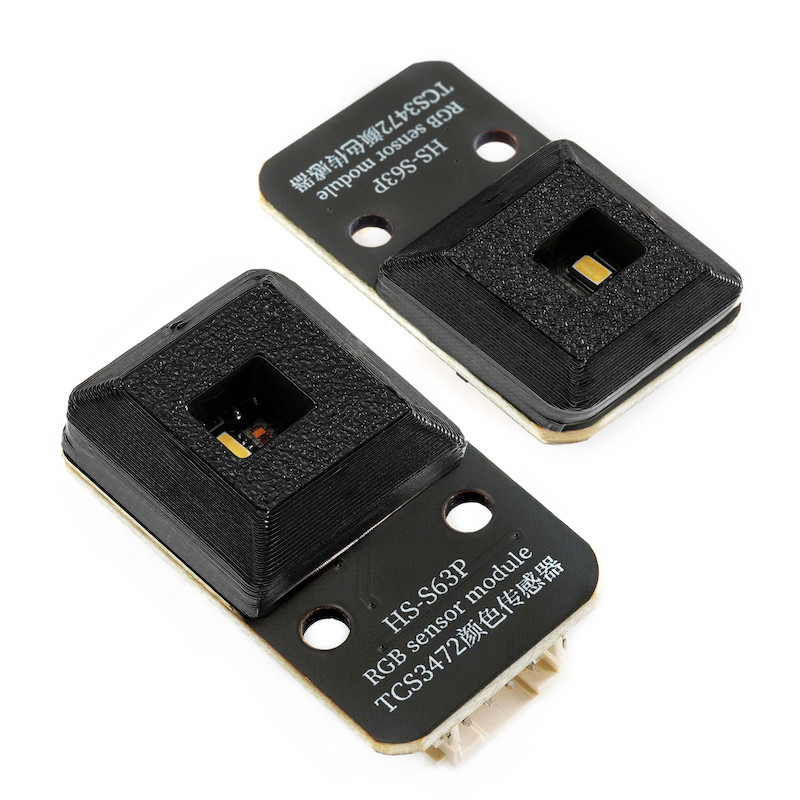
1. Introduction
2. Schematic
TCS3472 color sensor-HS-S63P schematicClick to view
Module Parameters
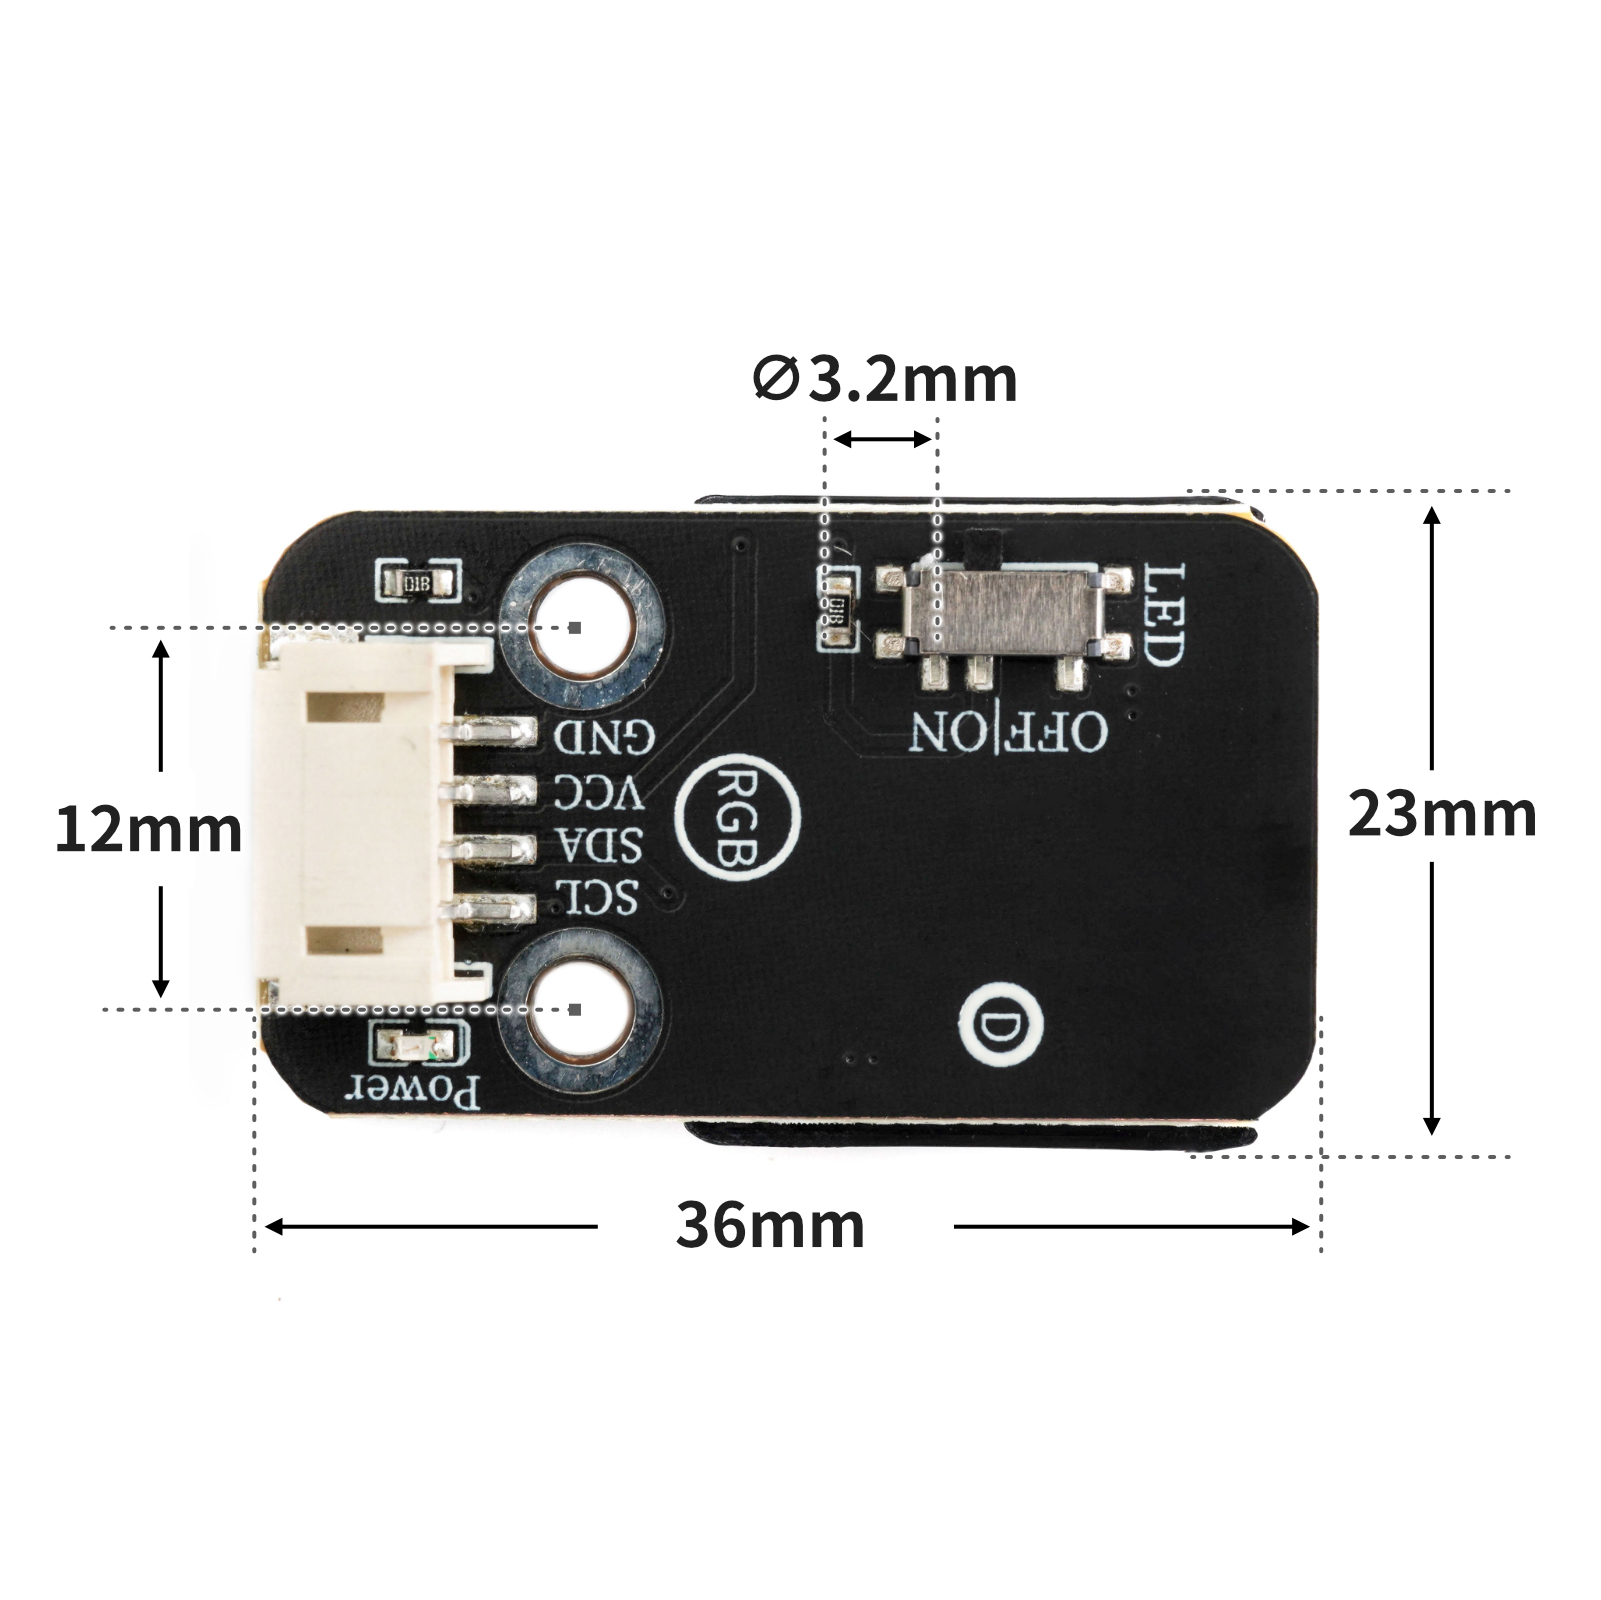
Pin Name | description |
|---|---|
G | GND (Negative Power Input) |
V | VCC (Positive Power Input) |
SDA | Data pin |
SCL | clock pin |
Supply voltage: 3.3V-5V
Connection method: PH2.0 4P terminal wire
Installation method: Lego assembly
4, Circuit Board Size
5 of Arduino IDE example program
Attention: If prompted with an error message about the library file during program upload, please import the library file first!
Arduino IDE Library Download and Import Tutorial:Click to view
Example program (UNO development board):
#include <Wire.h>
#include "Adafruit_TCS34725.h"
Adafruit_TCS34725 tcs = Adafruit_TCS34725(TCS34725_INTEGRATIONTIME_50MS, TCS34725_GAIN_1X);
void printColor() {
uint16_t clearcol = 0;
uint16_t red = 0;
uint16_t green = 0;
uint16_t blue = 0;
float r = 0;
float g = 0;
float b = 0;
float average = 0;
delay(100);
tcs.getRawData(&red, &green, &blue, &clearcol);
//加权平均值算法
average = (red + (green + blue)) / 3;
r = red / average;
g = green / average;
b = blue / average;
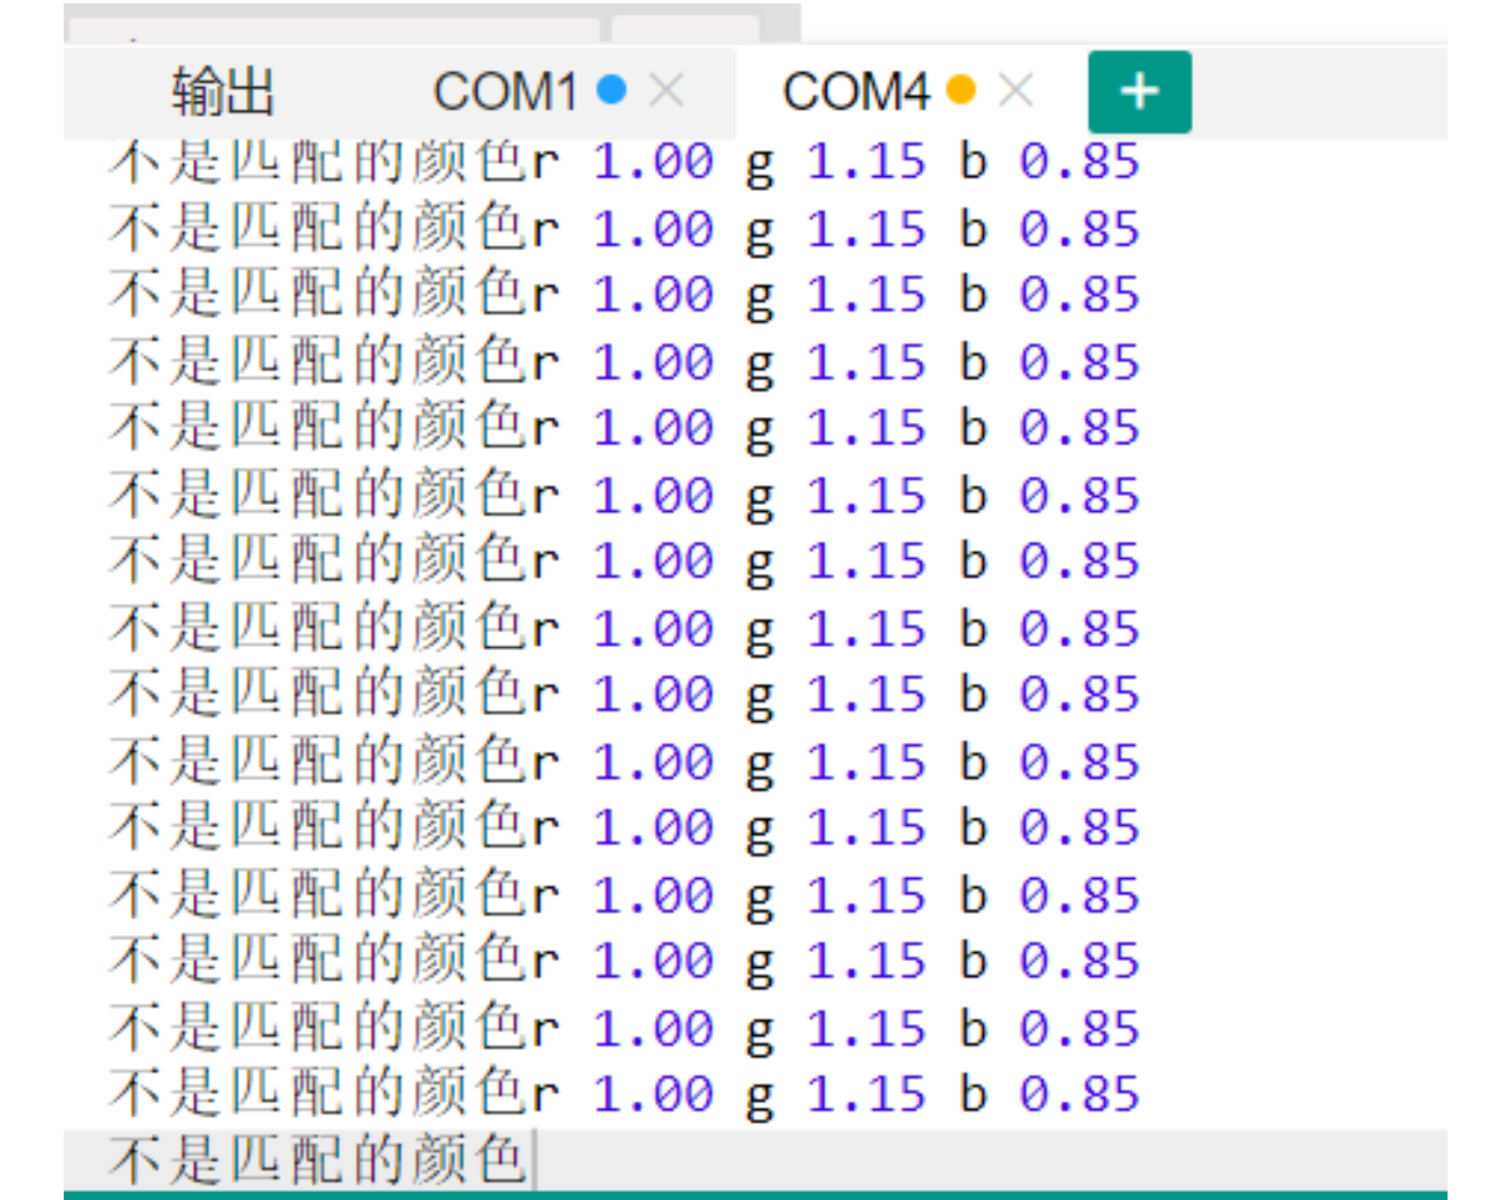
Serial.println(String("r ") + String(r) + String(" g ") + String(g) + String(" b ") + String(b));
if ((r > 1.2 && r < 1.9) && (g < 1 && (b > 0.45 && b < 0.9))) {
Serial.print(" 红");
} else if (r < 1.1 && (g > 1.3 && b < 0.7)) {
Serial.print(" 绿");
} else if ((r > 1 && r < 1.5) && ((g > 1.1 && g < 1.4) && (b > 0.35 && b < 0.75))) {
Serial.print(" 黄");
} else if ((r > 0.7 && r < 1) && (g < 1.2 && b > 1)) {
Serial.print(" 蓝");
} else if (false) {
} else {
Serial.print(" 不是匹配的颜色");
}
delay(10);
}
void setup(){
Serial.begin(9600);
if (tcs.begin(0x29)) {
Serial.println("搜索到TCS34725");
} else {
Serial.println("没有搜索到TCS34725");
while (true) {
delay(1);
}
}
}
void loop(){
printColor();
}6, ESP32 Python Example (for Mixly IDE/Misashi)
Choose the development board Python ESP32 [ESP32 Generic(4MB)] and upload in code mode
Attention: If prompted with an error message about the library file during program upload, please import the library file first!
Download and import tutorial for Mixly IDE ESP32 library:Click to view
Example program (ESP32-Python):
import machine
import time


from machine import Pin,I2C
from tcs34725 import TCS34725
import time

# 创建I2C对象
i2cObj = I2C(1,scl = Pin(22),sda = Pin(21),freq = 400000)
# 打印扫描出的I2C对象
print("I2C Bus Scan: ", i2cObj .scan(), "\n")
# 创建tcs34725颜色识别模块对象
tcs = TCS34725(i2cObj ,0x29)
# 创建RGB颜色计算函数
def Colour():
    try:
        red,green,blue,colour = tcs.read(True)  # 读取颜色值

        if colour != 0:  # 如果colour不等于0
            Red   = int((red / colour) * 32)  # 计算红色的值
            Green = int((green / colour) * 32)  # 计算绿色的值
            Blue  = int((blue / colour) * 32)  # 计算蓝色的值
            return Red,Green,Blue
        else:
            return 0,0,0
    except :
        print("数据异常!")
        RuntimeError
RGB = [0, 0, 0]
while True:
    print('(r,g,b)对应是',end ="")
    # 获取颜色R,G,B函数
    print(Colour())
    time.sleep_ms(10)
7, Mixly example program (graphical language)
Example program (UNO development board):Click to download
Attention: If prompted with an error message about the library file during program upload, please import the library file first!
Download and import tutorial of Mixly IDE Arduino library:Click to view
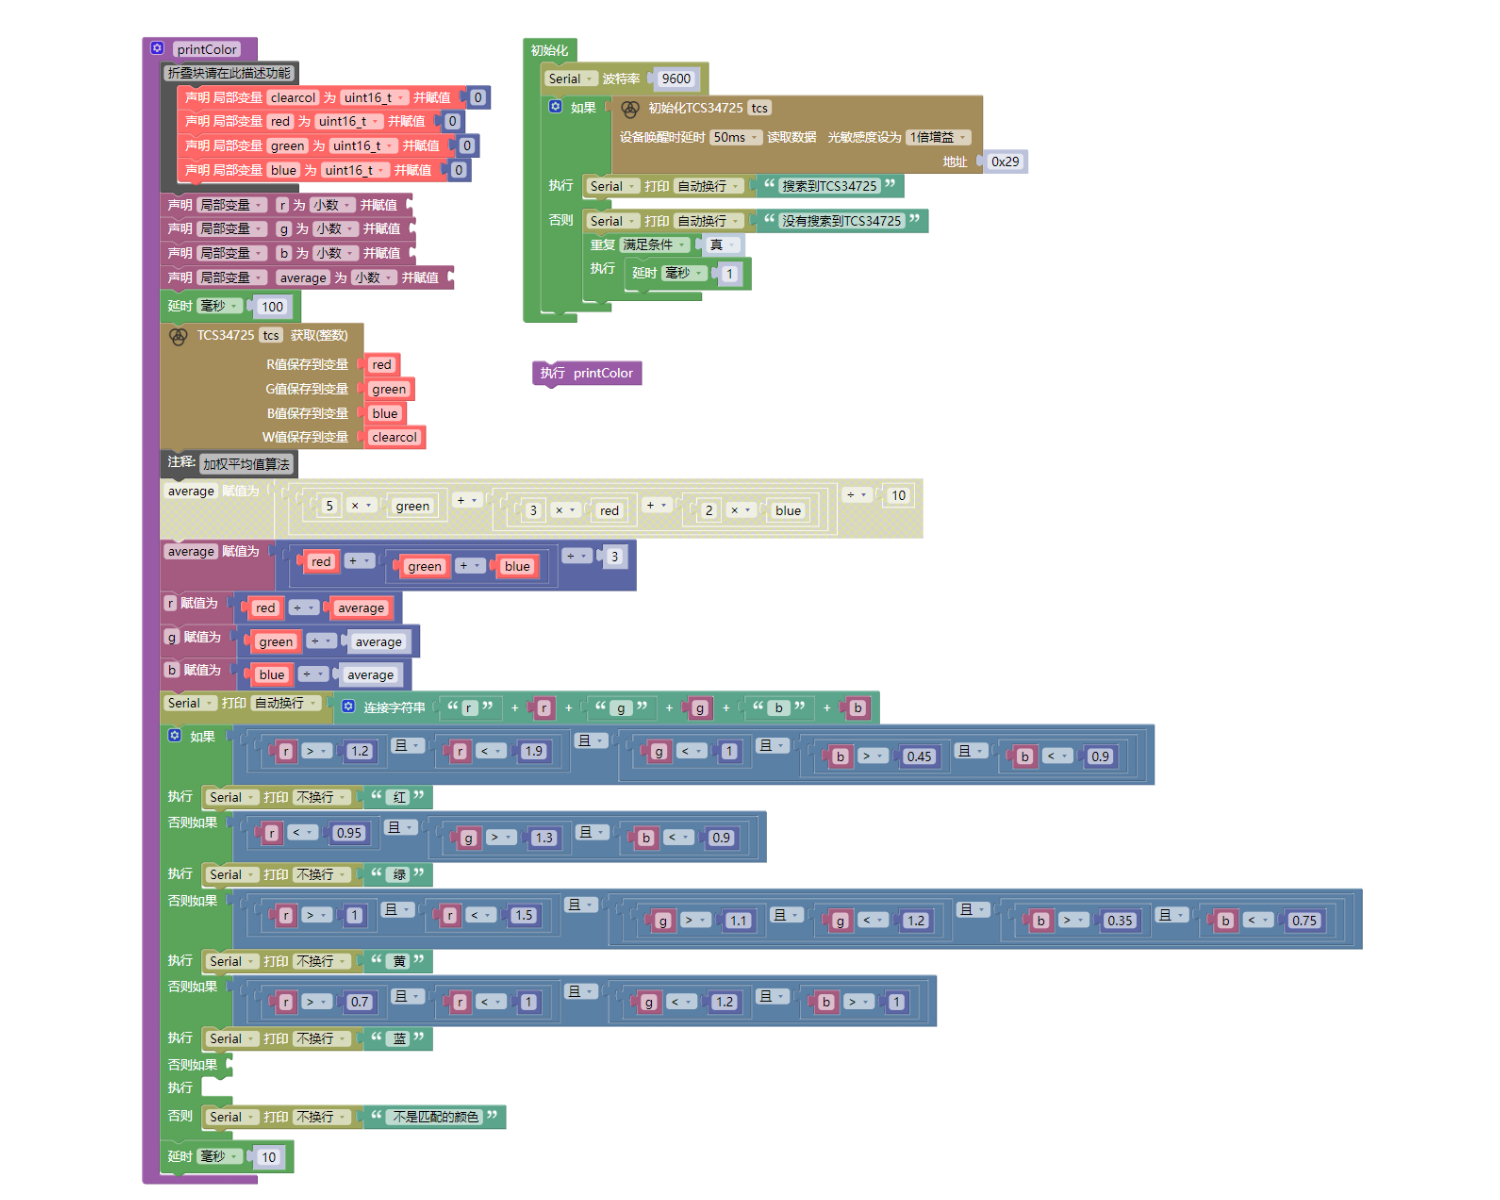
Example Program (ESP32 Development Board):Click to download
Attention: If prompted with an error message about the library file during program upload, please import the library file first!
Download and import tutorial for Mixly IDE ESP32 library:Click to view
Image pending update...
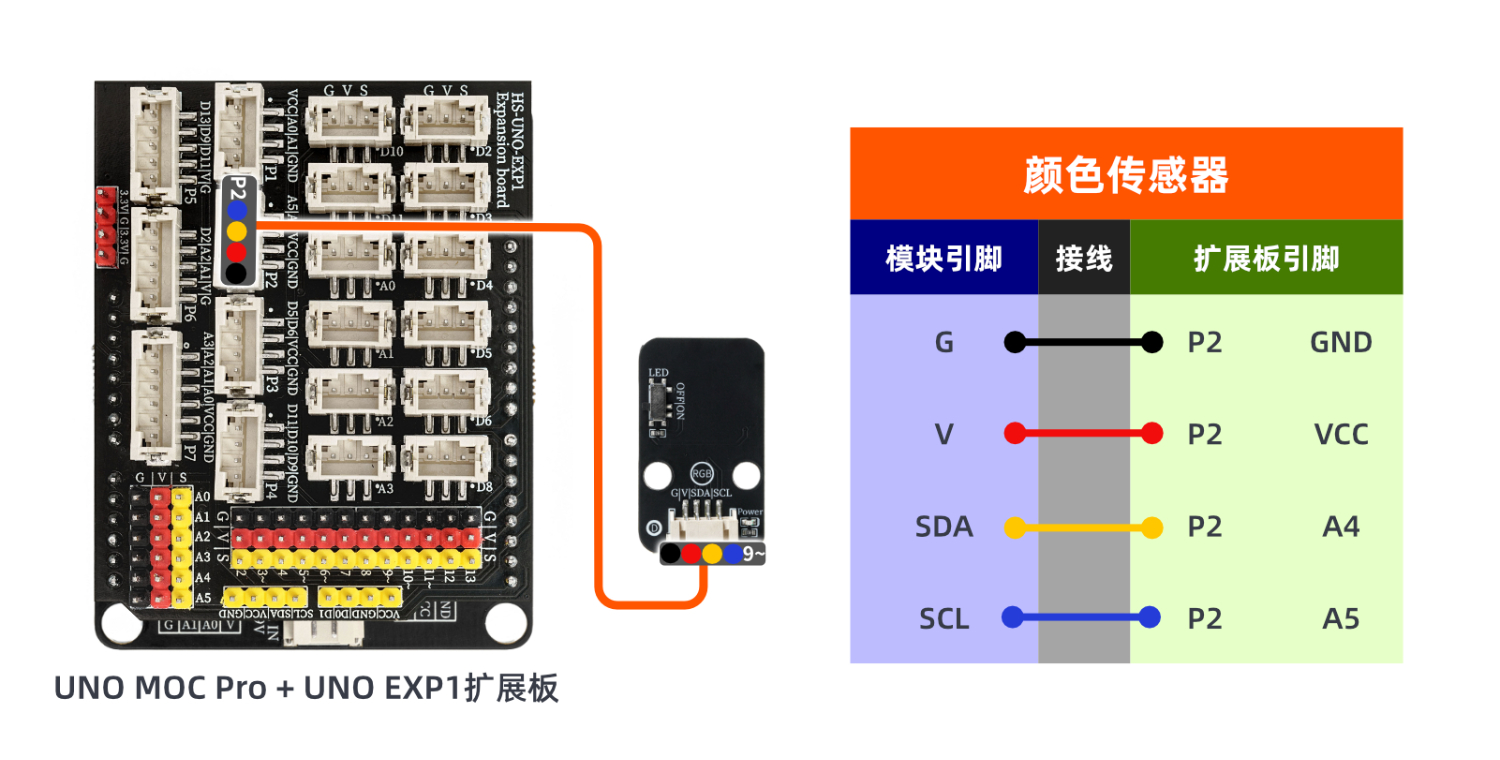
8. Setting up the Test Environment
Arduino UNO Test Environment Setup
Prepare Components:
UNO-R3 Development Board *1
UNO-R3 Expansion Board *1
USB TYPE-C DATA CABLE *1
TCS3472 color sensor*1
PH2.0 4P Double Head Terminal Line *1
Circuit wiring diagram:
ESP32 Test Environment Setup
Prepare Components:Pending update...
Circuit wiring diagram:Pending update...
9, Video tutorial
Arduino UNO video tutorial:Click to view
ESP32 Python Video Tutorial:Click to view
10, Test results
Arduino UNO Test Conclusion:
Enter the code, then align the module with the color board.

Aiming at different colors, you can observe different r, g, b values printed by the computer serial port.
ESP32 Test Results:
Pending update...