
1. Introduction
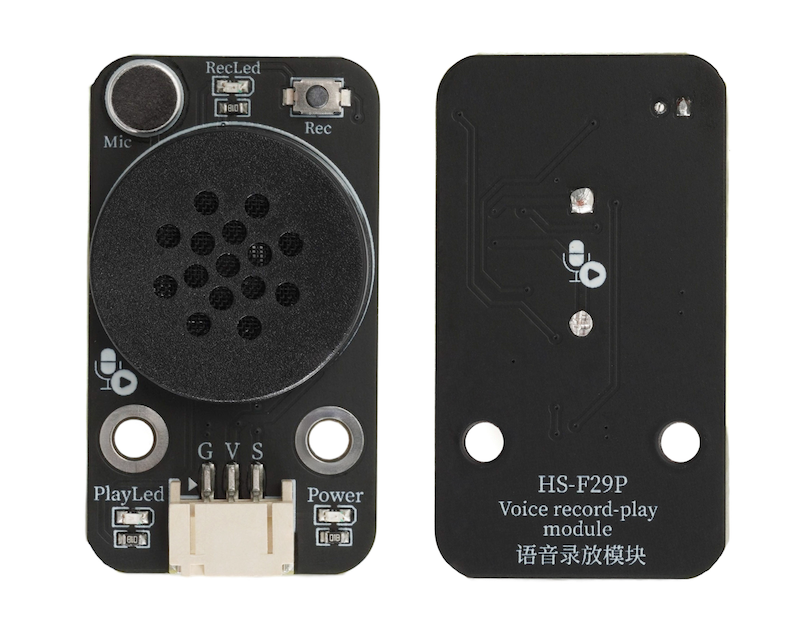
An audio playback module is an electronic module that integrates the functions of voice signal collection, storage, and playback, equipped with buttons for easy start and stop recording.Built-in microphone, can record directly.With its powerful voice processing capabilities, it is widely used in fields such as smart devices, security systems, and educational products.
2. Schematic
Audio Recording and Playback Module-HS-F29P SchematicClick to view
Module Parameters
Pin Name | description |
|---|---|
G | GND (Negative Power Input) |
V | VCC (Positive Power Input) |
S | Digital Signal Pin |
Power Supply Voltage: 3.3V / 5V
Connection method: PH2.0 terminal wire
Installation method: Screw fixed
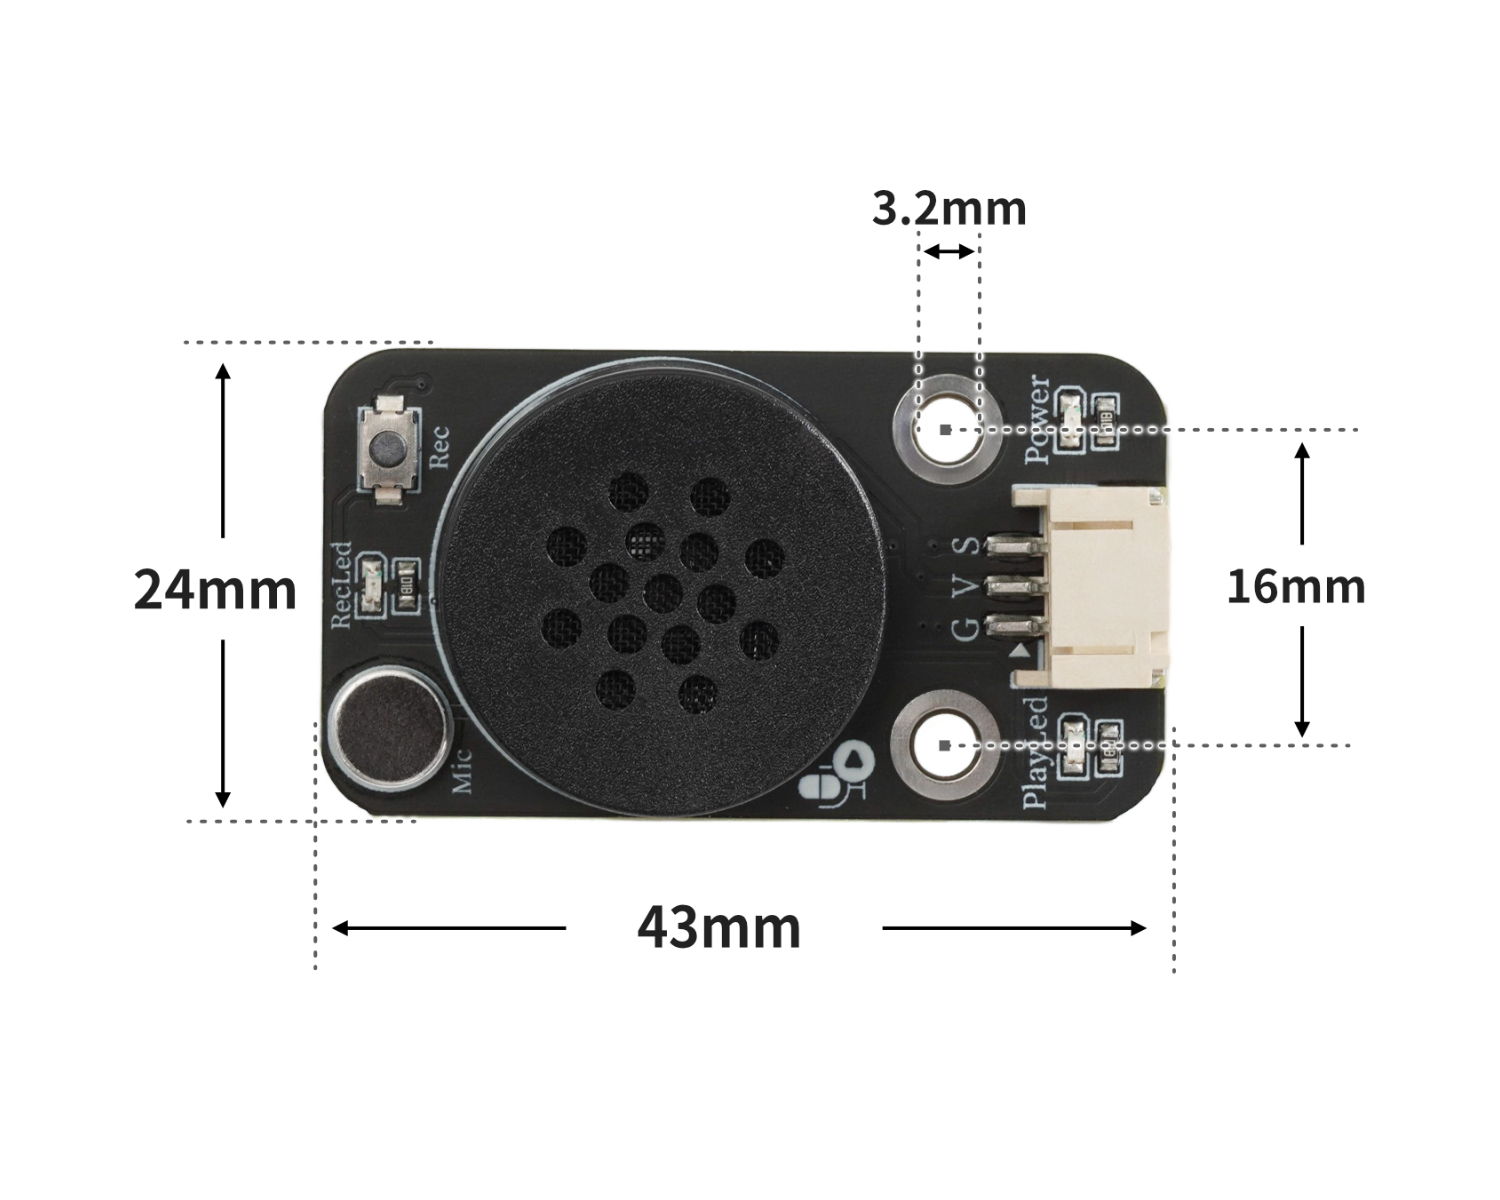
4, Circuit Board Size
5 of Arduino IDE example program
Attention: If prompted with an error message about the library file during program upload, please import the library file first!
Arduino IDE Library Download and Import Tutorial:Click to view
Example program (UNO development board):
void setup(){
  pinMode(2, INPUT);
  pinMode(3, OUTPUT);
}

void loop(){
  if (digitalRead(2) == LOW) {
    digitalWrite(3,HIGH);

  } else {
    digitalWrite(3,LOW);

  }

}
6, ESP32 Python Example (for Mixly IDE/Misashi)
Choose the development board Python ESP32 [ESP32 Generic(4MB)] and upload in code mode
Attention: If prompted with an error message about the library file during program upload, please import the library file first!
Download and import tutorial for Mixly IDE ESP32 library:Click to view
Example program (ESP32-Python):
import machine


pin4 = machine.Pin(4, machine.Pin.IN)
pin12 = machine.Pin(12, machine.Pin.OUT)
while True:
    if pin4.value() == 0:
        pin12.value(0)
    else:
        pin12.value(1)
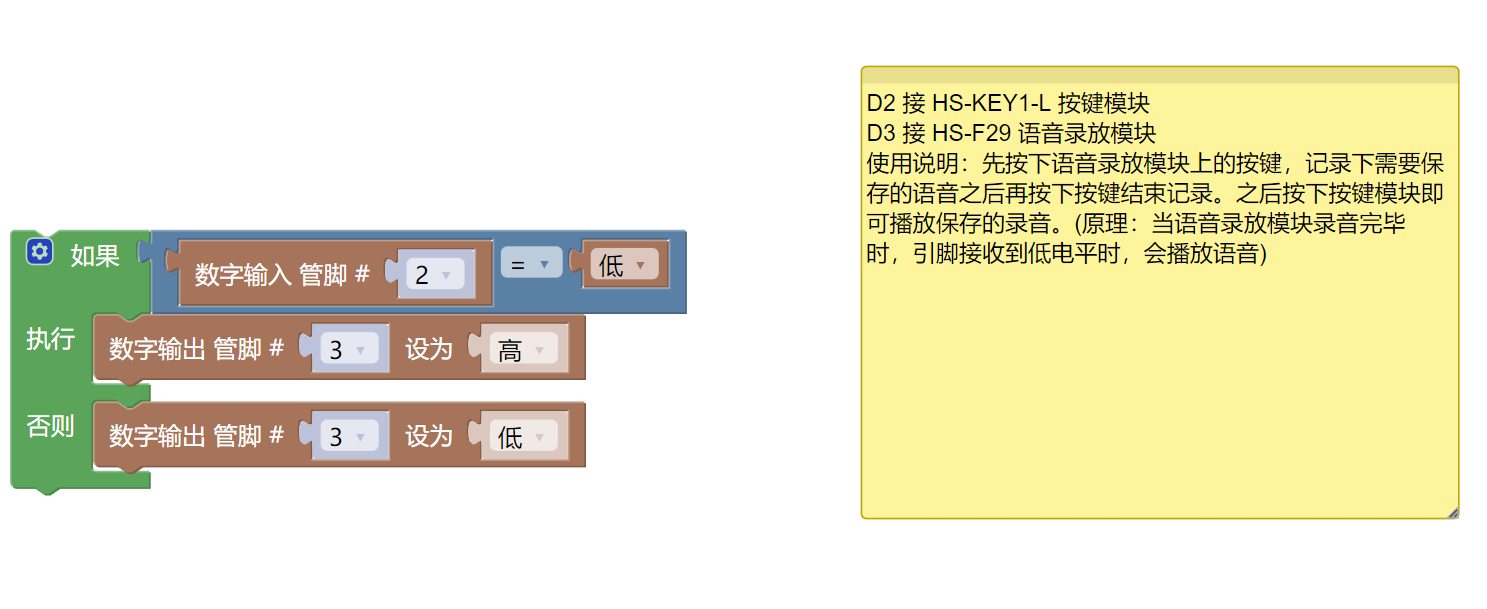
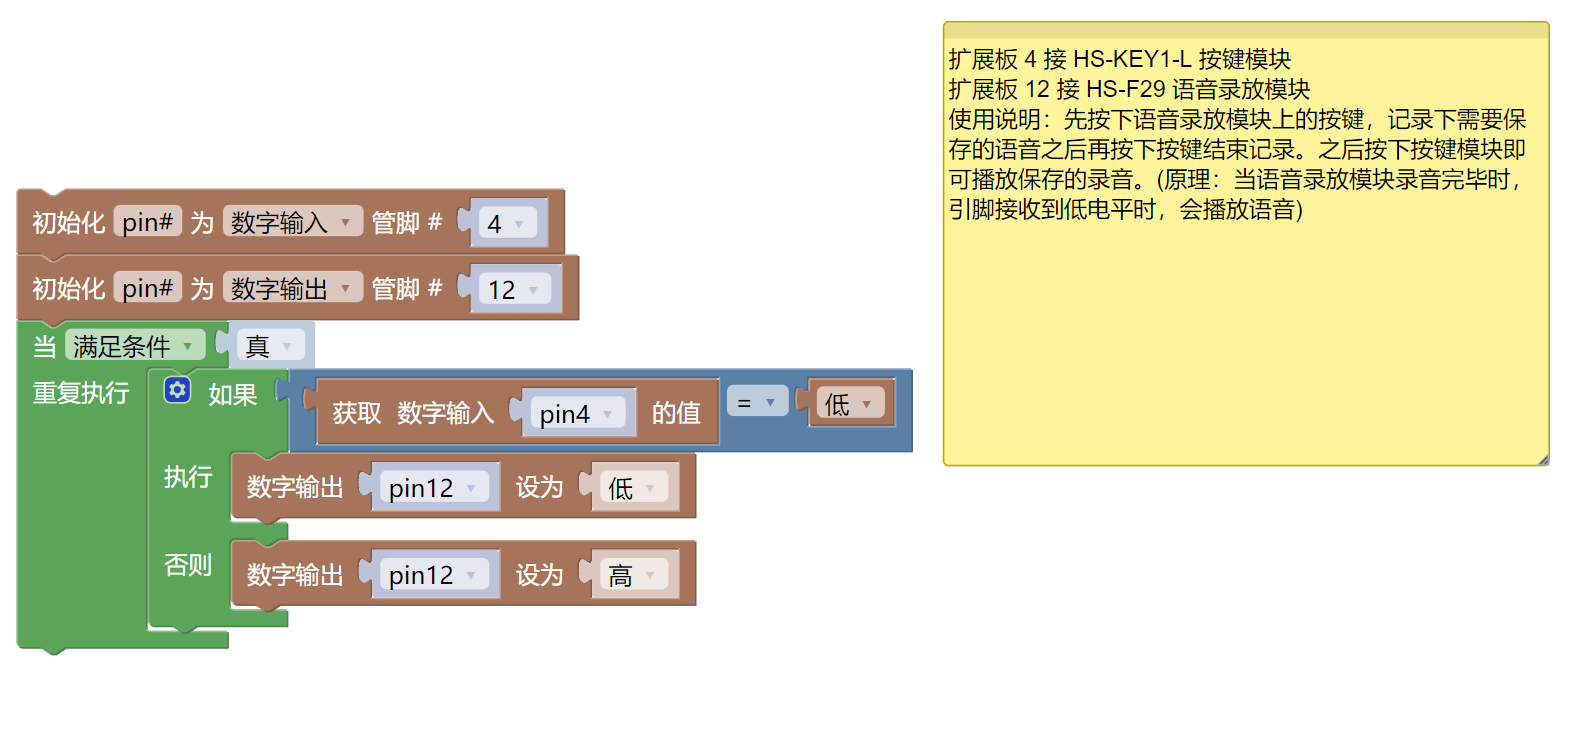
7, Mixly example program (graphical language)
Example program (UNO development board):Click to download
Attention: If prompted with an error message about the library file during program upload, please import the library file first!
Download and import tutorial of Mixly IDE Arduino library:Click to view
Example Program (ESP32 Development Board):Click to download
Attention: If prompted with an error message about the library file during program upload, please import the library file first!
Download and import tutorial for Mixly IDE ESP32 library:Click to view
8. Setting up the Test Environment
Arduino UNO Test Environment Setup
Prepare Components:
HELLO STEM UNO R3 DEVELOPMENT BOARD *1
HELLO STEM UNO R3 P EXPANSION BOARD *1
USB TYPE-C DATA CABLE *1
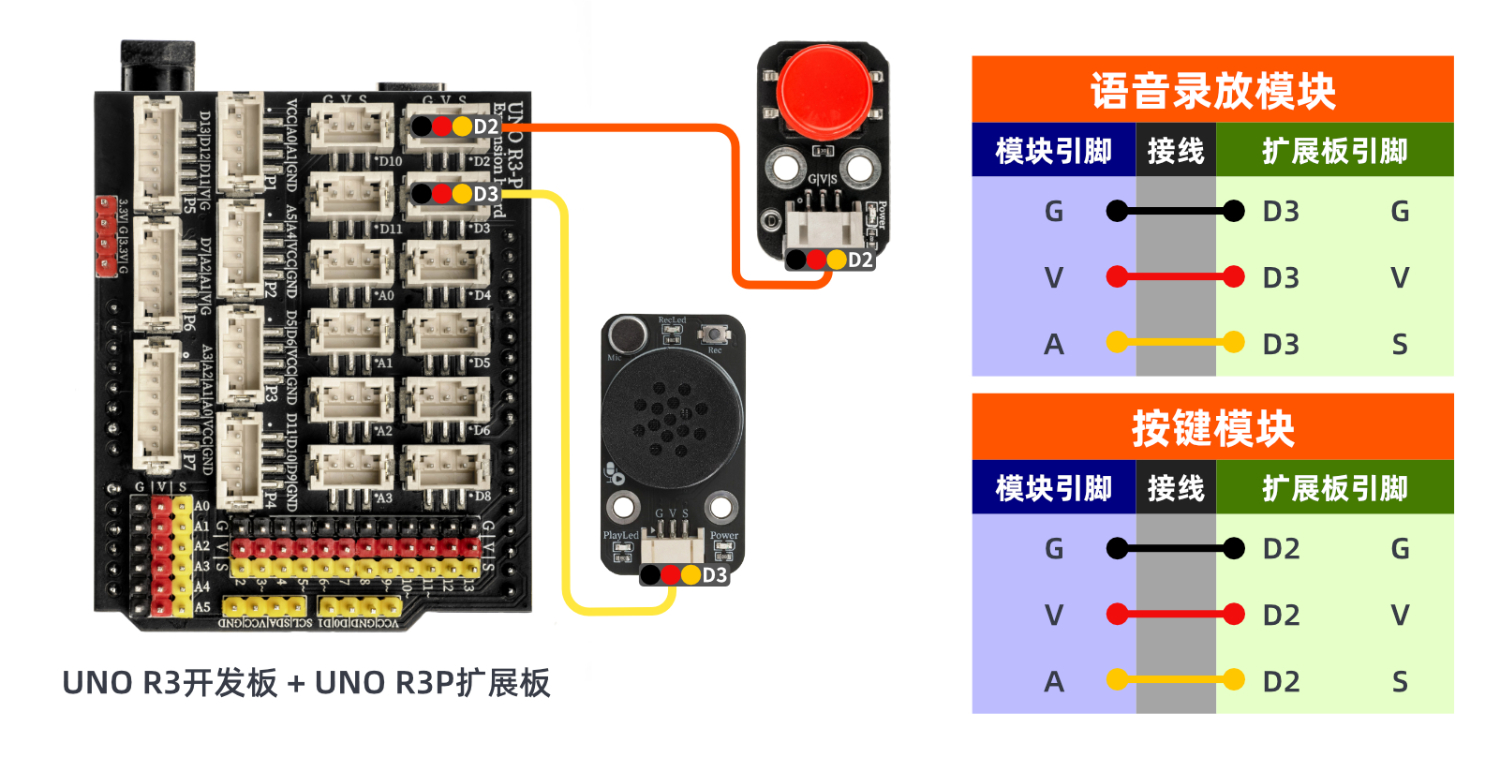
Audio playback module (HS-F29P) *1
Push-button switch module (HS-KEY1p) *1
PH2.0 3P Dupont wire *2
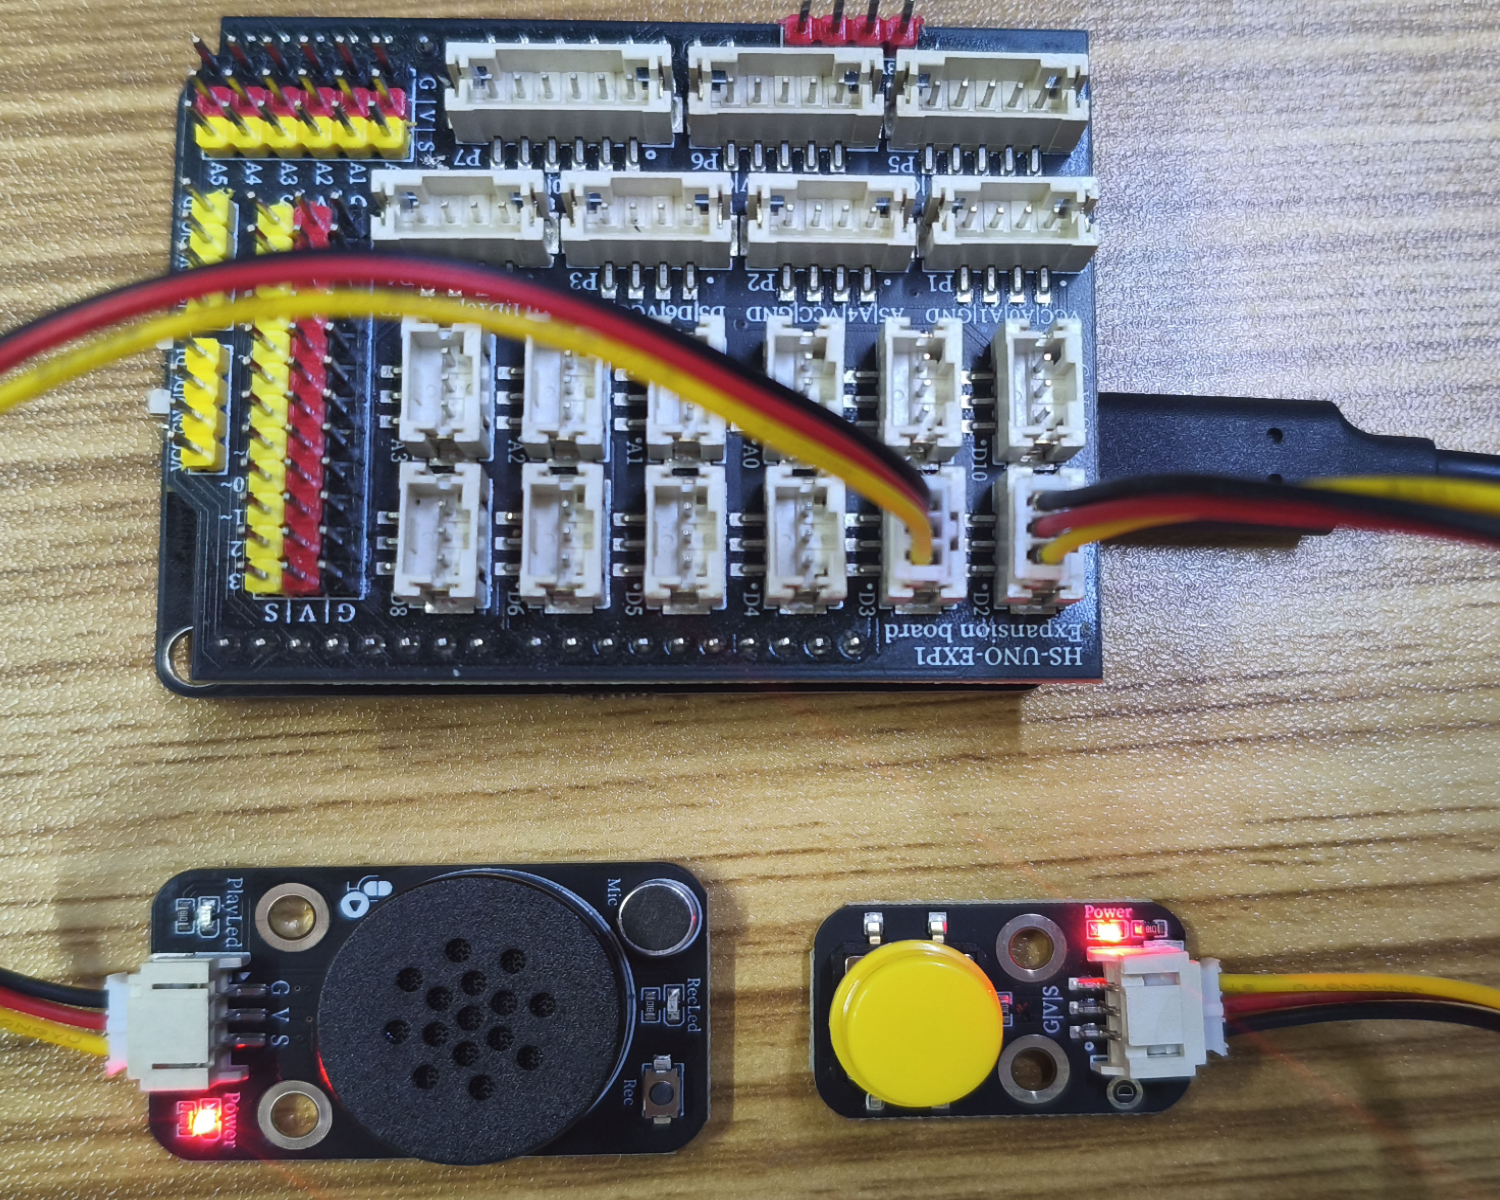
Circuit wiring diagram:
ESP32 Test Environment Setup
Prepare Components:Pending update...
Circuit wiring diagram:Pending update...
9, Video tutorial
Arduino UNO video tutorial:Click to view
ESP32 Python Video Tutorial:Click to view
10, Test conclusion
Arduino UNO Test Conclusion:
After connecting the device, after burning the above program to the development board, press the button on the voice playback module first, record the voice to be saved, and then press the button to end the recording.Press the button module to play the saved recording.
ESP32 Python test conclusion:
After connecting the device, after burning the above program to the development board, press the button on the voice playback module first, record the voice to be saved, and then press the button to end the recording.Press the button module to play the saved recording.