
1. Introduction
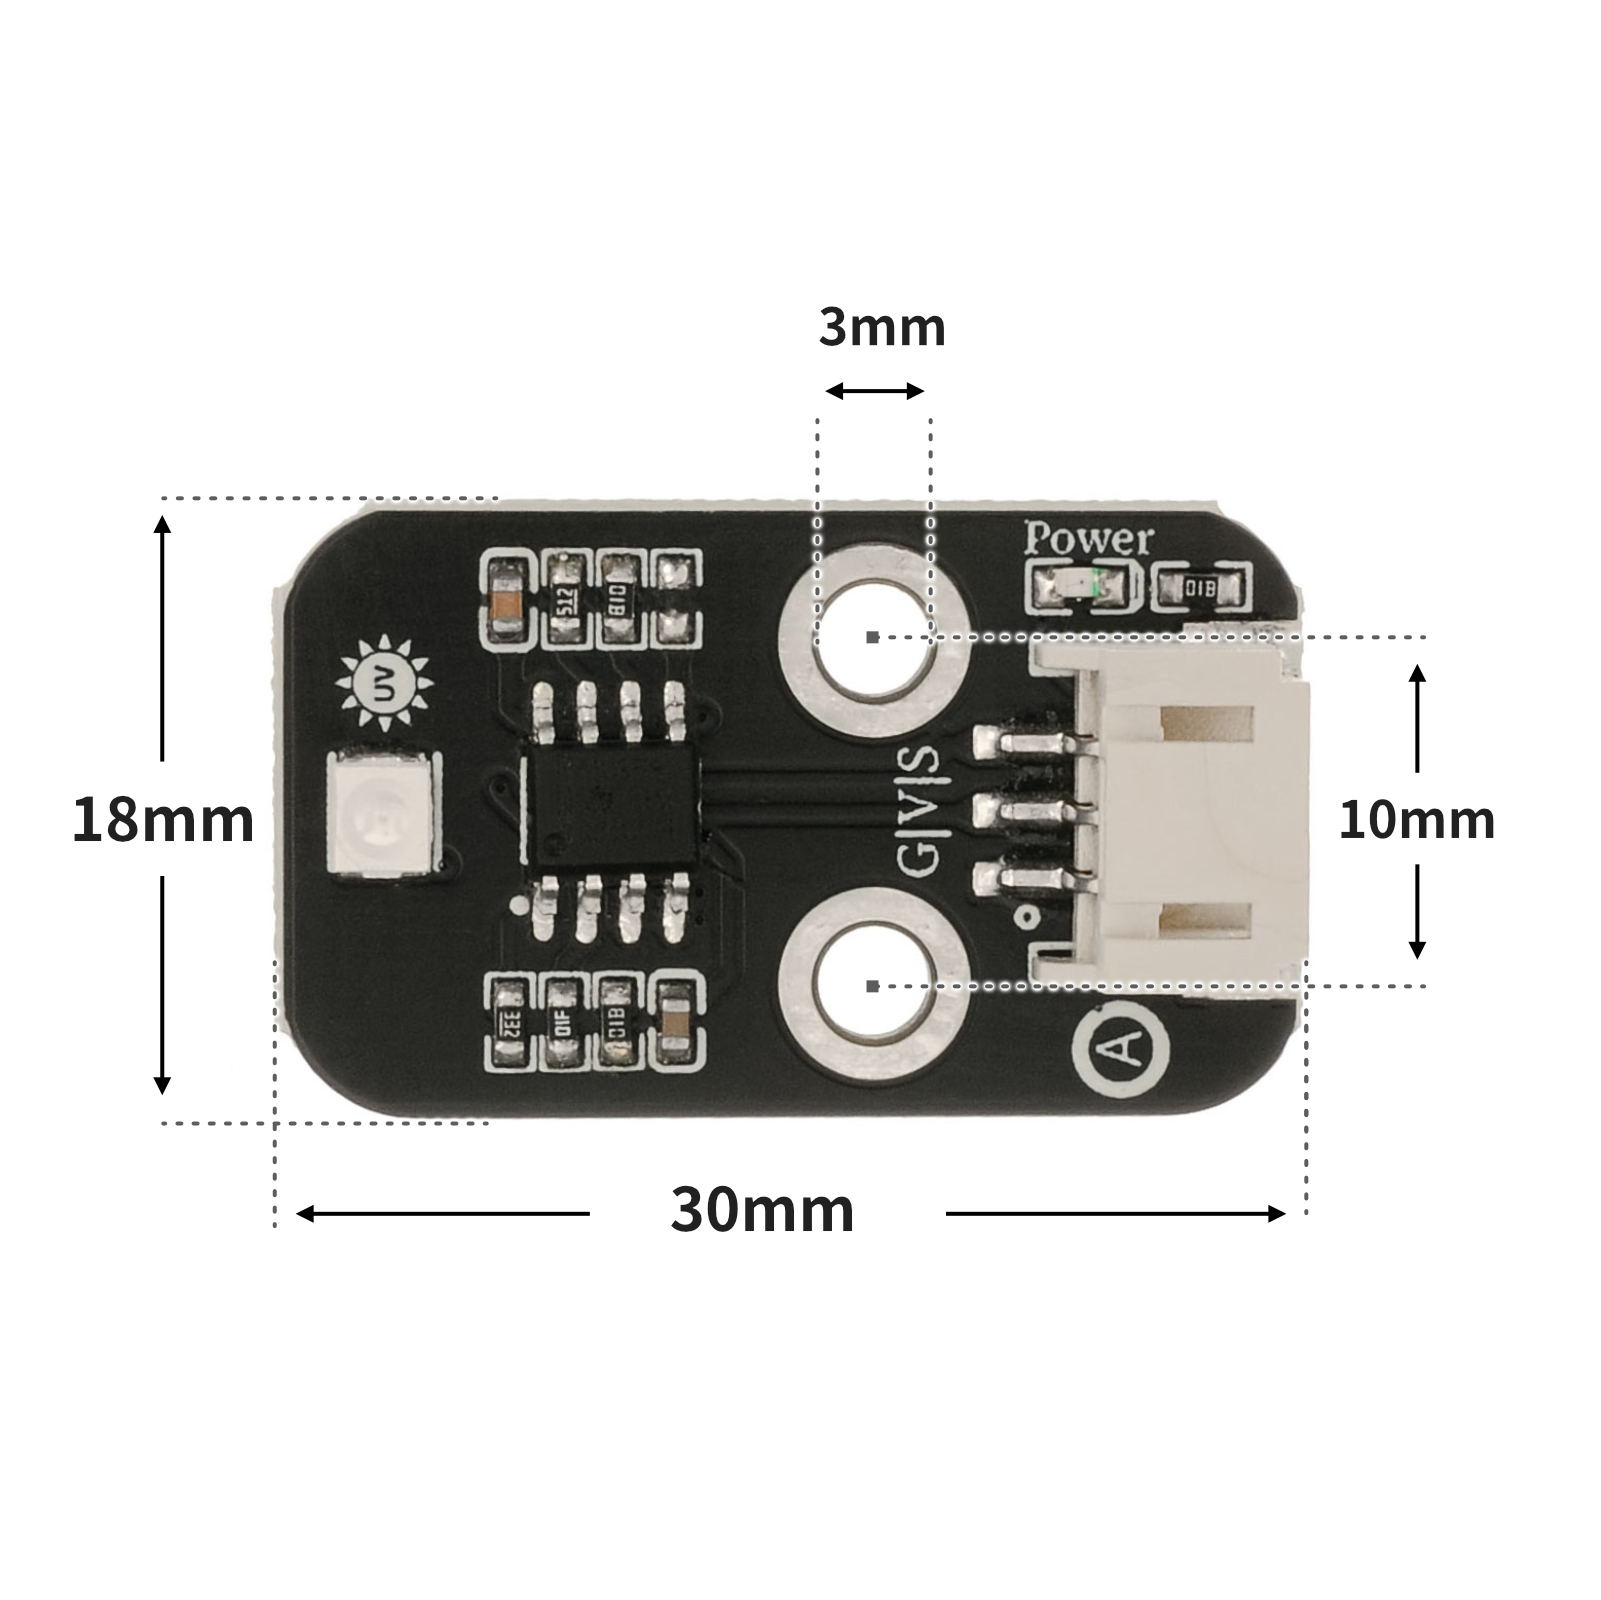
Features: 1. Small size: 11mm×27mm
2. Low power consumption: Supply voltage 2.5V~5V, working current is microampere level
3. Good linearity
4. High sensitivity
5. High stability
6. Wide detection range: 240nm-370nm
7. Large angle: 130 degrees
8. Schottky type photo sensitive diode, suitable for photoelectric mode
Typical applications: ultraviolet test instrument, ultraviolet watch, outdoor sports equipment, mobile phone, mobile phone, etc.
This product can be used in the specifications of mobile phone fields. It also has a linear current corresponding directly to the UV INDEX.
Resource link: https://pan.baidu.com/s/1pJvdC5l
Learning link 1: https://zhuanlan.zhihu.com/p/641537240
Learning link 2: https://blog.csdn.net/UbiBots/article/details/52558287
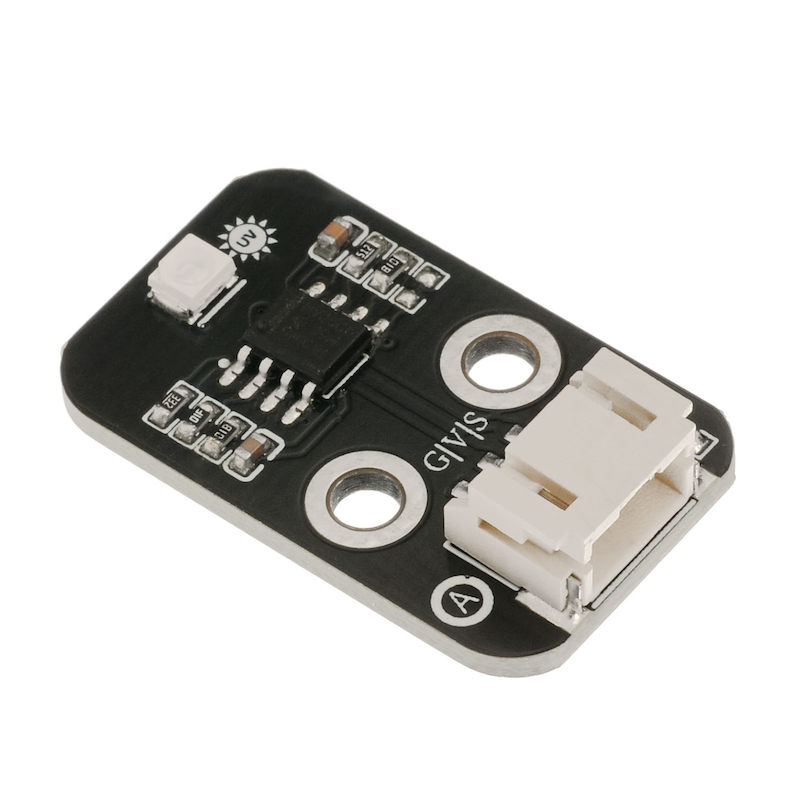
2. Schematic
Ultraviolet Light Sensor HS-S03P SchematicClick to view
Module Parameters
Pin Name | description |
|---|---|
G | GND (Negative Power Input) |
V | VCC (Positive Power Input) |
S | Analog Signal Pin |
Power Supply Voltage: 3.3V / 5V
Connection method: PH2.0 terminal wire
Installation Method: Double Screw Fixed
4, Circuit Board Size
5 of Arduino IDE example program
Attention: If prompted with an error message about the library file during program upload, please import the library file first!
Arduino IDE Library Download and Import Tutorial:Click to view
Example program (UNO development board):
#include <Wire.h>
#include <LiquidCrystal_I2C.h>

LiquidCrystal_I2C mylcd(0x27,16,2);
int sensorValue;//传感器输出的数据包
long sum = 0;//由于测试中发现数据会溢出,就用了long,long目前还未溢出过
int vout = 0;//由于通信中输出的是整一串数据包,所以需要翻译,vout是处理好的数据,也就是CJMCU-GUVA-S12SD传感器光电流的输出电压
int uv = 0;//紫外线等级

void setup(){
Serial.begin(9600);//CJMCU-GUVA-S12SD的波特率为9600
mylcd.init();
  mylcd.backlight();
}

void loop()
{
  sensorValue = 0;
  sum = 0;
  for(int i = 0 ; i < 1024 ; i++ )//这里我用的是最简单的filter算法
  {
      sensorValue = analogRead(A0);
      sum = sensorValue + sum;
      delay(2);
  }
  vout = sum >> 10;//开始数据处理
  vout = vout * 4980.0 / 1024;
  Serial.print("The Photocurrent value : ");
  Serial.print(vout);
  Serial.println("mV");
  if(vout < 50){  //查表,把得到的光电流值转换成紫外线等级
    uv = 0;
  }
  else if(vout < 227){
    uv = 1;
  }
  else if(vout < 318){
    uv = 2;
  }
  else if(vout < 408){
    uv = 3;
  }
  else if(vout < 503){
    uv = 4;
  }
  else if(vout < 606){
    uv = 5;
  }
  else if(vout < 696){
    uv = 6;
  }
  else if(vout < 795){
    uv = 7;
  }
  else if(vout < 881){
    uv = 8;
  }
  else if(vout < 976){
    uv = 9;
  }
  else if(vout < 1079){
    uv = 10;
  }
  else{
    uv = 11;
  }
  delay(20);
  Serial.print("UV Index = ");
  Serial.println(uv);
mylcd.clear();
 mylcd.setCursor(0, 0);
  mylcd.print(String(" value :") + String(vout) + String("mV"));
  mylcd.setCursor(0, 1);
  mylcd.print(String("   UV Index =") + String(uv));
  }
6, ESP32 Python Example (for Mixly IDE/Misashi)
Choose the development board Python ESP32 [ESP32 Generic(4MB)] and upload in code mode
Attention: If prompted with an error message about the library file during program upload, please import the library file first!
Download and import tutorial for Mixly IDE ESP32 library:Click to view
Example program (ESP32-Python):
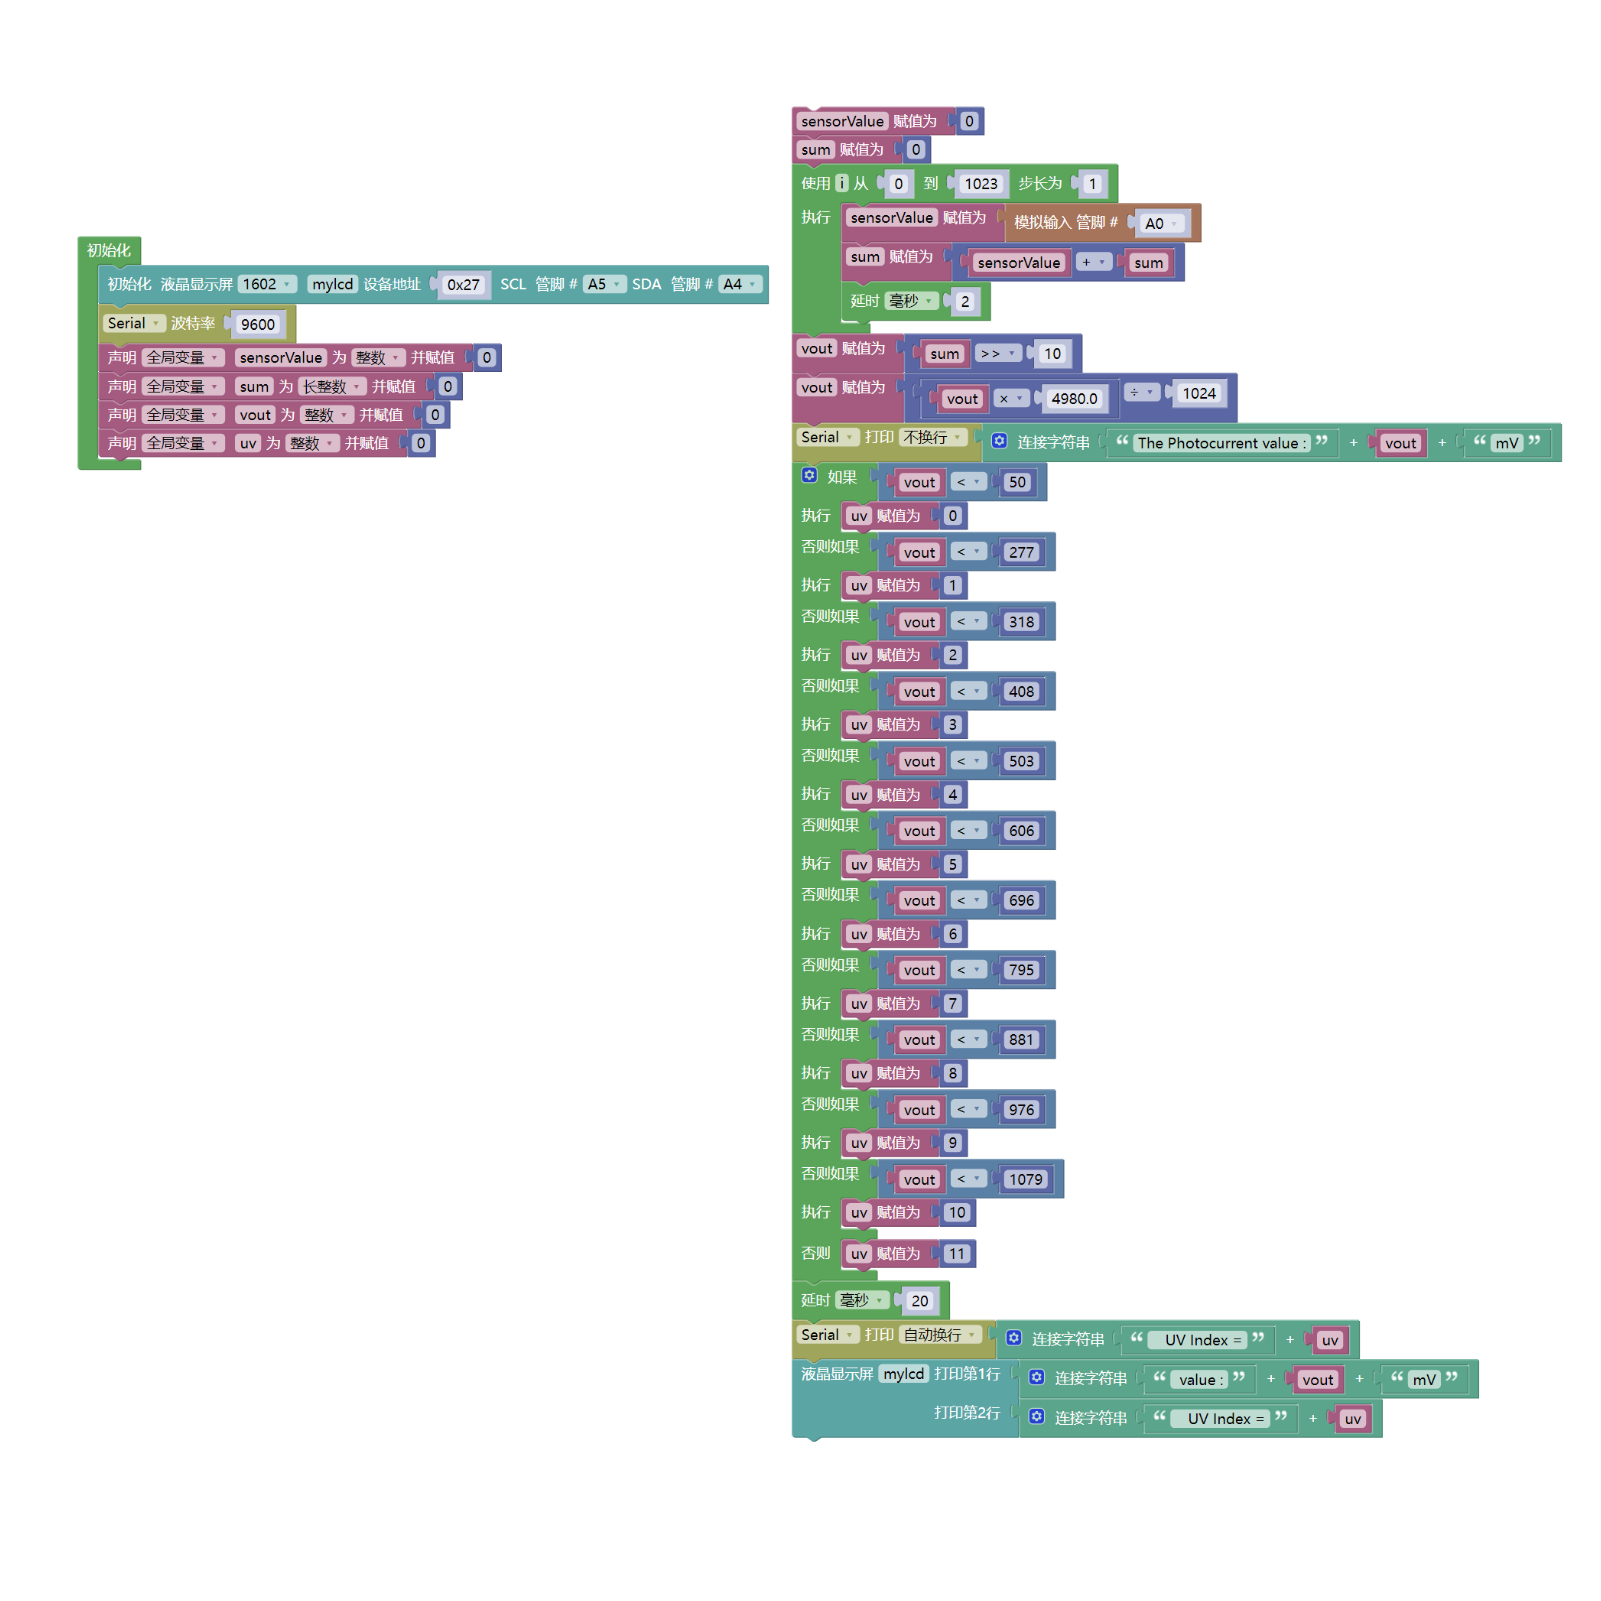
待更新...7, Mixly example program (graphical language)
Example program (UNO development board):Click to download
Attention: If prompted with an error message about the library file during program upload, please import the library file first!
Download and import tutorial of Mixly IDE Arduino library:Click to view
Example Program (ESP32 Development Board):Click to download
Attention: If prompted with an error message about the library file during program upload, please import the library file first!
Download and import tutorial for Mixly IDE ESP32 library:Click to view
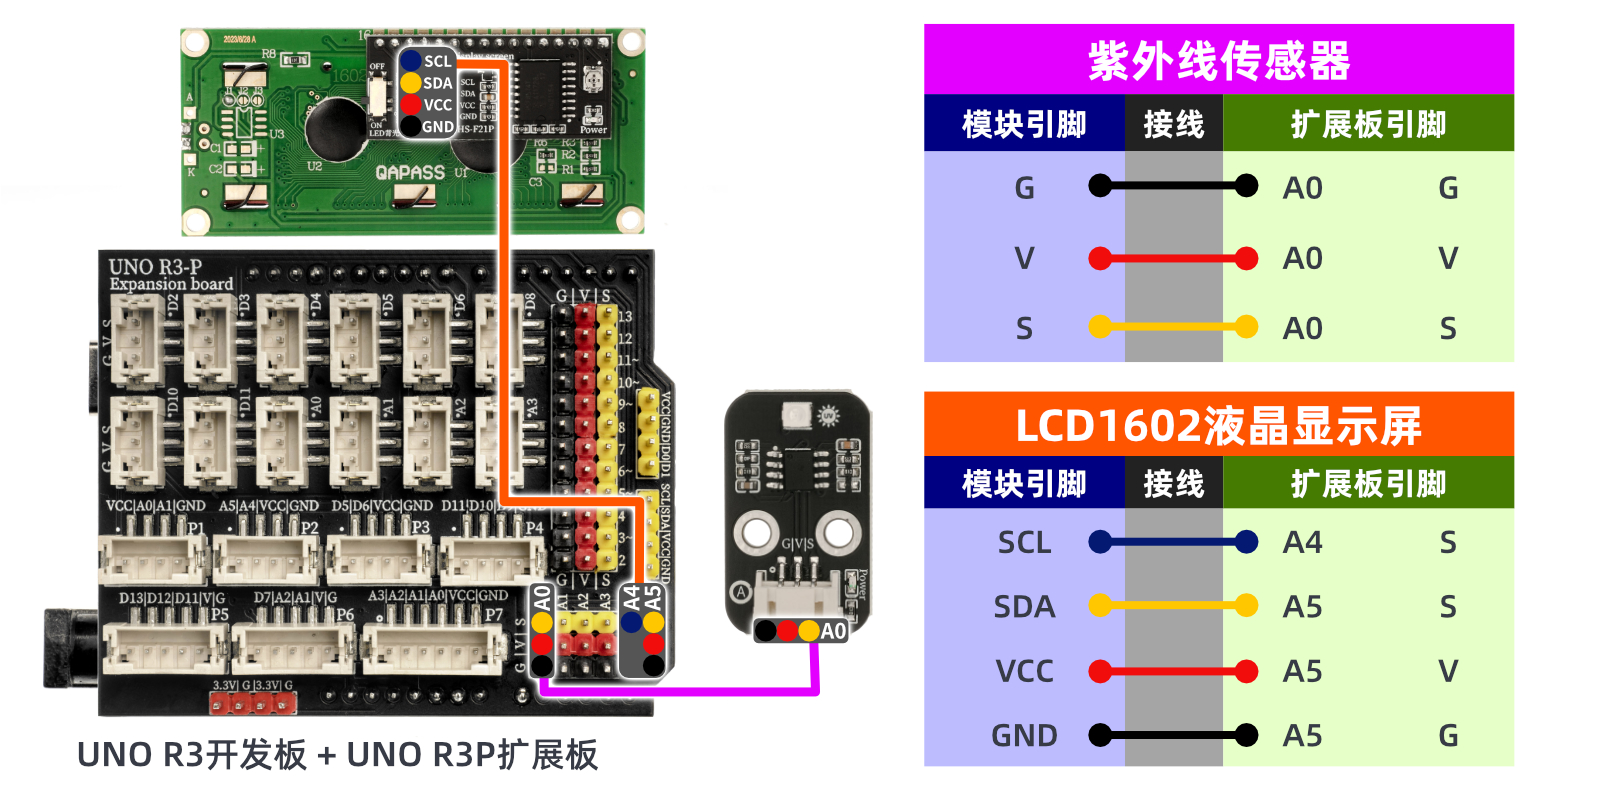
8. Setting up the Test Environment
Arduino UNO Test Environment Setup
Prepare Components:
UNO-R3 Development Board *1
UNO-R3 P Expansion Board *1
USB TYPE-C DATA CABLE *1
LCD1602 Liquid Crystal Display (HS-F21P) *1
Ultraviolet Sensor (HS-S03P) *1
Circuit wiring diagram:
ESP32 Test Environment Setup
Prepare Components:Pending update...
Circuit wiring diagram:Pending update...
9, Video tutorial
Video tutorial:Click to view
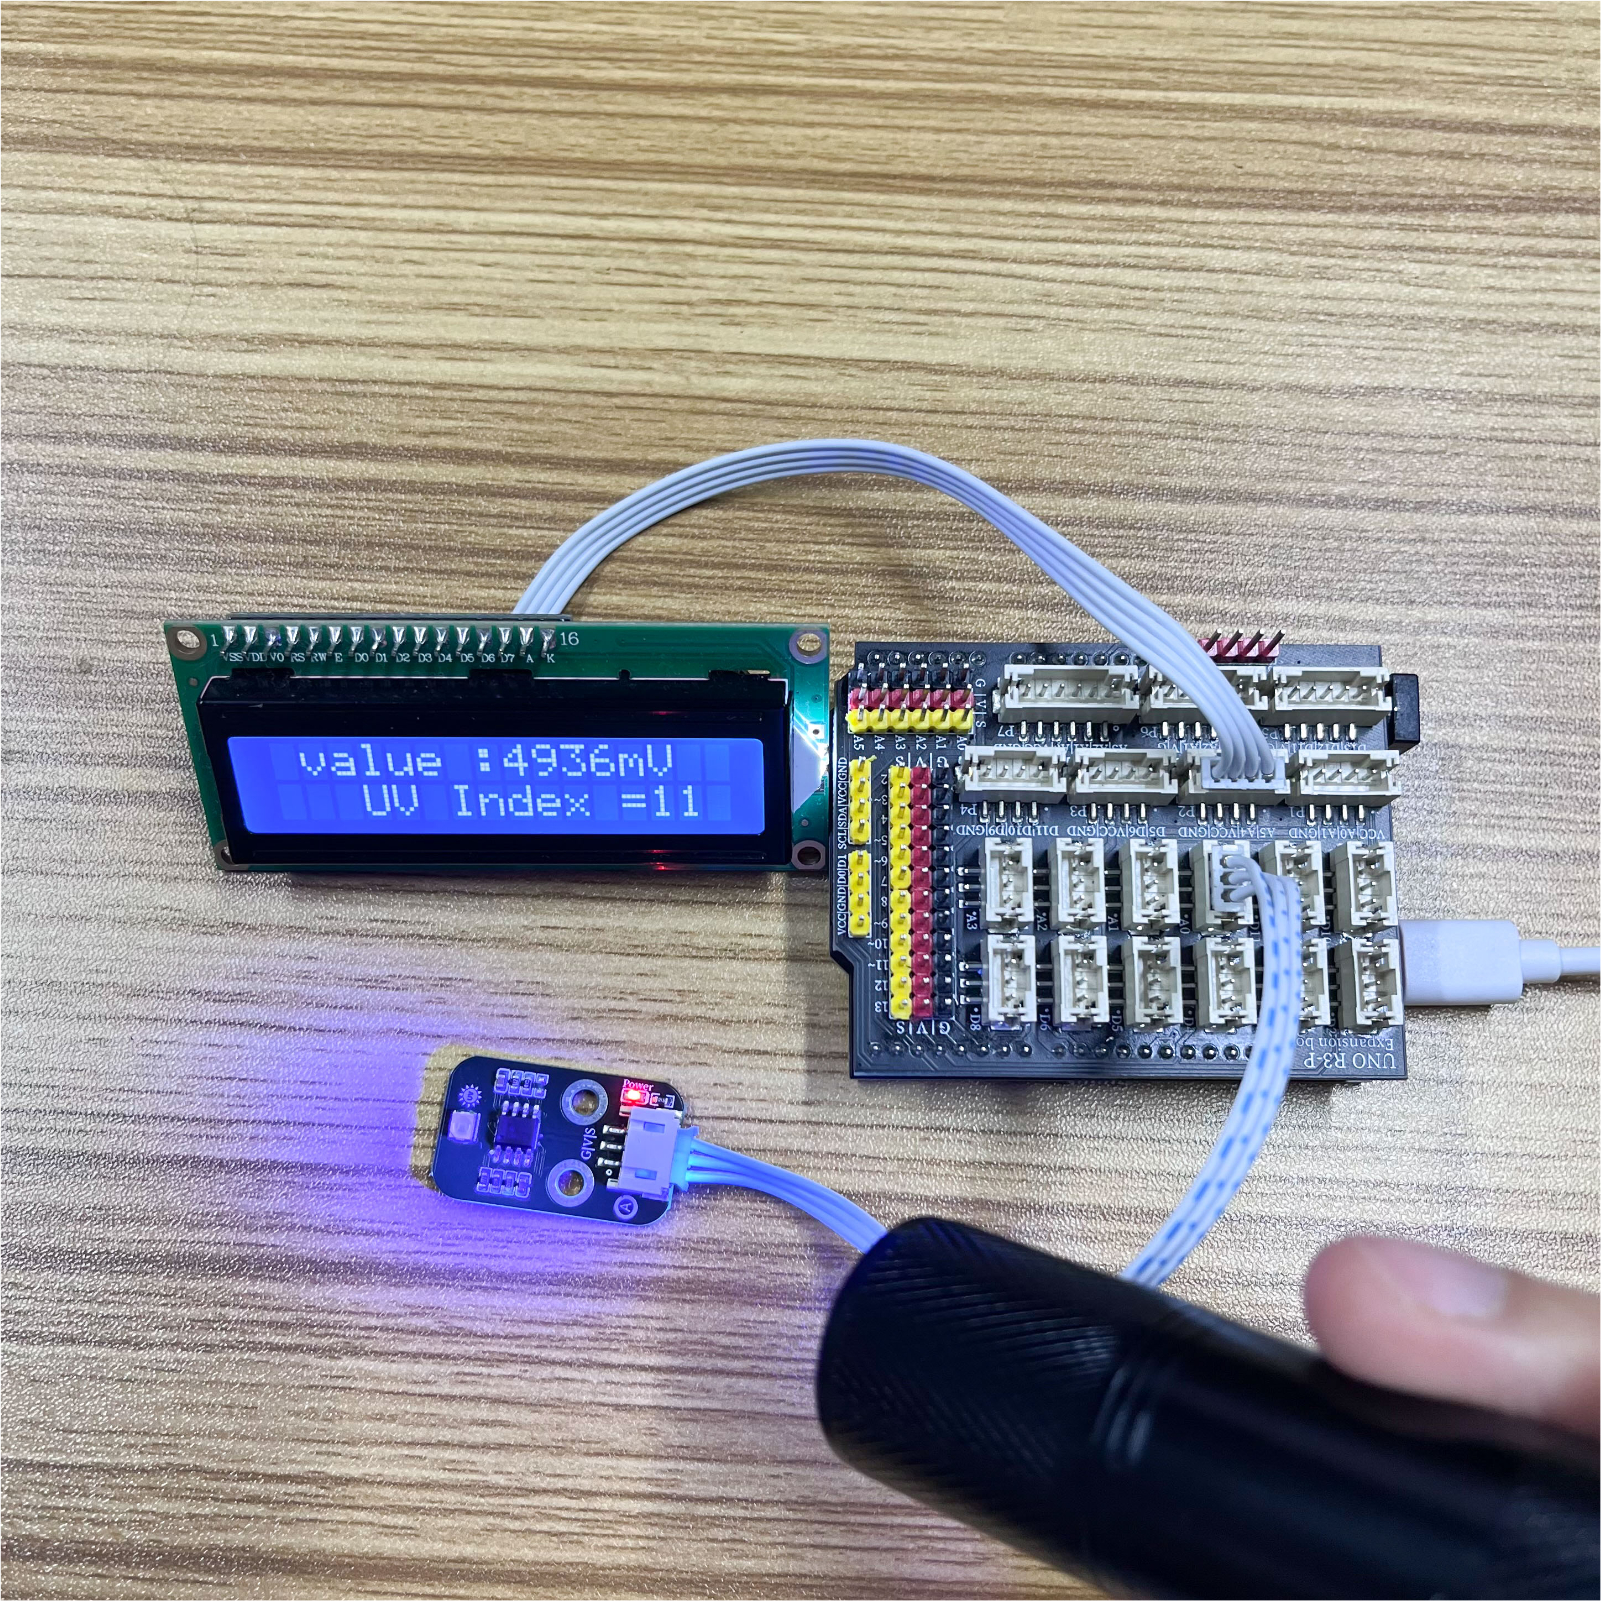
10, Test results
Arduino UNO test results:
ESP32 Test Results:
Pending update...