1. Introduction
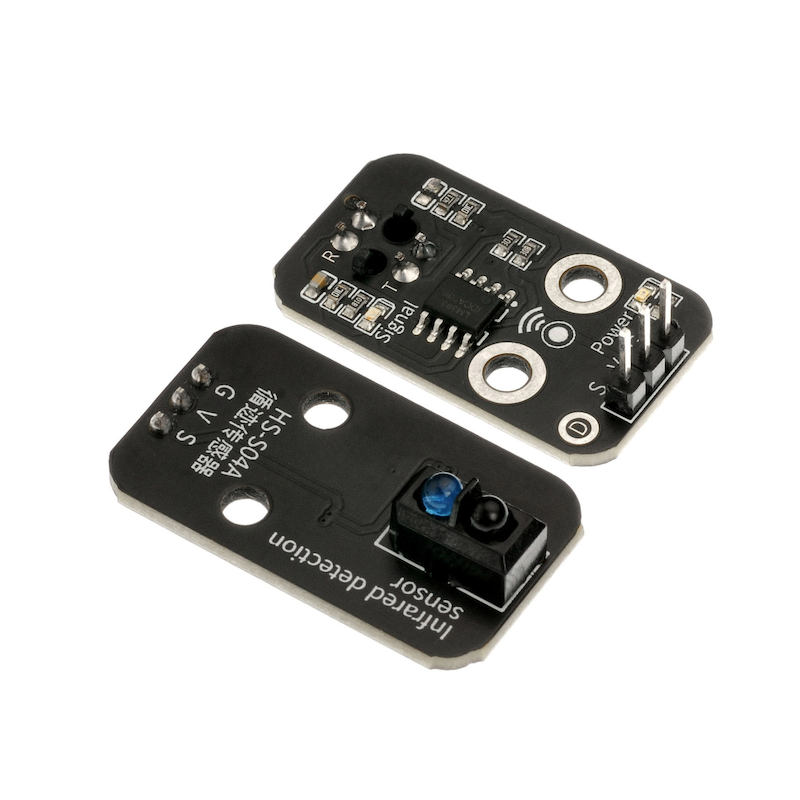
The infrared transmitter and receiver of the tracking sensor are greatly interfered by the ambient light, generally speaking, the closer to the reflective surface, the better the effect.Operating voltage: 3.3~5V.Check the reaction distance: 1-20mm.
2. Schematic
Tracking sensor-HS-S04B schematicClick to view
Module Parameters
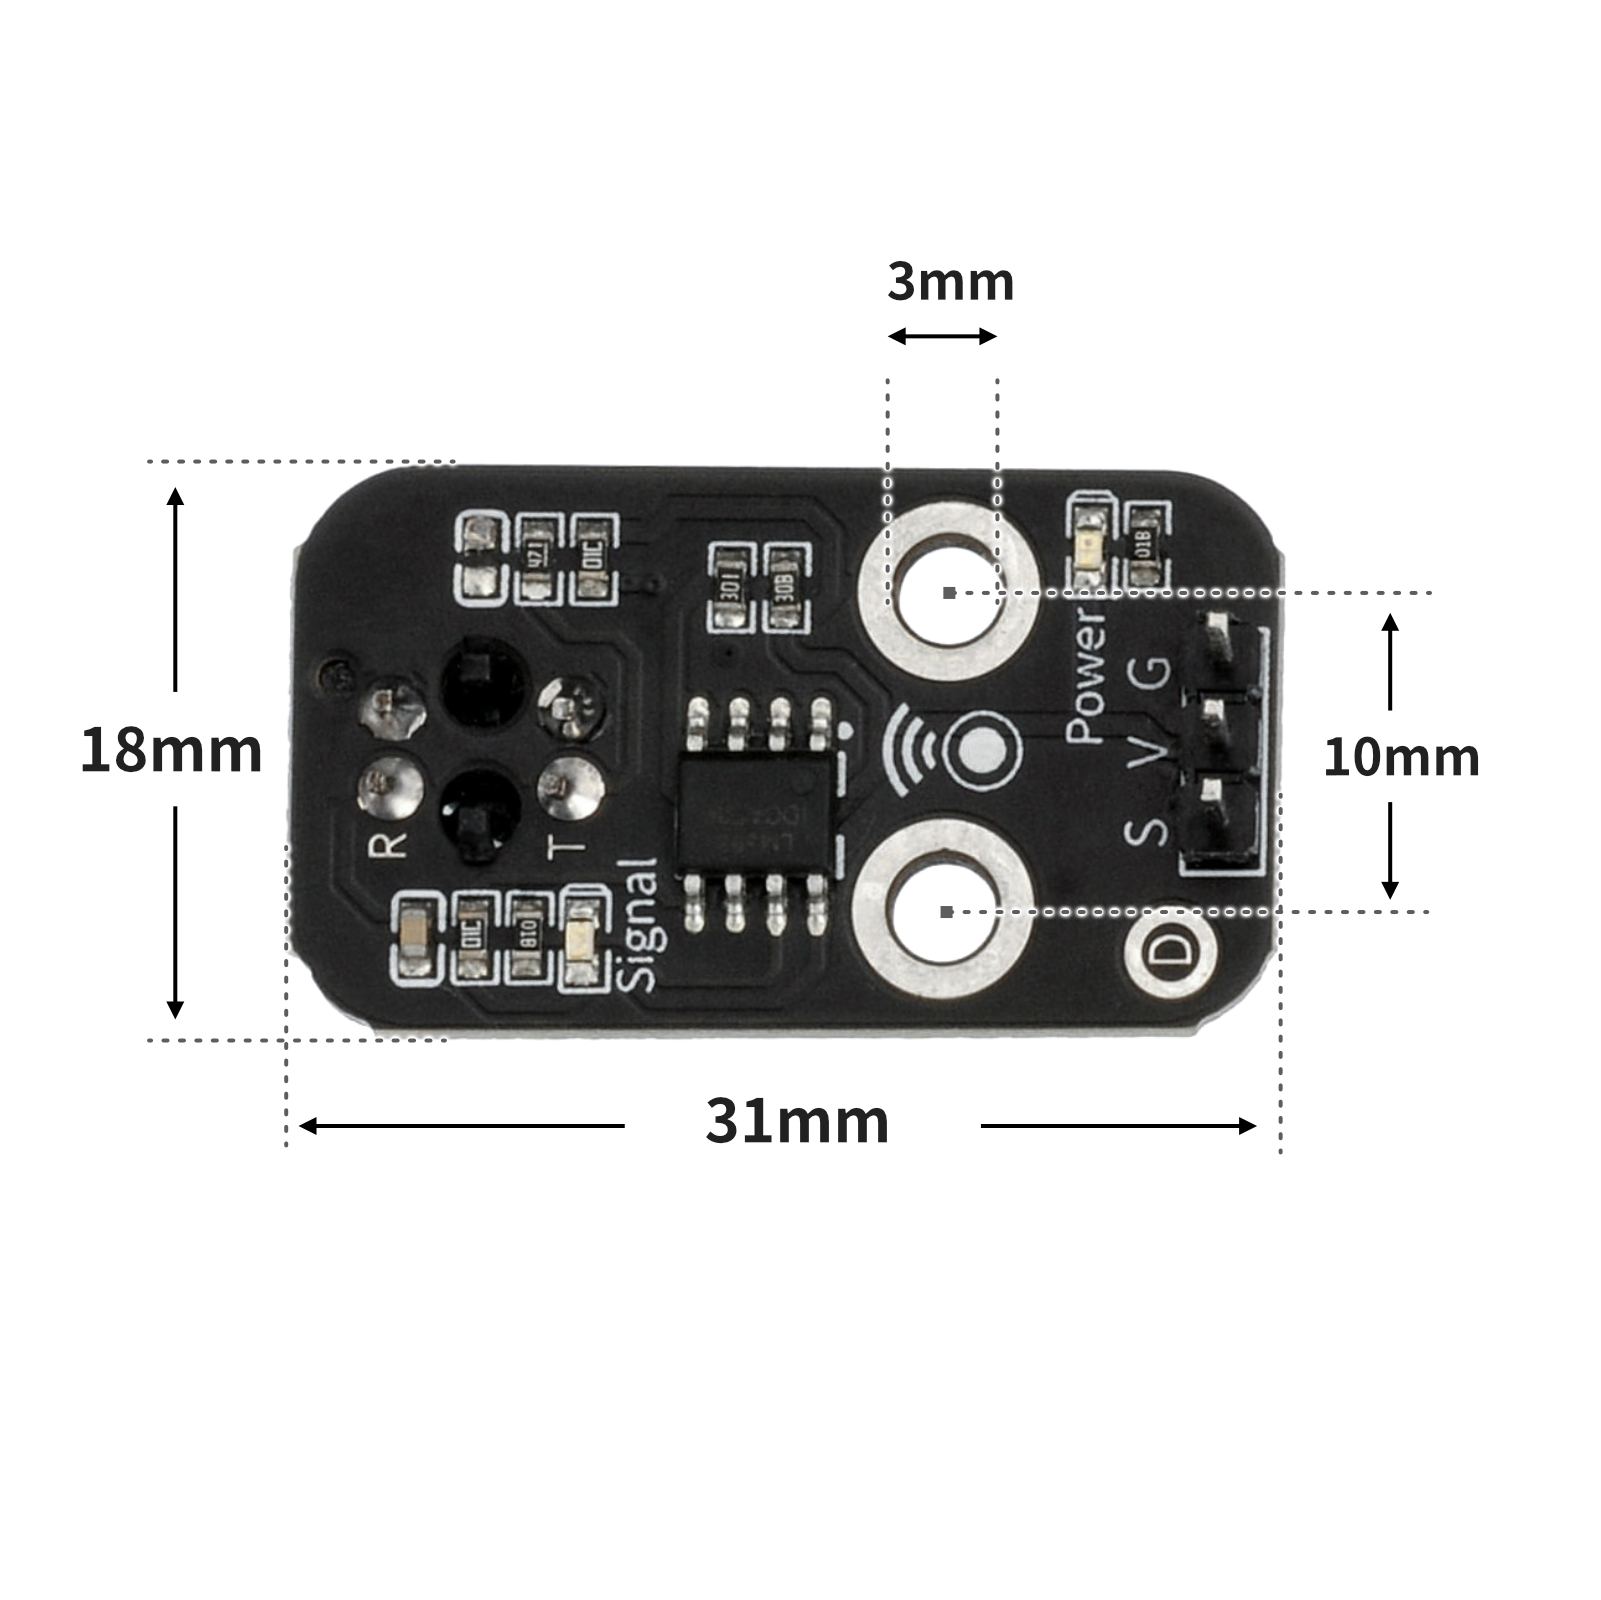
Pin Name | description |
|---|---|
G | GND (Negative Power Input) |
V | VCC (Positive Power Input) |
S | Digital Signal Pin |
Power Supply Voltage: 3.3V / 5V
Connection Type: 2.54mm Header
Installation Method: Double Screw Fixed
4, Circuit Board Size
5 of Arduino IDE example program
Attention: If prompted with an error message about the library file during program upload, please import the library file first!
Arduino IDE Library Download and Import Tutorial:Click to view
Example program (UNO development board):
void setup(){
  Serial.begin(9600);
  pinMode(3, INPUT);
}

void loop(){
  if (digitalRead(3) == 1) {
    Serial.println("hei se");

  } else {
    Serial.println("bai se");

  }

}
6, ESP32 Python Example (for Mixly IDE/Misashi)
Choose the development board Python ESP32 [ESP32 Generic(4MB)] and upload in code mode
Attention: If prompted with an error message about the library file during program upload, please import the library file first!
Download and import tutorial for Mixly IDE ESP32 library:Click to view
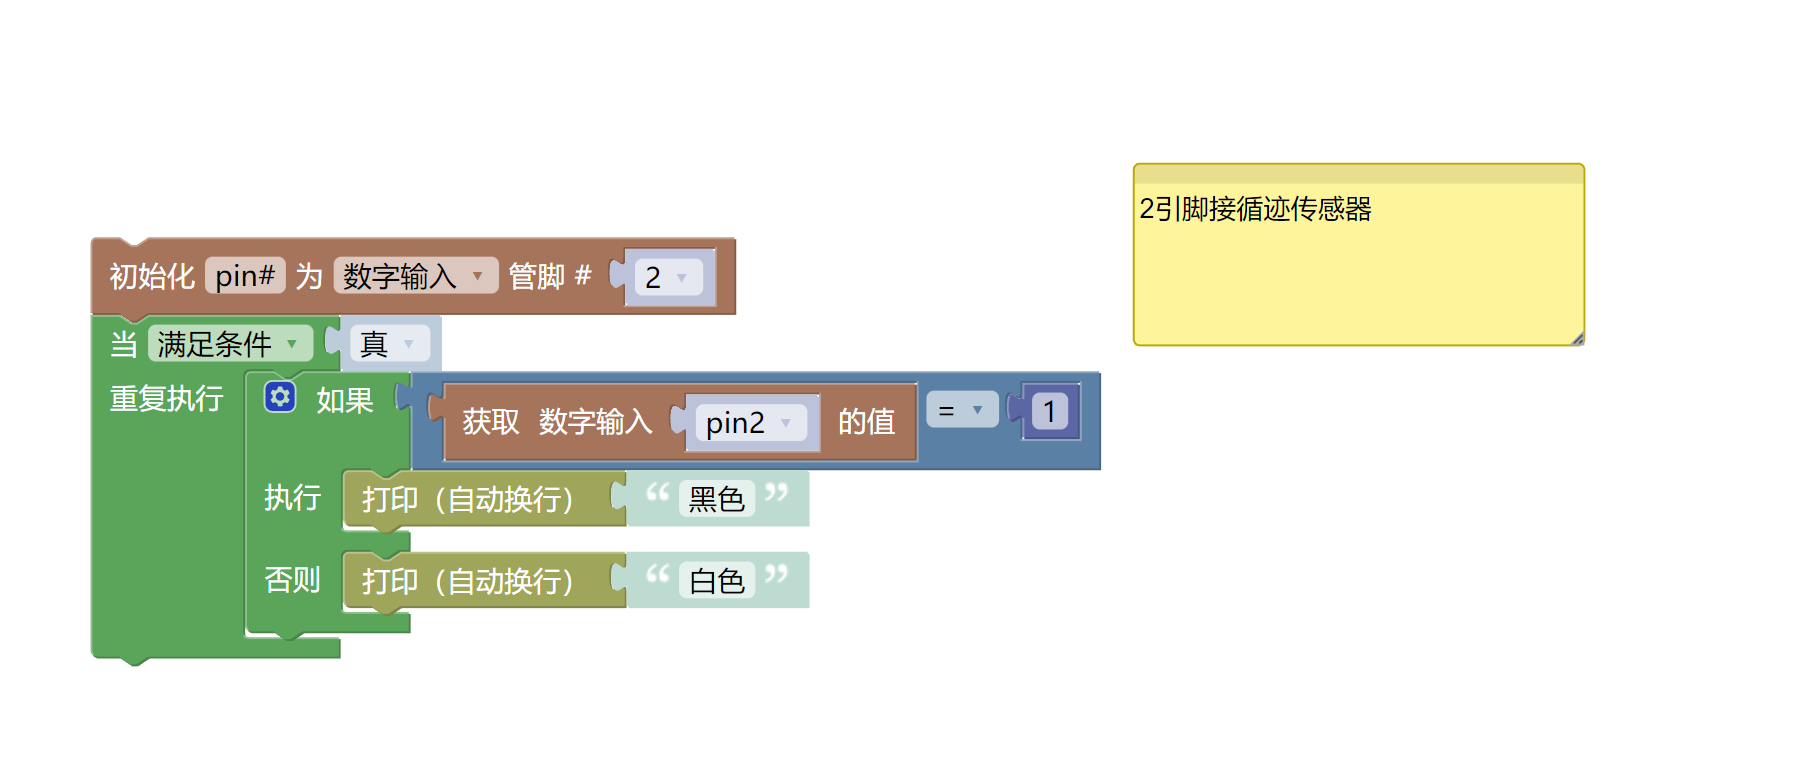
Example program (ESP32-Python):
import machine
pin2 = machine.Pin(2, machine.Pin.IN)
while True:
if pin2.value() == 1:
print('黑色')
else:
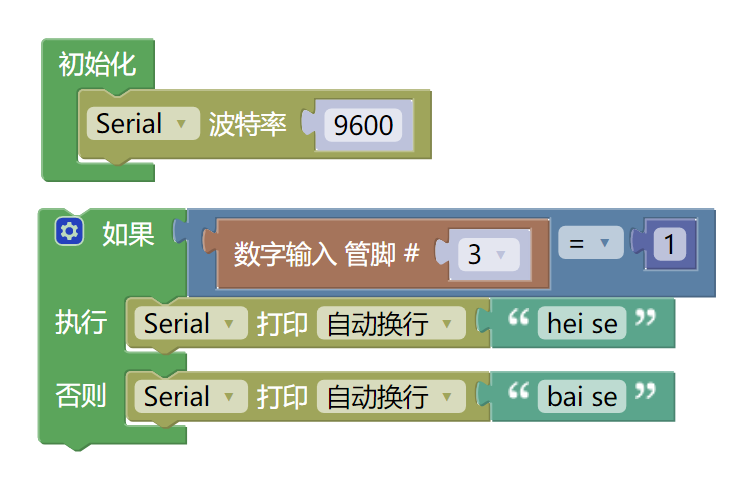
print('白色')7, Mixly example program (graphical language)
Example program (UNO development board):Click to download
Attention: If prompted with an error message about the library file during program upload, please import the library file first!
Download and import tutorial of Mixly IDE Arduino library:Click to view
Example Program (ESP32 Development Board):Click to download
Attention: If prompted with an error message about the library file during program upload, please import the library file first!
Download and import tutorial for Mixly IDE ESP32 library:Click to view
8. Setting up the Test Environment
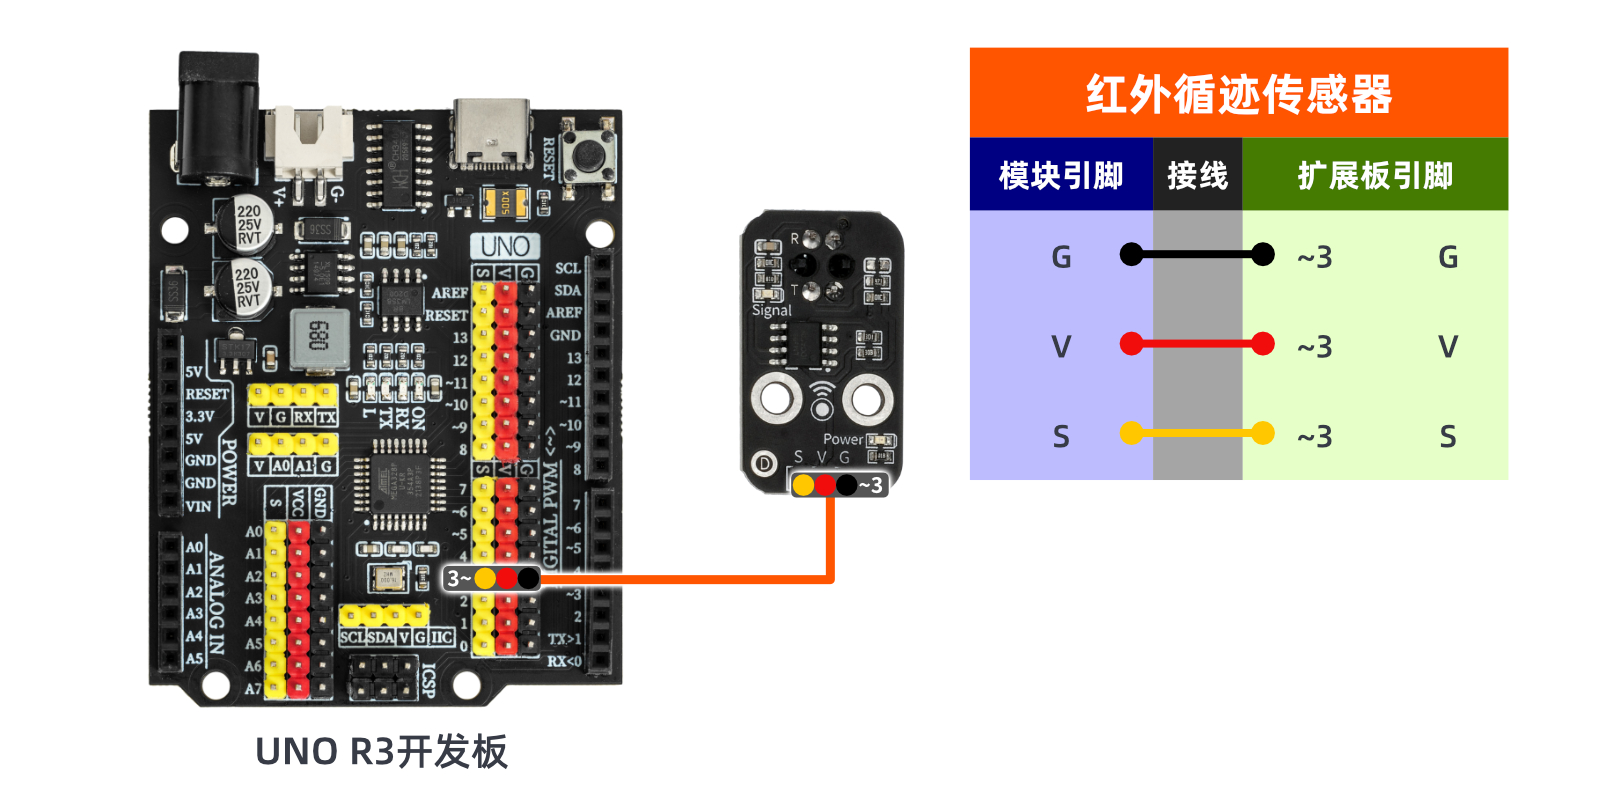
Arduino UNO Test Environment Setup
Prepare Components:
HELLO STEM UNO R3 PRO DEVELOPMENT BOARD *1
USB TYPE-C DATA CABLE *1
Tracking Sensor (HS-S04A) *1
1P female to female DuPont wire *3 pieces or 3P female to female DuPont wire *1 piece
Circuit wiring diagram:
ESP32 Test Environment Setup
Prepare Components:Pending update...
Circuit wiring diagram:Pending update...
9, Video tutorial
Video tutorial:Click to view
10, Test results
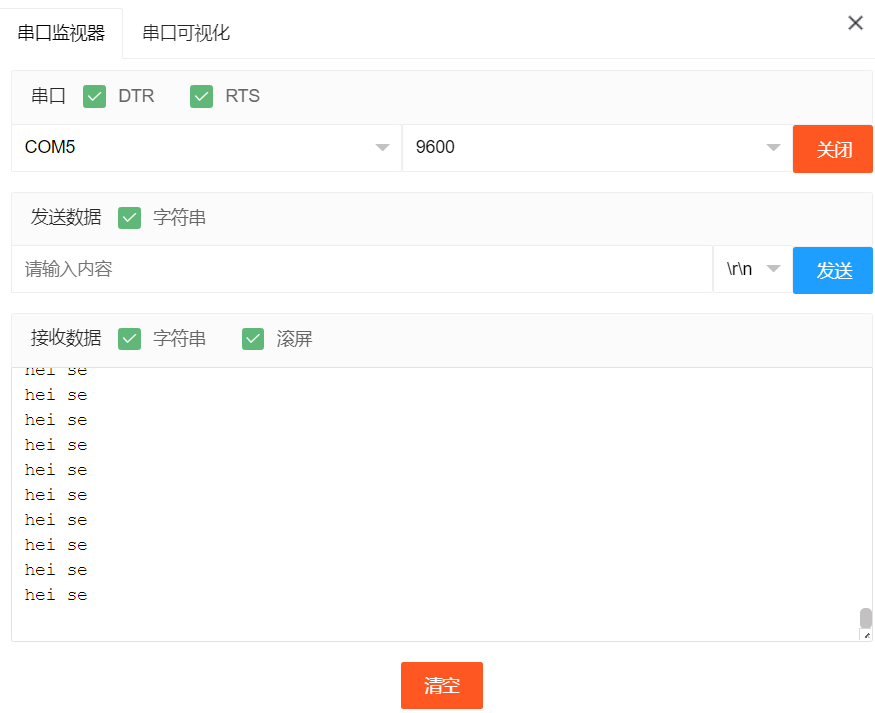
Arduino UNO test results:
The tracking sensor uses the working characteristics of infrared light, infrared light is reflected when it meets a white background, the receiving tube receives the reflected light, and after being shaped by an inverter (Schmitt trigger), it outputs a low level (0); the serial port prints "beise". When infrared light meets a black line, it is absorbed, and the receiving tube does not receive the reflected light, after being shaped by an inverter (Schmitt trigger), it outputs a high level (1), and the serial port prints "heise".