
1. Introduction
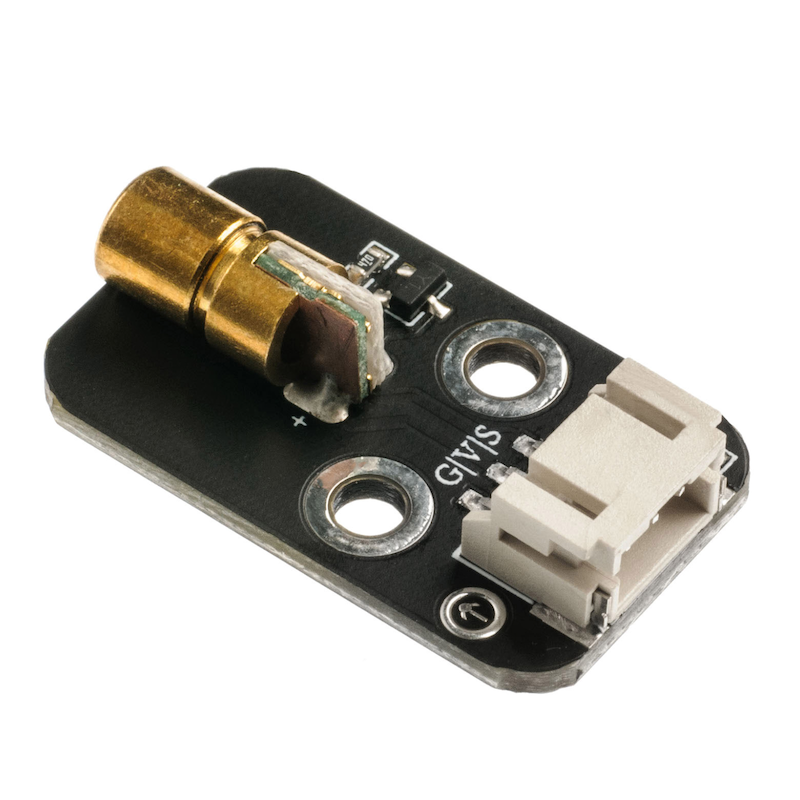
6.0 laser module, the diameter of the laser head is 0.6mm, with positive and negative terminals, operating voltage 3.3v-5v, only visible faint red line under fog or other medium, while in normal conditions, a red dot is seen, and the tube is made of copper.主要用于激光类玩具,发光陀螺,各种水平仪,地线仪等。Pay special attention: Do not point at someone's eyes.
2. Schematic
Linear Laser Light-HS-F03P SchematicClick to view
Module Parameters
Pin Name | description |
|---|---|
G | GND (Negative Power Input) |
V | VCC (Positive Power Input) |
S | Digital Signal Pin |
Power Supply Voltage: 3.3V / 5V
Connection method: PH2.0 terminal wire
Installation Method: Double Screw Fixed
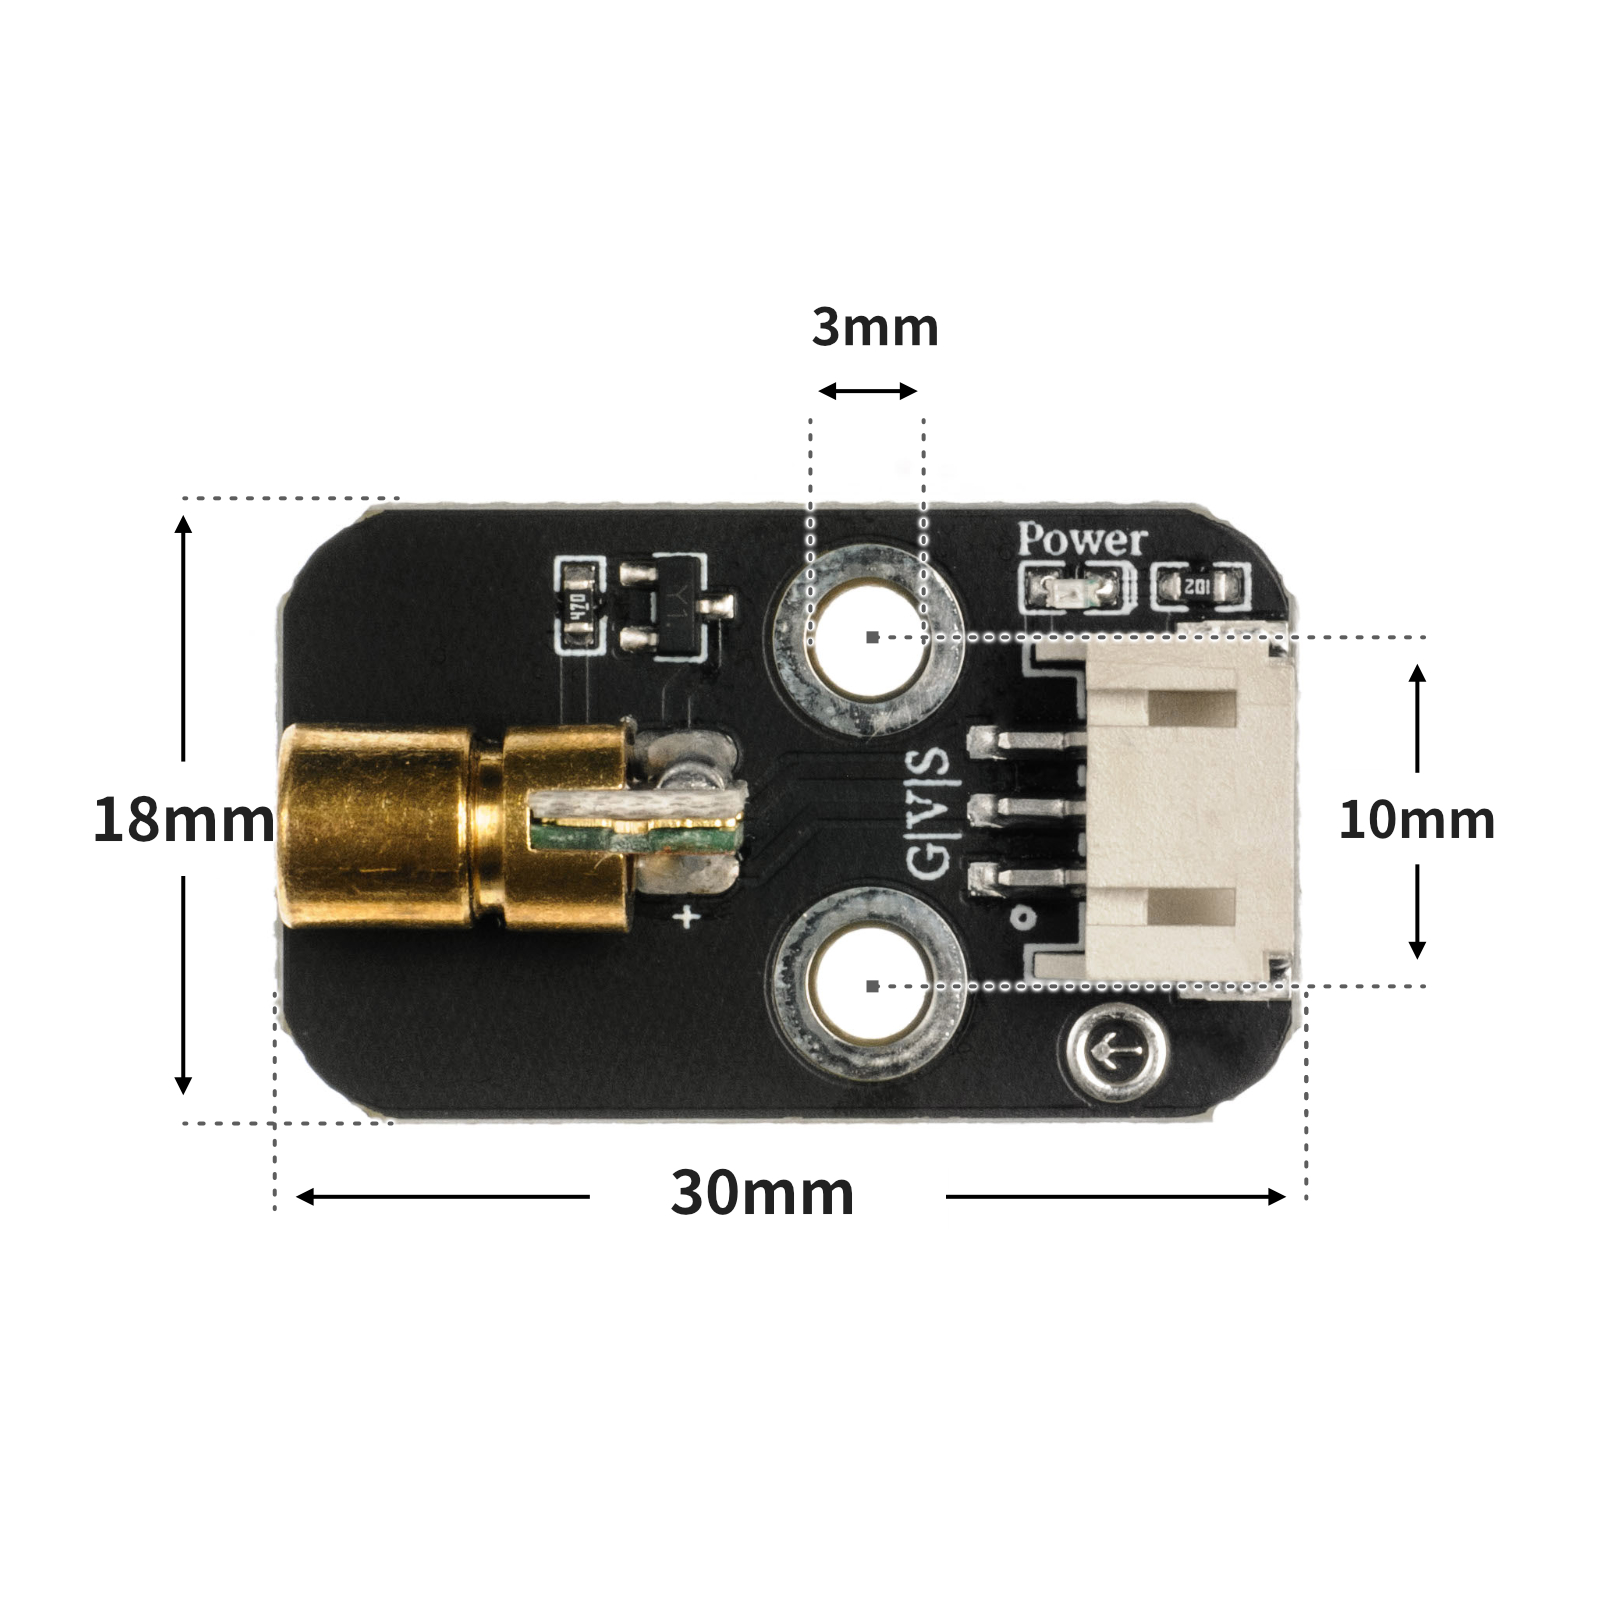
4, Circuit Board Size
5 of Arduino IDE example program
Attention: If prompted with an error message about the library file during program upload, please import the library file first!
Arduino IDE Library Download and Import Tutorial:Click to view
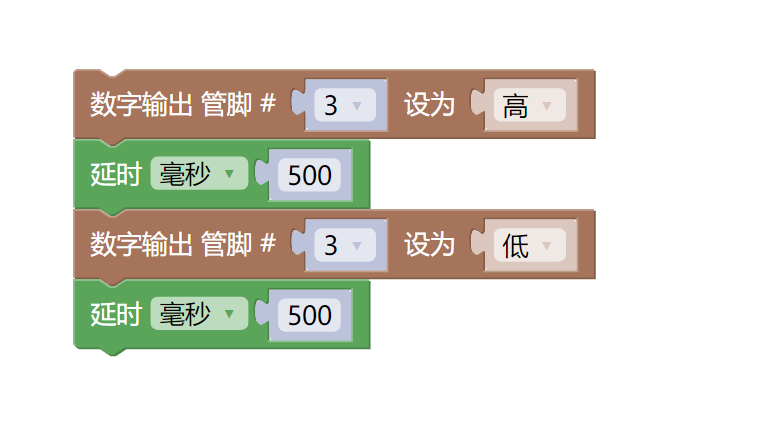
Example program (UNO development board):
void setup(){
  pinMode(3, OUTPUT);
}

void loop(){
  digitalWrite(3,HIGH);
  delay(500);
  digitalWrite(3,LOW);
  delay(500);

}
6, ESP32 Python Example (for Mixly IDE/Misashi)
Choose the development board Python ESP32 [ESP32 Generic(4MB)] and upload in code mode
Attention: If prompted with an error message about the library file during program upload, please import the library file first!
Download and import tutorial for Mixly IDE ESP32 library:Click to view
Example program (ESP32-Python):
import machine
import time


pin2 = machine.Pin(2, machine.Pin.OUT)
while True:
    pin2.value(1)
    time.sleep_ms(500)
    pin2.value(0)
    time.sleep_ms(500)
7, Mixly example program (graphical language)
Example program (UNO development board):Click to download
Attention: If prompted with an error message about the library file during program upload, please import the library file first!
Download and import tutorial of Mixly IDE Arduino library:Click to view
Example Program (ESP32 Development Board):Click to download
Attention: If prompted with an error message about the library file during program upload, please import the library file first!
Download and import tutorial for Mixly IDE ESP32 library:Click to view

8. Setting up the Test Environment
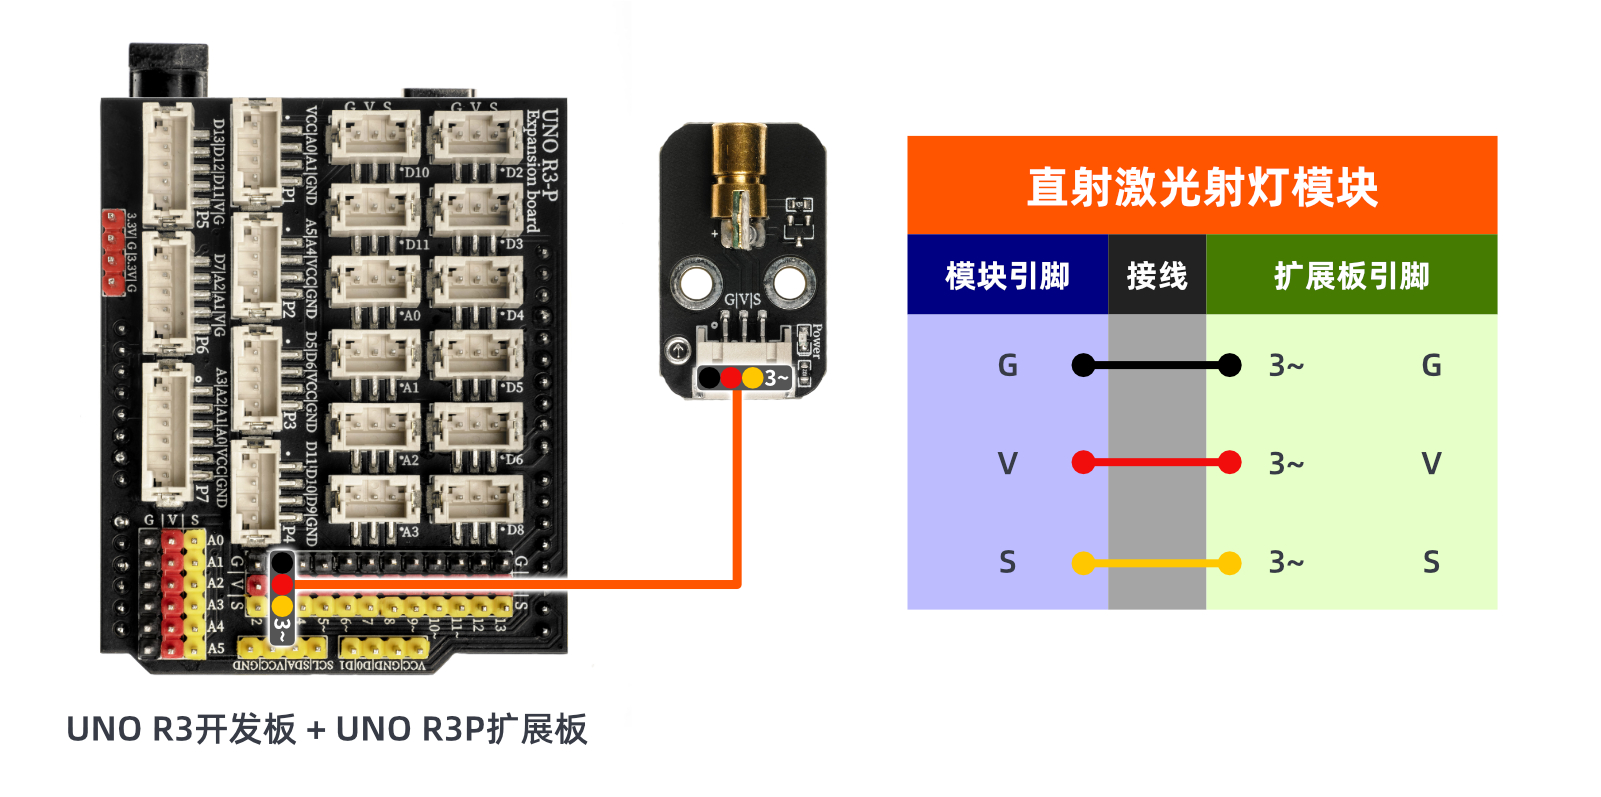
Arduino UNO Test Environment Setup
Prepare Components:
HELLO STEM UNO R3 DEVELOPMENT BOARD *1
HELLO STEM UNO R3 P EXPANSION BOARD *1
USB TYPE-C DATA CABLE *1
Direct laser projector module (HS-F03P) *1
PH2.0 3P Connector to DuPont Wire *1 or PH2.0 3P Dual Head Connector Wire *1
Circuit wiring diagram:
ESP32 Test Environment Setup
Prepare Components:Pending update...
Circuit wiring diagram:Pending update...
9, Video tutorial
Video tutorial:Click to view
10, Test results
Arduino UNO test results:
After the device is connected and the above program is flashed onto the Arduino UNO development board, you will find that the linear laser spotlight will blink at a frequency of 0.5 seconds, achieving the desired effect.
ESP32 Test Results:
Pending update...