
1. Introduction
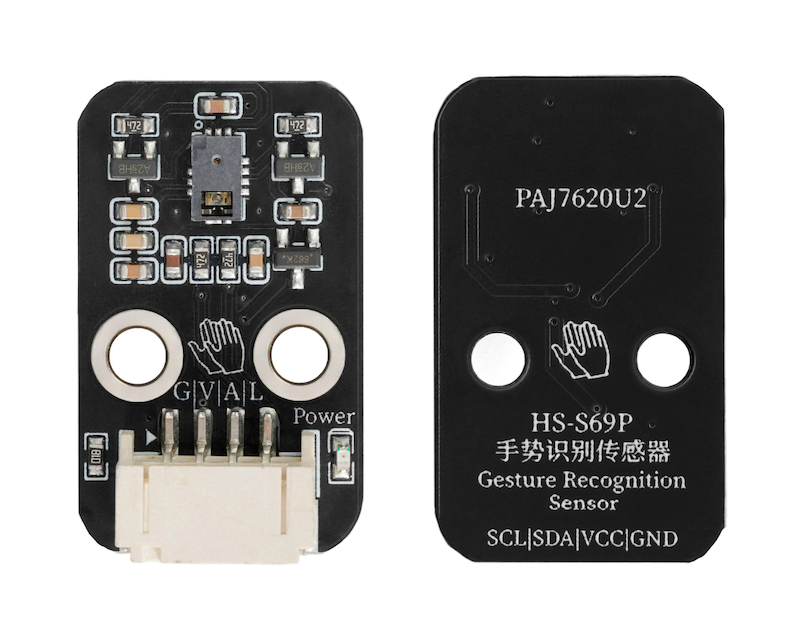
The PAJ7620U2 gesture recognition sensor is an interactive 3D gesture recognition sensor that communicates via IIC.The operating current is only 3.5mA, and the gesture recognition distance reaches 20mm.Within a range of up to 20cm, up to 13 different gestures can be recognized.The gesture sensor has good stability in gesture recognition, reacts quickly, has a high accuracy rate, and can recognize a variety of gestures.Supports two gesture recognition modes, high-speed mode (can recognize 9 types) and low-speed mode (can recognize 13 types).Supports user-defined gesture recognition.
PAJ7620U2 gesture recognition sensor can recognize up, down, left, right, front, back, clockwise, counterclockwise, and quick waving in high-speed mode.And the low-speed mode supports all gestures included in the high-speed basic mode, as well as slow up and down, slow left and right, slow forward and backward, and random order.In addition, the low-speed mode can customize the unit sampling time, and can also easily define gesture recognition according to your own needs.
2. Schematic
Gesture Recognition Sensor - HS-S69P SchematicClick to view
Module Parameters
Pin Name | description |
|---|---|
G | GND (Negative Power Input) |
V | VCC (Positive Power Input) |
A | Bidirectional Data Communication Pin |
L | Clock Signal Communication Pin |
Supply voltage: 3.3V-5V
Connection method: PH2.0 4P terminal wire
Installation method: screw assembly
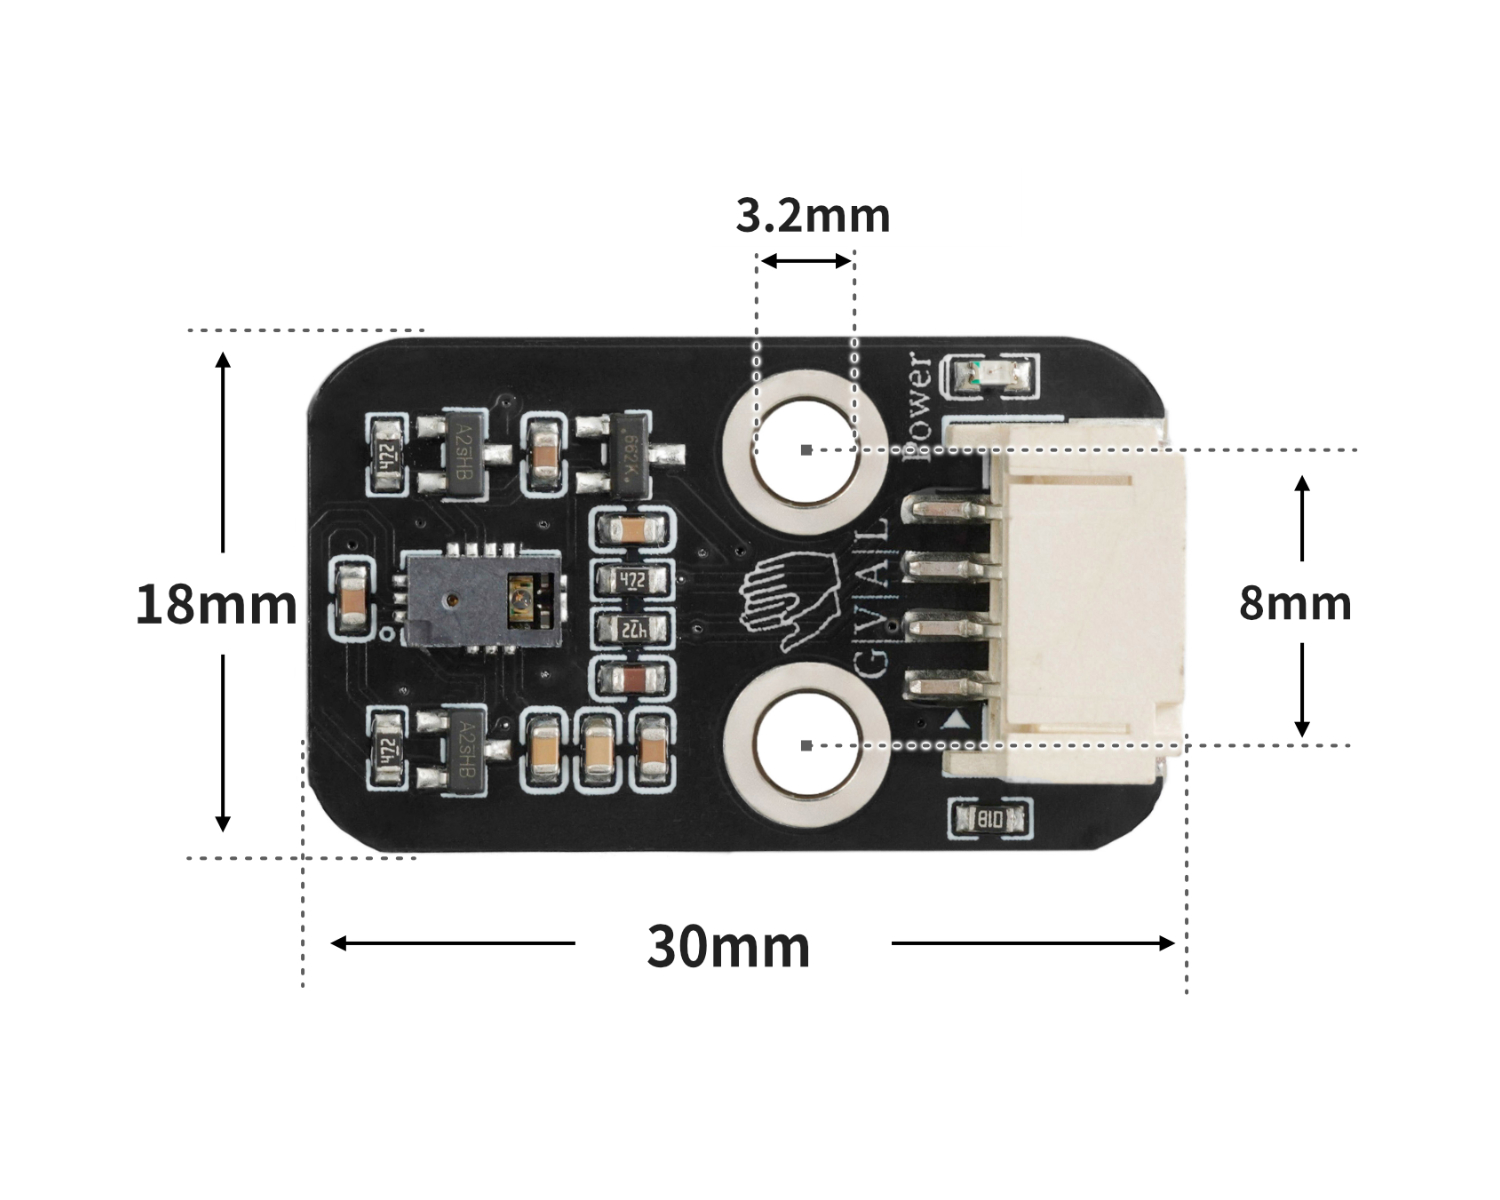
4, Circuit Board Size
5 of Arduino IDE example program
Attention: If prompted with an error message about the library file during program upload, please import the library file first!
Arduino IDE Library Download and Import Tutorial:Click to view
Example program (UNO development board):
#include <Wire.h>
#include "paj7620.h"

const int GES_REACTION_TIME = 500;
const int GES_ENTRY_TIME = 800;
const int GES_QUIT_TIME = 1000;

void setup(){
  Serial.begin(9600);
  Serial.println("\\nPAJ7620U2 TEST DEMO: Recognize 9 gestures.");
  uint8_t error = 0;
  error = paj7620Init();
  if (error) {
    Serial.print("INIT ERROR,CODE:");
    Serial.println(error);

  } else {
    Serial.println("INIT OK");

  }
}

void loop(){
  uint8_t data = 0;
  uint8_t error = 0;
  error = paj7620ReadReg(0x43, 1, &data);
  if (!error) {
    switch (data) {
     case GES_UP_FLAG:
      Serial.println("上");
      break;
     case GES_DOWN_FLAG:
      Serial.println("下");
      break;
     case GES_LEFT_FLAG:
      Serial.println("左");
      break;
     case GES_RIGHT_FLAG:
      Serial.println("右");
      break;
    }

  }

}
6, ESP32 Python Example (for Mixly IDE/Misashi)
Choose the development board Python ESP32 [ESP32 Generic(4MB)] and upload in code mode
Attention: If prompted with an error message about the library file during program upload, please import the library file first!
Download and import tutorial for Mixly IDE ESP32 library:Click to view
Example program (ESP32-Python):
待更新...7, Mixly example program (graphical language)
Example Program (UNO Development Board):Click to download
Attention: If prompted with an error message about the library file during program upload, please import the library file first!
Download and import tutorial of Mixly IDE Arduino library:Click to view
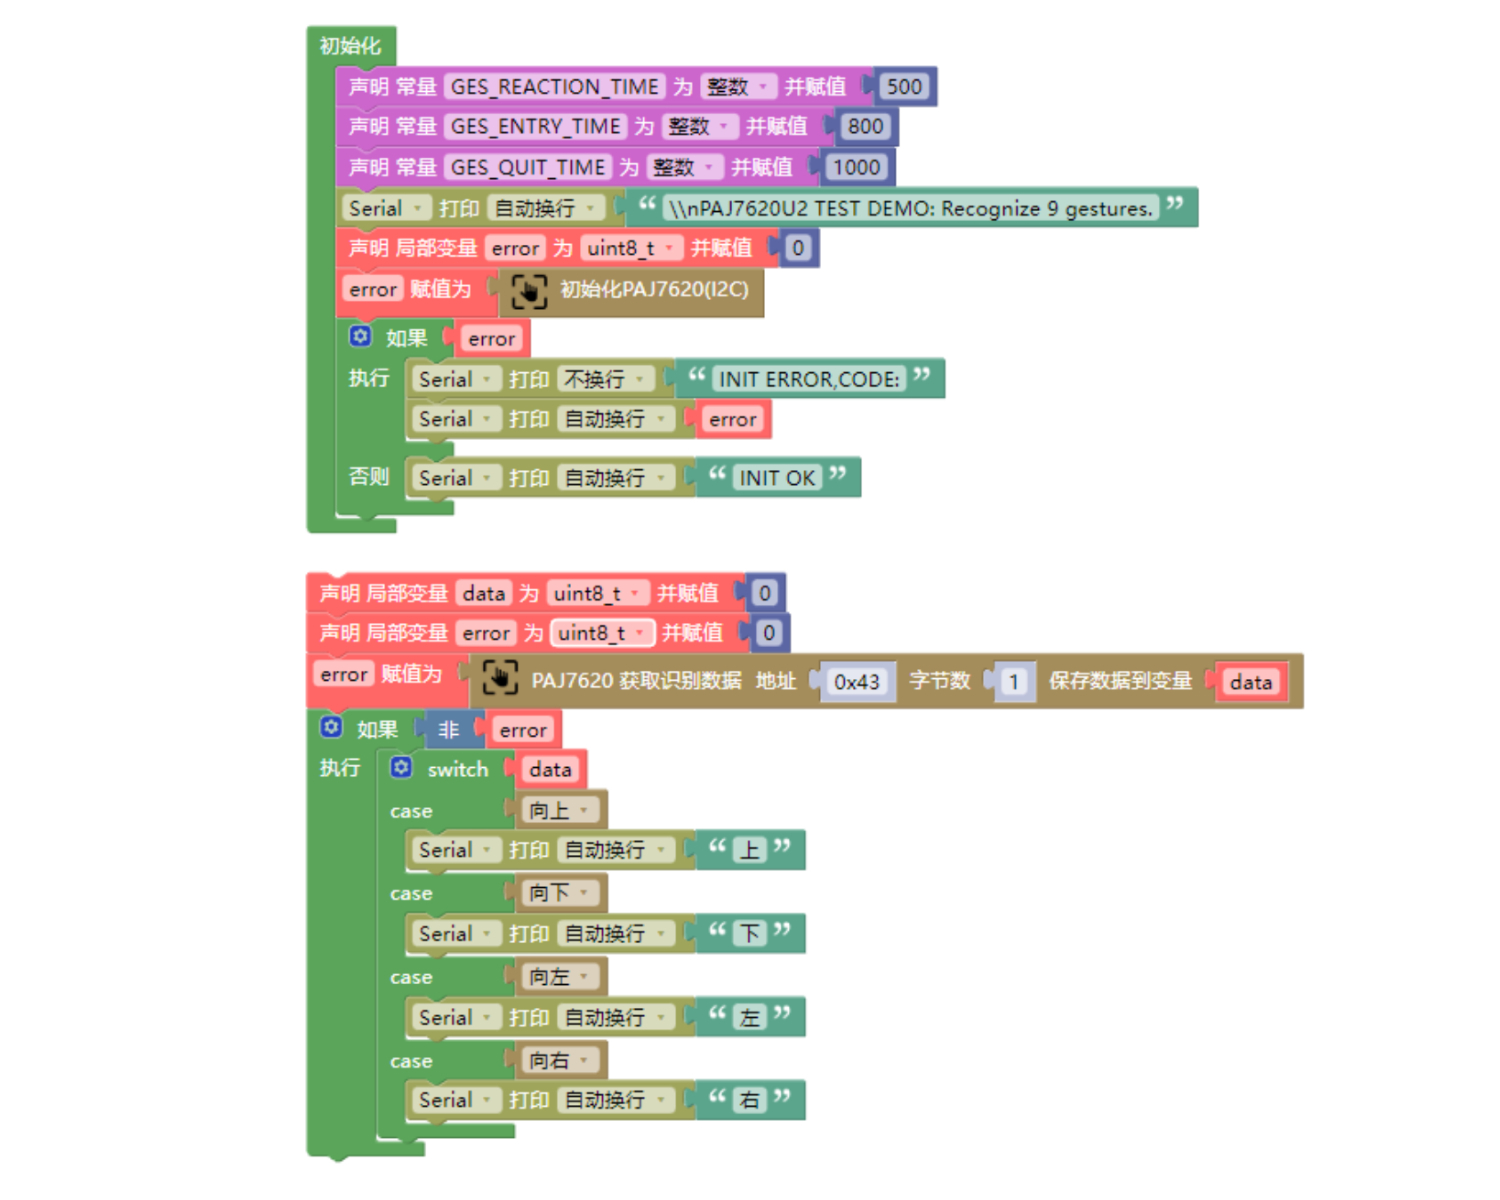
Example Program (ESP32 Development Board):
Attention: If prompted with an error message about the library file during program upload, please import the library file first!
Download and import tutorial for Mixly IDE ESP32 library:Click to view
Image pending update...
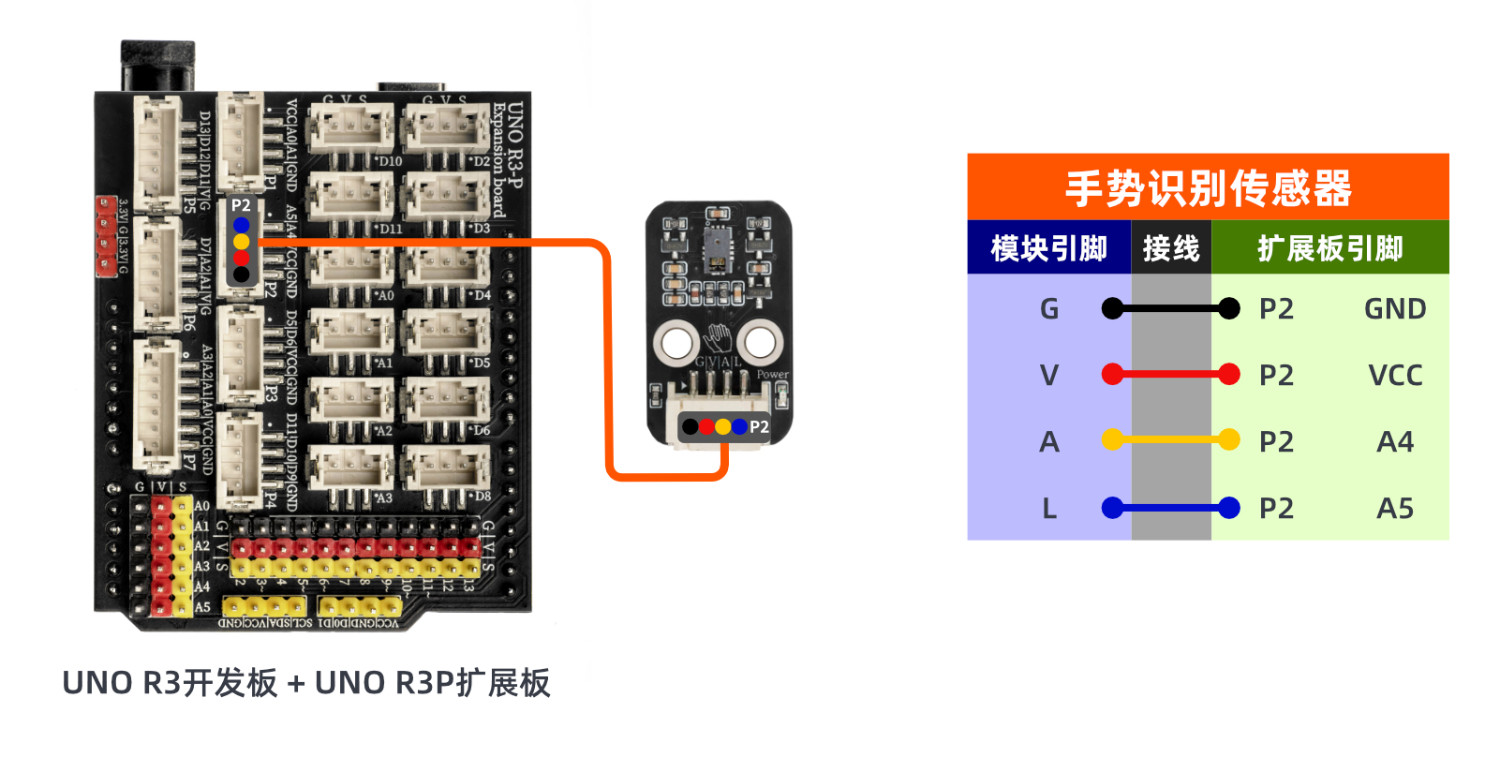
8. Setting up the Test Environment
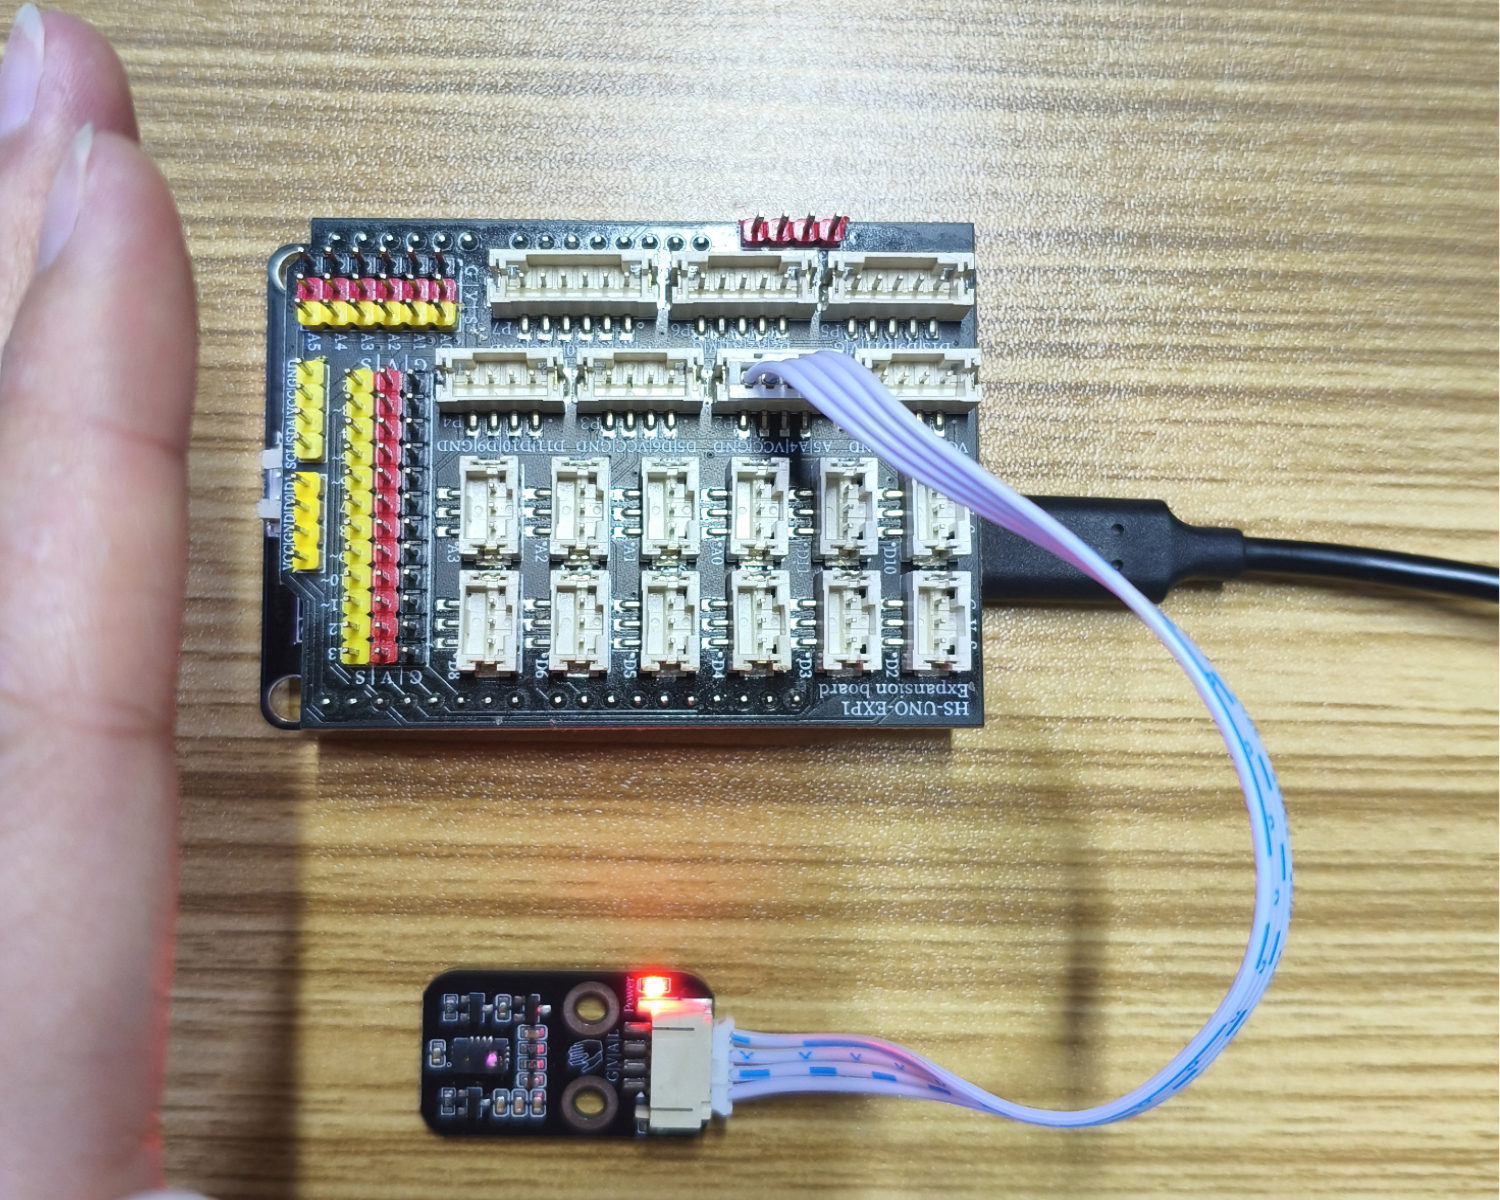
Arduino UNO Test Environment Setup
Prepare Components:
UNO-R3 Development Board *1
UNO-R3 Expansion Board *1
USB TYPE-C DATA CABLE *1
HS-S69P Gesture Recognition Sensor*1
PH2.0 4P Double Head Terminal Line *1
Circuit wiring diagram:
ESP32 Test Environment Setup
Prepare Components:Pending update...
Circuit wiring diagram:Pending update...
9, Video tutorial
Arduino UNO video tutorial:Click to view
ESP32 Python Video Tutorial:Click to view
10, Test results
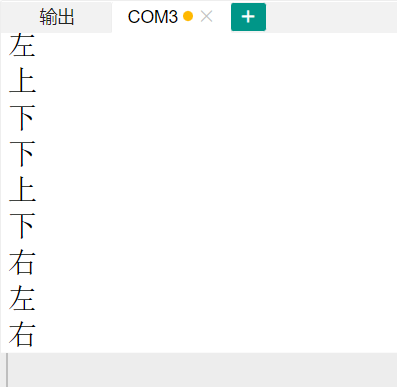
Arduino UNO test results:
Download the code, and then the computer serial port will display the gesture direction.
ESP32 Test Results:
Pending update...