
1. Introduction
The MQ-4 gas sensor is a sensor used to detect methane gas concentration. It is widely used in coal gas and natural gas detection equipment. Features are as follows:
1, High sensitivity and stability, capable of detecting methane and natural gas gases in the range of 100-10000ppm.
2, features long life and low cost, making it an ideal choice for industrial and household products.
3, universal digital pin design, which can be directly connected to microcontroller devices for reading.
4, In an environment with methane gas, the conductivity of the sensor will increase with the increase of methane concentration in the air.
5, A simple drive circuit, convenient for equipment connection and debugging.
6, The application fields of the sensor include gas leak detection, gas leak detection in homes and factories, portable gas detection equipment, and so on.
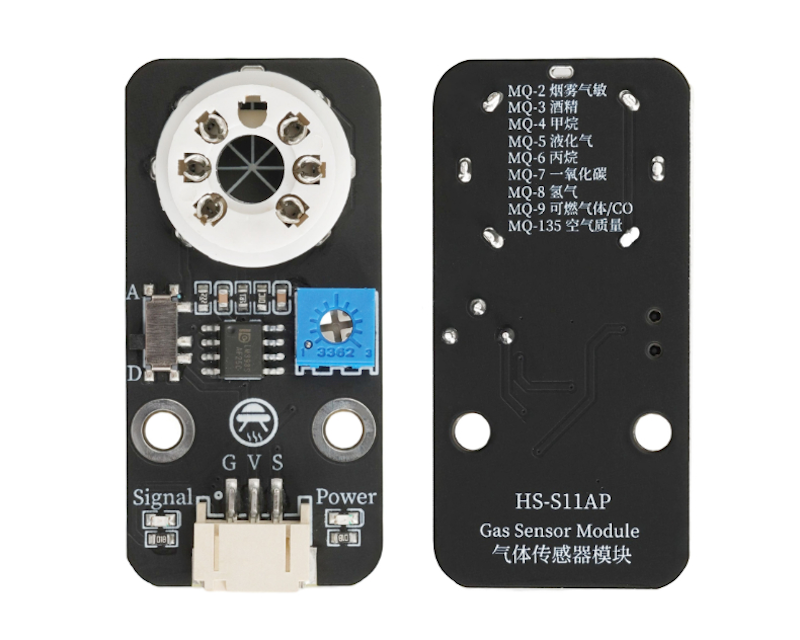
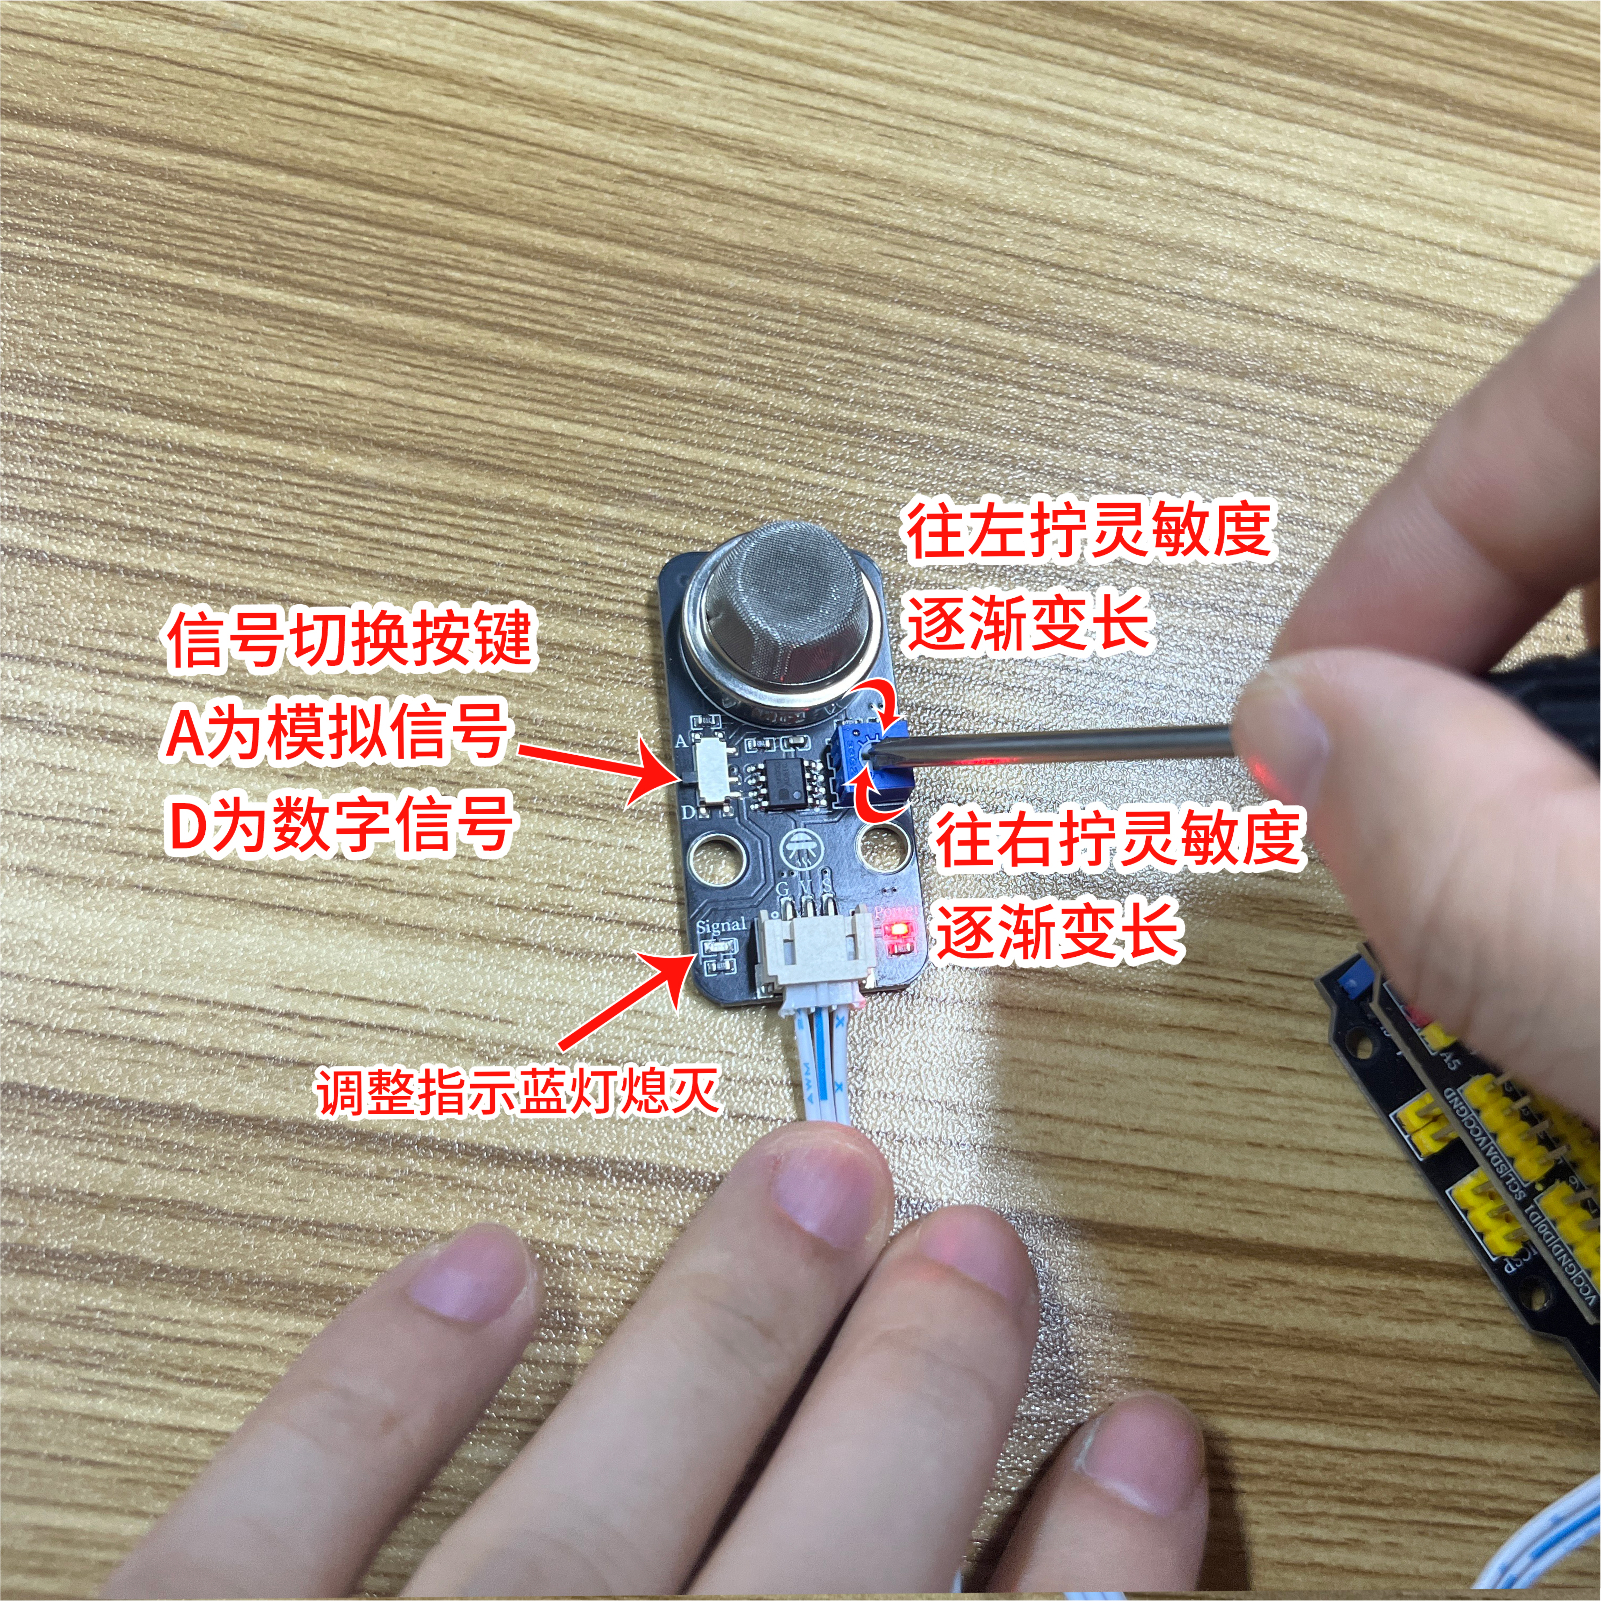
7, the module has an AD digital analog switch, when the switch is turned to A, it outputs an analog value, when turned to D, it outputs a digital signal, and the trigger threshold is controlled by the adjustable potentiometer on the module.
2. Schematic
Gas Sensor - HS-S11AP SchematicClick to view
Module Parameters
Pin Name | description |
|---|---|
G | GND (Negative Power Input) |
V | VCC (Positive Power Input) |
S | Signal Pin |
Power Supply Voltage: 3.3V / 5V
Connection method: PH2.0 3P terminal
Installation method: Screw fixed
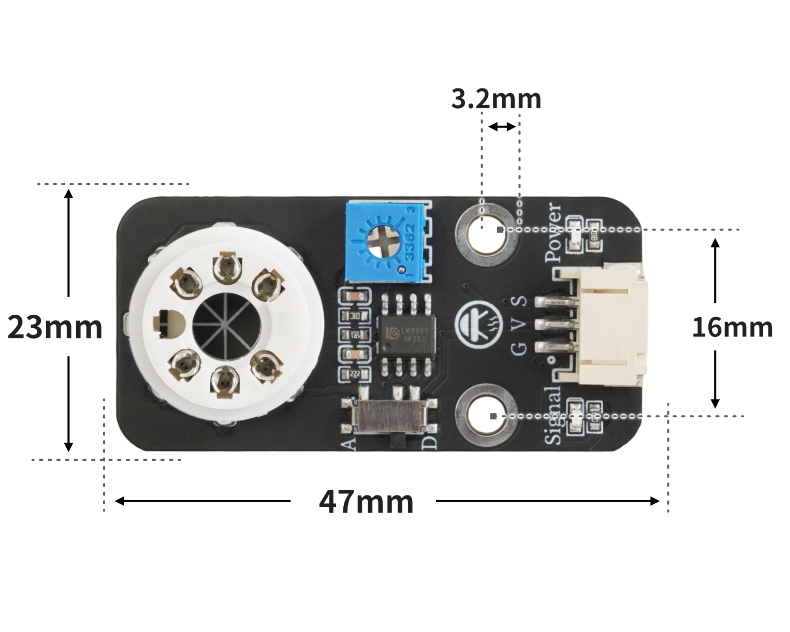
4, Circuit Board Size
5 of Arduino IDE example program
Attention: If prompted with an error message about the library file during program upload, please import the library file first!
Arduino IDE Library Download and Import Tutorial:Click to view
Example program (UNO development board):
void setup(){
pinMode(11, OUTPUT);
Serial.begin(9600);
digitalWrite(11,LOW);
pinMode(A2, INPUT);
}
void loop(){
//烟雾报警器:有源蜂鸣器接D11,
//烟雾传感器接A2;
//注意烟雾传感器与扩展版接口线序,不要正负极接反。
//当烟雾传感器检测气体或者烟雾时输出低电平(0),
//蜂鸣器有频率的响起。
//打开串口监视器,查看串口烟雾传感器输出值,调节电位器,没有烟雾或者气体,模块指示灯熄灭。
if (digitalRead(A2) == 0) {
//检测到烟雾输出低电平(0),蜂鸣器响
for (int i = 0; i <= 3; i = i + (1)) {
digitalWrite(11,HIGH);
delay(200);
digitalWrite(11,LOW);
delay(200);
}
} else {
digitalWrite(11,LOW);
}
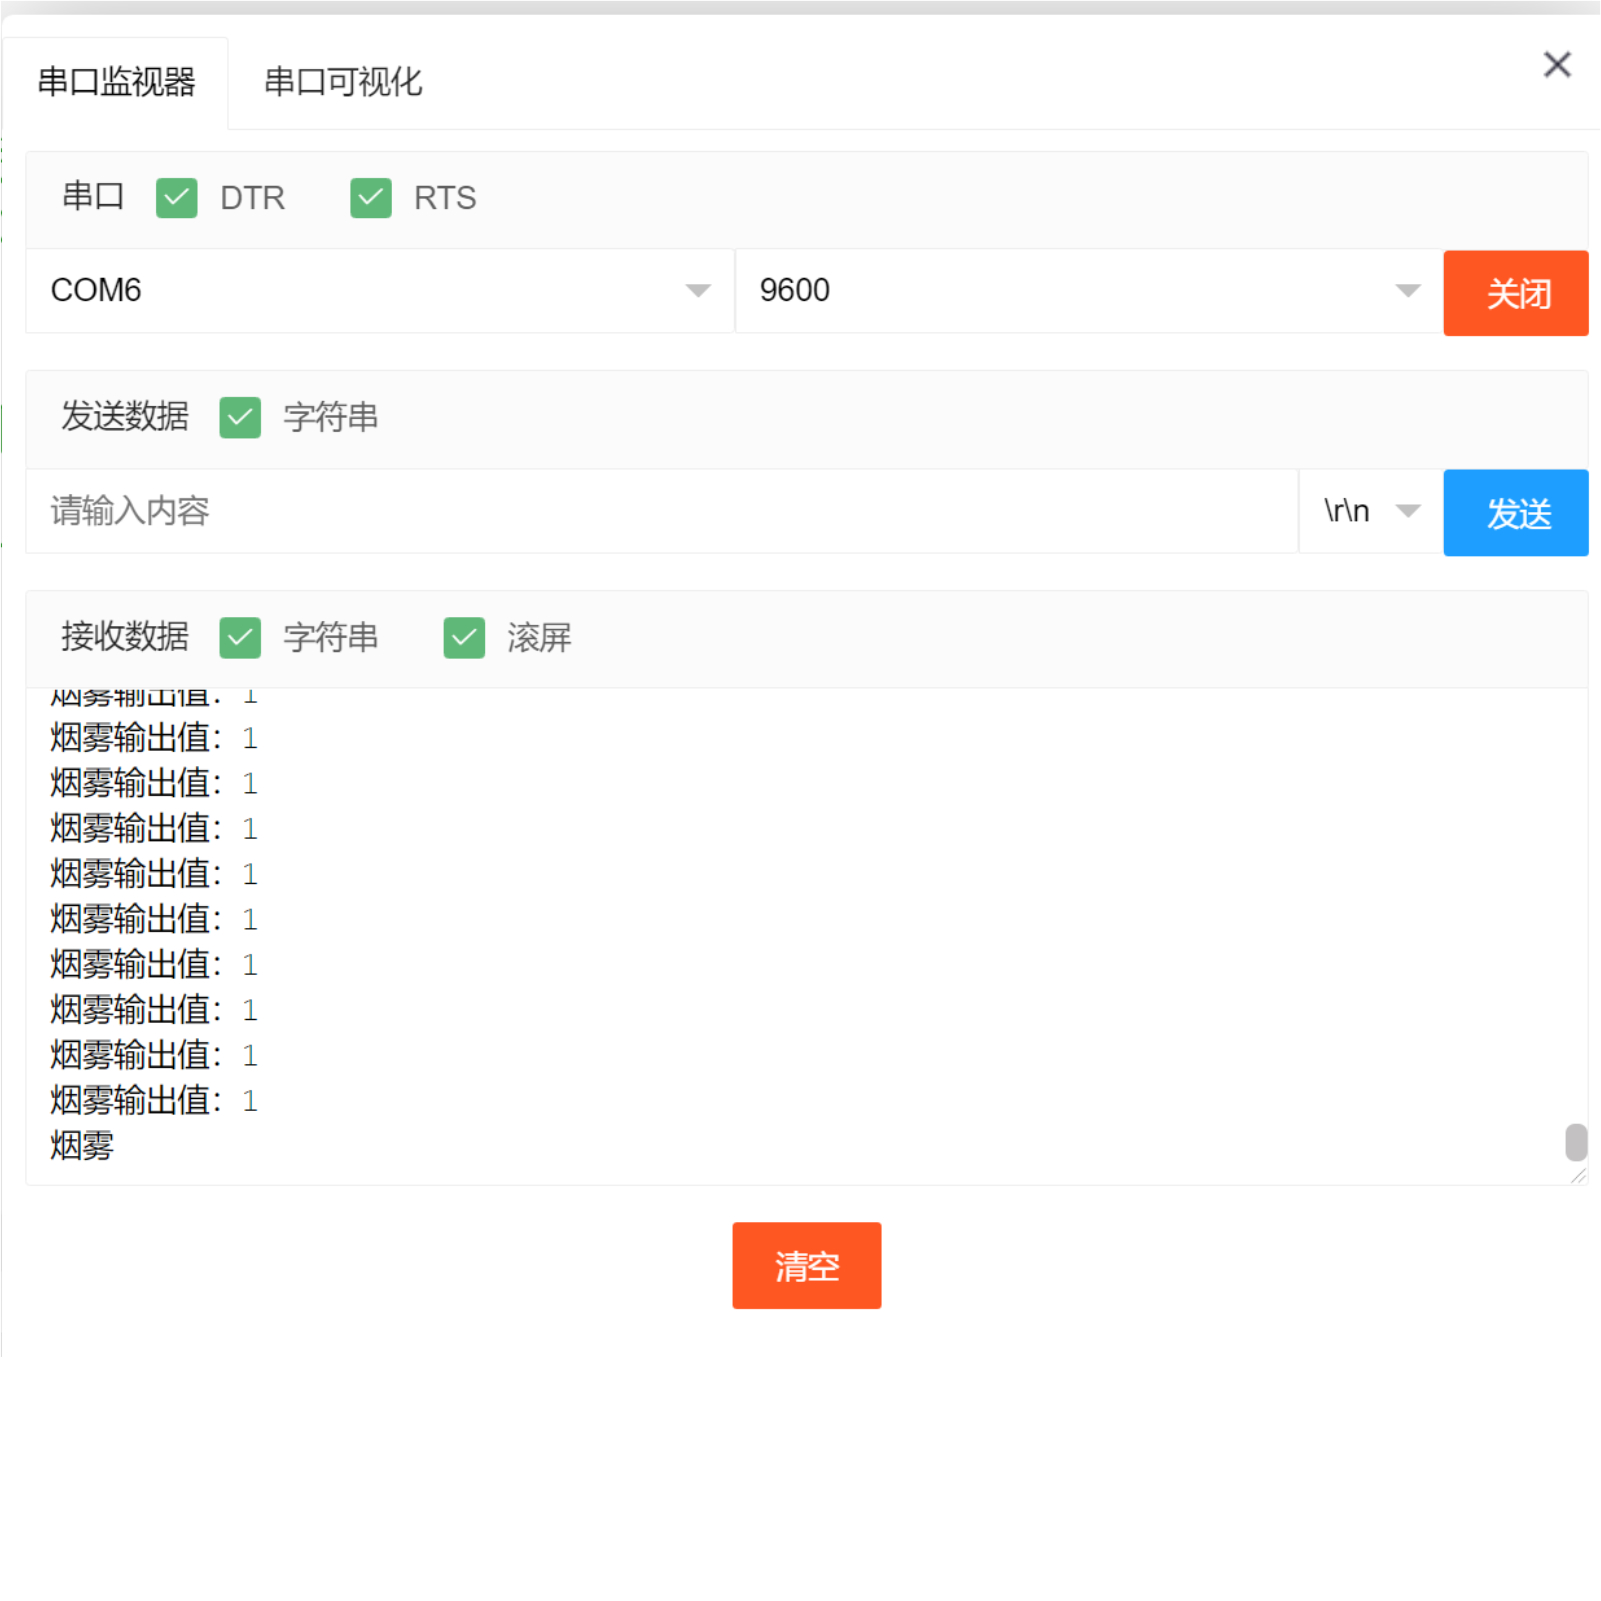
Serial.print("烟雾输出值:");
Serial.println(digitalRead(A2));
delay(10);
}6, ESP32 Python Example (for Mixly IDE/Misashi)
Choose the development board Python ESP32 [ESP32 Generic(4MB)] and upload in code mode
Attention: If prompted with an error message about the library file during program upload, please import the library file first!
Download and import tutorial for Mixly IDE ESP32 library:Click to view
Example program (ESP32-Python):
import machine
import time


pin4 = machine.Pin(4, machine.Pin.OUT)
pin12 = machine.Pin(12, machine.Pin.IN)
while True:
    if pin12.value() == 0:
        for i in range(0, 3, 1):
            pin4.value(1)
            time.sleep_ms(200)
            pin4.value(0)
            time.sleep_ms(200)
    else:
        pin4.value(0)
    print('烟雾输出值:',end ="")
    print(pin12.value())
    time.sleep_ms(10)
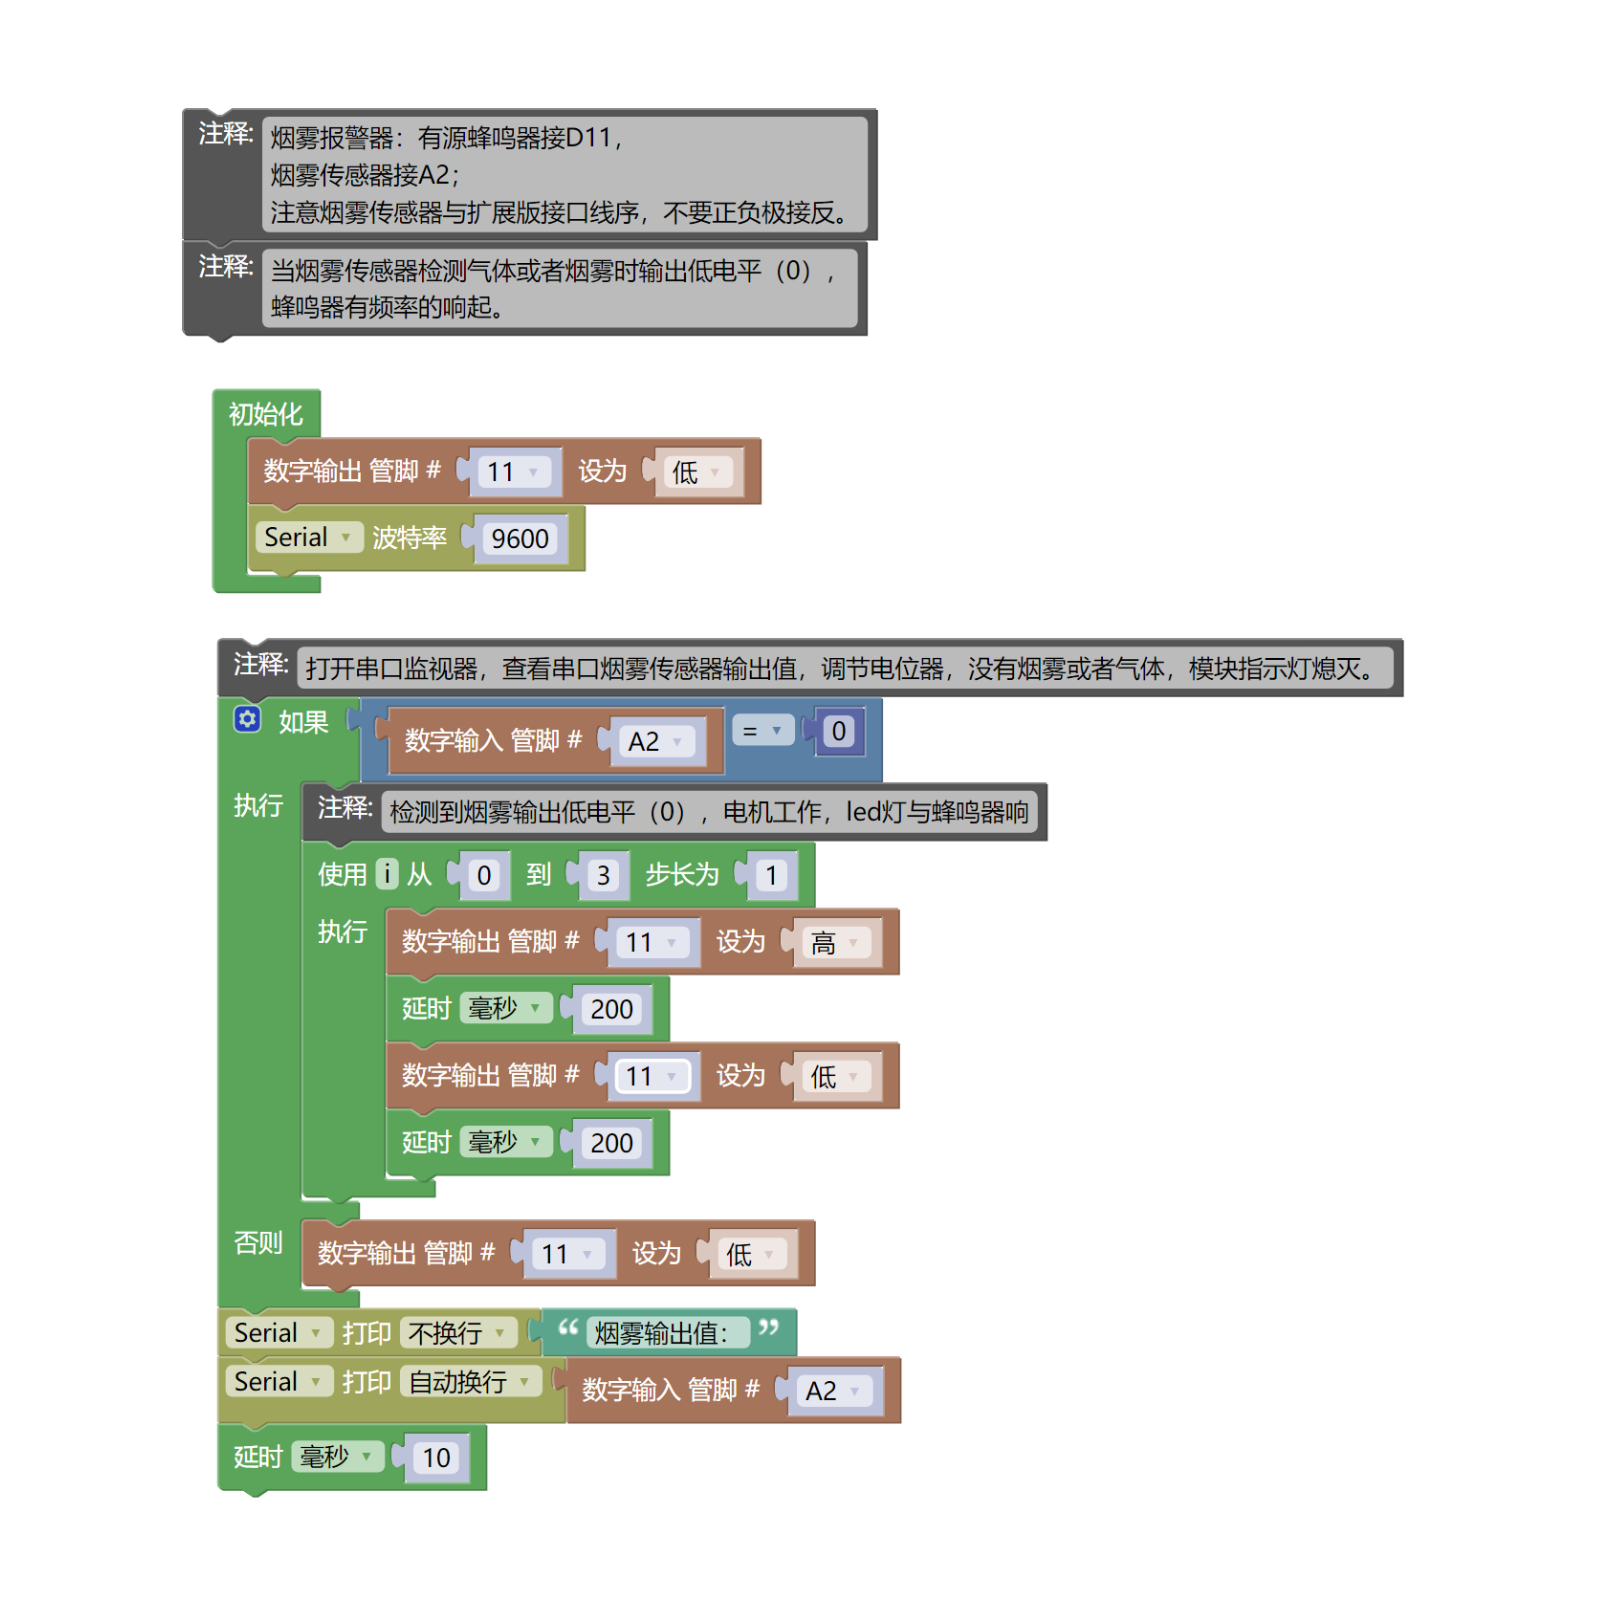
7, Mixly example program (graphical language)
Example program (UNO development board):Click to download
Attention: If prompted with an error message about the library file during program upload, please import the library file first!
Download and import tutorial of Mixly IDE Arduino library:Click to view
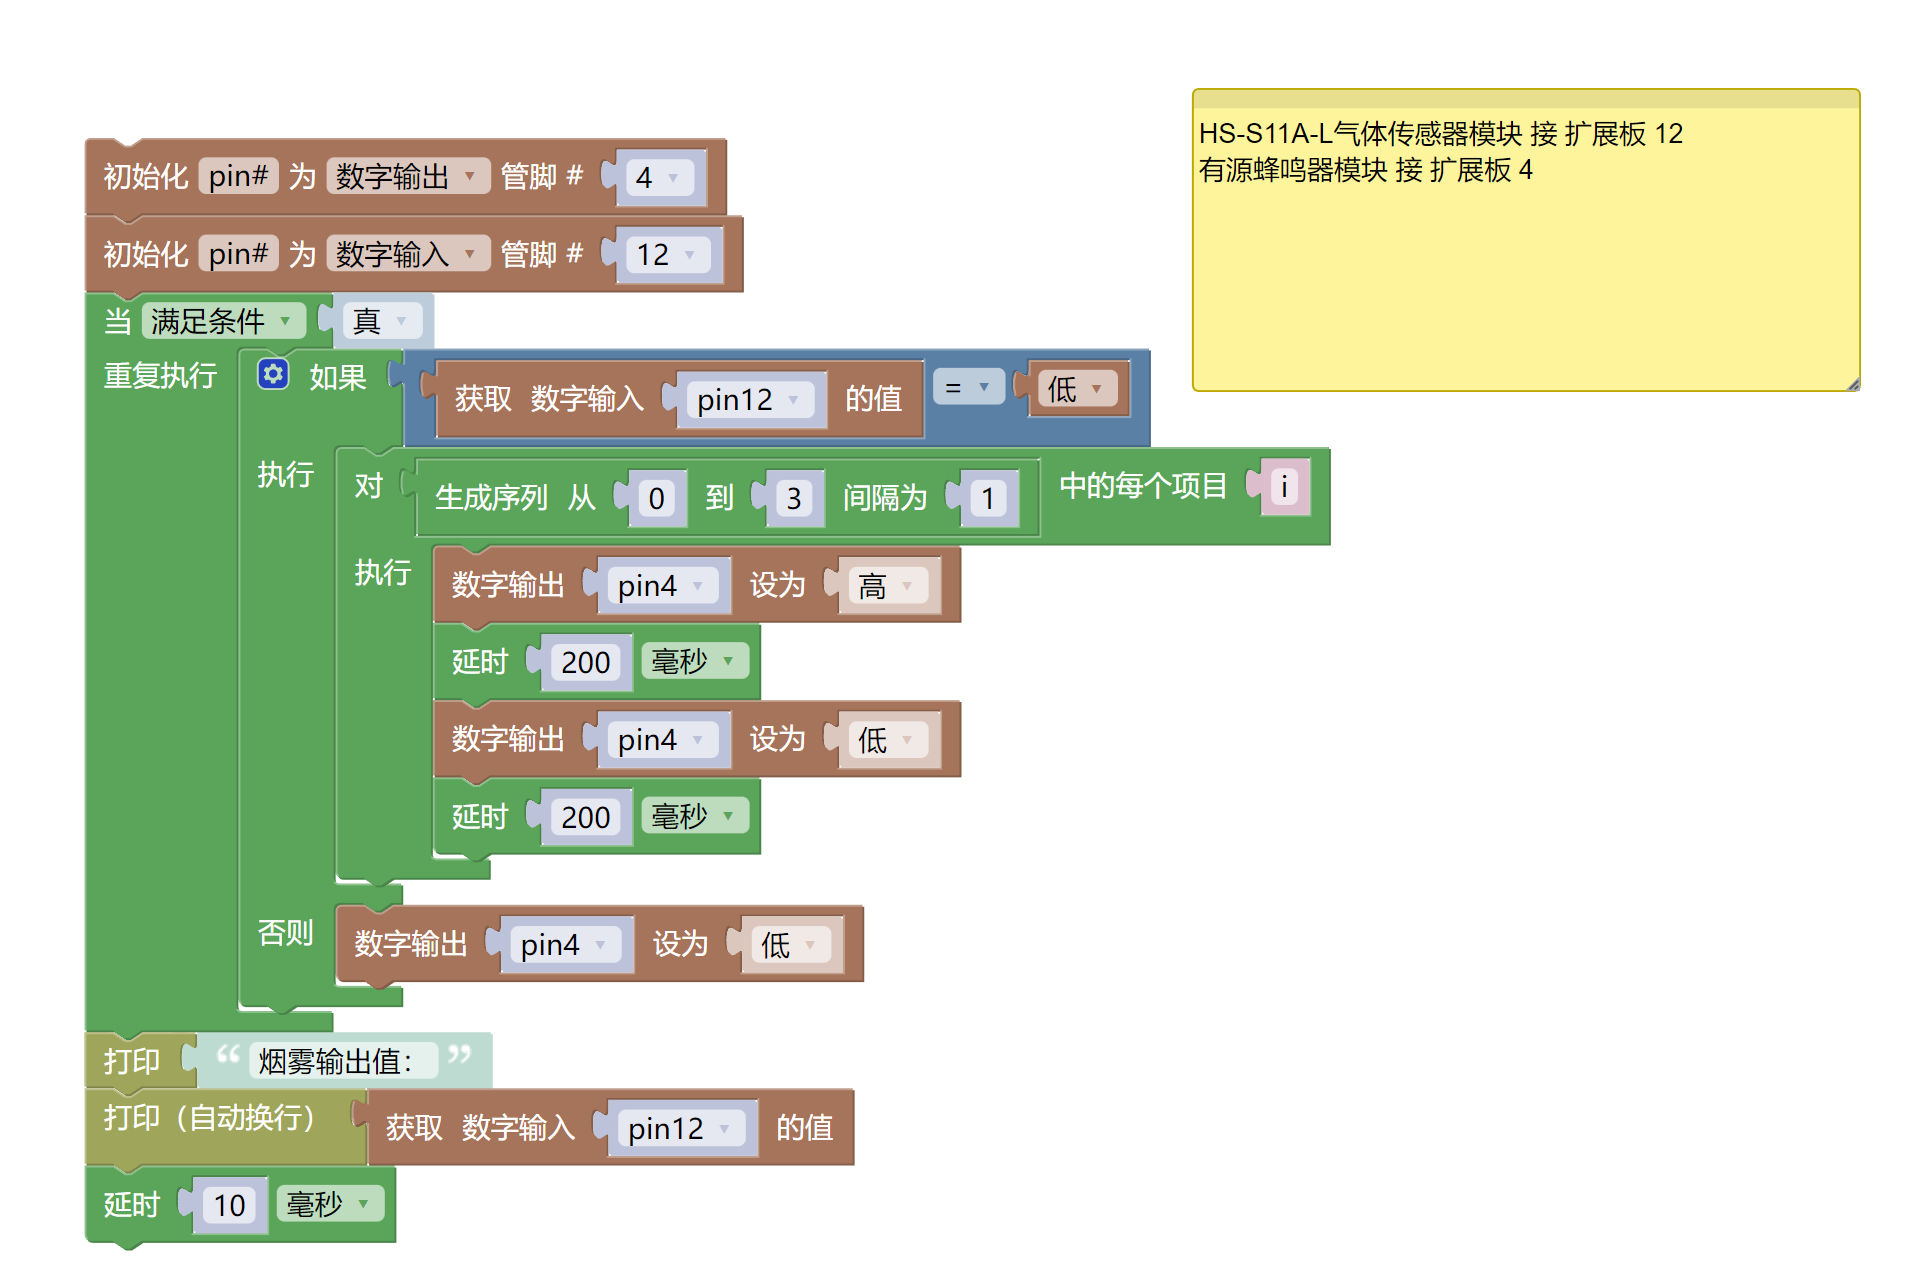
Example Program (ESP32 Development Board):Click to download
Attention: If prompted with an error message about the library file during program upload, please import the library file first!
Download and import tutorial for Mixly IDE ESP32 library:Click to view
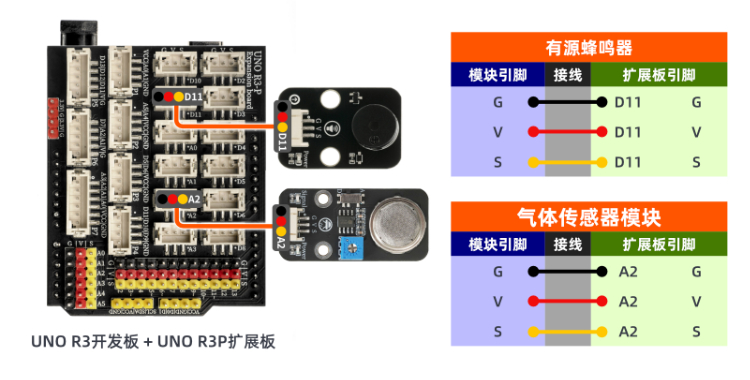
8. Setting up the Test Environment
Arduino UNO Test Environment Setup
Prepare Components:
HELLO STEM UNO R3 DEVELOPMENT BOARD *1
HELLO STEM UNO R3 P EXPANSION BOARD *1
USB TYPE-C DATA CABLE *1
Gas Sensor Module (HS-S11A-P) *1
Active buzzer (HS-F07L) * 1
PH2.0 3P dual-head terminal line *2
Circuit wiring diagram:
ESP32 Test Environment Setup
Prepare Components:Pending update...
Circuit wiring diagram:Pending update...
9, Video tutorial
Arduino UNO video tutorial:Click to view
ESP32 Python Video Tutorial:Click to view
10, Test conclusion
Arduino UNO Test Conclusion:
Adjust the threshold of the potentiometer on the back of the module, with the gas sensor module powered on, adjust the potentiometer of the sensor module with a small screwdriver, until the sensor signal indicates the blue light is off when there is no gas or smoke interference, and the signal of the gas sensor module indicates the blue light is on when there is gas or smoke.
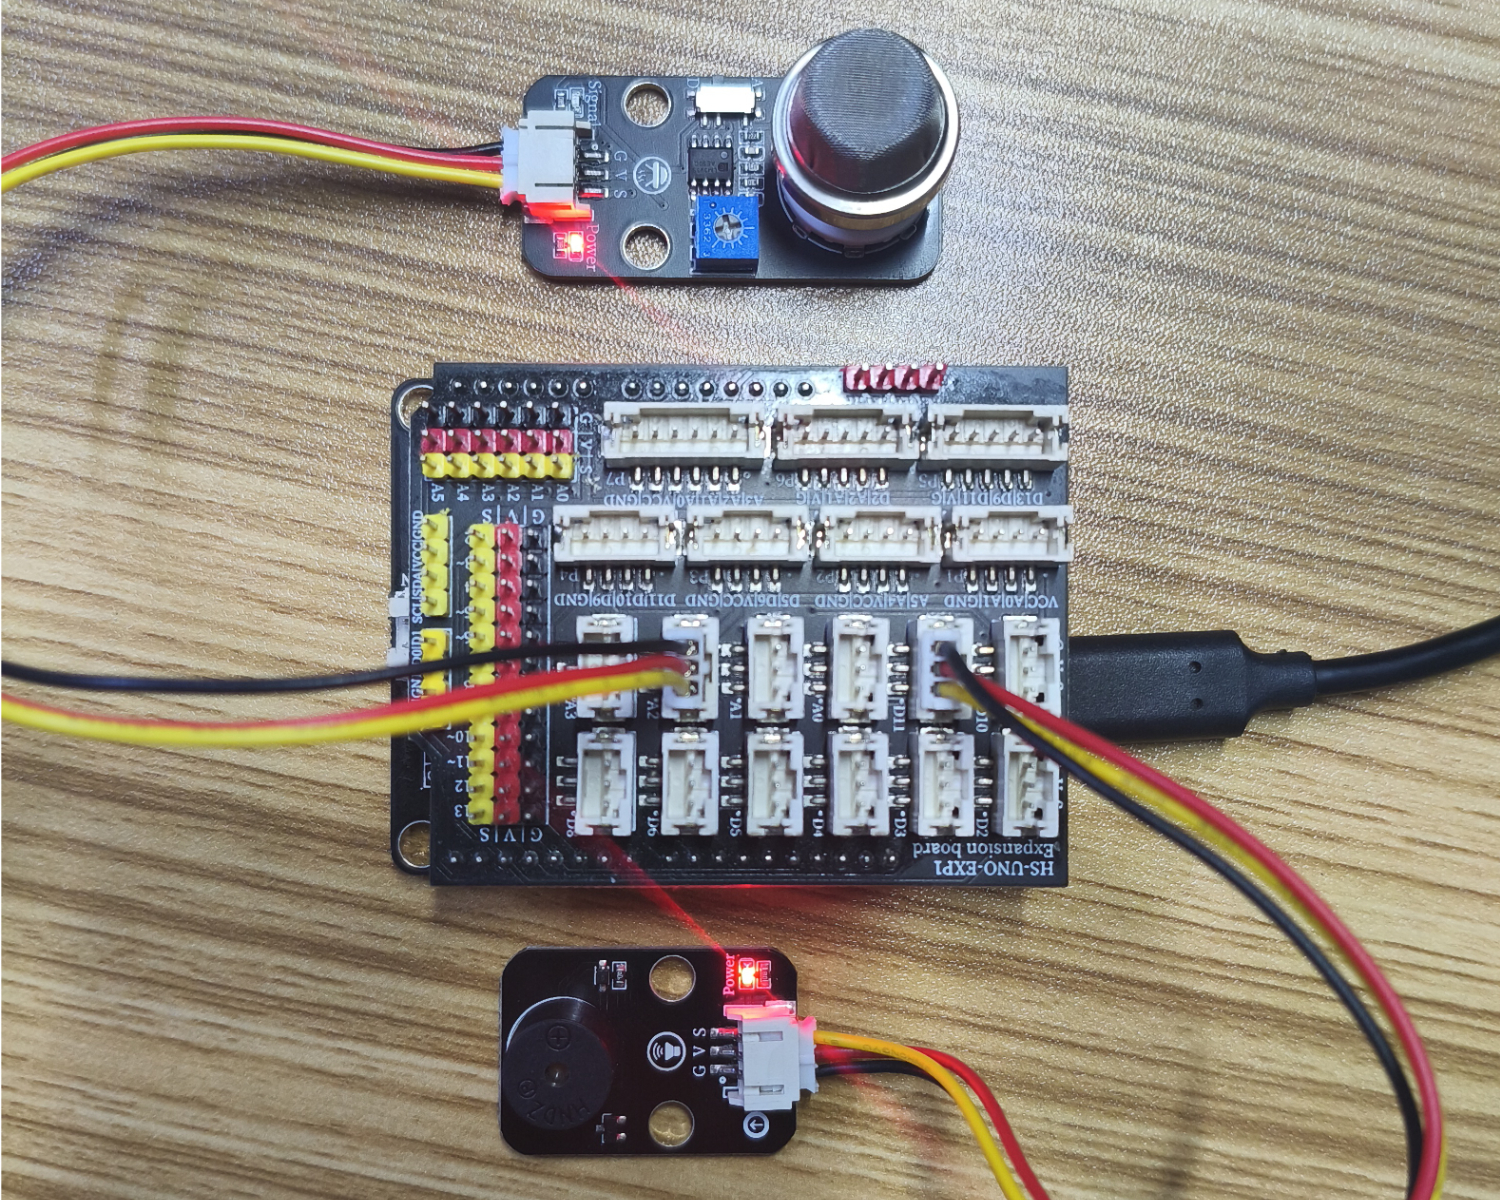
After the device is connected to the wire, upload the above program to the Arduino UNO development board, open the Mxily serial port monitor, and when the smoke sensor detects gas or smoke, it outputs a low level (0), and the buzzer sounds at a frequency; when no smoke is detected, it outputs a high level (1), and the buzzer does not sound.
ESP32 Python test conclusion:
Adjust the threshold of the potentiometer on the back of the module, with the gas sensor module powered on, adjust the potentiometer of the sensor module with a small screwdriver, until the sensor signal indicates the blue light is off when there is no gas or smoke interference, and the signal of the gas sensor module indicates the blue light is on when there is gas or smoke.
After the device is connected to the wire, upload the above program to the ESP32 development board, open the Mxily serial port monitor, when the smoke sensor detects gas or smoke, it outputs a low level (0), and the buzzer sounds at a frequency; when no smoke is detected, it outputs a high level (1), and the buzzer does not sound.