
1. Introduction
Voice Announcement Module Usage Instructions:Click to download
2. Schematic
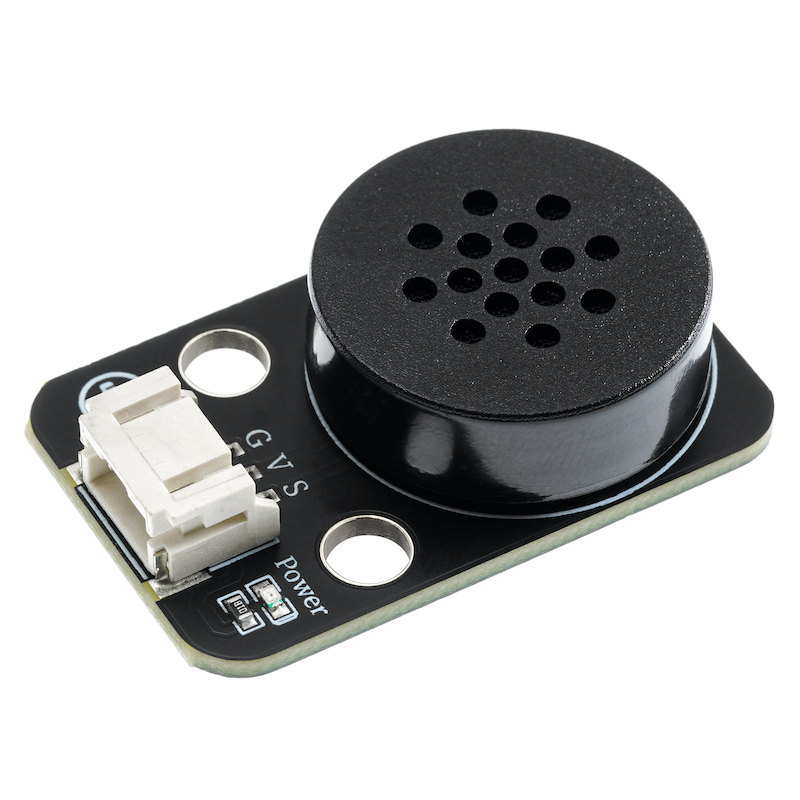
Module Parameters
Pin Name | description |
|---|---|
G | GND (Negative Power Input) |
V | VCC (Positive Power Input) |
S | Data pin |
Power Supply Voltage: 3.3V / 5V
Connection type: PH2.0 3P terminal wire
Installation Method: Double Screw Fixed
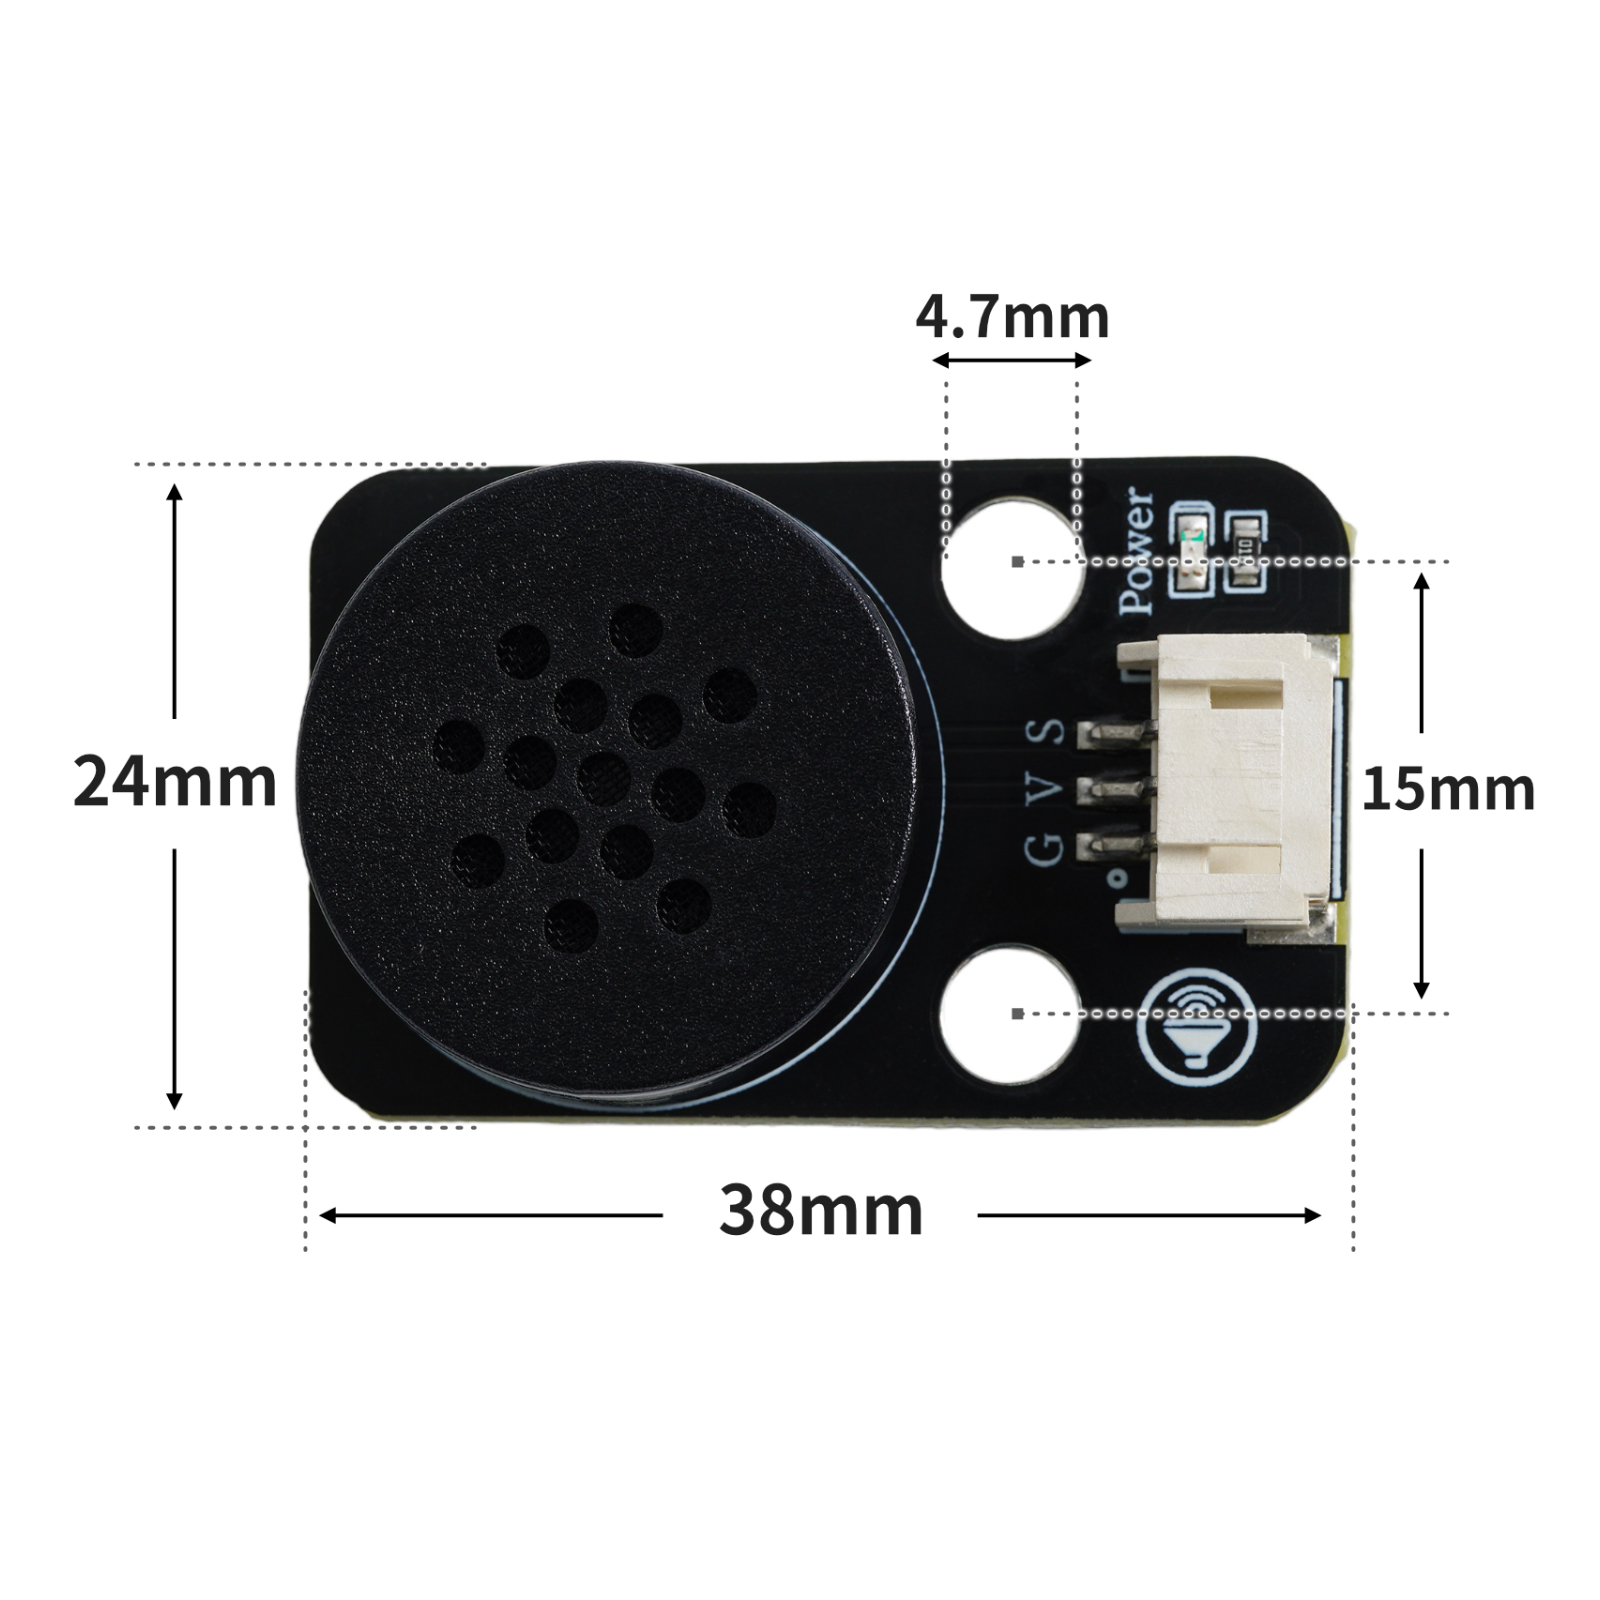
4, Circuit Board Size
5, Misaki adds UNO library and Python library
Add Arduino UNO library:
Misaki's built-in library does not need to be added.
Add ESP32 Micro Python Library:
Click here to install the library file:Reference link
6, Arduino IDE example program
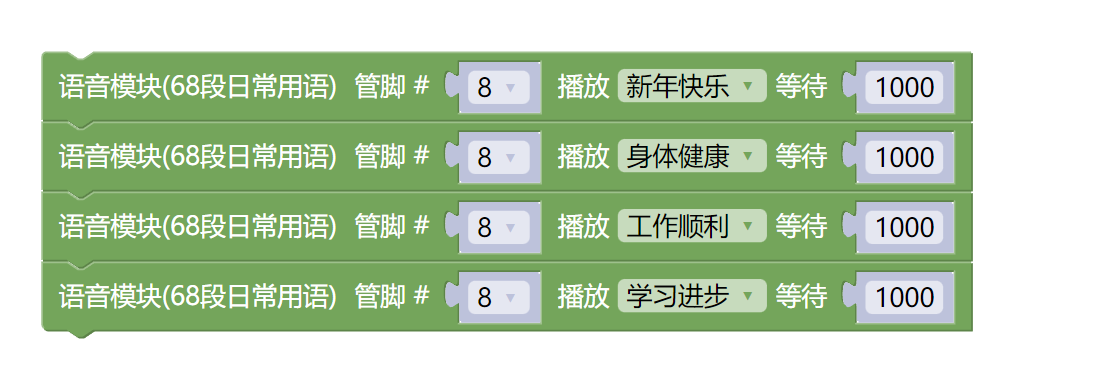
Arduino UNO Graphical Example Program:
void send_data(int addr) {
int i;
digitalWrite(8, LOW);
delay(3); //>2ms
for (i = 0; i < 8; i++) {
digitalWrite(8, HIGH);
if (addr & 1) {
delayMicroseconds(2400); //>2400us
digitalWrite(8, LOW);
delayMicroseconds(800);
} //>800us
else {
delayMicroseconds(800); //>800us
digitalWrite(8, LOW);
delayMicroseconds(2400);
} //>2400us
addr >>= 1;
}
digitalWrite(8, HIGH);
}
void setup(){
pinMode(8, OUTPUT);
}
void loop(){
send_data(0x10); //volume control 0xE0-E7;
delay(1000);
send_data(0x11); //volume control 0xE0-E7;
delay(1000);
send_data(0x12); //volume control 0xE0-E7;
delay(1000);
send_data(0x13); //volume control 0xE0-E7;
delay(1000);
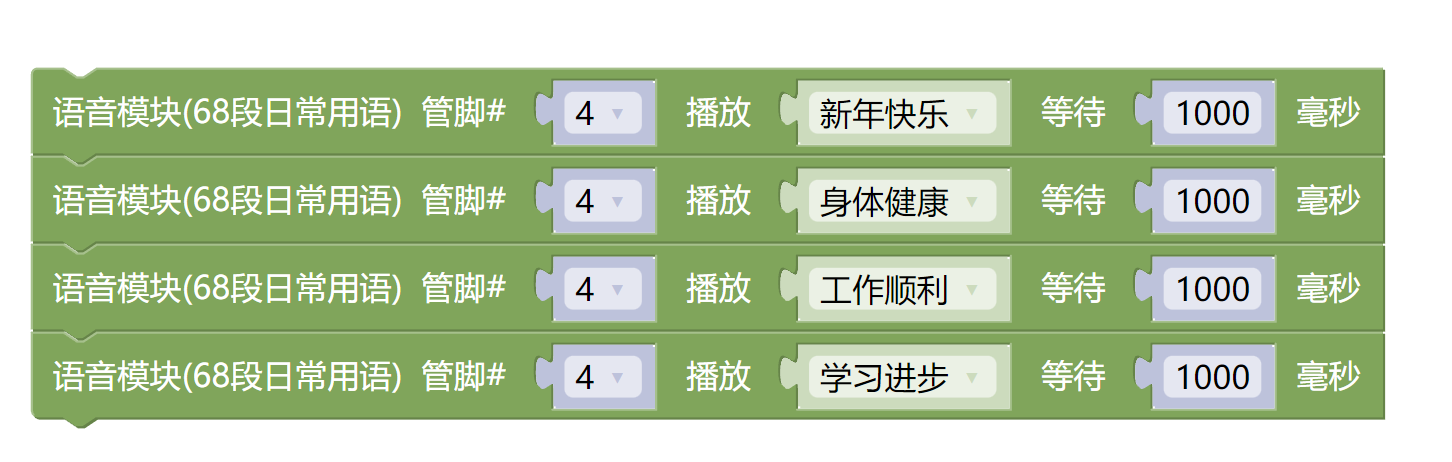
}ESP32 Python Example (for Mixly IDE / Micskit)
(Choose the Python ESP32 [ESP32 Generic(4MB)] to switch to code mode upload):
import machine
import time
def voice_broadcast(Pin, directives, delay):
    Pin.value(0)
    time.sleep_ms(5)
    for i in range(0, 8, 1):
        if ((directives>>i)&0x01) == 0:
            Pin.value(1)
            time.sleep_us(800)
            Pin.value(0)
            time.sleep_us(2400)
        elif ((directives>>i)&0x01) == 1:
            Pin.value(1)
            time.sleep_us(2400)
            Pin.value(0)
            time.sleep_us(800)
    Pin.value(1)
    time.sleep_ms(delay)

Pin4 = machine.Pin(4, machine.Pin.OUT)
Pin4.value(1)
time.sleep_ms(10)


voice_broadcast(Pin4, 0x10,1000)
voice_broadcast(Pin4, 0x11,1000)
voice_broadcast(Pin4, 0x12,1000)
voice_broadcast(Pin4, 0x13,1000)
7, Mixly example program (graphical language)
Arduino UNO Graphical Example Program:Click to download
ESP32 Python Graphical Example Program:Click to download
8. Setting up the Test Environment
Arduino UNO Test Environment Setup
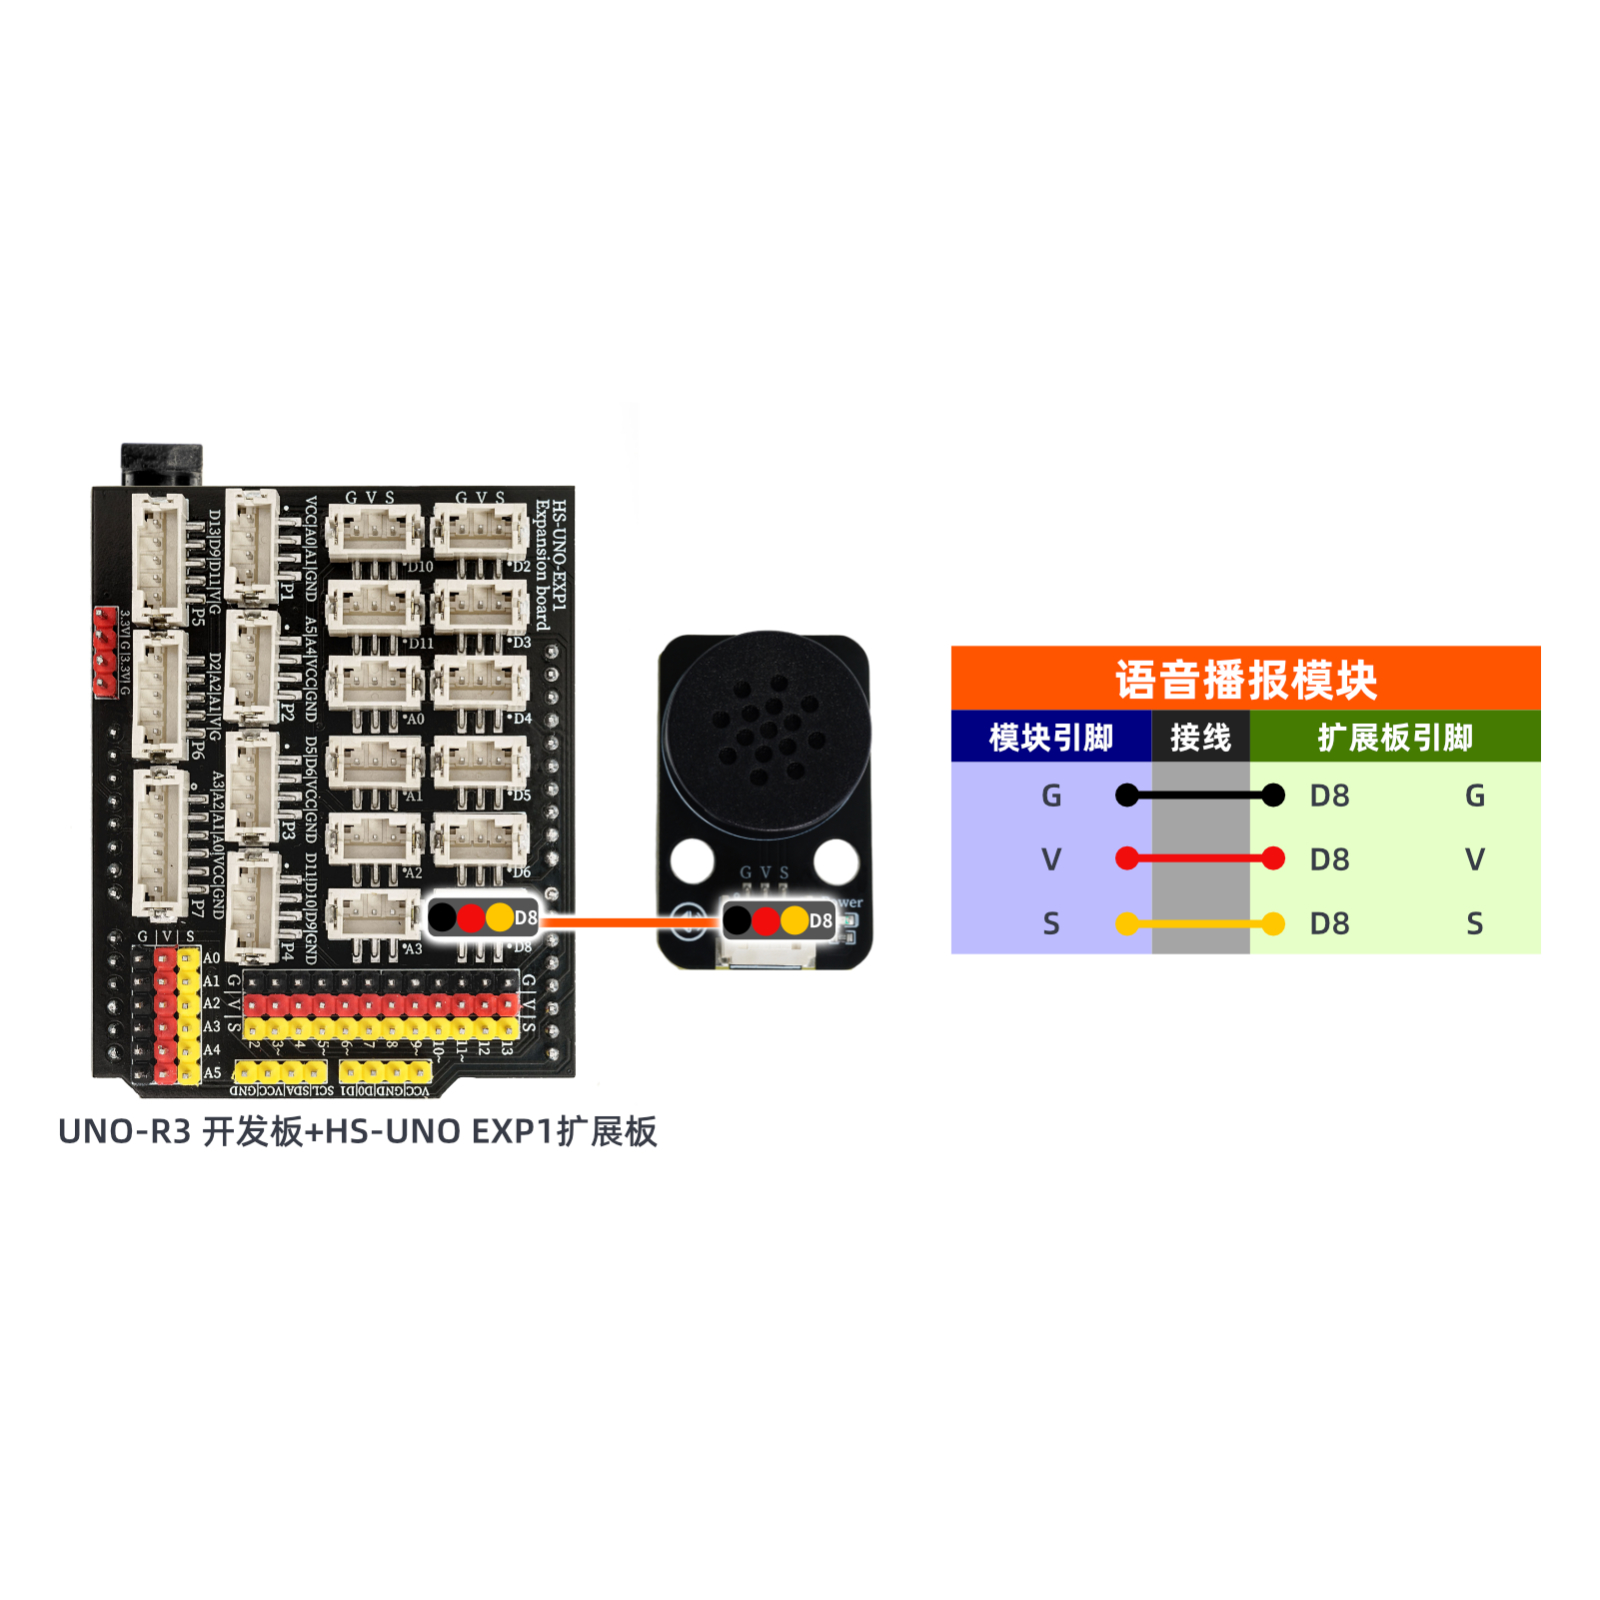
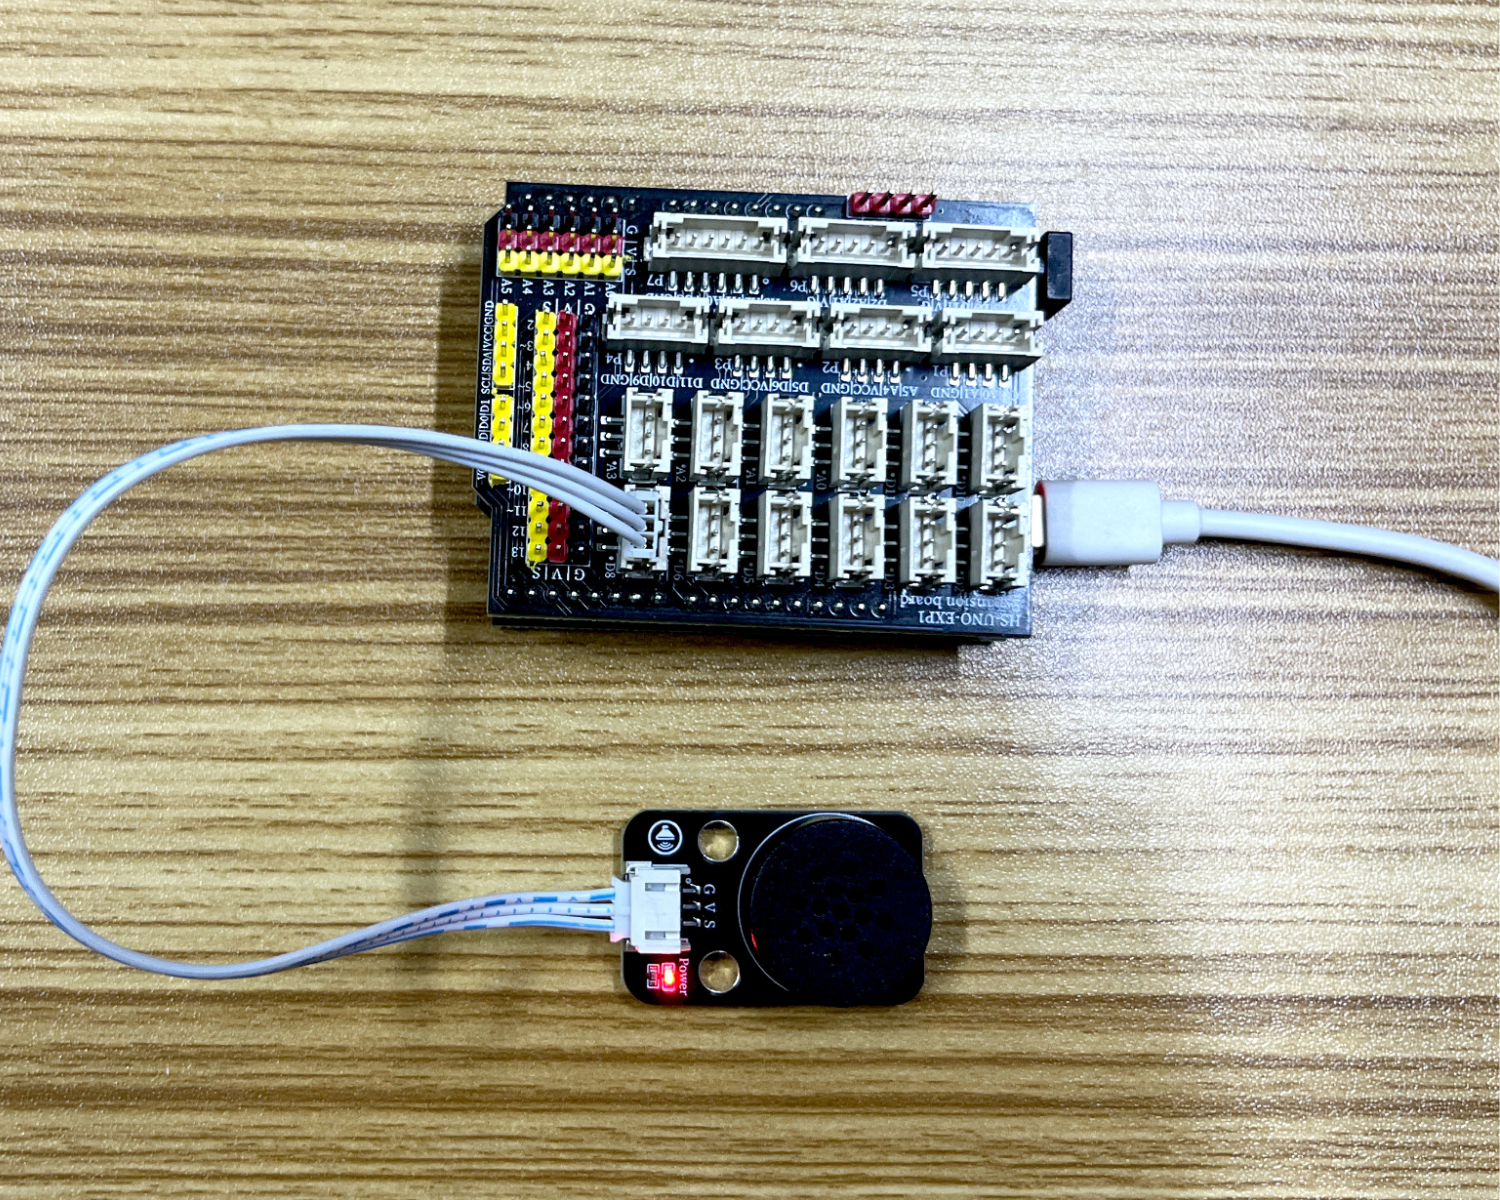
Prepare Components:
UNO-R3 Development Board *1
UNO-R3 P Expansion Board *1
USB TYPE-C DATA CABLE *1
Announcement Module (HS-F26L) *1
PH2.0 4P Double Head Terminal Line *1
Circuit wiring diagram:
ESP32 Python test environment setup
9, Video tutorial
Arduino UNO video tutorial: Click to view
ESP32 Python Video Tutorial:
10, Test conclusion
Arduino UNO Test Conclusion:
After connecting the device and uploading the program to the Arduino UNO development board, you will find that the voice broadcast module plays the statements set by the program in a loop.
ESP32 Python test conclusion: