
1. Introduction
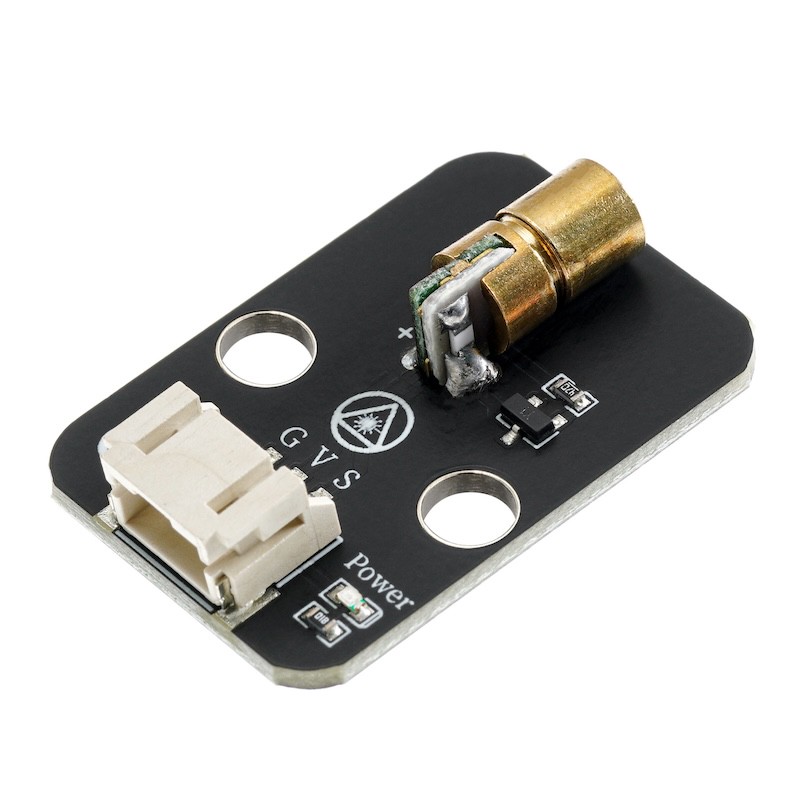
6.0 laser module, the diameter of the laser head is 0.6mm, with positive and negative terminals, operating voltage 3.3v-5v, only visible faint red line under fog or other medium, while in normal conditions, a red dot is seen, and the tube is made of copper.主要用于激光类玩具,发光陀螺,各种水平仪,地线仪等。Pay special attention: Do not point at someone's eyes.
2. Schematic

Module Parameters
Pin Name | description |
|---|---|
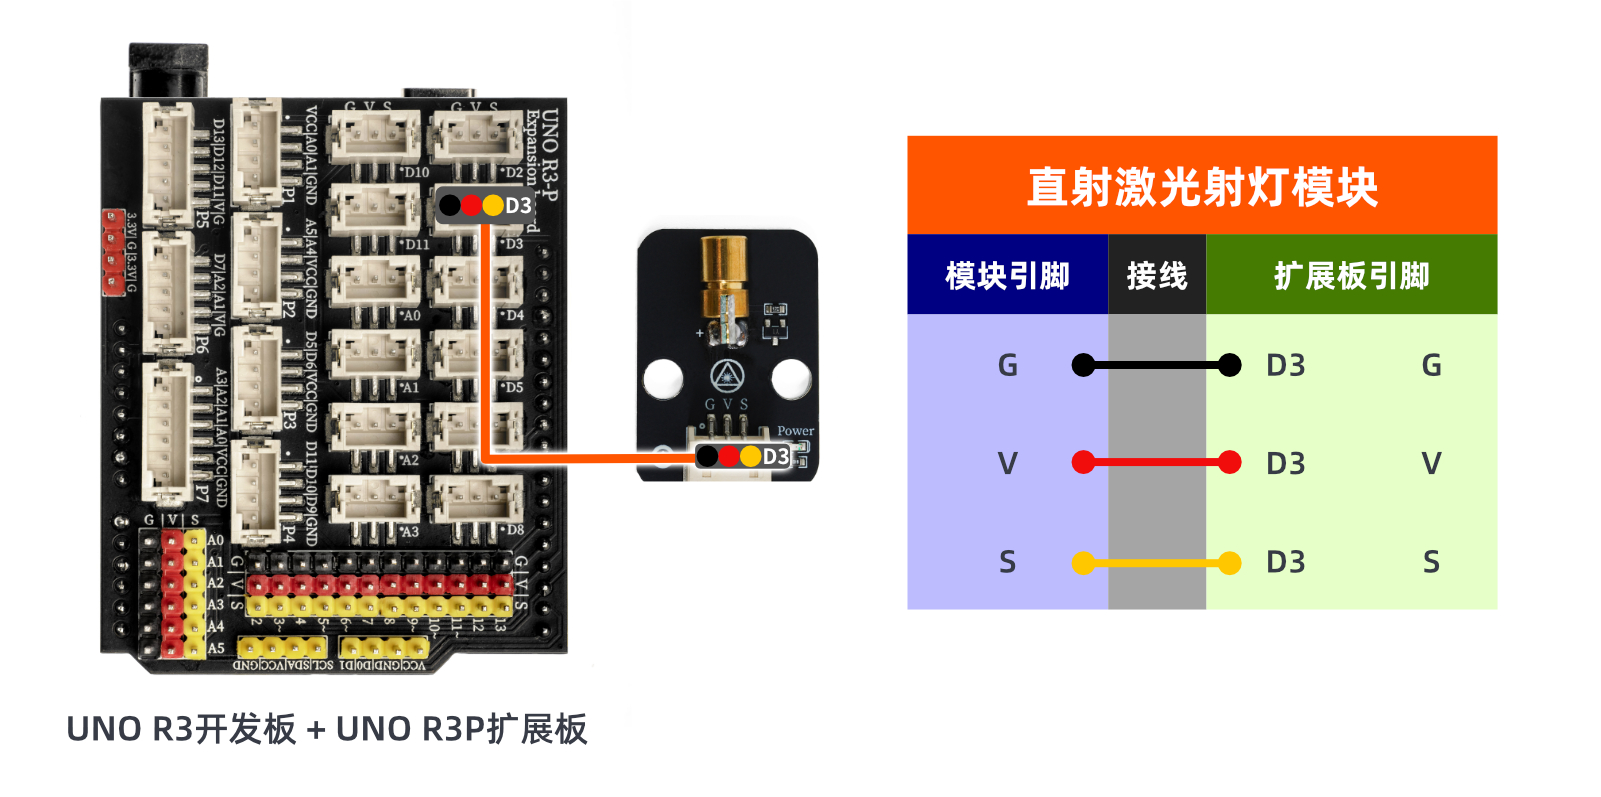
G | GND (Negative Power Input) |
V | VCC (Positive Power Input) |
S | Digital Signal Pin |
Power Supply Voltage: 3.3V / 5V
Connection method: PH2.0 3P terminal
Installation Method: Double Screw Fixed
4, Circuit Board Size

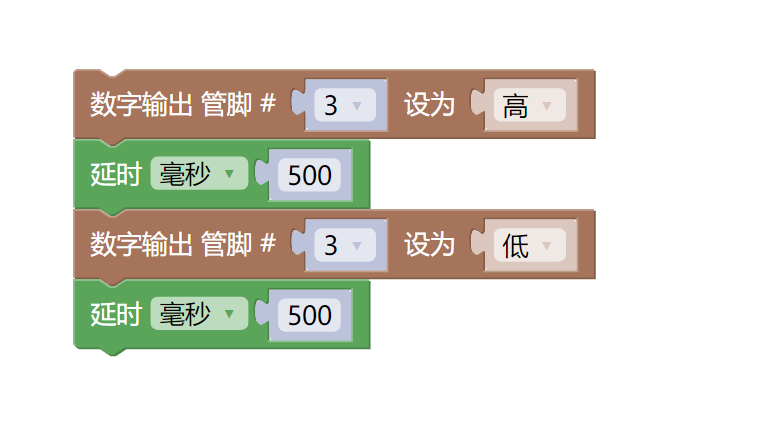
5 of Arduino IDE example program
Example program (UNO development board):Click to download
void setup(){
  pinMode(3, OUTPUT);
}

void loop(){
  digitalWrite(3,HIGH);
  delay(500);
  digitalWrite(3,LOW);
  delay(500);

}
Example Program (ESP32 Development Board — Based on Python language, cannot be uploaded using Arduino IDE):
import machine
import time


pin2 = machine.Pin(2, machine.Pin.OUT)
while True:
    pin2.value(1)
    time.sleep_ms(500)
    pin2.value(0)
    time.sleep_ms(500)
6, Miciqi Mixly Example Program (Graphical Language)
Example program (UNO development board):Click to download
Example Program (ESP32 Development Board):Click to download

7, Test Environment Setup
Prepare Components:
HELLO STEM UNO R3 PRO DEVELOPMENT BOARD *1
UNO R3P expansion board*1
USB TYPE-C DATA CABLE *1
Direct Laser Light Module (HS-F03-L) *1
PH2.0 3P dual headed terminal line *1
Circuit wiring diagram:
8. Video tutorial
Video tutorial:Click to view
9. Test conclusion
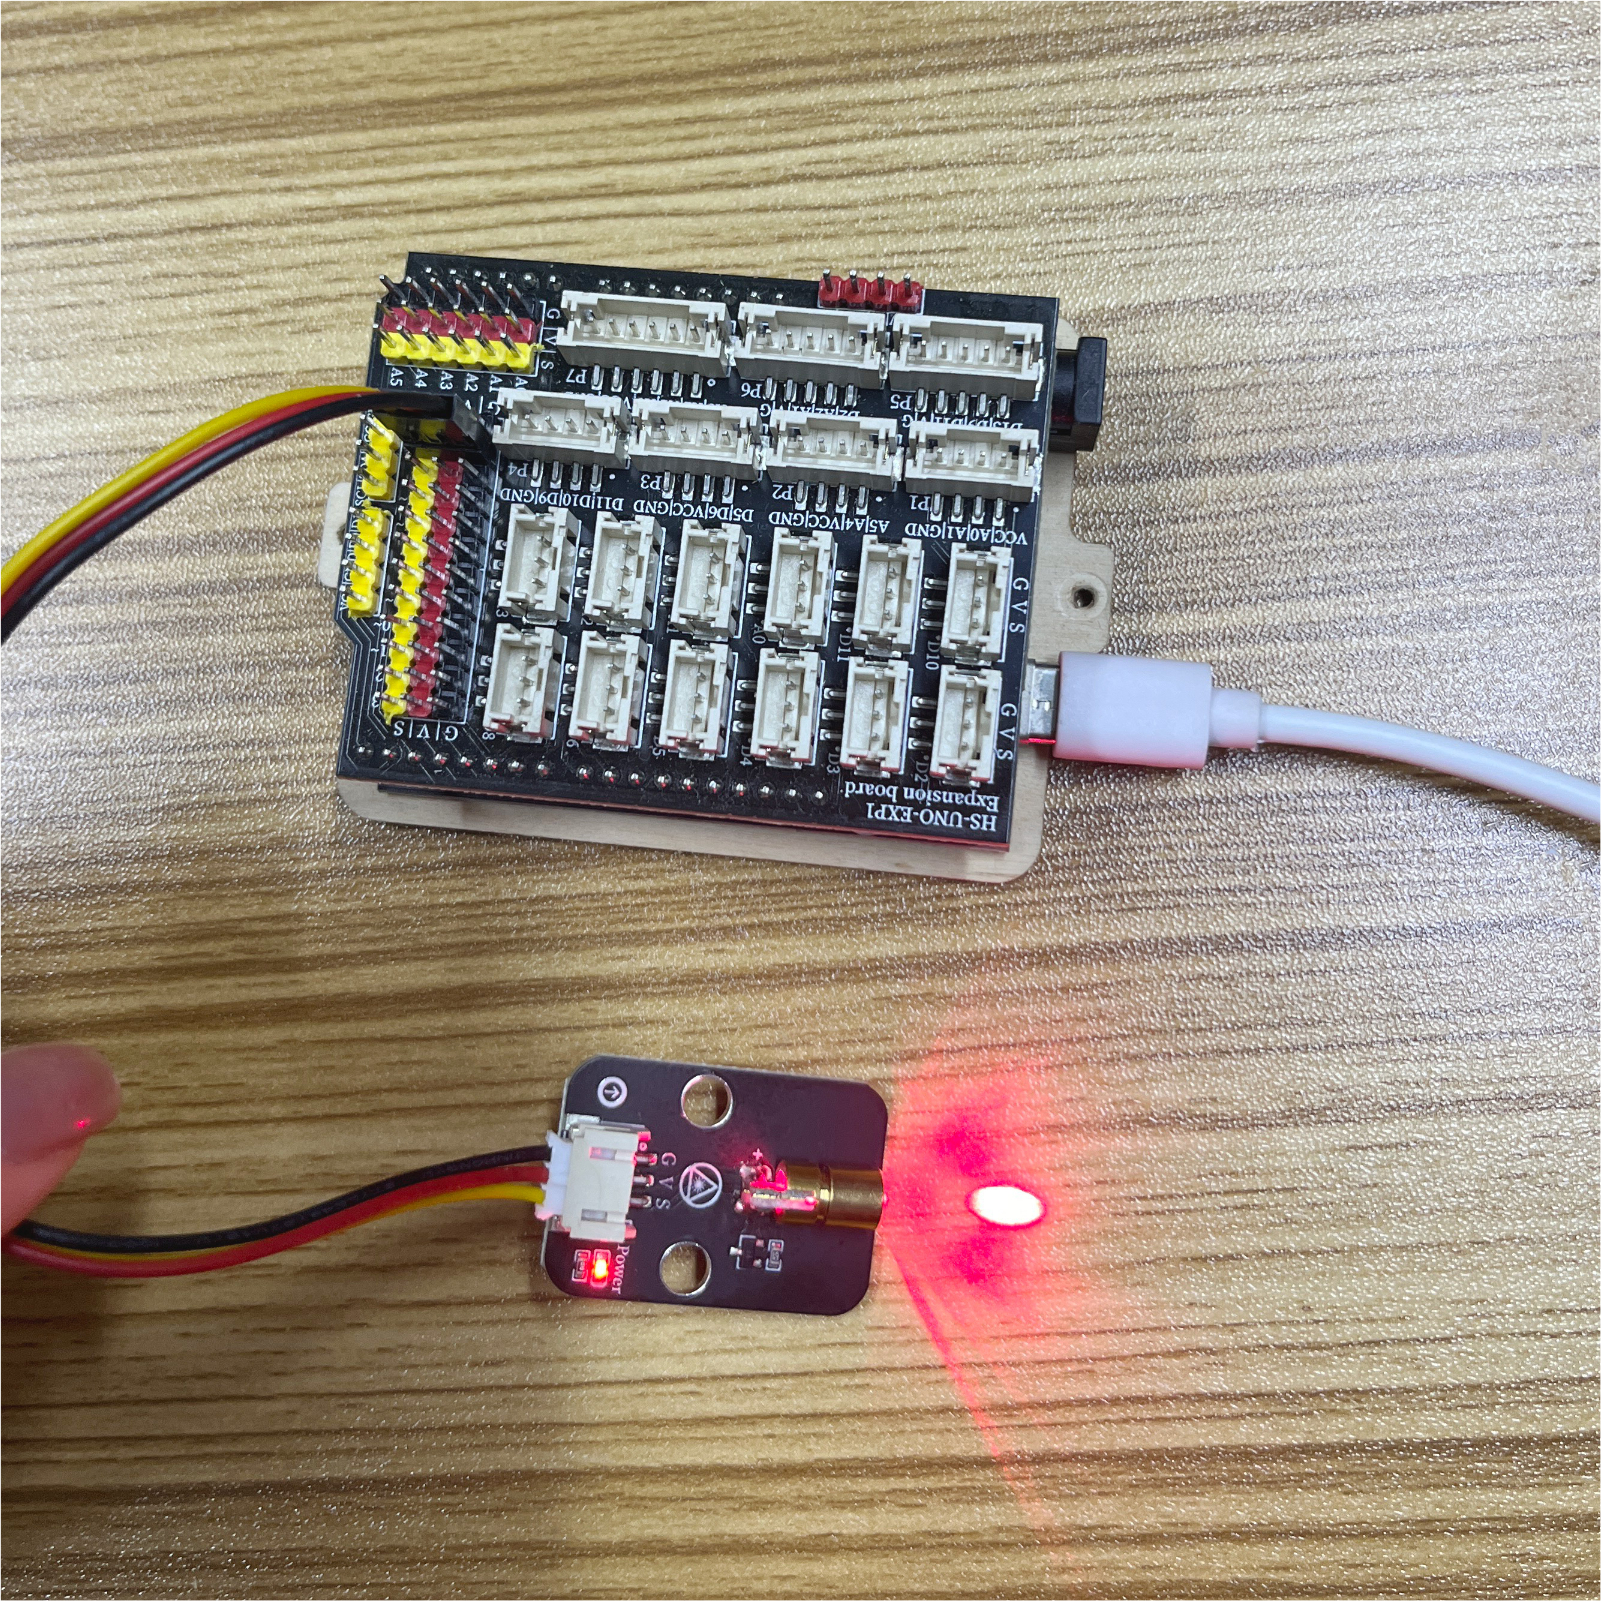
After the device is connected and the above program is flashed onto the Arduino UNO development board, you will find that the linear laser spotlight will blink at a frequency of 0.5 seconds, achieving the desired effect.