
1. Introduction
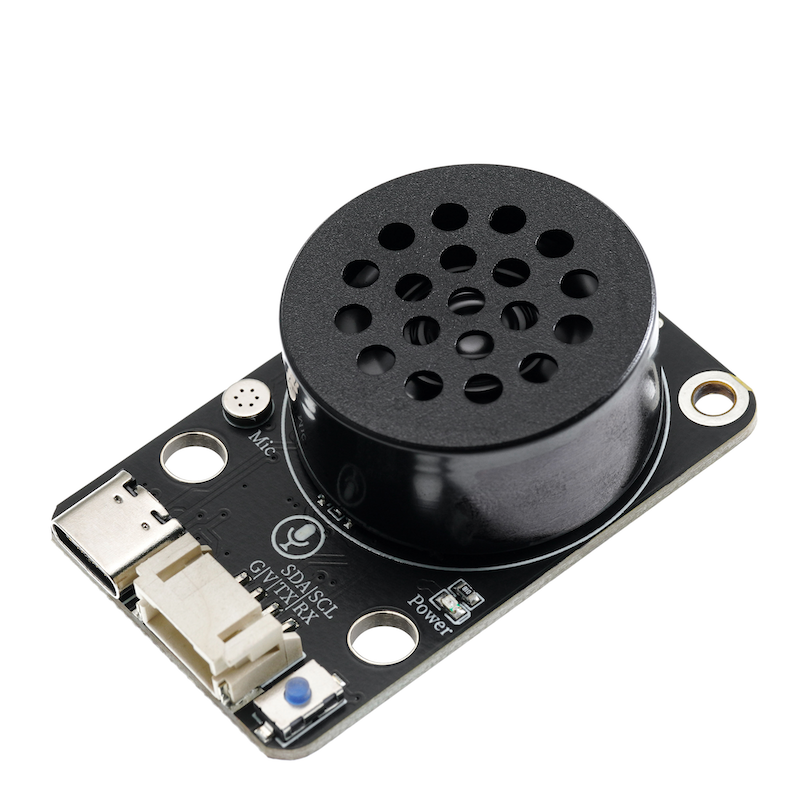
The SU-03T voice recognition control module provides users with a convenient and inexpensive serial port offline voice recognition solution that can be widely and rapidly applied to smart home, various smart appliances, 86 boxes, toys, lighting, and other products that require voice control.Voice recognition uses offline voice recognition chips.Achieve communication with the host through serial port, supporting up to 150 voice commands, customizable voice commands and firmware on the user platform, arbitrary modification of command words, simple development, no coding required.The chip comes with firmware download, you can complete the firmware download with just a data cable.Supports voice volume adjustment, learning wake words, and has sensitive and high recognition accuracy.
2. Schematic
SU-03T voice recognition control module-HS-S57-L schematicClick to view
Module Parameters
Pin Name | description |
|---|---|
VCC | VCC (Positive Power Input) |
GND | GND (Negative Power Input) |
TX | Signal Transmission Pin |
RX | Signal Reception Pin |
Power Supply Voltage: 3.3V / 5V
Connection method: PH2.0 4P terminal wire
Installation method: double screw fixing/Lego assembly
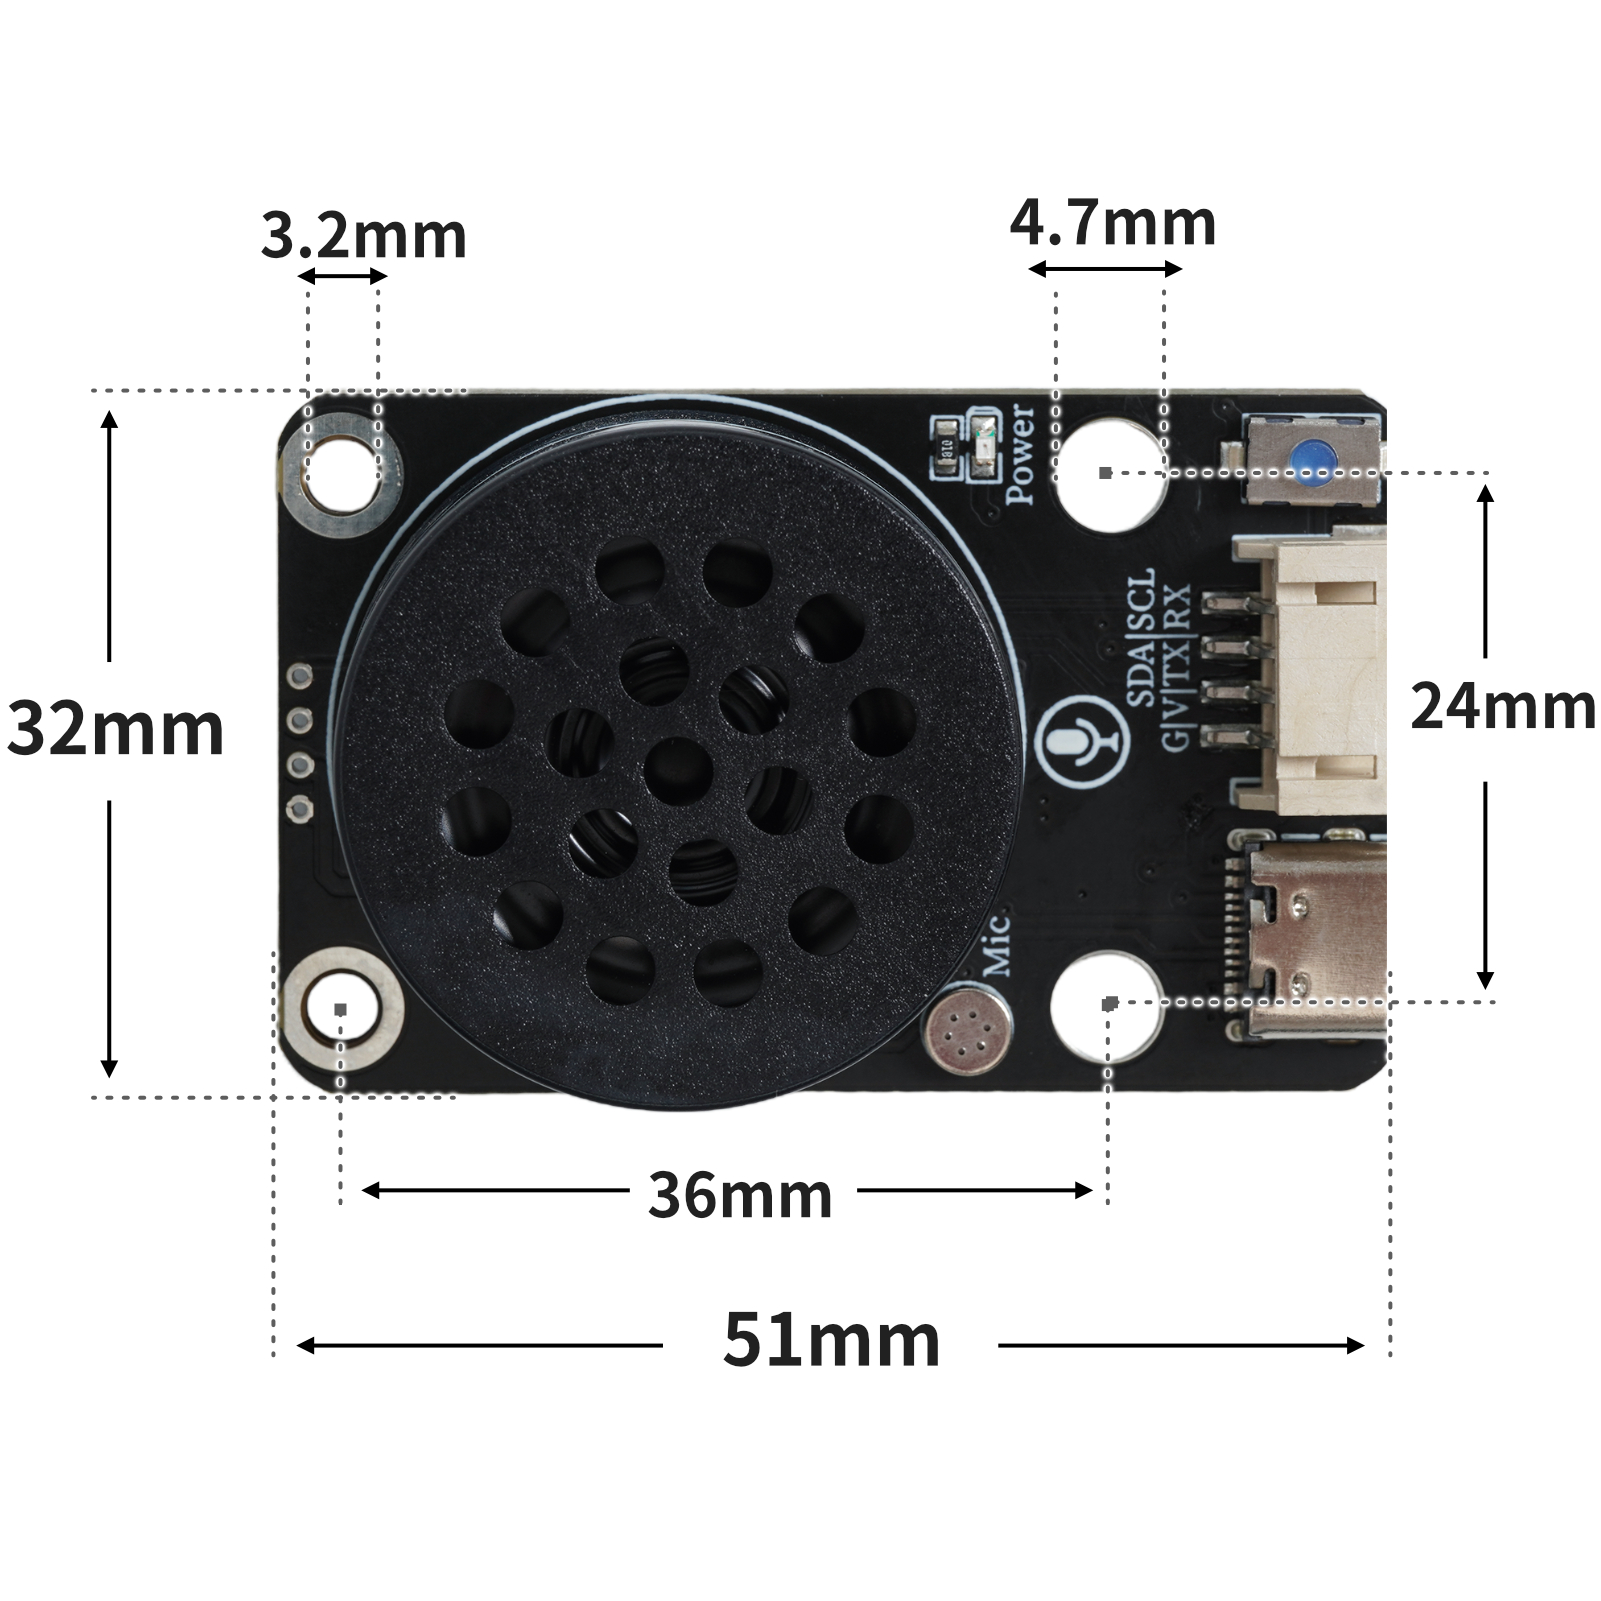
4, Circuit Board Size
Flashing firmware tutorial(Note: The module is pre-flashed with firmware upon manufacture and can be used directly. Flash firmware steps are required when you need to modify the terms yourself.)
Flash file:Click to download
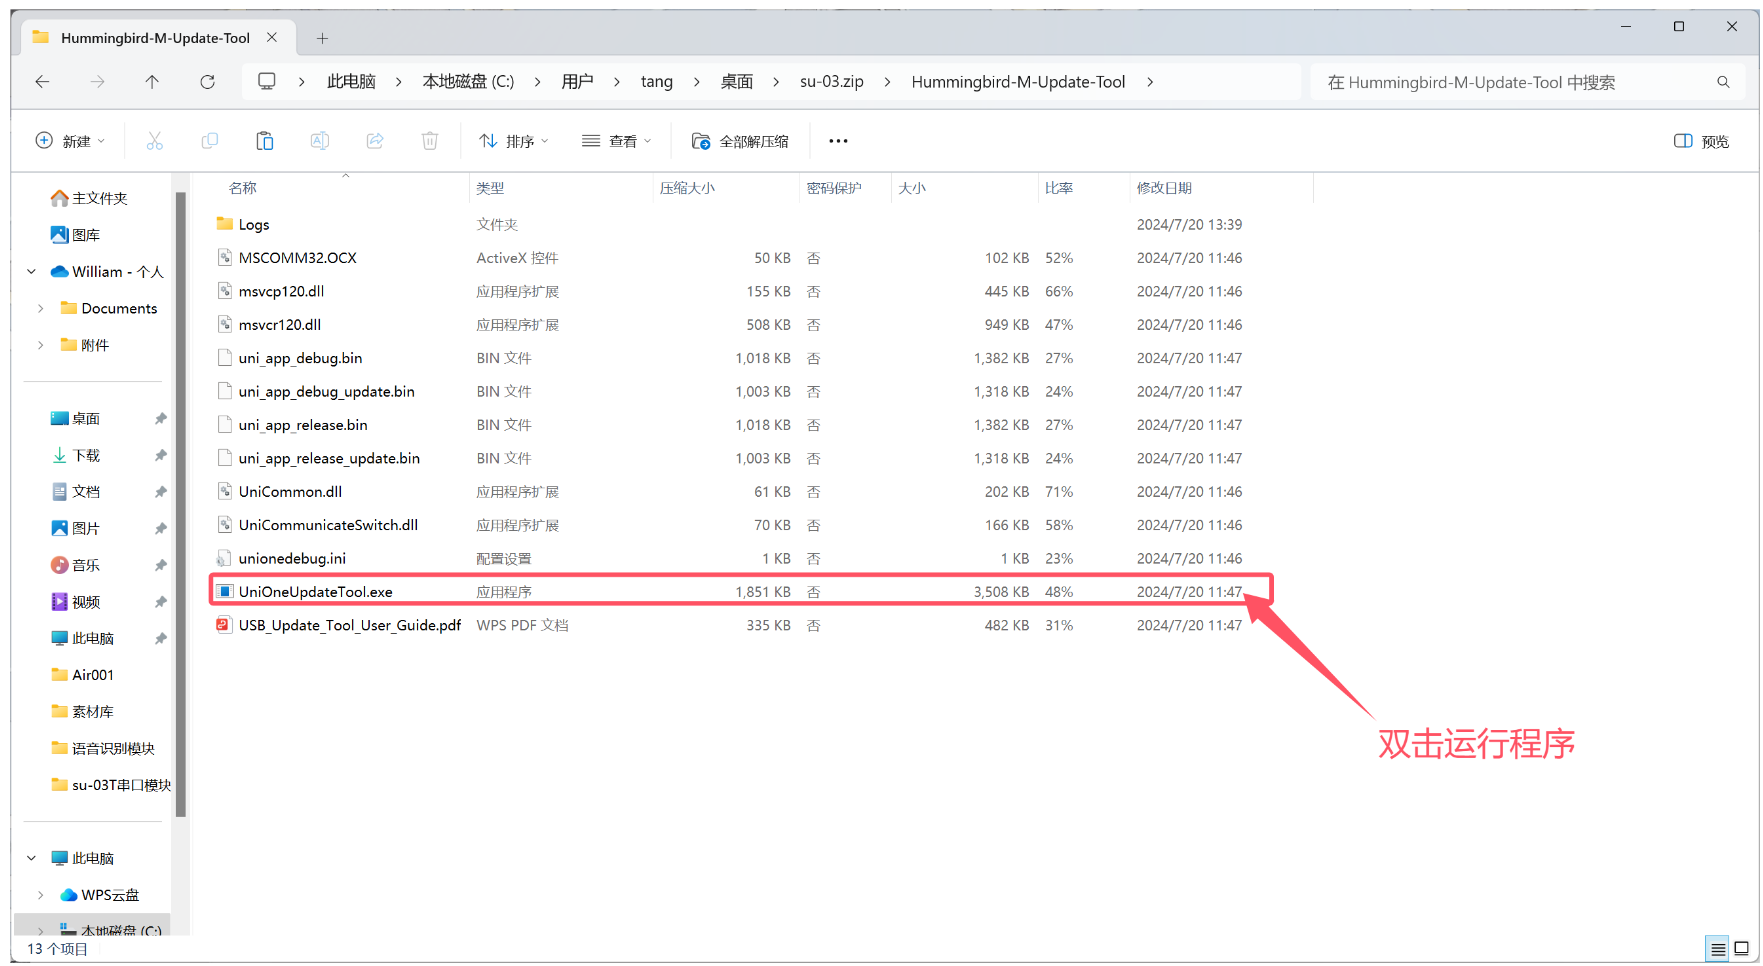
Step 1: Download the file

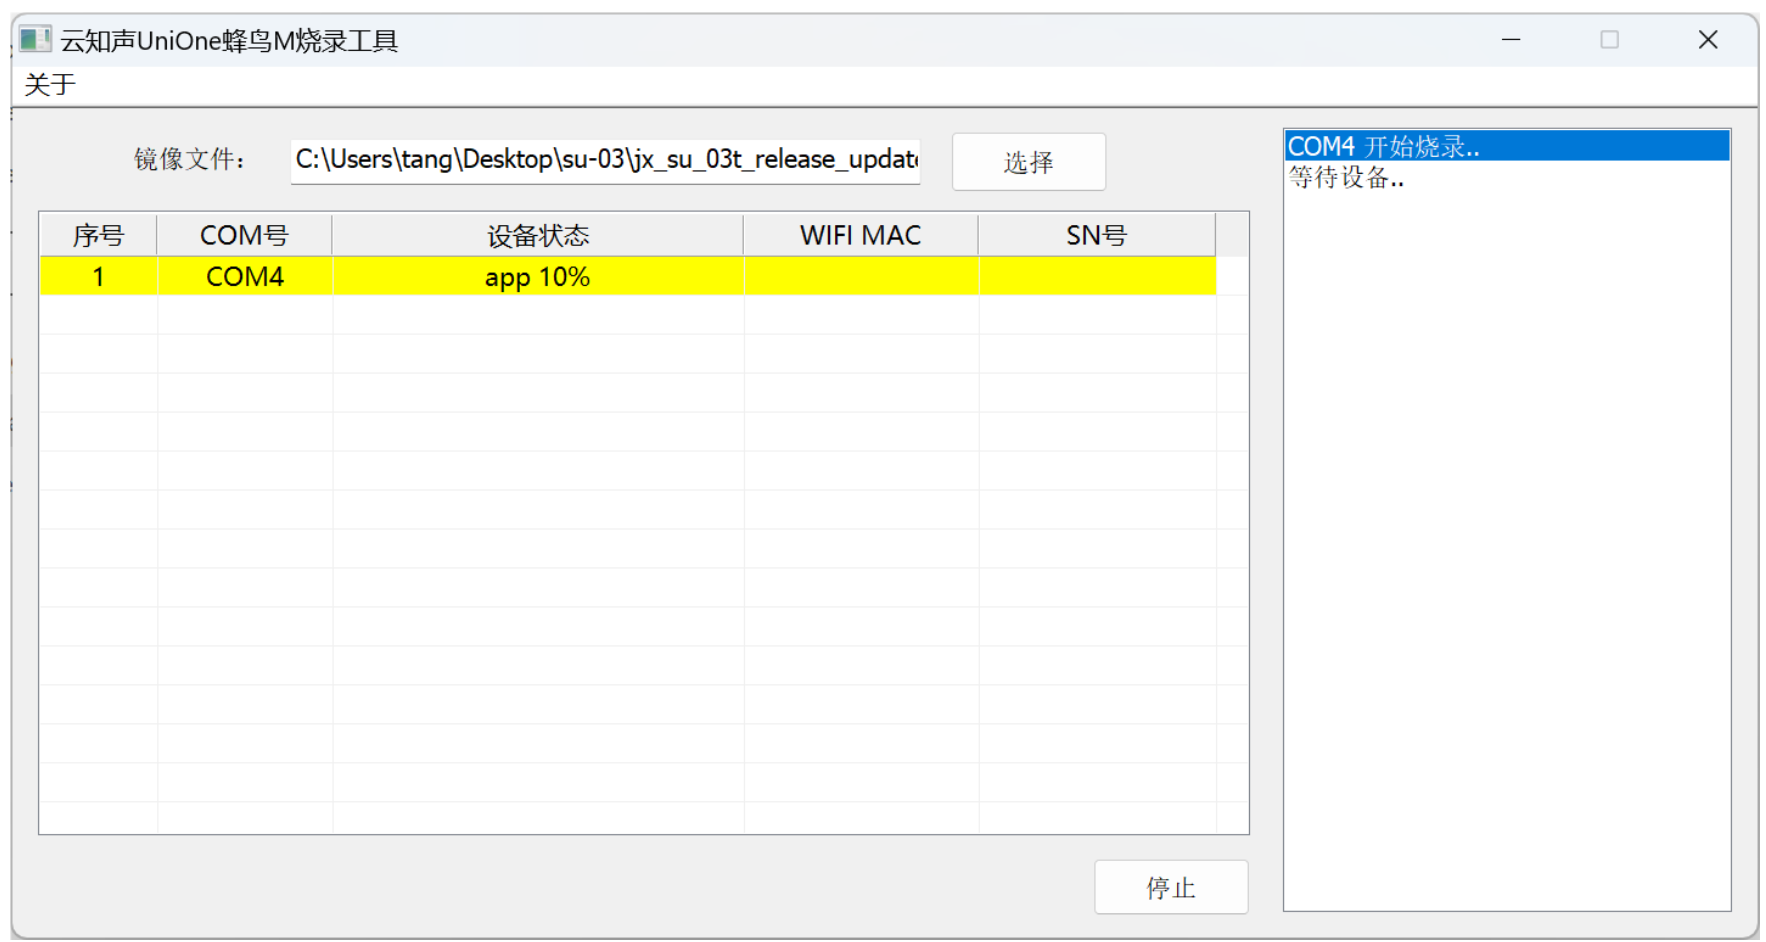
Step 2: Open the burning program
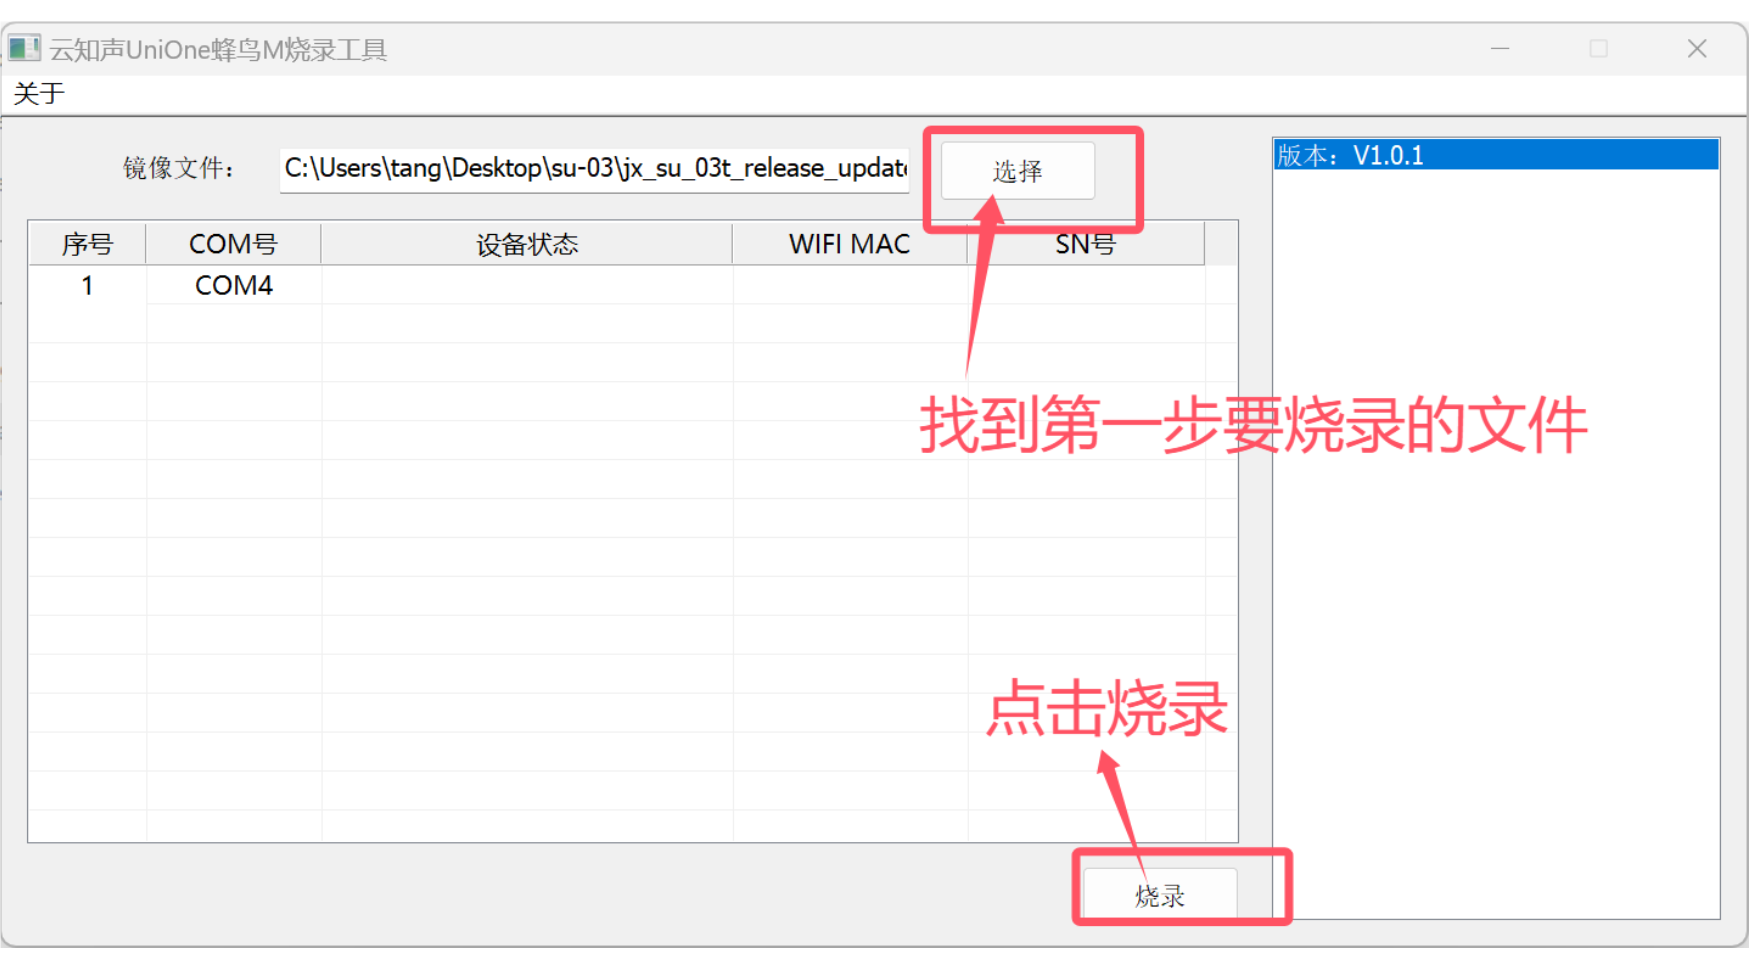
Step 3: Add the files to be burned into the program and click burn
Step 4: Press the module reset button
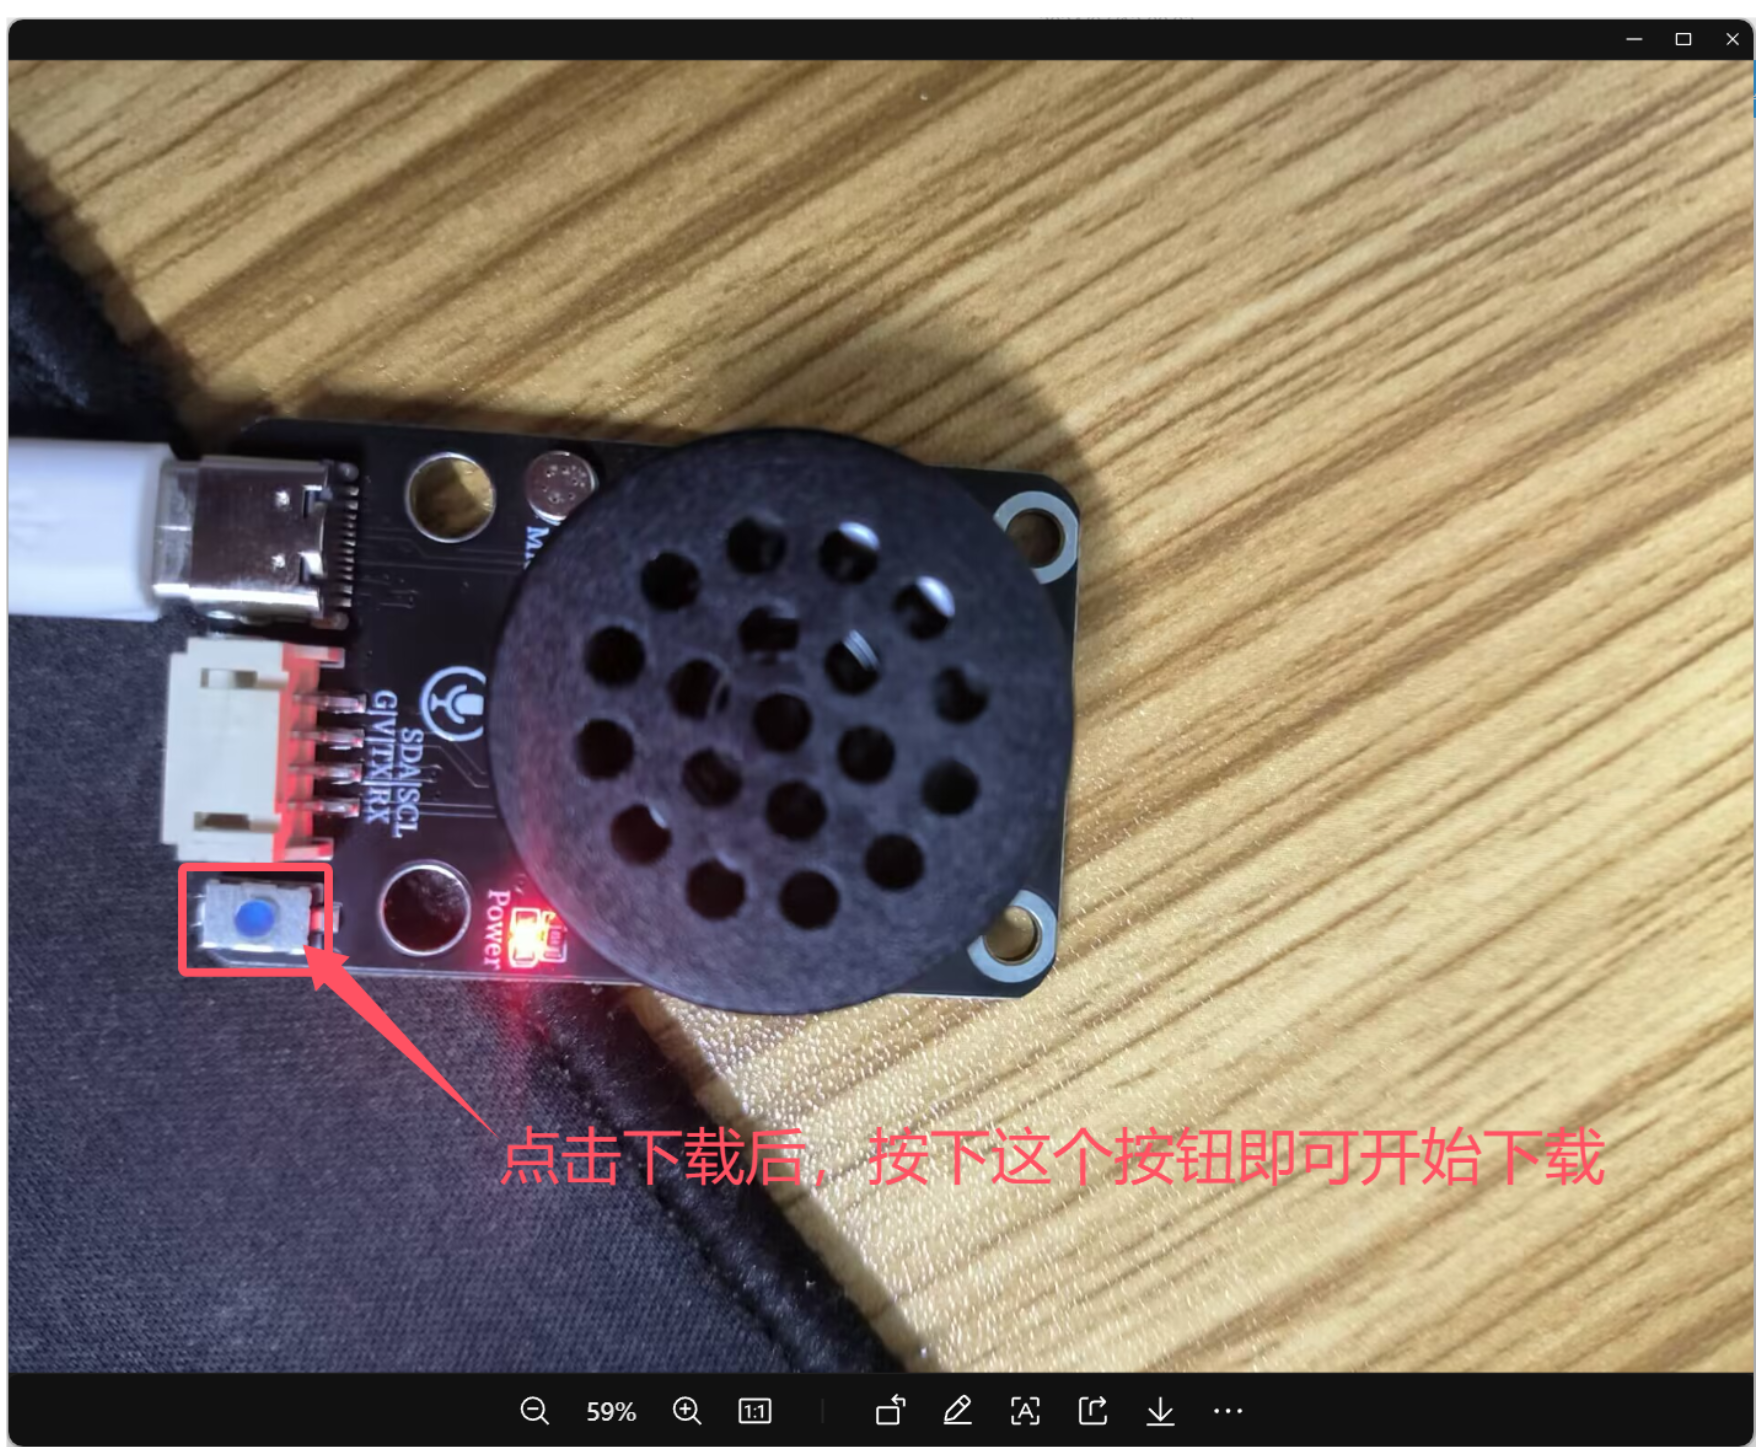
After pressing, observe the app starting to load progress
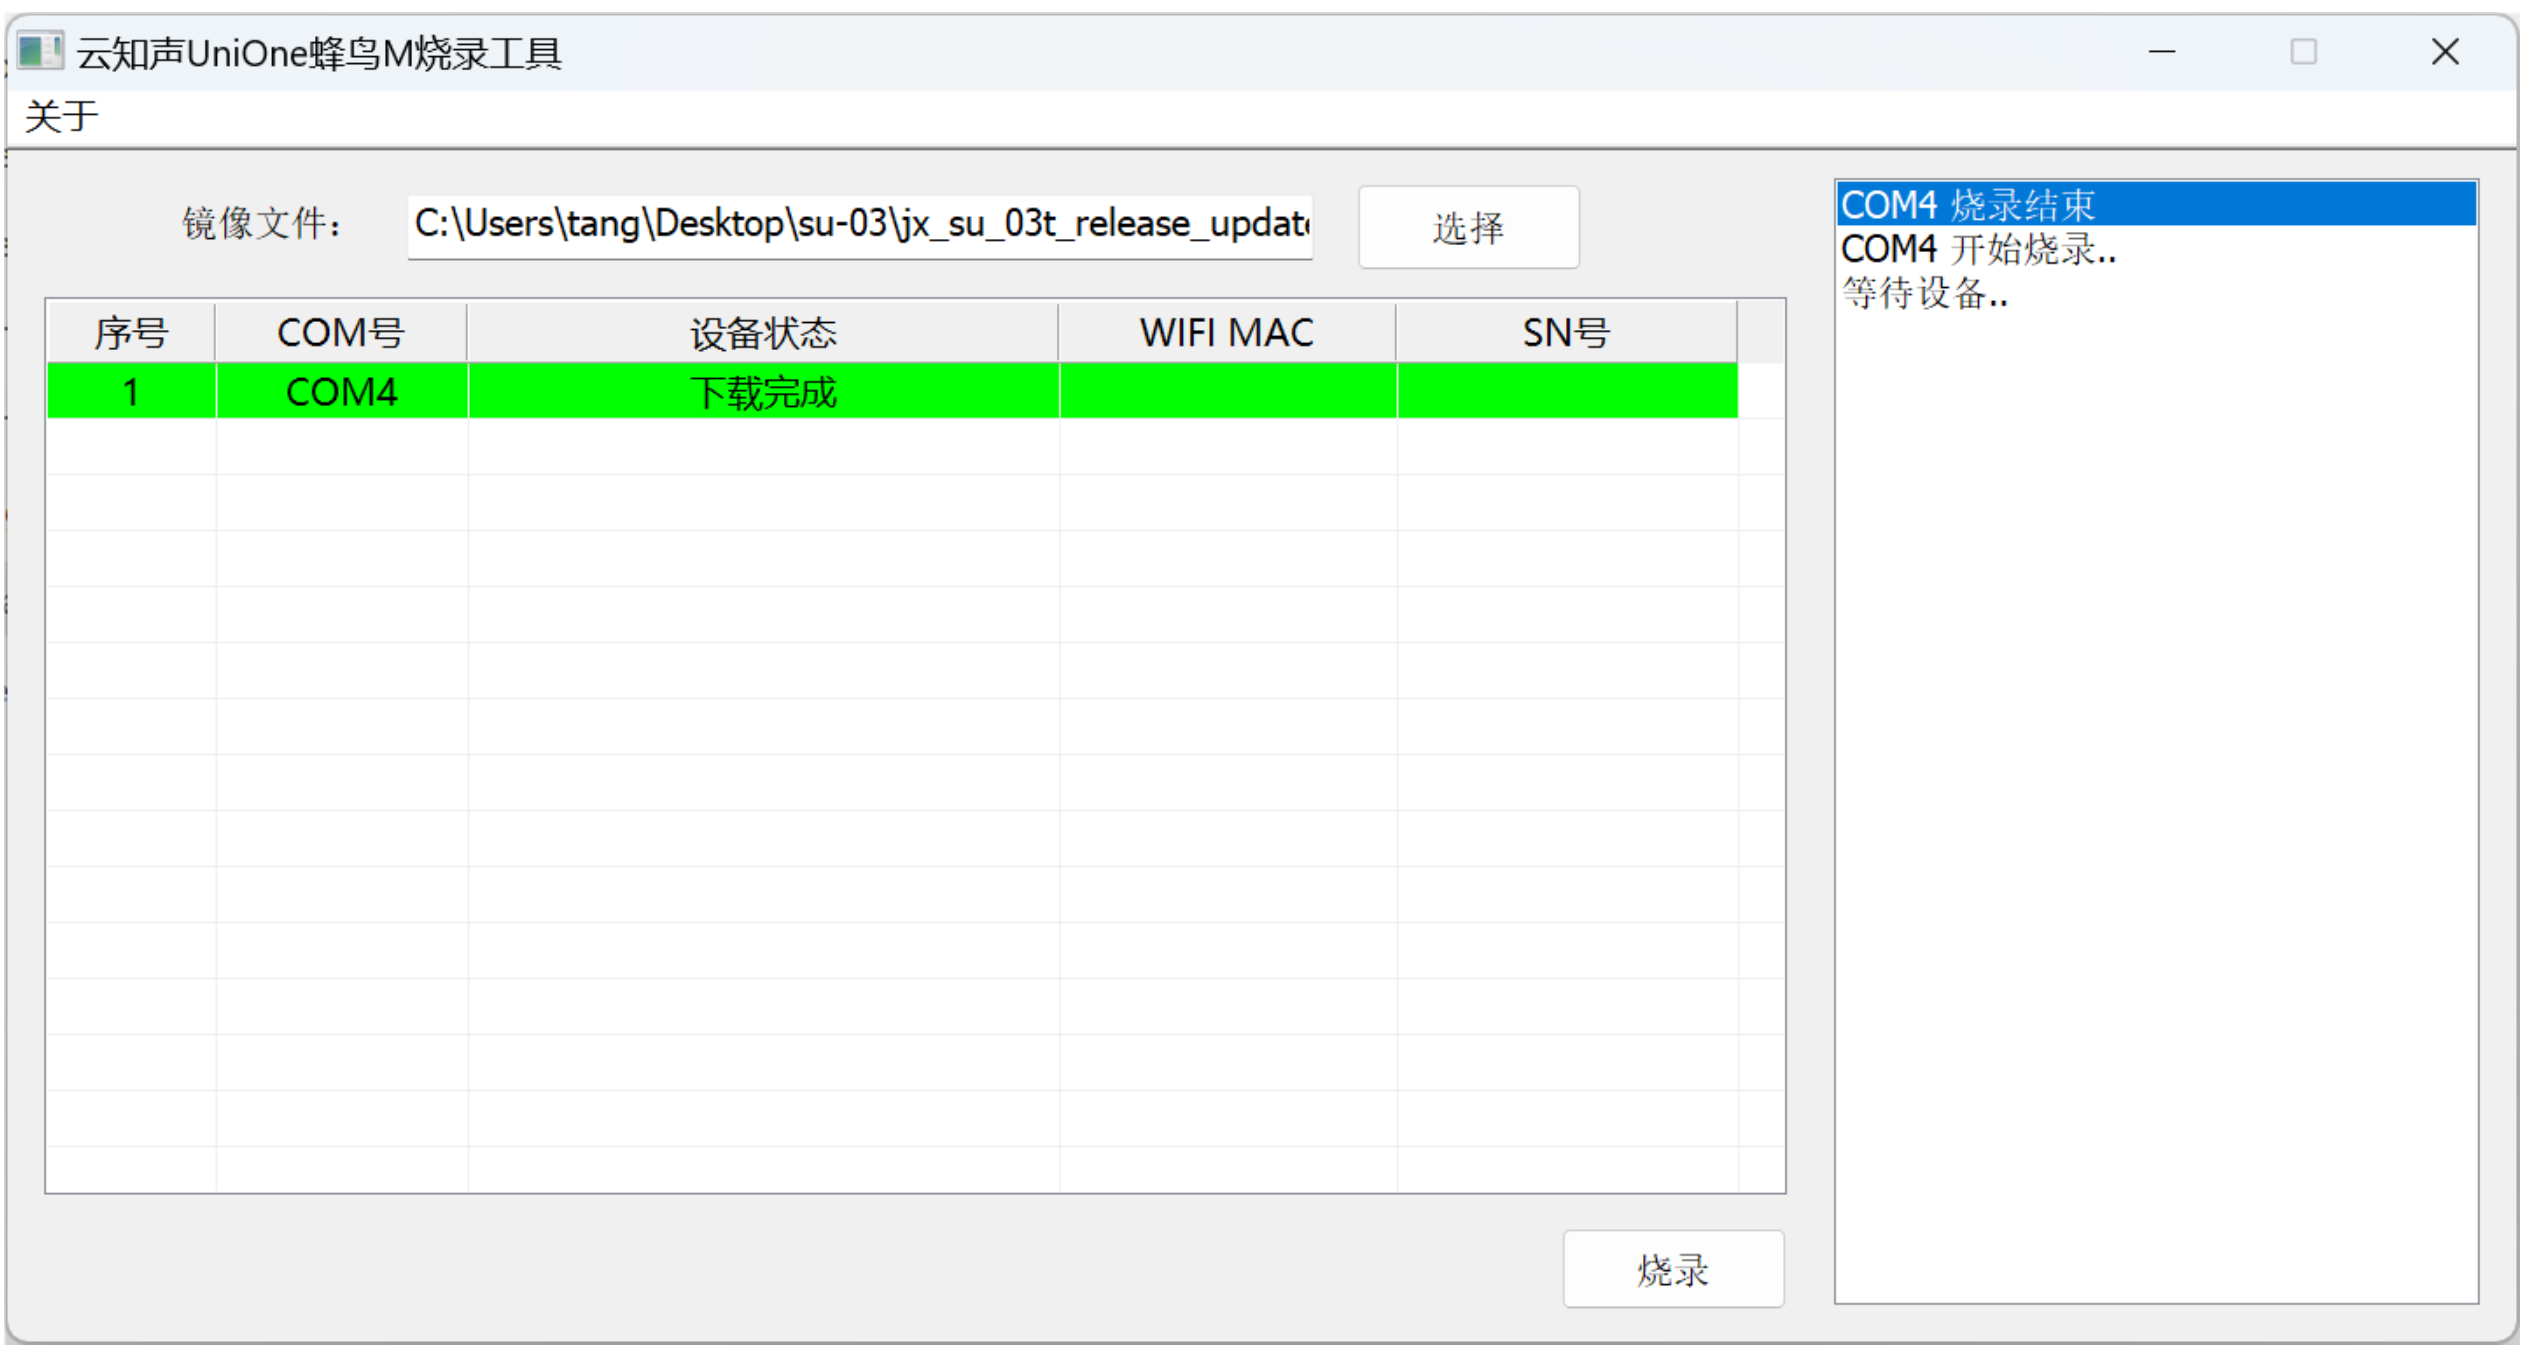
After the download is complete, the module has voice prompts. You can then control the voice module with the UNO development board.
5 of Arduino IDE example program
Attention: If prompted with an error message about the library file during program upload, please import the library file first!
Arduino IDE Library Download and Import Tutorial:Click to view
Example program (UNO development board):
volatile int yuyin;
#include <SoftwareSerial.h>

// 串口发送消息最大长度
#define UART_SEND_MAX      32
#define UART_MSG_HEAD_LEN  2
#define UART_MSG_FOOT_LEN  2
// 串口发送消息号
#define U_MSG_bozhensgshu      1
#define U_MSG_boxiaoshu      2
#define U_MSG_bobao1      3
#define U_MSG_bobao2      4
#define U_MSG_bobao3      5
#define U_MSG_bobao4      6
#define U_MSG_bobao5      7
#define U_MSG_bobao6      8
#define U_MSG_bobao7      9
#define U_MSG_bobao8      10
#define U_MSG_bobao9      11
#define U_MSG_bobao10      12
#define U_MSG_bobao11      13
#define U_MSG_bobao12      14
#define U_MSG_bobao13      15
#define U_MSG_bobao14      16
#define U_MSG_bobao15      17
#define U_MSG_bobao16      18
#define U_MSG_bobao17      19
#define U_MSG_bobao18      20
#define U_MSG_bobao19      21
#define U_MSG_bobao20      22
#define U_MSG_bobao21      23
#define U_MSG_bobao22      24
#define U_MSG_bobao23      25
#define U_MSG_bobao24      26
#define U_MSG_bobao25      27
#define U_MSG_bobao26      28
#define U_MSG_bobao27      29
#define U_MSG_bobao28      30
#define U_MSG_bobao29      31
#define U_MSG_bobao30      32
#define U_MSG_bobao31      33
#define U_MSG_bobao32      34
#define U_MSG_bobao33      35
#define U_MSG_bobao34      36
// 串口消息参数类型
typedef union {
  double d_double;
  int d_int;
  unsigned char d_ucs[8];
  char d_char;
  unsigned char d_uchar;
  unsigned long d_long;
  short d_short;
  float d_float;}uart_param_t;

SoftwareSerial mySerial(5,6);
// 串口发送函数实现
void _uart_send_impl(unsigned char* buff, int len) {
  // TODO: 调用项目实际的串口发送函数
  for(int i=0;i<len;i++)
{
   mySerial.write (*buff++);
}
}

// 串口通信消息尾
const unsigned char g_uart_send_foot[] = {
  0x55, 0xaa
};

// 十六位整数转32位整数
void _int16_to_int32(uart_param_t* param) {
  if (sizeof(int) >= 4)
    return;
  unsigned long value = param->d_long;
  unsigned long sign = (value >> 15) & 1;
  unsigned long v = value;
  if (sign)
    v = 0xFFFF0000 | value;
  uart_param_t p;  p.d_long = v;
  param->d_ucs[0] = p.d_ucs[0];
  param->d_ucs[1] = p.d_ucs[1];
  param->d_ucs[2] = p.d_ucs[2];
  param->d_ucs[3] = p.d_ucs[3];
}

// 浮点数转双精度
void _float_to_double(uart_param_t* param) {
  if (sizeof(int) >= 4)
    return;
  unsigned long value = param->d_long;
  unsigned long sign = value >> 31;
  unsigned long M = value & 0x007FFFFF;
  unsigned long e =  ((value >> 23 ) & 0xFF) - 127 + 1023;
  uart_param_t p0, p1;
  p1.d_long = ((sign & 1) << 31) | ((e & 0x7FF) << 20) | (M >> 3);
  param->d_ucs[0] = p0.d_ucs[0];
  param->d_ucs[1] = p0.d_ucs[1];
  param->d_ucs[2] = p0.d_ucs[2];
  param->d_ucs[3] = p0.d_ucs[3];
  param->d_ucs[4] = p1.d_ucs[0];
  param->d_ucs[5] = p1.d_ucs[1];
  param->d_ucs[6] = p1.d_ucs[2];
  param->d_ucs[7] = p1.d_ucs[3];
}

// 串口通信消息头
const unsigned char g_uart_send_head[] = {
  0xaa, 0x55
};

void setup(){
  Serial.begin(9600);
  pinMode(13, OUTPUT);
  digitalWrite(13,LOW);
  mySerial.begin(9600);
  yuyin = 0;
  Serial.begin(9600);
}

void loop(){
  //你好小爱唤醒语音识别模块
  //语音识别模块RX引脚接uno开发D5引脚,TX引脚接uno开发D6引脚

  if (mySerial.available() > 0) {
  yuyin = mySerial.read();
   Serial.println(yuyin,HEX);
  }
  if (yuyin == 1) {
    yuyin = 0;
    Serial.println("开灯");
    digitalWrite(13,HIGH);

  } else if (yuyin == 2) {
    yuyin = 0;
    Serial.println("关灯 ");
    digitalWrite(13,LOW);
  }

}
6, ESP32 Python Example (for Mixly IDE/Misashi)
Choose the development board Python ESP32 [ESP32 Generic(4MB)] and upload in code mode
Attention: If prompted with an error message about the library file during program upload, please import the library file first!
Download and import tutorial for Mixly IDE ESP32 library:Click to view
Example program (ESP32-Python):
import machine
import time
uart1=machine.UART(1, tx=17, rx=16, baudrate=9600)
pin2 = machine.Pin(2, machine.Pin.OUT)
while True:
if uart1.any():
data = uart1.read()
if data == b'\x01':
pin2.value(1)
print('111', 'Mixly')
time.sleep_ms(100)
elif data == b'\x02':
pin2.value(0)
print('nnnn', 'Mixly')
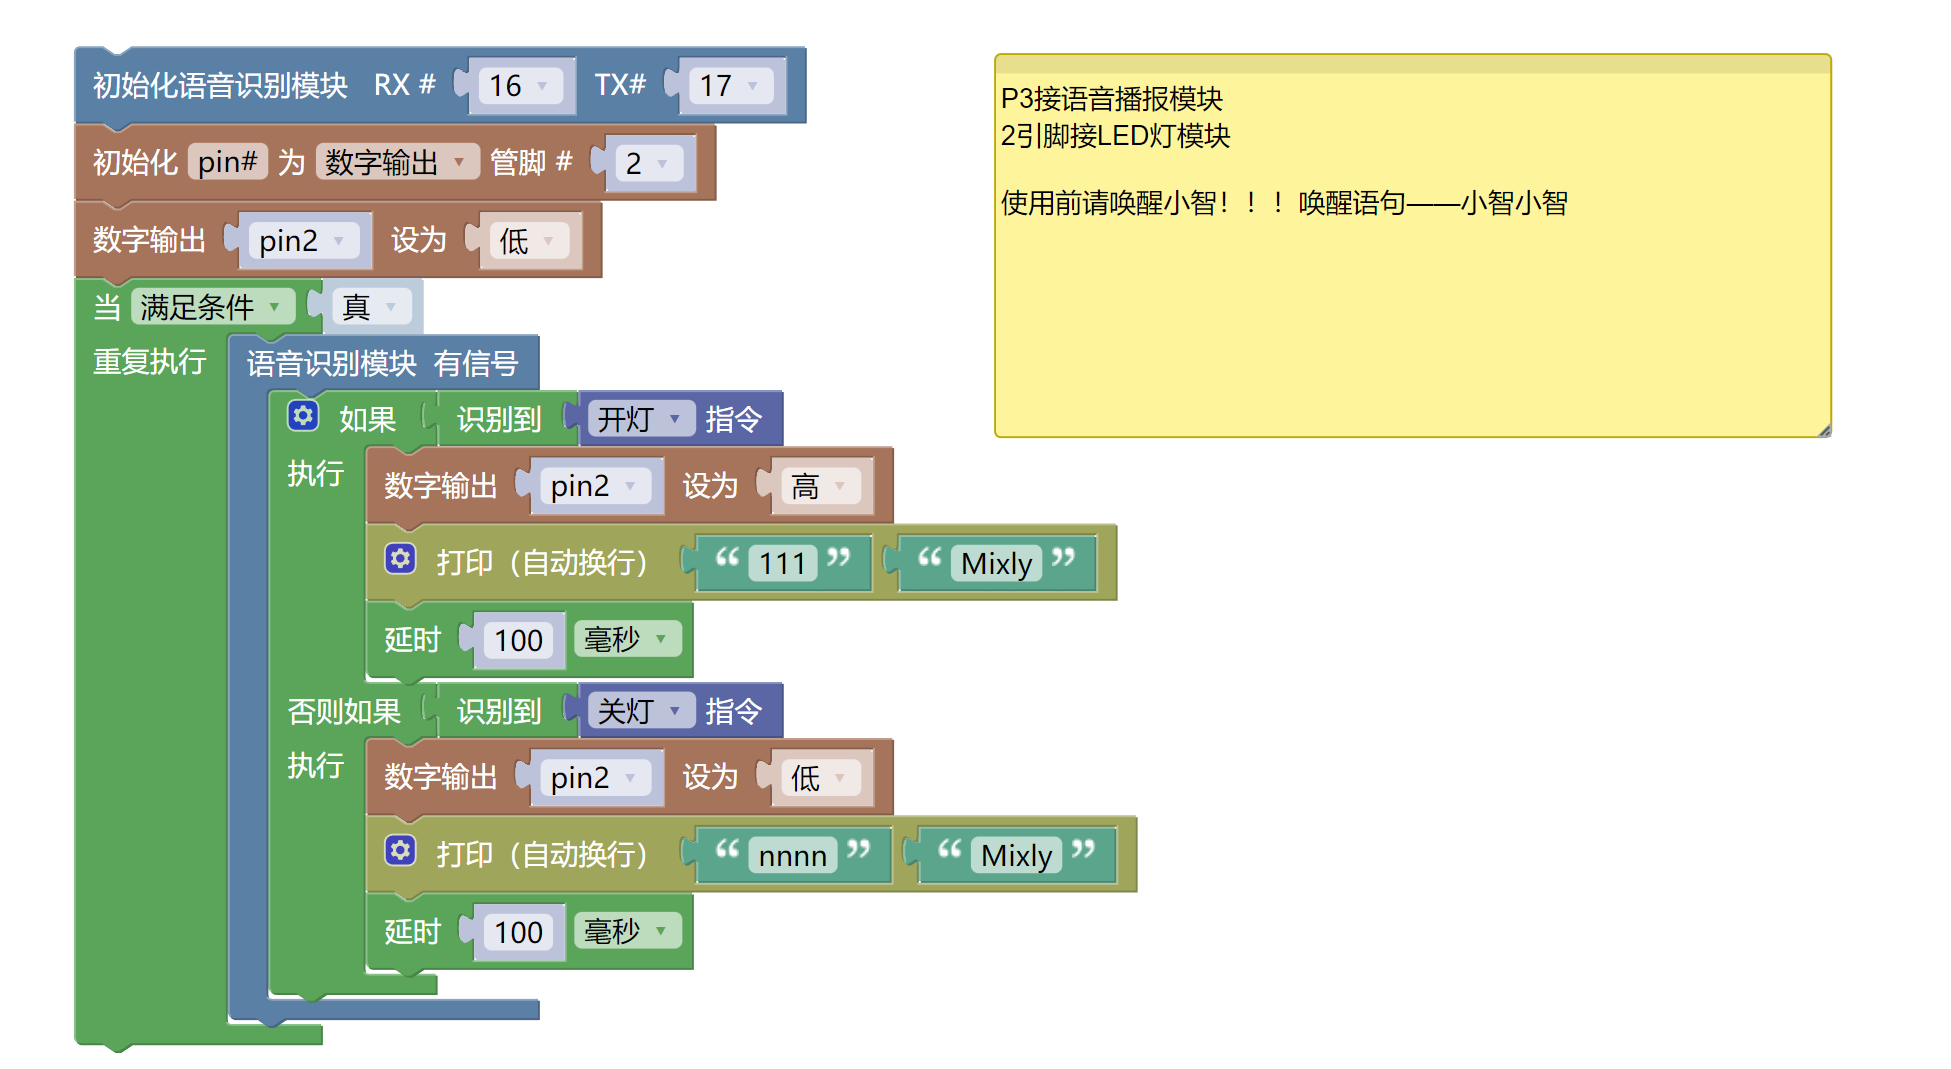
time.sleep_ms(100)7, Mixly example program (graphical language)
Example program (UNO development board):Click to download
Attention: If prompted with an error message about the library file during program upload, please import the library file first!
Download and import tutorial of Mixly IDE Arduino library:Click to view

Example Program (ESP32 Development Board):Click to download
Attention: If prompted with an error message about the library file during program upload, please import the library file first!
Download and import tutorial for Mixly IDE ESP32 library:Click to view
8. Setting up the Test Environment
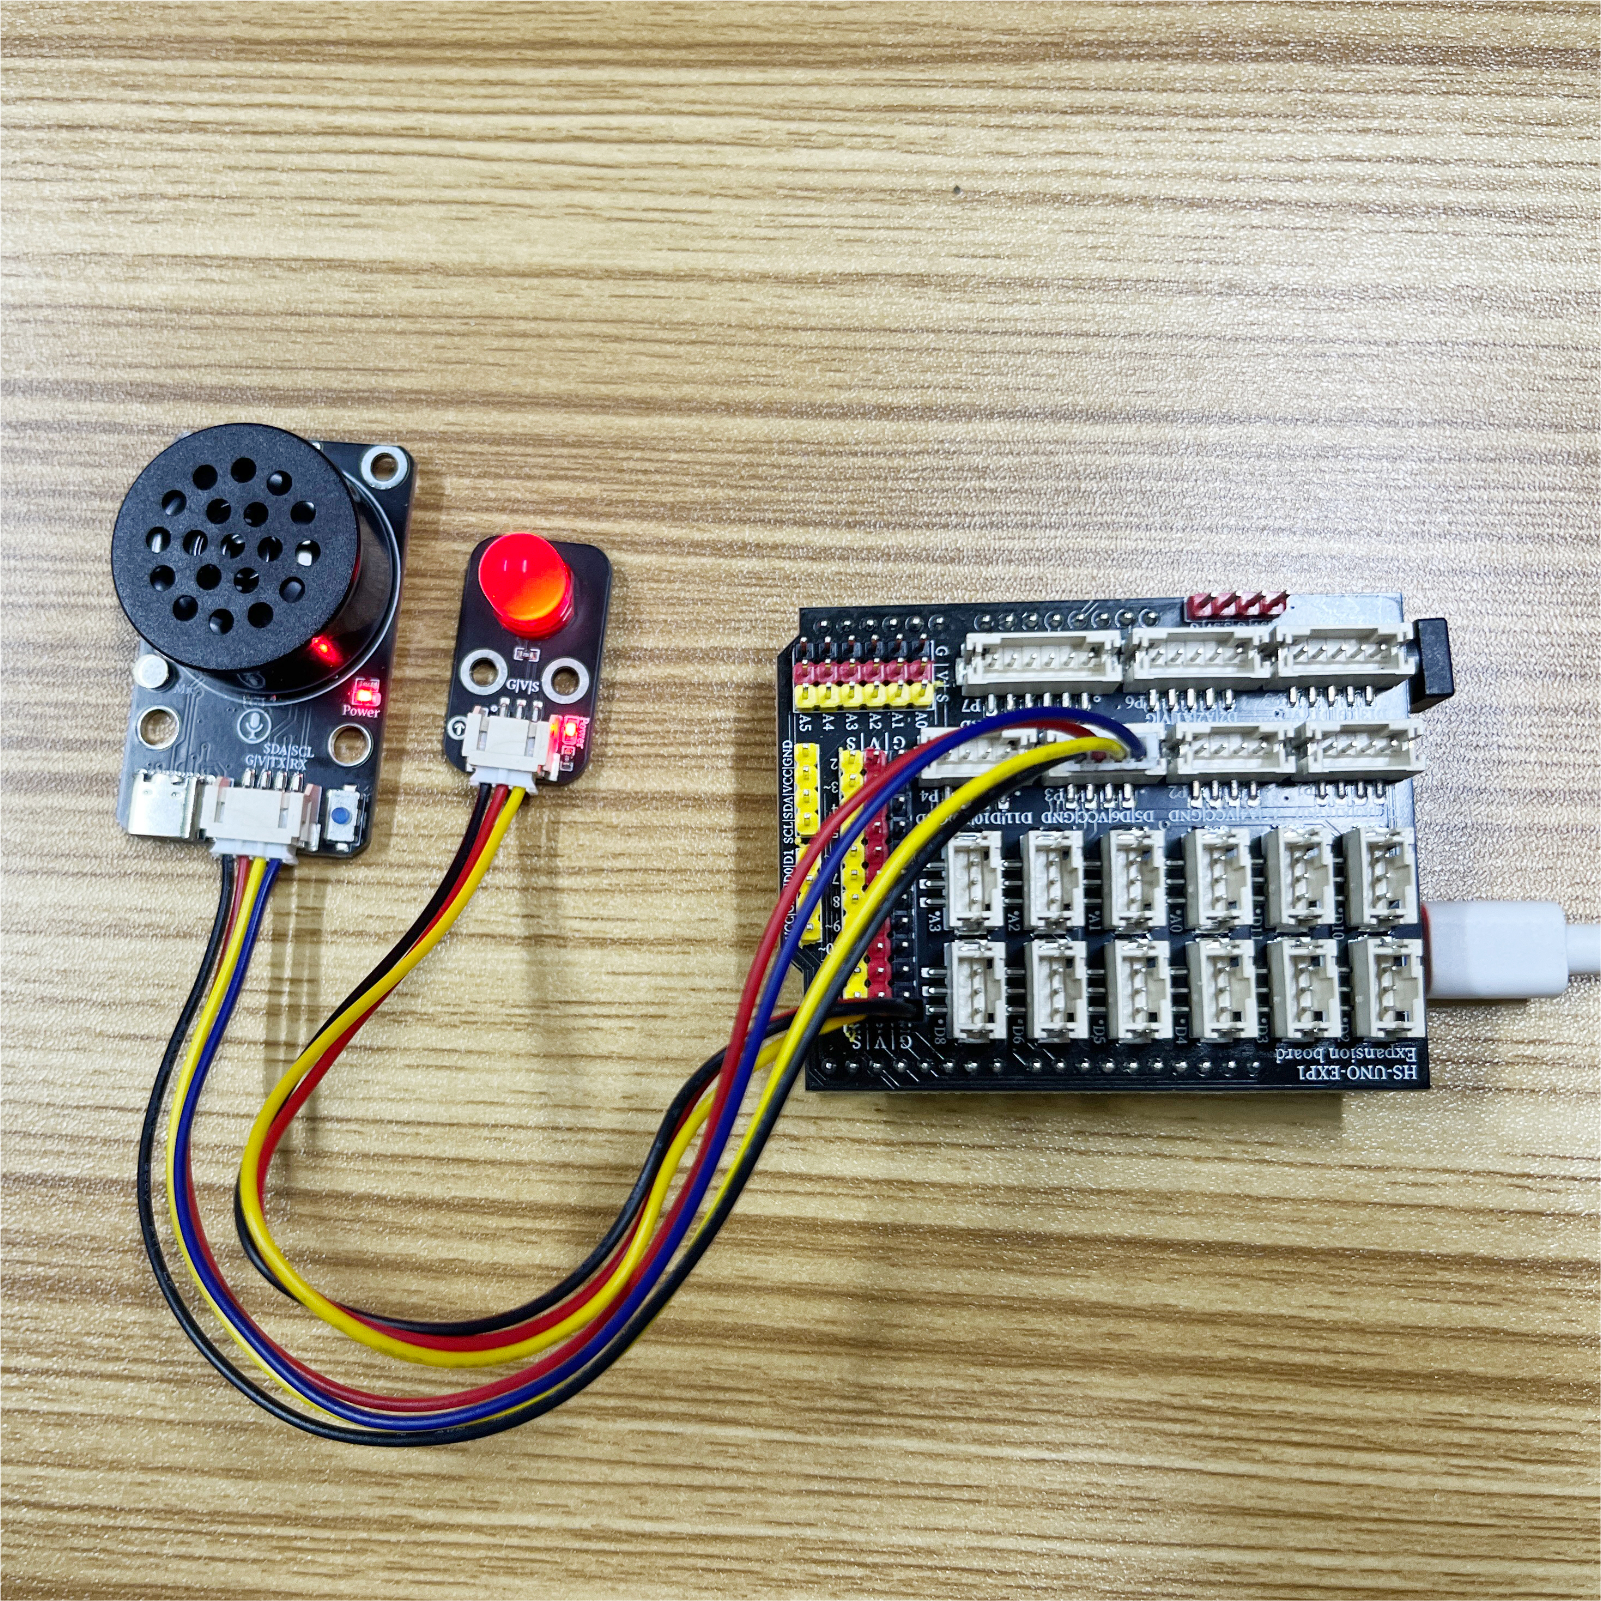
Arduino UNO Test Environment Setup
Prepare Components:
UNO - R3 Development Board *1
HS-UNO EXP1 Expansion Board *1
USB TYPE-C DATA CABLE *1
LED light module *1
SU-03T voice recognition control module (HS-S57-L) *1
PH2.0 4P socket to Dupont wire *1 or PH2.0 4P double-ended socket wire *1
Circuit wiring diagram:

ESP32 Test Environment Setup
Prepare Components:Pending update...
Circuit wiring diagram:Pending update...
9, Video tutorial
Video tutorial:Click to view (Learn how to customize the voice statements and burn the firmware)
10, Test conclusion
Arduino UNO test results:
After the device is connected and the program is burned to the development board, you can communicate with the SU-03T voice recognition control module.
All reference materials:Click to download