
1. Introduction
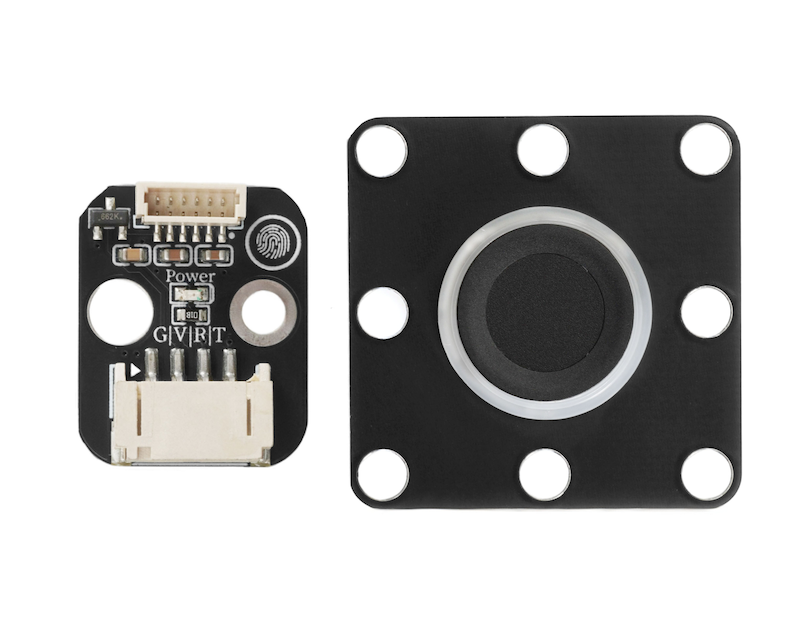
A fingerprint sensor is an electronic device that collects and identifies unique texture information of human fingerprints to achieve identity verification or command triggering, with the core feature being the "uniqueness" (each person's and each finger's fingerprint texture is different) and "stability" (fingerprint does not change much after adulthood) of biological characteristics, completing accurate identity recognition, and widely used in security, consumer electronics, smart home and other fields.
2. Schematic
Fingerprint sensor-HS-S74-PL SchematicClick to view
Module Parameters
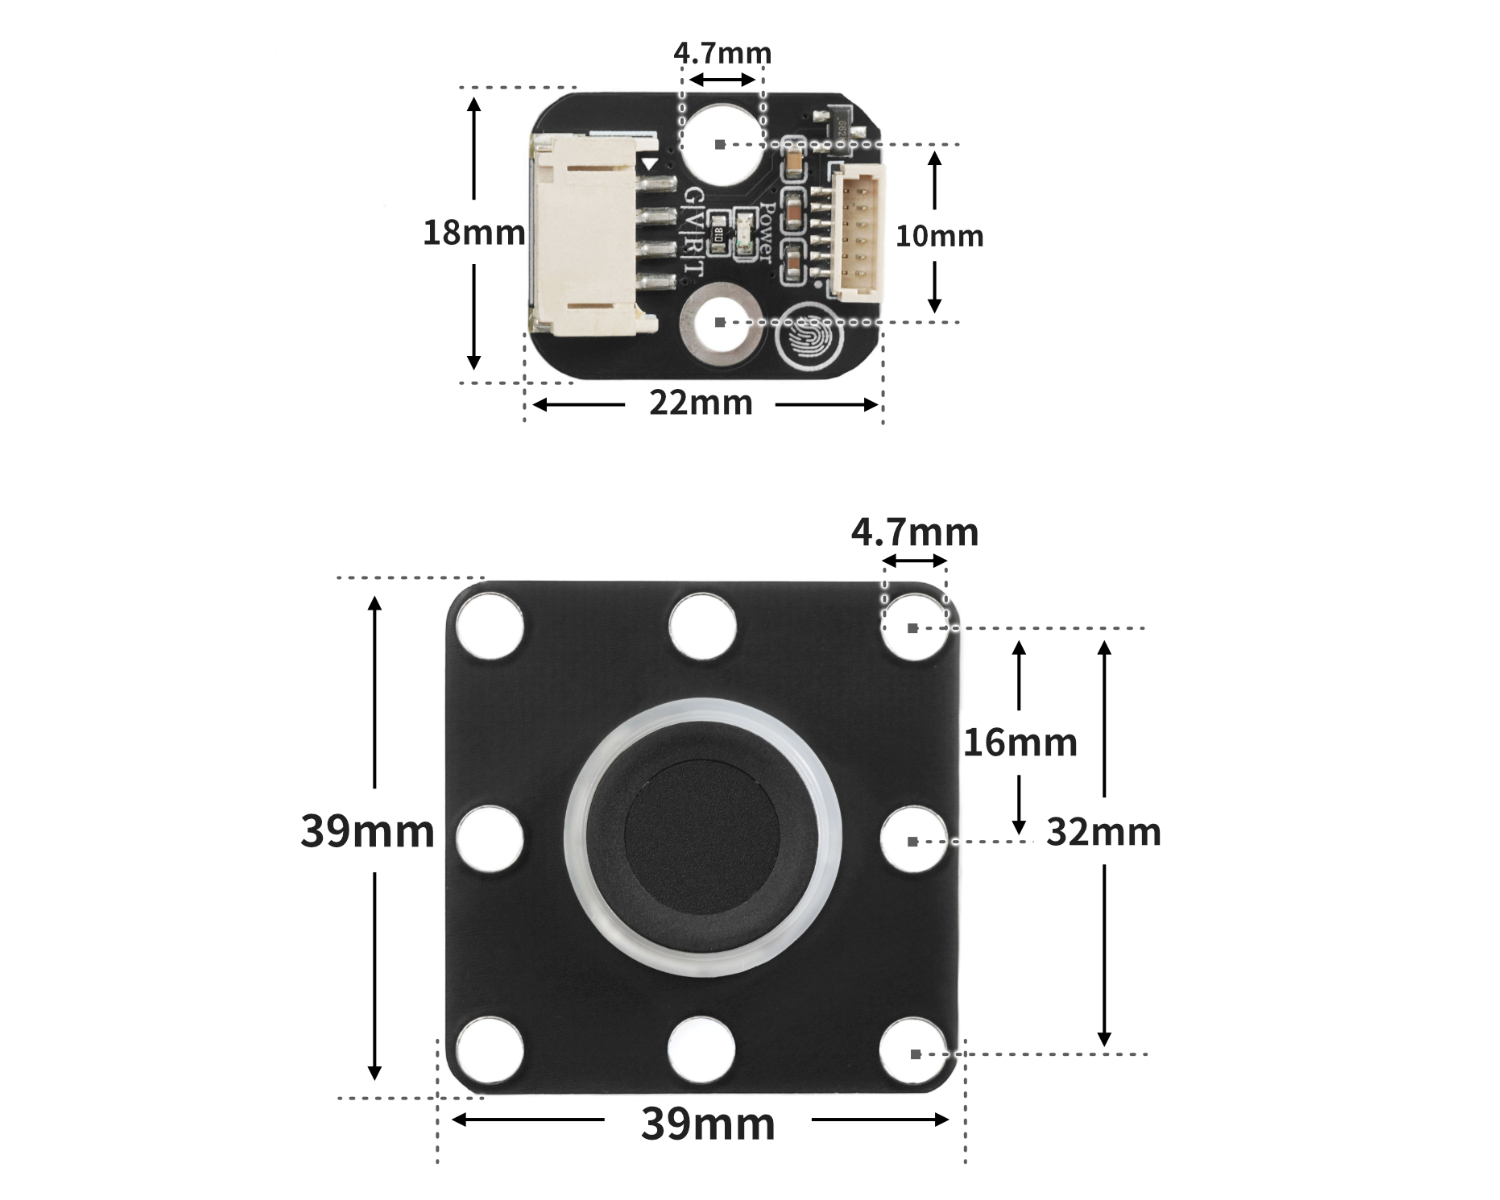
Pin Name | description |
|---|---|
G | GND (Negative Power Input) |
V | VCC (Positive Power Input) |
R | Fingerprint Module Data Interface Pin |
T | Fingerprint module data send pin |
Supply voltage: 3.3V-5V
Connection method: PH2.0 4P terminal wire
Installation method: Building block fixed/screw fixed
4, Circuit Board Size
5 of Arduino IDE example program
Attention: If prompted with an error message about the library file during program upload, please import the library file first!
Arduino IDE Library Download and Import Tutorial:Click to view
Example program (UNO development board):
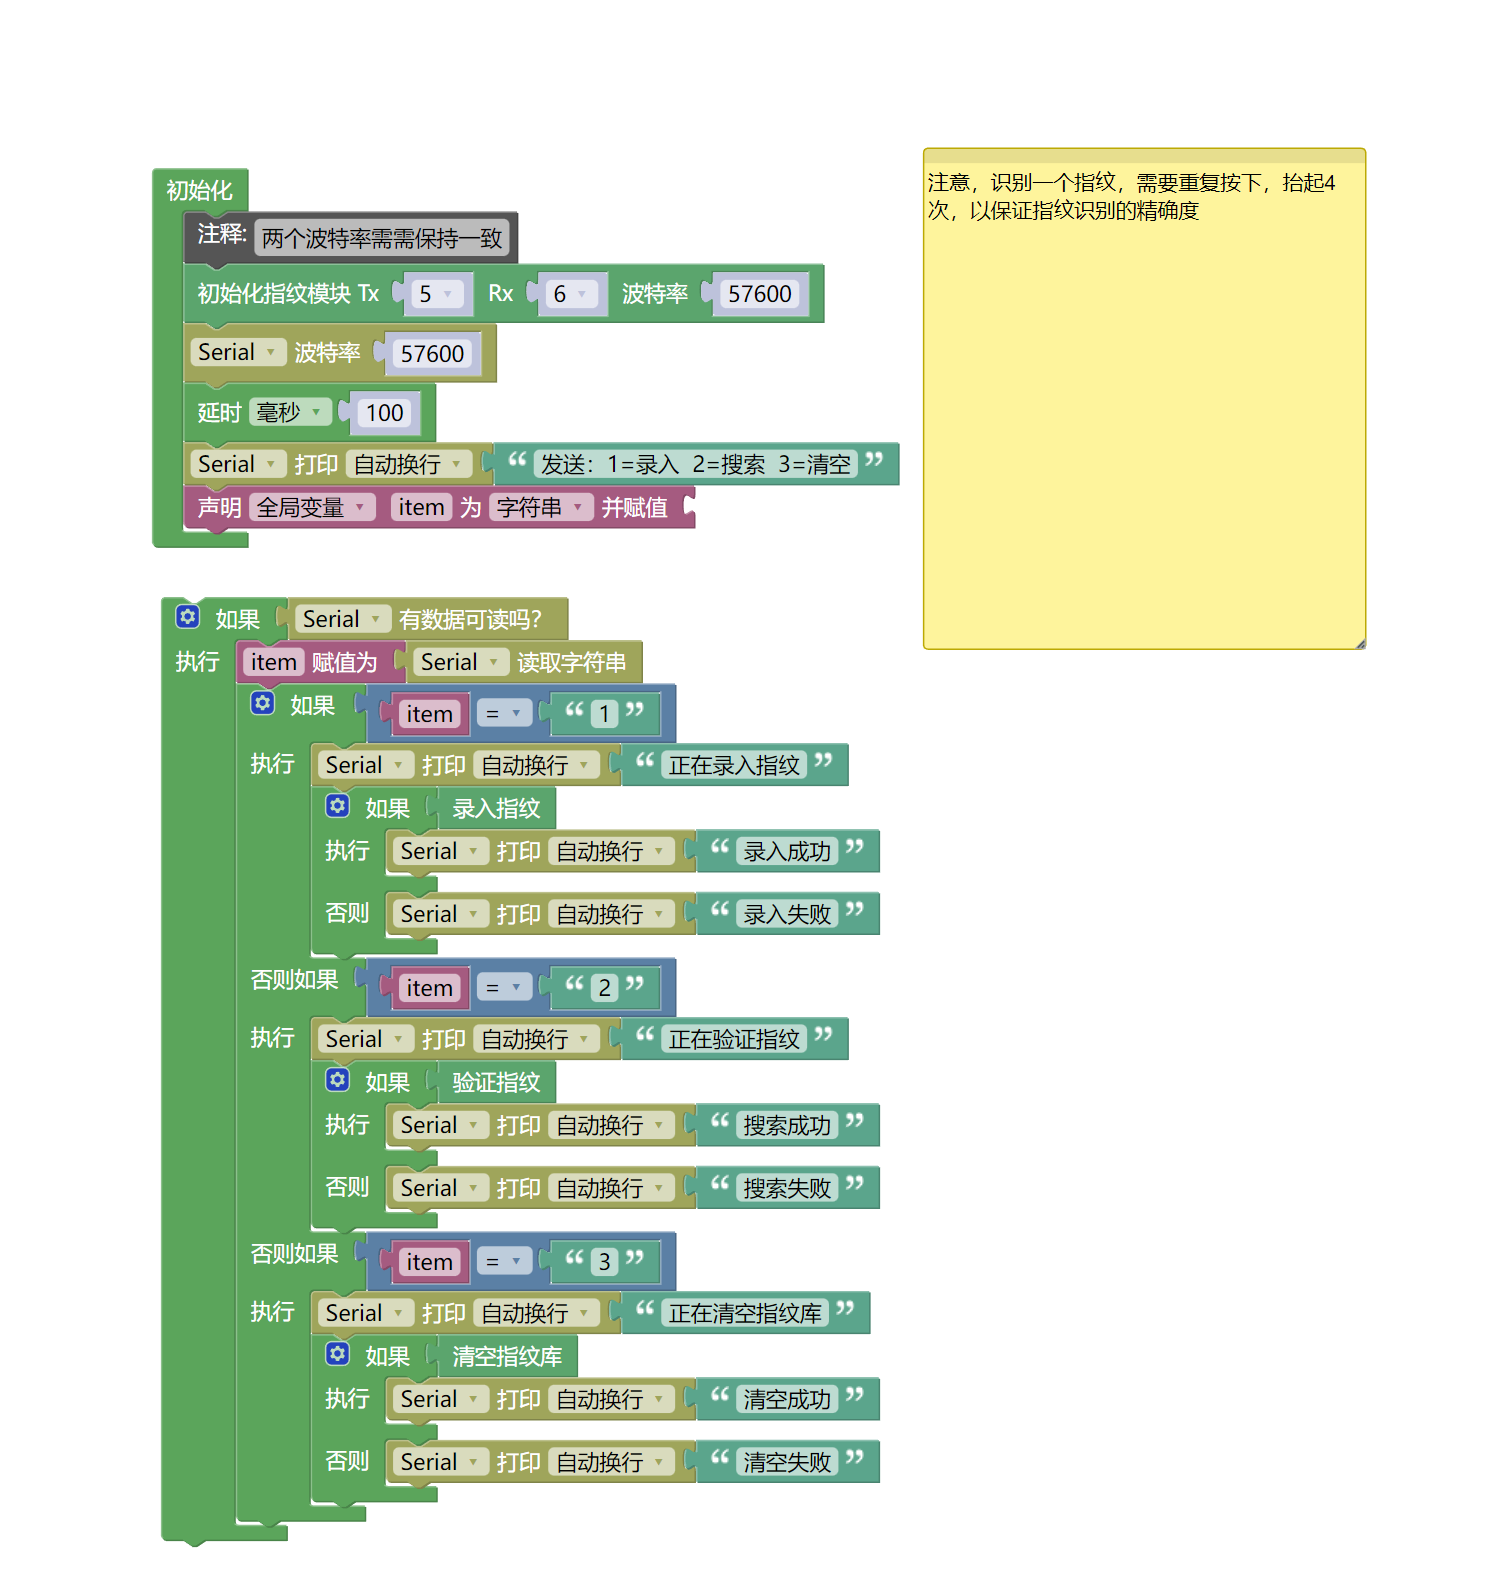
String item;
#include "Hello_STEM_ZW101.h"
FingerprintZW101 finger;
void setup(){
finger.begin(5,6,57600);
Serial.begin(57600);
item = "";
//两个波特率需需保持一致
delay(100);
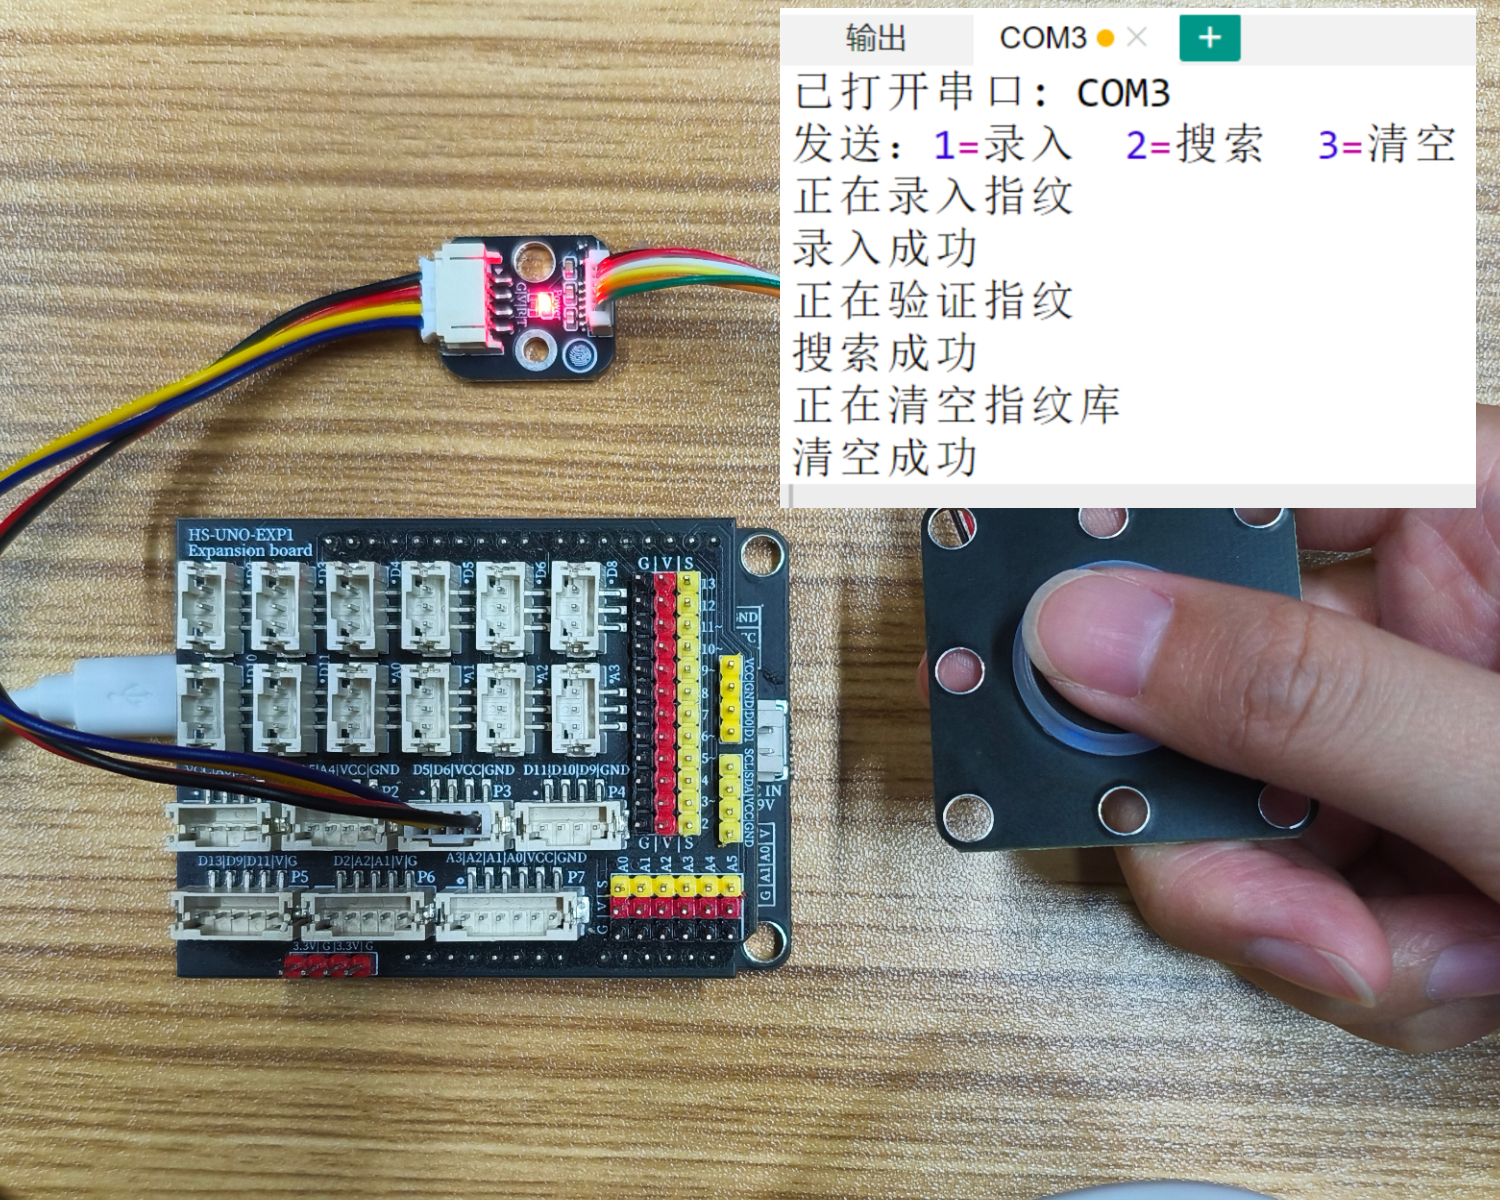
Serial.println("发送:1=录入 2=搜索 3=清空");
}
void loop(){
if (Serial.available()) {
item = Serial.readString();
if (item == "1") {
Serial.println("正在录入指纹");
if (finger.registerFinger()) {
Serial.println("录入成功");
} else {
Serial.println("录入失败");
}
} else if (item == "2") {
Serial.println("正在验证指纹");
if (finger.searchFinger()) {
Serial.println("搜索成功");
} else {
Serial.println("搜索失败");
}
} else if (item == "3") {
Serial.println("正在清空指纹库");
if (finger.clearLibrary()) {
Serial.println("清空成功");
} else {
Serial.println("清空失败");
}
}
}
}6, ESP32 Python Example (for Mixly IDE/Misashi)
Choose the development board Python ESP32 [ESP32 Generic(4MB)] and upload in code mode
Attention: If prompted with an error message about the library file during program upload, please import the library file first!
Download and import tutorial for Mixly IDE ESP32 library:Click to view
Example program (ESP32-Python):
待更新...7, Mixly example program (graphical language)
Example Program (UNO Development Board):Click to download
Attention: If prompted with an error message about the library file during program upload, please import the library file first!
Download and import tutorial of Mixly IDE Arduino library:Click to view
Example Program (ESP32 Development Board):Click to download
Attention: If prompted with an error message about the library file during program upload, please import the library file first!
Download and import tutorial for Mixly IDE ESP32 library:Click to view
Image pending update...
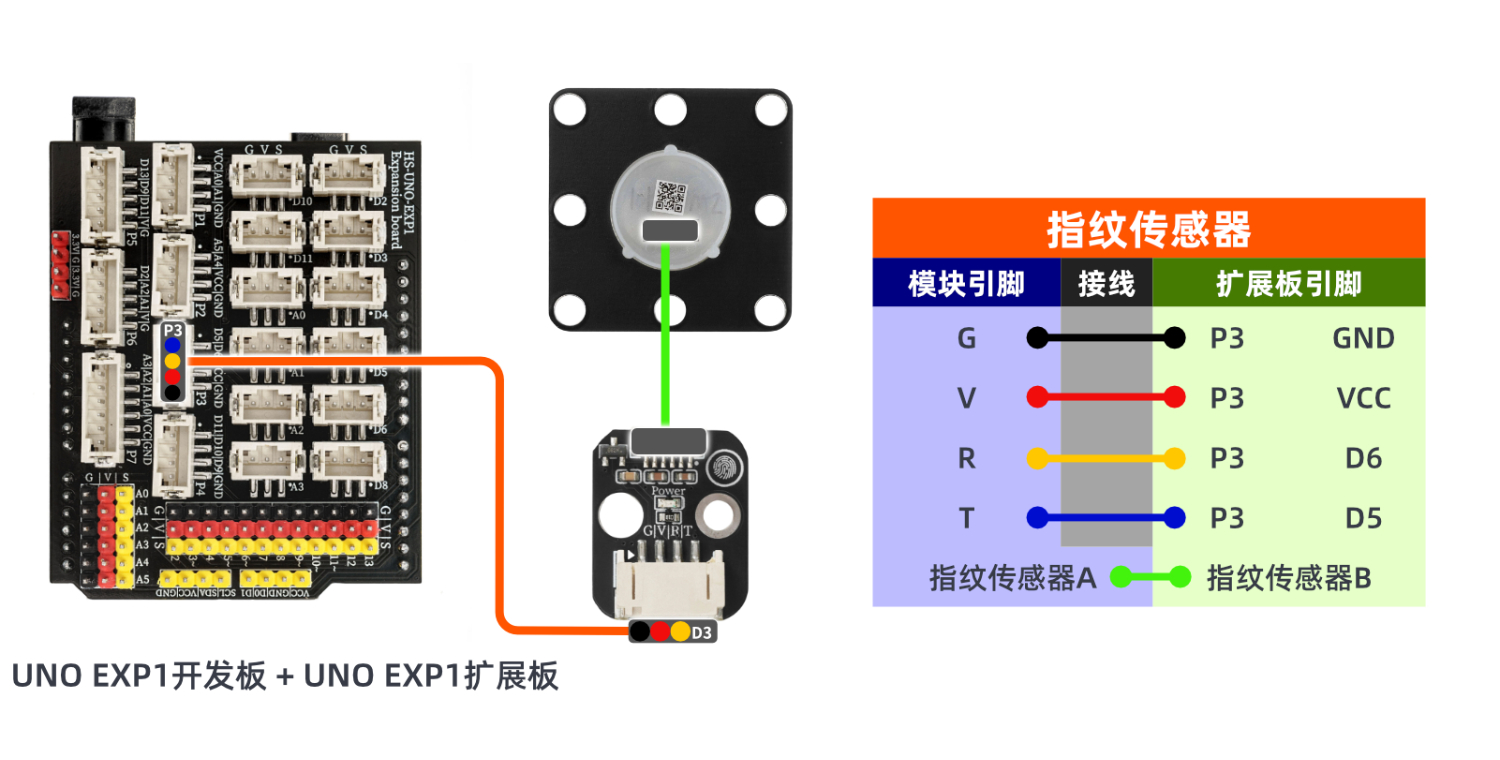
8. Setting up the Test Environment
Arduino UNO Test Environment Setup
Prepare Components:
UNO-R3 Development Board *1
UNO-R3 Expansion Board *1
USB TYPE-C DATA CABLE *1
HS-S74-PL Fingerprint Sensor *1
PH2.0 4P dual headed terminal line *1
Circuit wiring diagram:
ESP32 Test Environment Setup
Prepare Components:Pending update...
Circuit wiring diagram:Pending update...
9, Video tutorial
Arduino UNO video tutorial:Click to view
ESP32 Python Video Tutorial:Click to view
10, Test results
Arduino UNO Test Conclusion:
Send the corresponding number through the serial port to perform the corresponding operation on the module.

ESP32 Test Results:
Pending update...