1. Introduction
MicroSD card communicates with the system via the SD card interface, and implements data read and write operations.SD cards are commonly used in data recorders, such as environmental monitoring equipment.By regularly writing sensor data to the SD card, data can be saved for a long time, which is convenient for subsequent analysis.In scenarios where a large amount of data needs to be stored, an SD card is an ideal choice.For example, in IoT devices, SD cards can be used to store configuration files, log files, and so on.
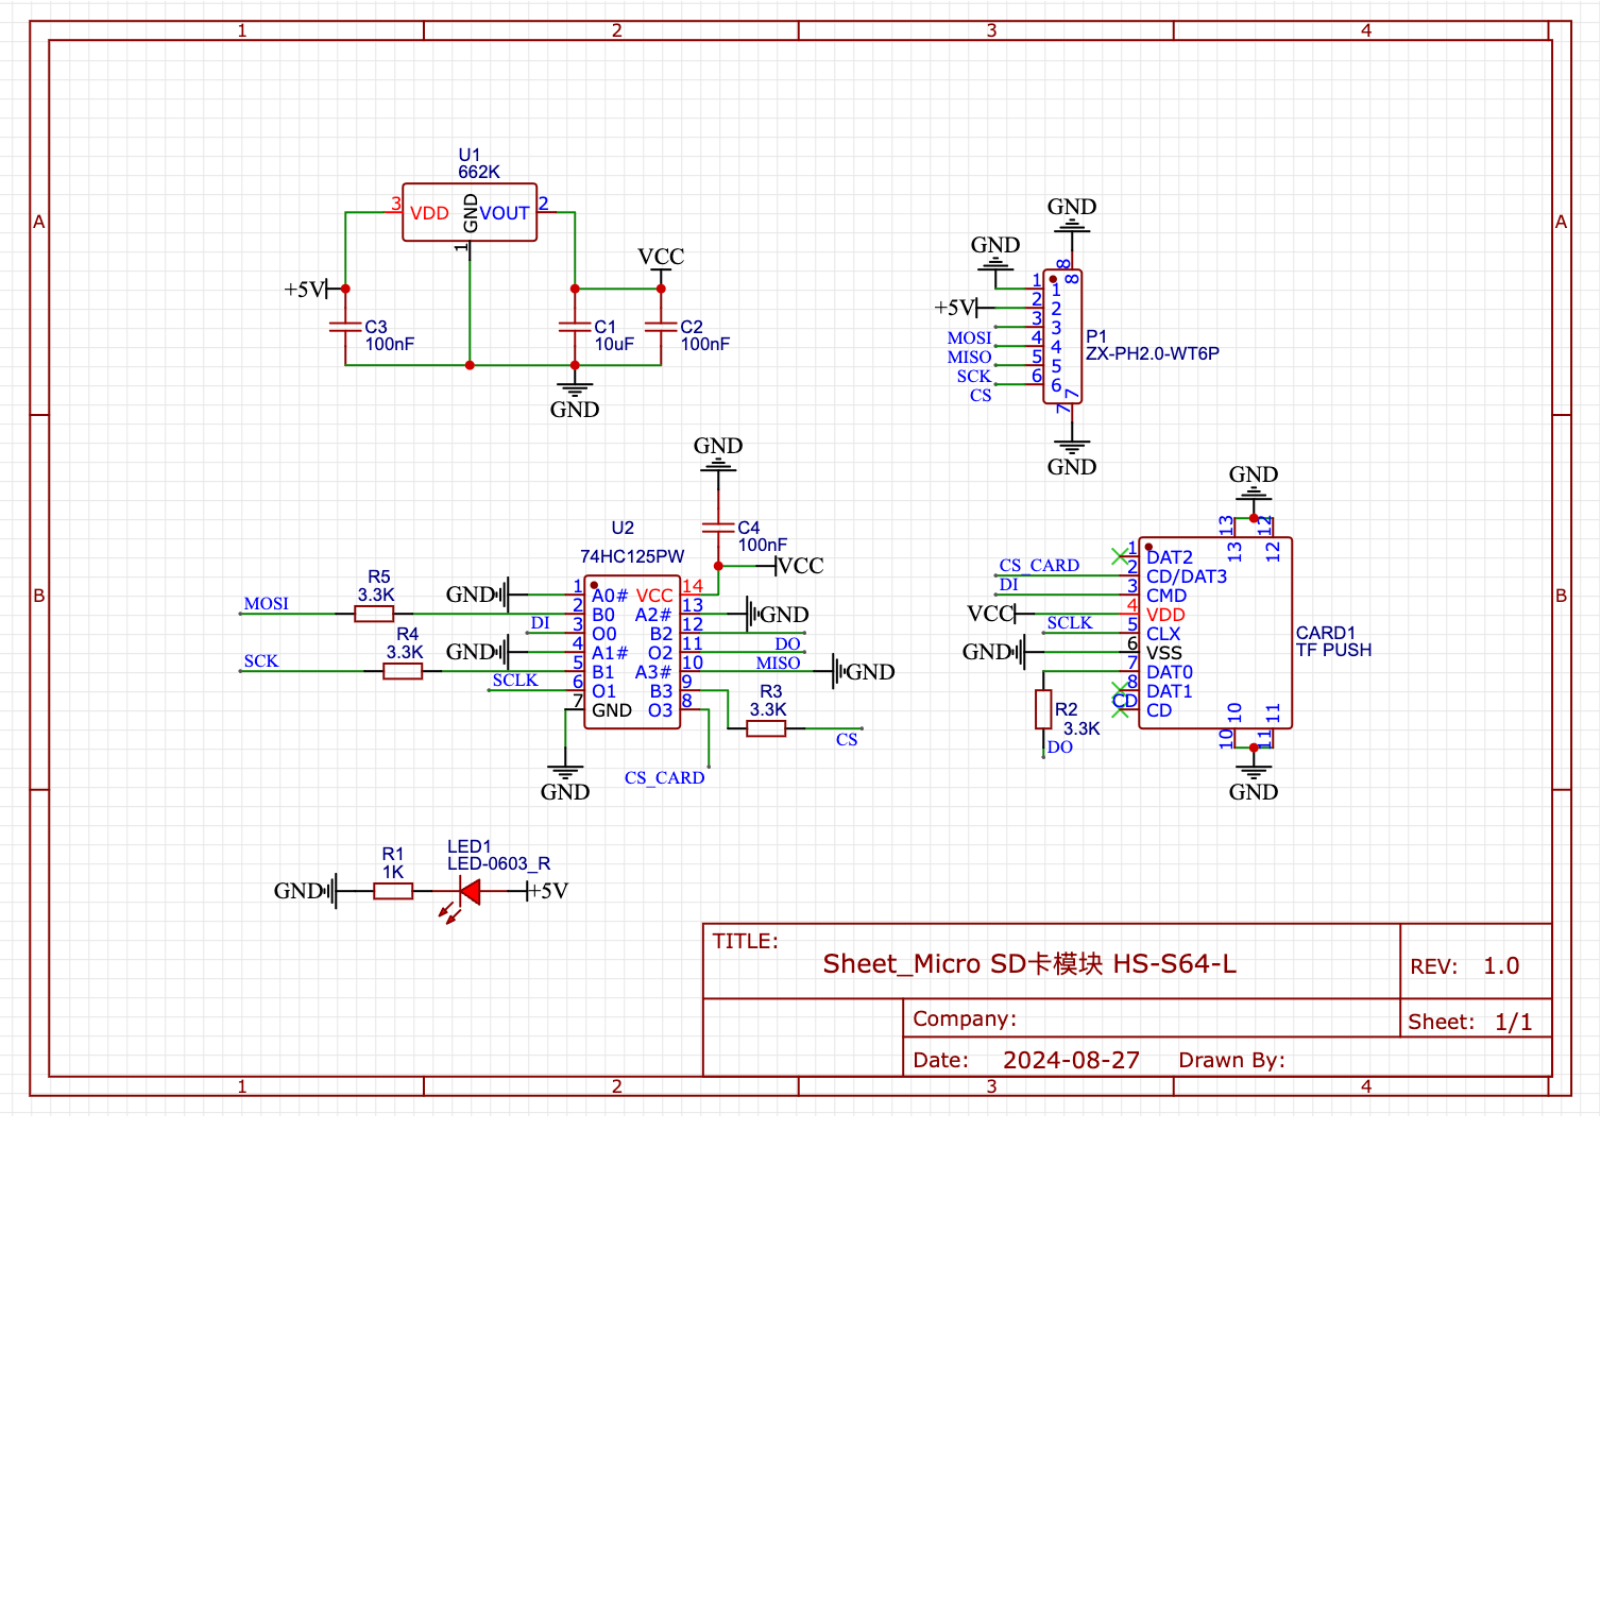
2. Schematic
Module Parameters
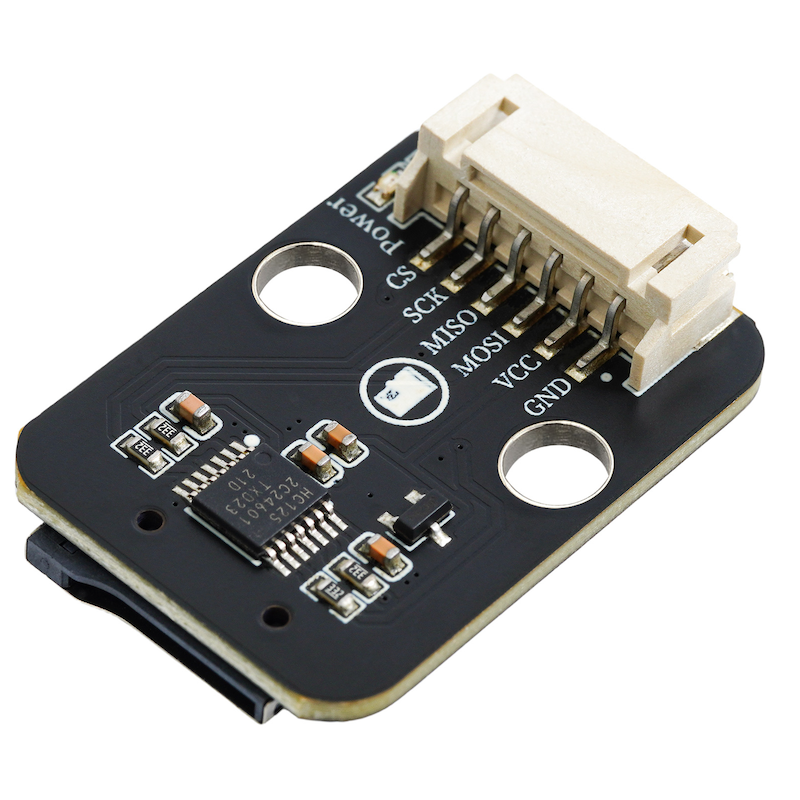
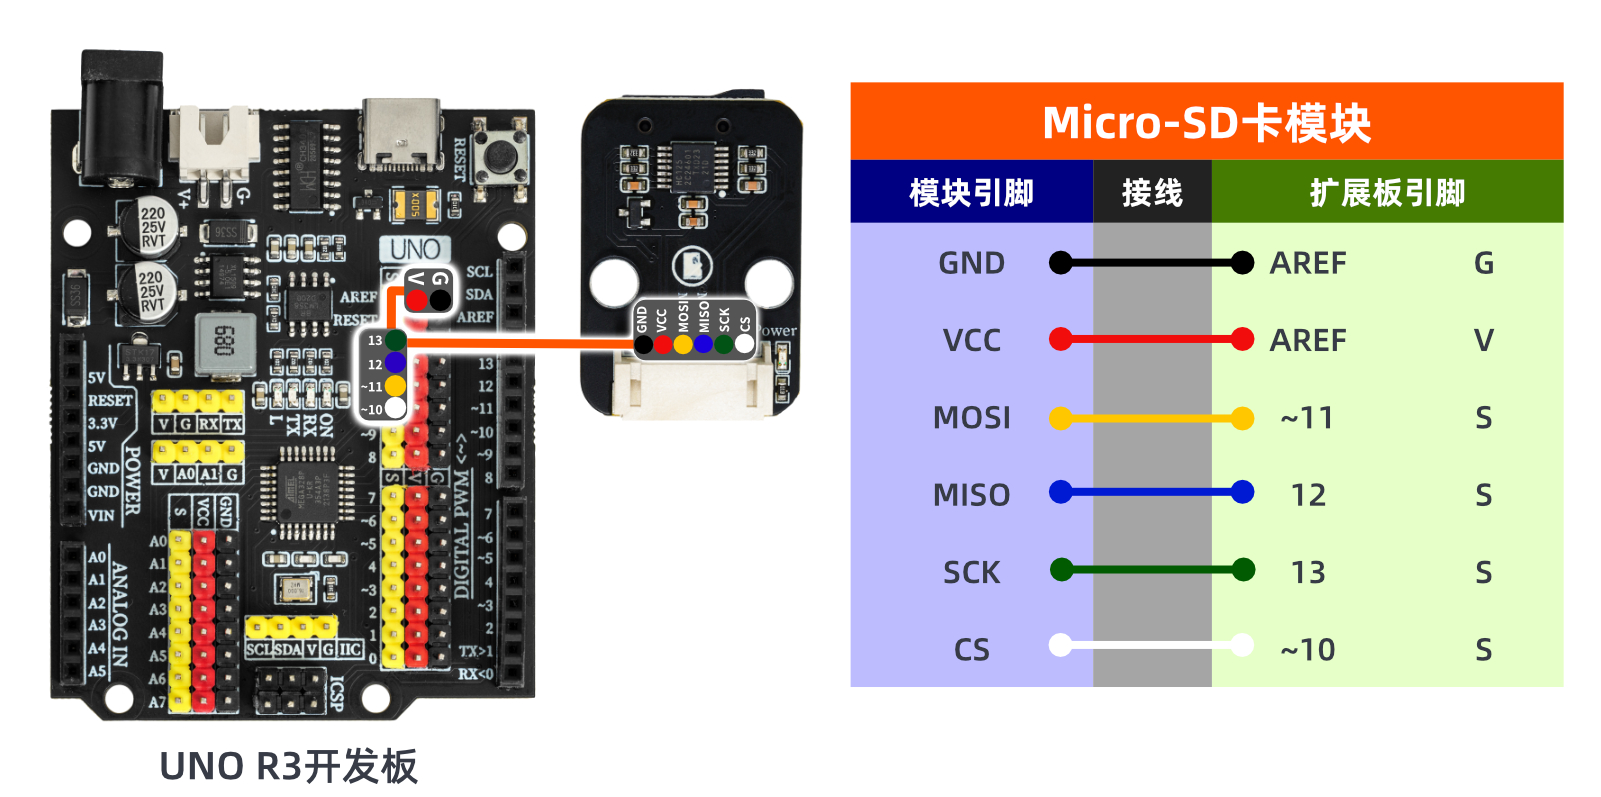
Pin Name | description |
|---|---|
G | GND (Negative Power Input) |
V | VCC (Positive Power Input) |
MOSI | Module data input pin |
MISO | Module Data Output Pin |
SCK | Data Transmission Clock Pin |
CS | Data Transmission Enable Pin |
Supply voltage: 3.3V-5V
Connection Type: PH2.0 6P Substrate Wire
Installation method: Lego assembly
4, Circuit Board Size

Add Arduino Library File
Reference here if you don't know how to use library files:Install and use library files
Library file download: Click to download
6, Arduino IDE example program
Example Program (UNO Development Board):Click to download
#include <SD.h>
#include <SPI.h>
Sd2Card card;
SdVolume volume;
SdFile root;
File datafile;
String SD_card_reading(String path) {
datafile = SD.open(path.c_str());
String sd_data = "";
while (datafile.available()) {
sd_data = String(sd_data) + String(char(datafile.read()));
}
return sd_data;
}
void setup(){
SD.begin(10);
card.init(SPI_HALF_SPEED, 10);
Serial.begin(9600);
volume.init(card);
Serial.println(card.type());
Serial.println(String(volume.blocksPerCluster()*volume.clusterCount()/2/1024) + String("MB"));
root.openRoot(volume);
root.ls(LS_R | LS_DATE | LS_SIZE);if (SD.exists("fileName.txt")) {
Serial.println(SD_card_reading("fileName.txt"));
}
datafile = SD.open("fileName.txt", FILE_WRITE);
if(datafile){
datafile.print("您好");
datafile.println("");
datafile.close();
}
}
void loop(){
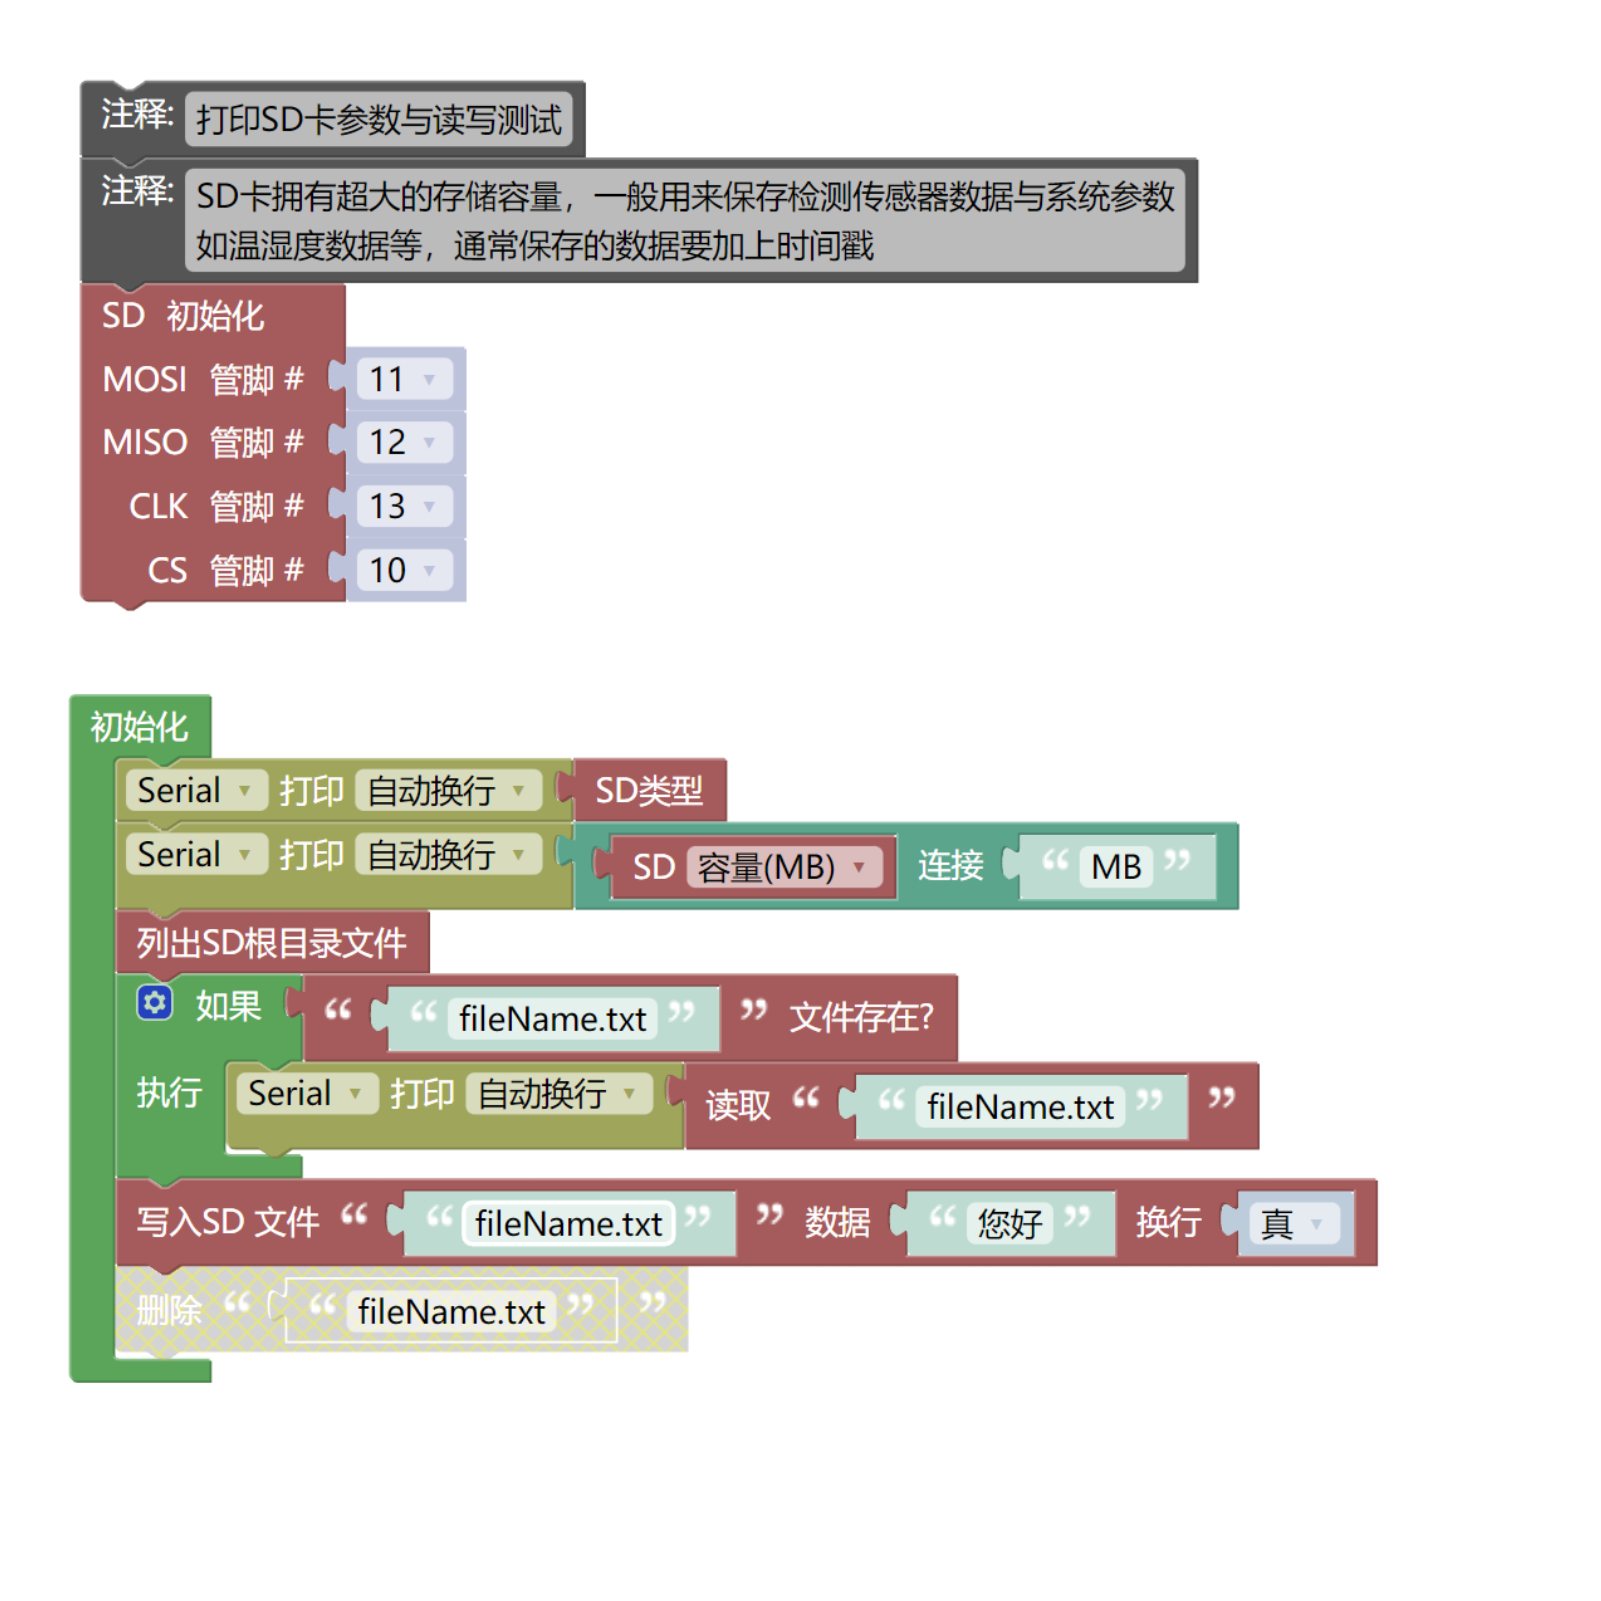
//打印SD卡参数与读写测试
//SD卡拥有超大的存储容量,一般用来保存检测传感器数据与系统参数
//如温湿度数据等,通常保存的数据要加上时间戳
}Example Program (ESP32 Development Board — Based on Python language, cannot be uploaded using Arduino IDE):
7, Mixly example program (graphical language)
Example Program (UNO Development Board):Click to download
Example Program (ESP32 Development Board): Click to download
8. Setting up the Test Environment
Arduino UNO Test Environment Setup
Prepare Components:
UNO-R3 Development Board *1
UNO-R3 P Expansion Board *1
USB TYPE-C DATA CABLE *1
Micro-SD card module (HS-S64-L) *1
PH2.0-5P wire
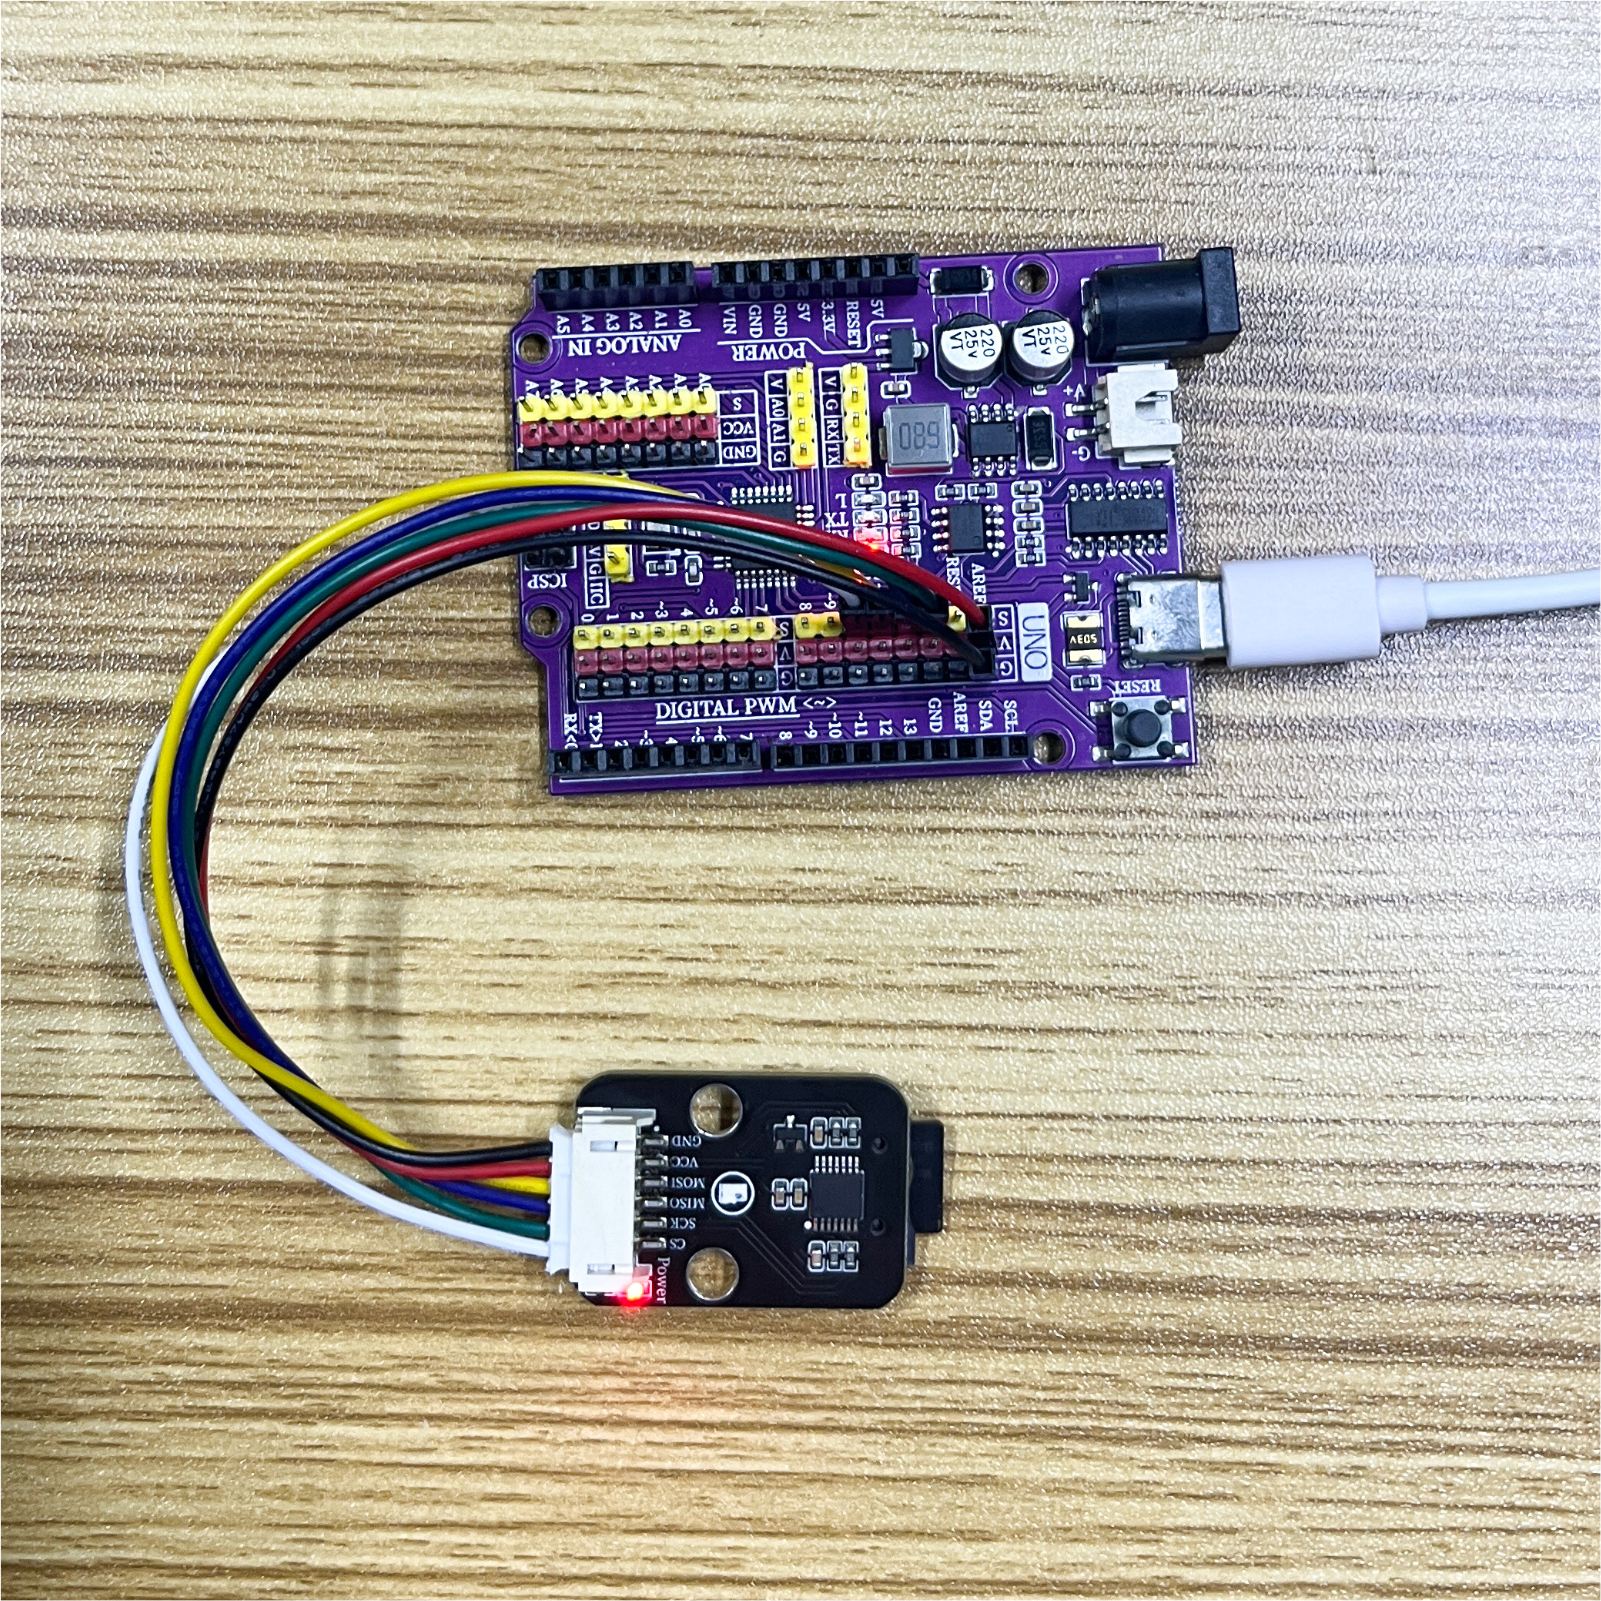
Circuit wiring diagram:
ESP32 Python test environment setup
9, Video tutorial
Arduino UNO video tutorial: Click to view
ESP32 Python Video Tutorial:
10, Test conclusion
Arduino UNO Test Conclusion:
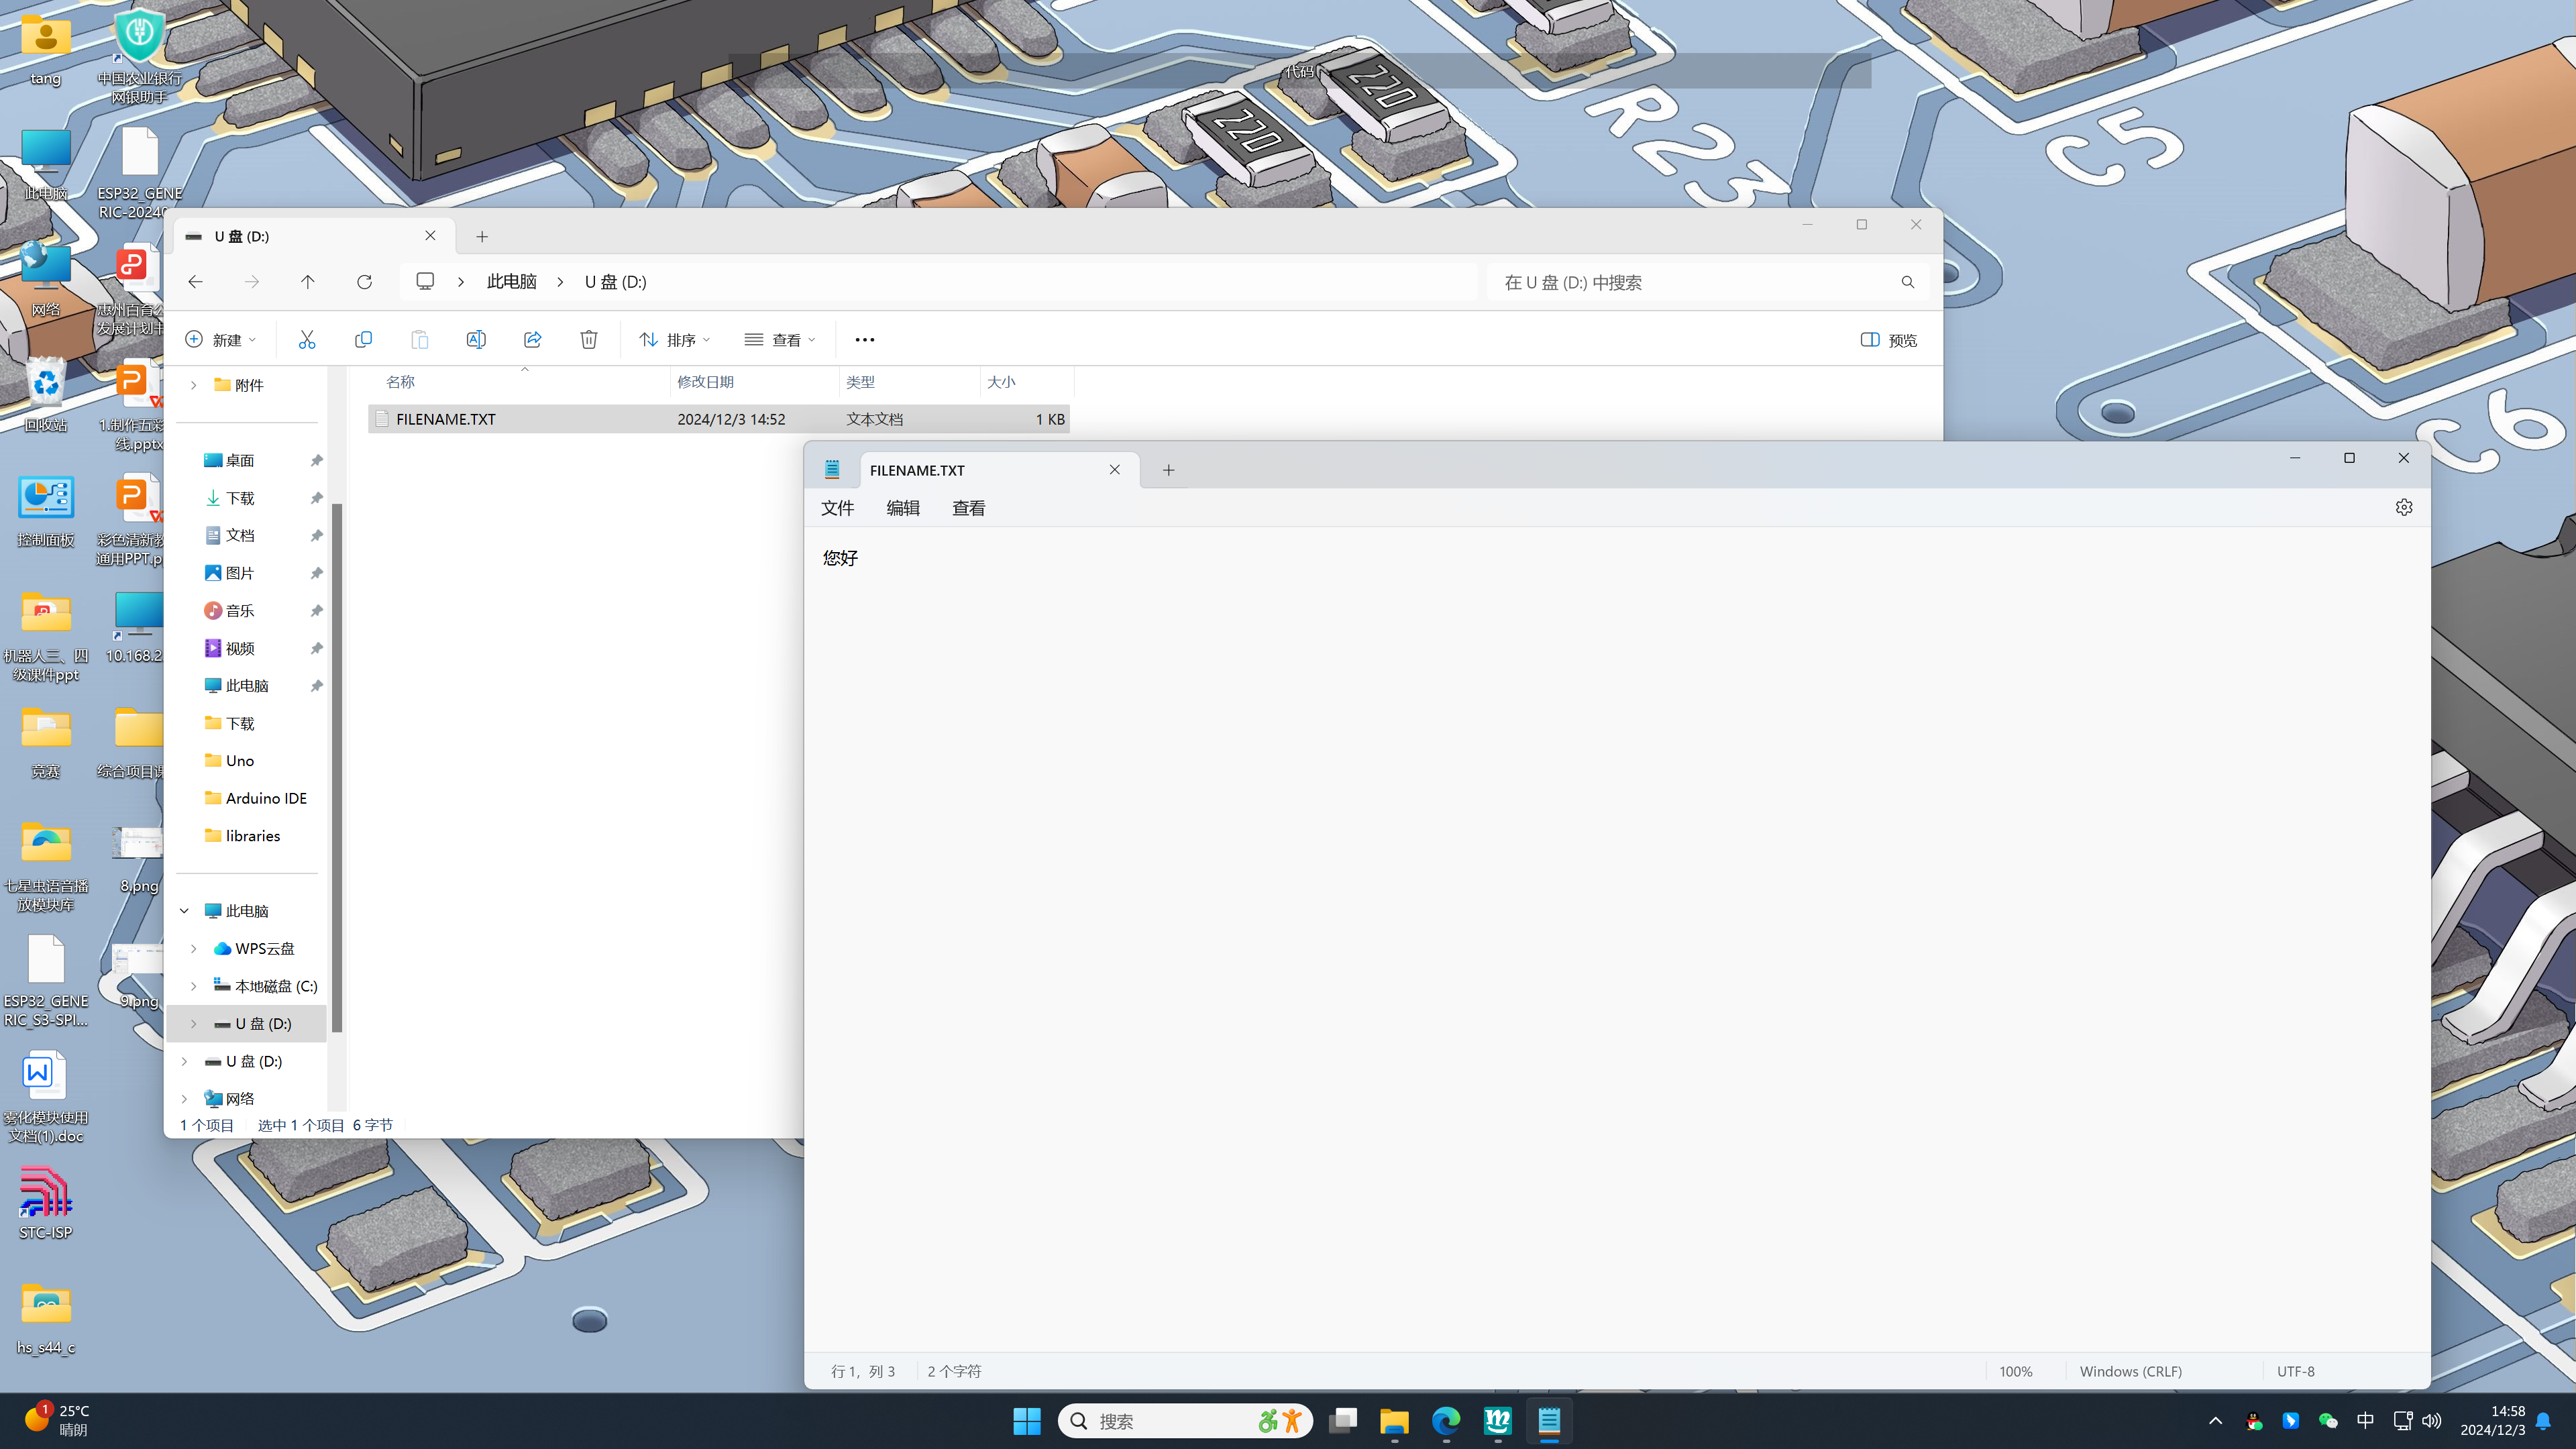
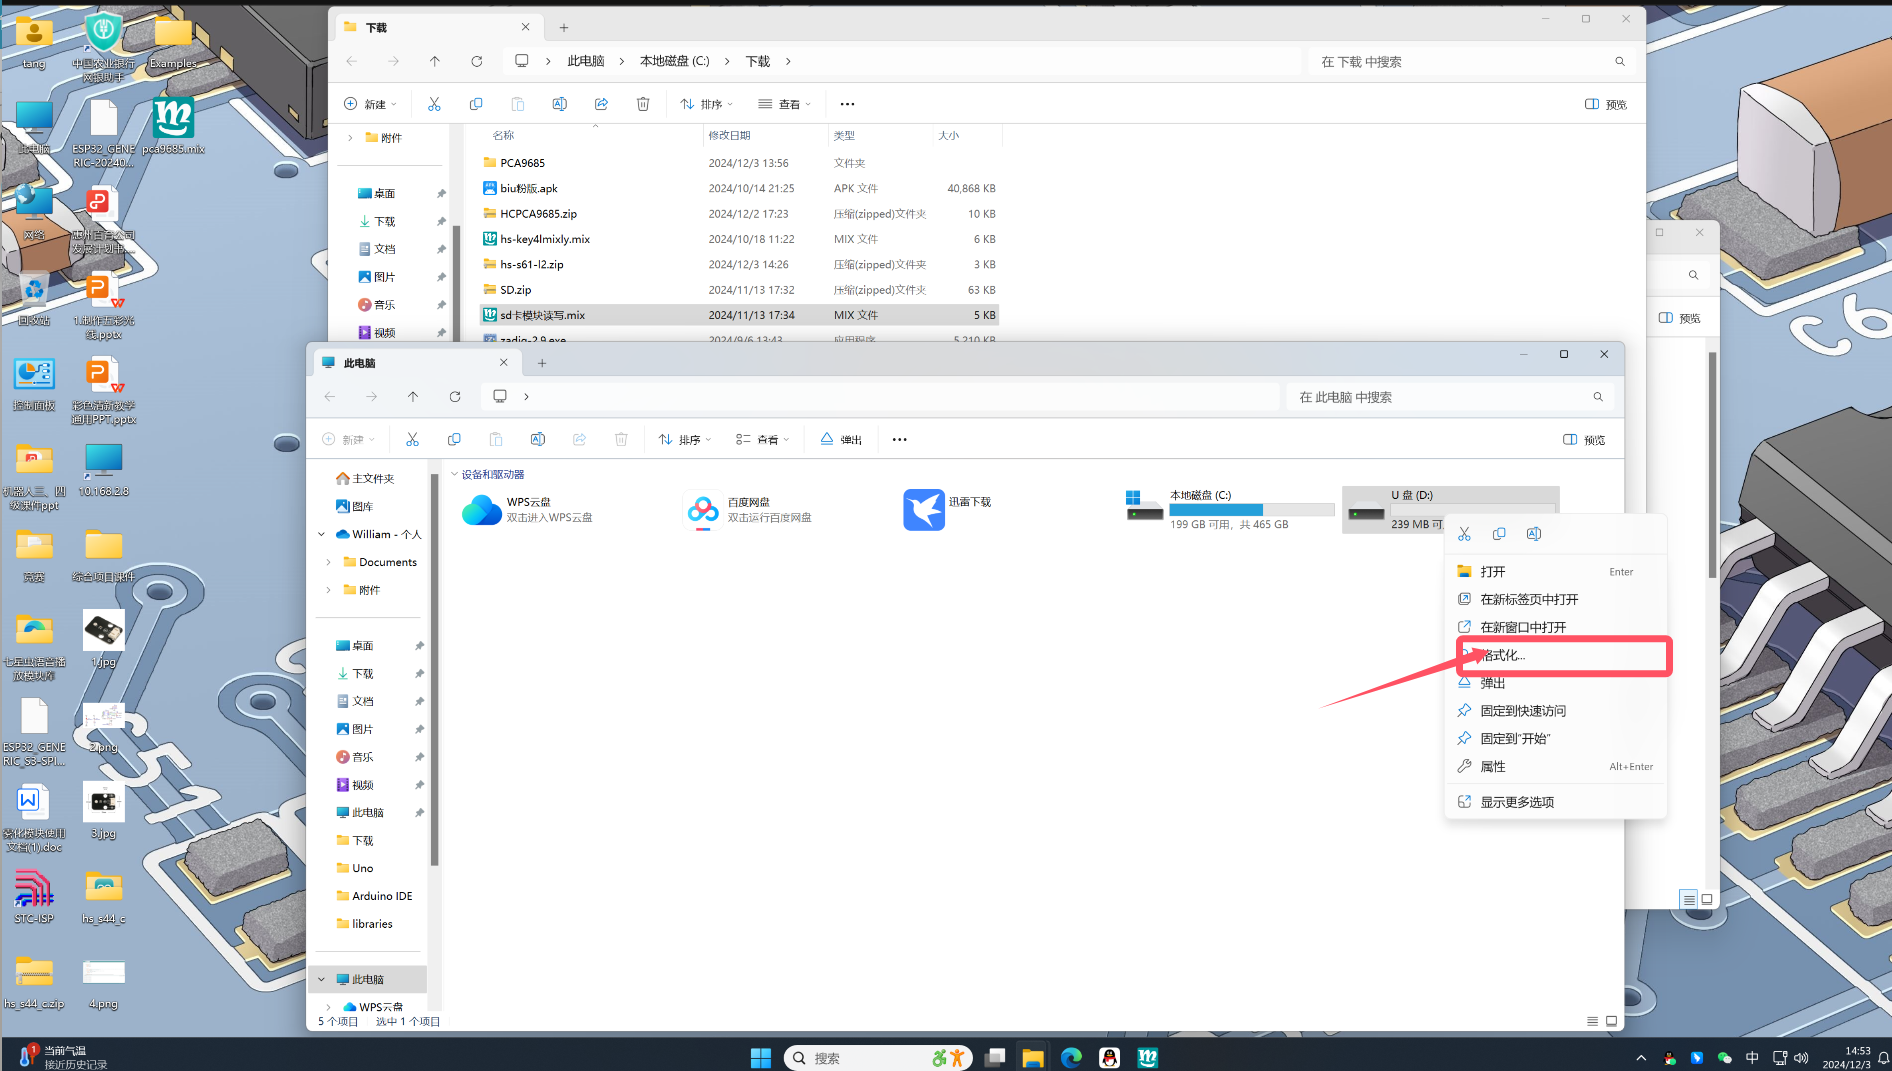
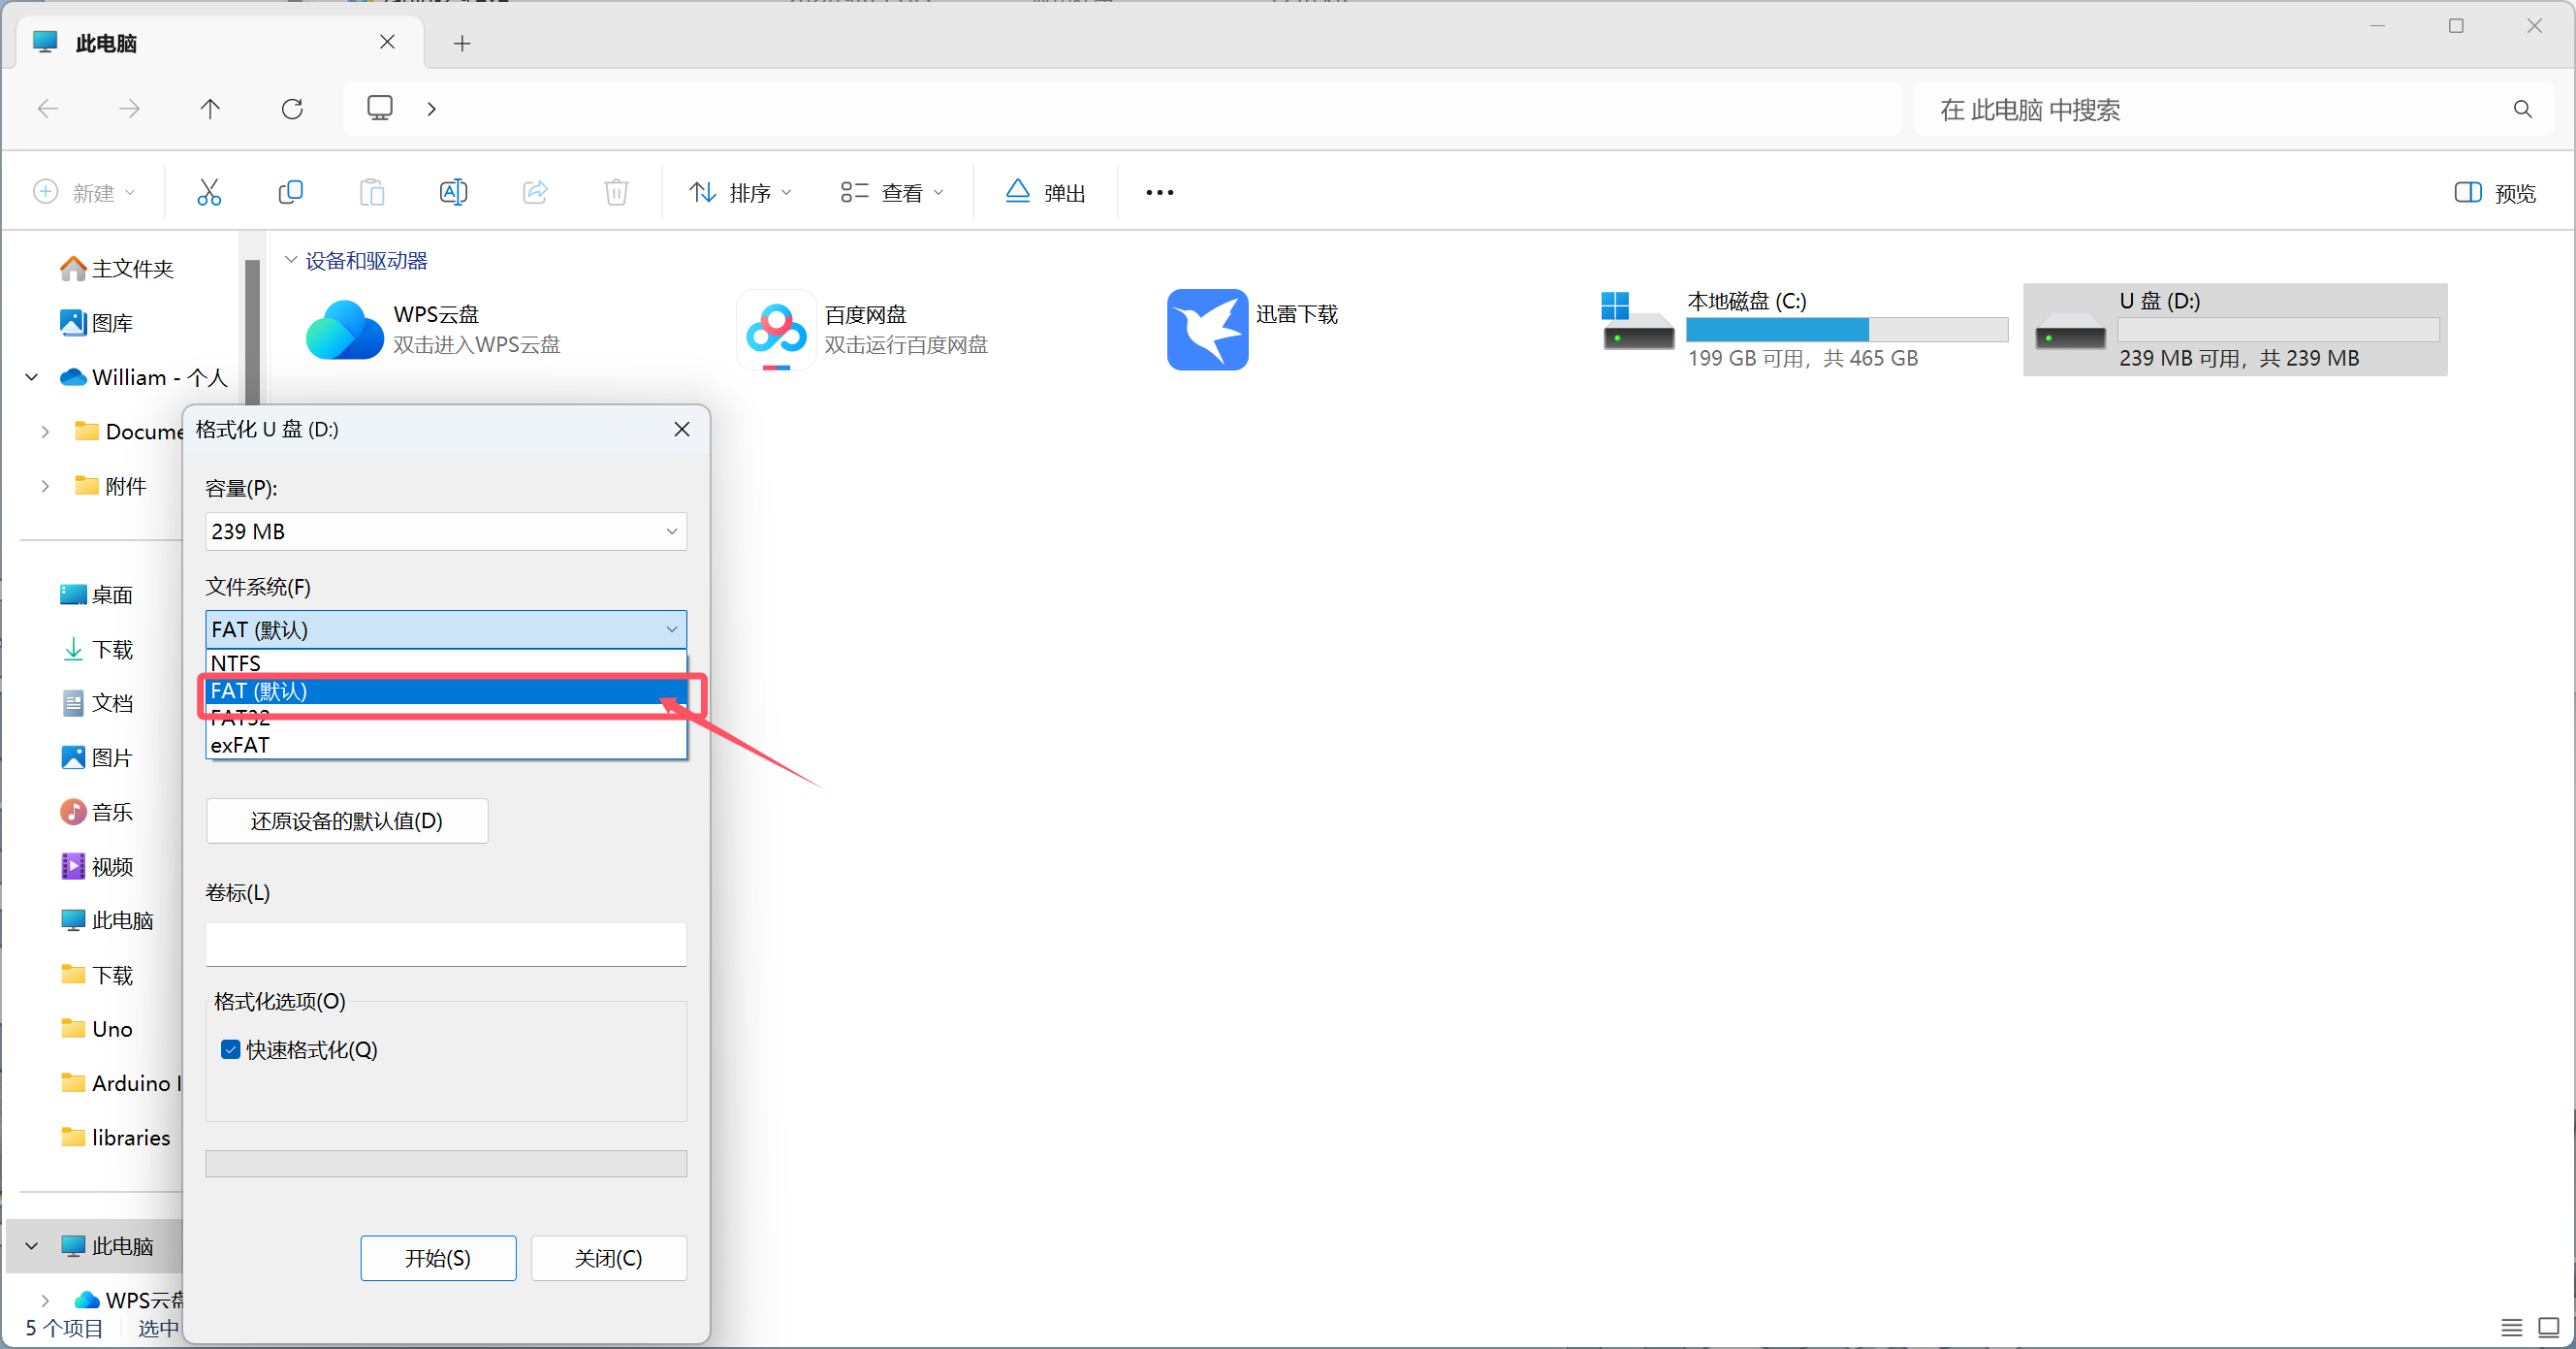
Note: Format the SD card to FAT before use in the card reader.
Connect the wire and upload the code.
Open the serial port of the Misaki software, and you can observe the data in the SD card.
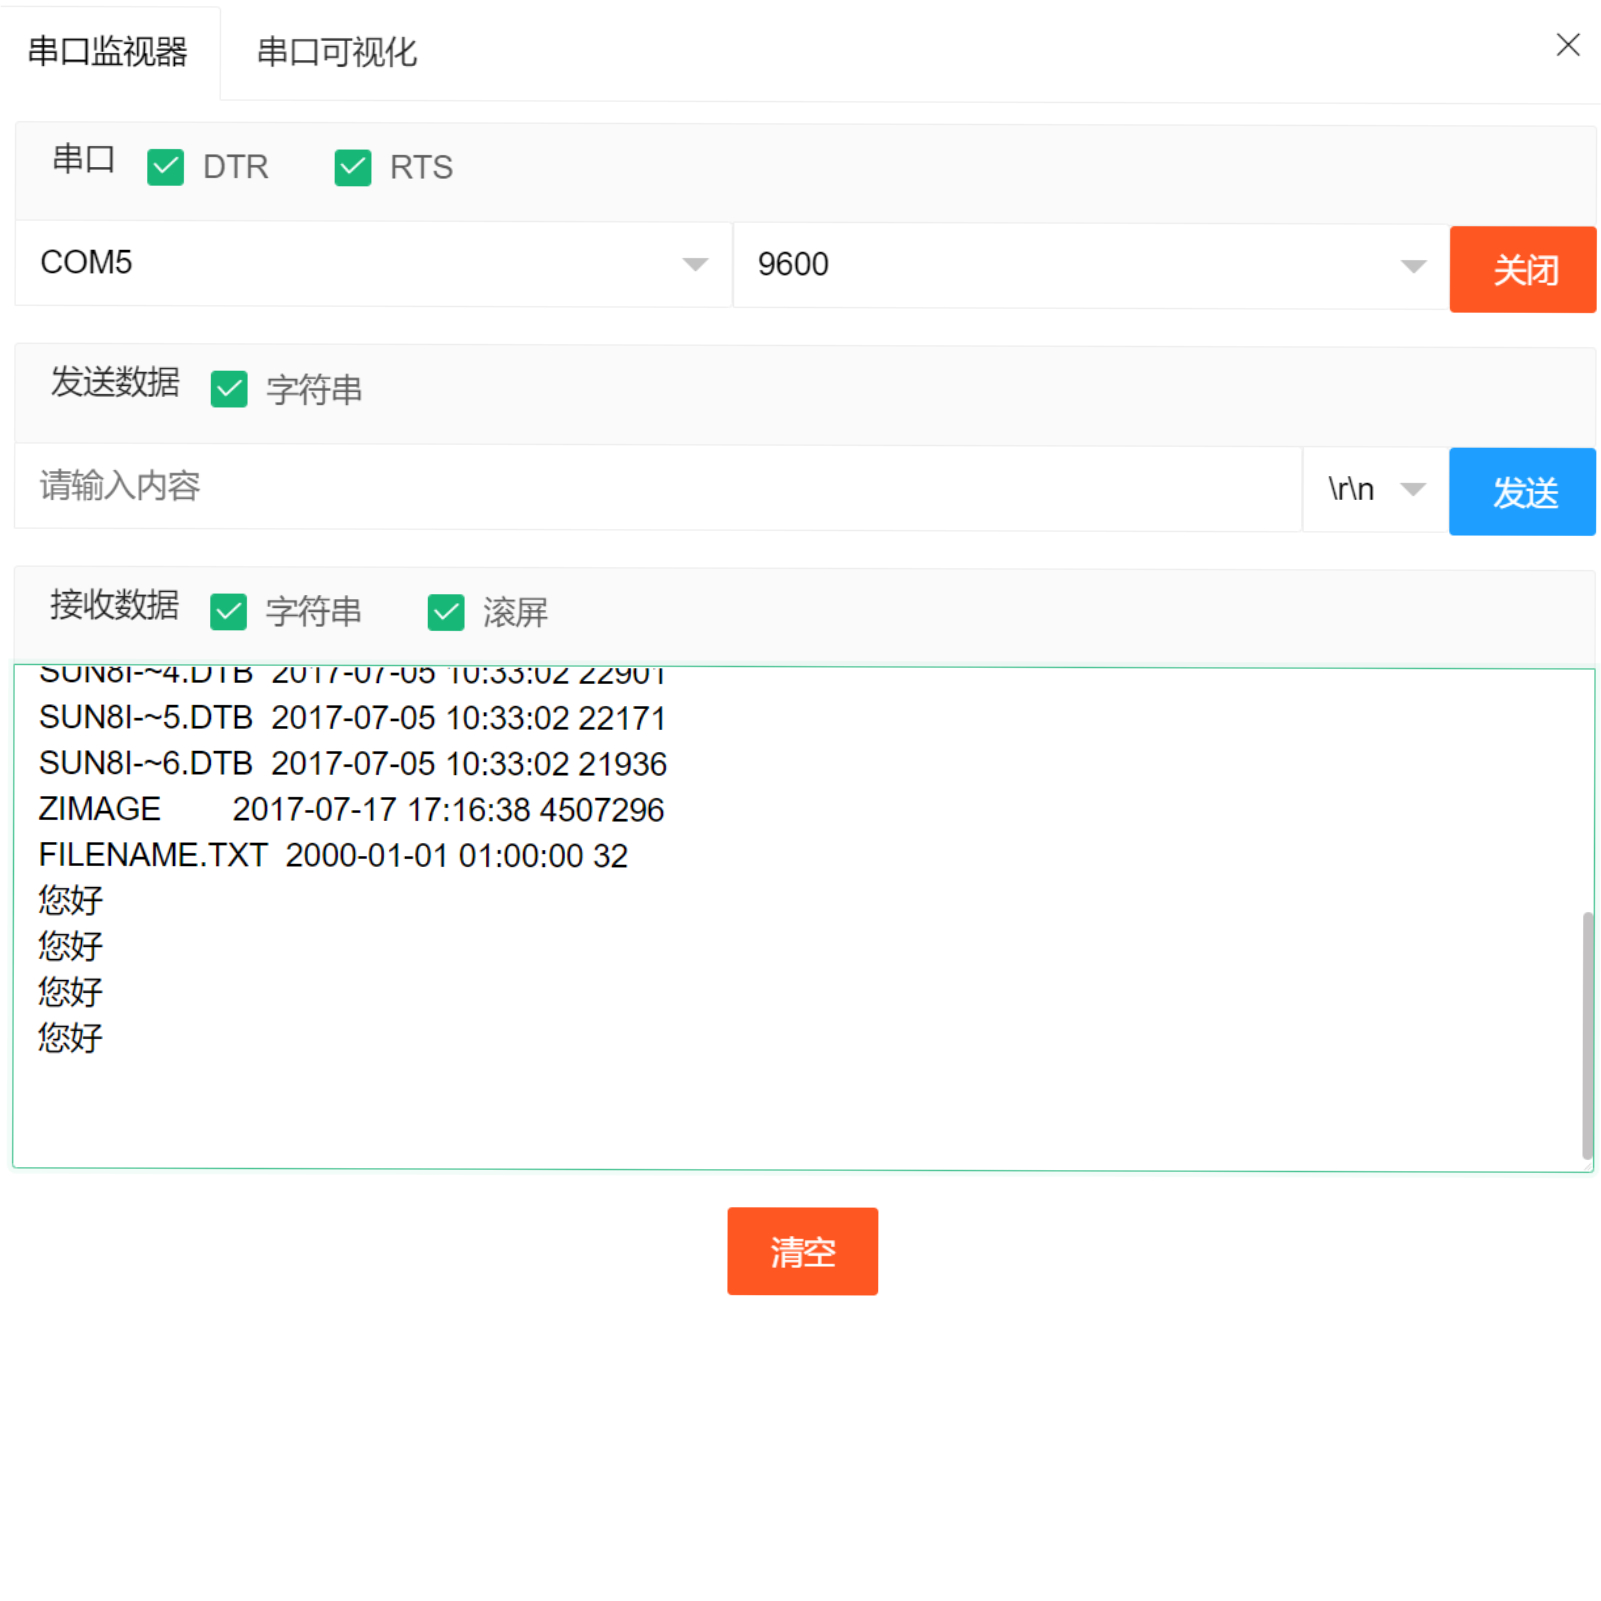
Insert the SD card into the card reader, connect it to the computer, find the corresponding USB drive, and you can see the corresponding data: Hello.