
1. Introduction
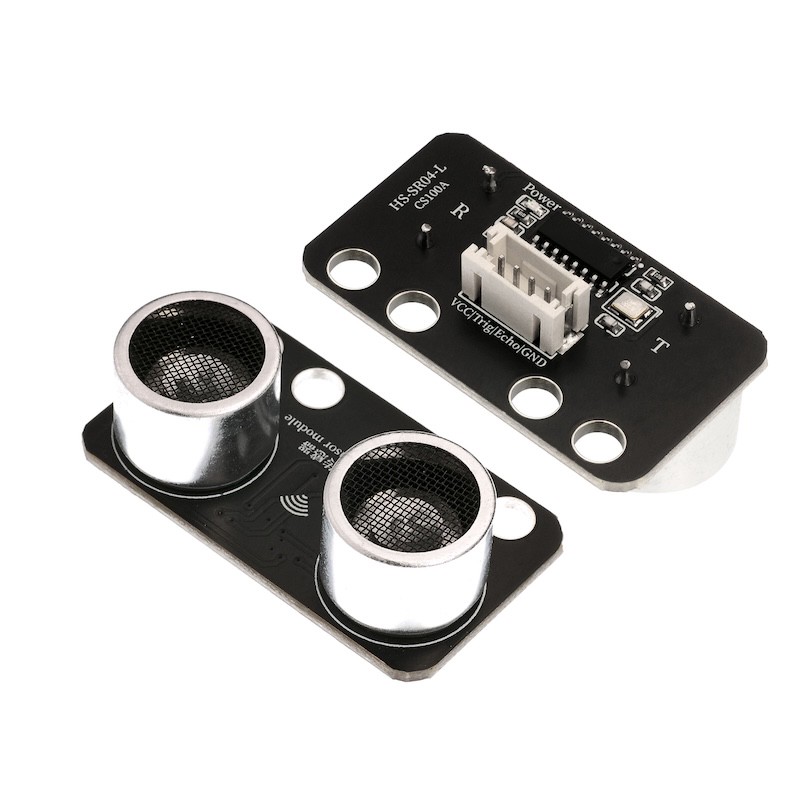
The HS-SR04 ultrasonic module is an optimized design based on the traditional HC-SR04 ultrasonic module.The function size is fully compatible with the traditional HC-SR04 module, and it is much more optimized in detail than the traditional HC-SR04 module.This module has stable performance, accurate measurement distance, high precision module, small blind area.
2. Schematic
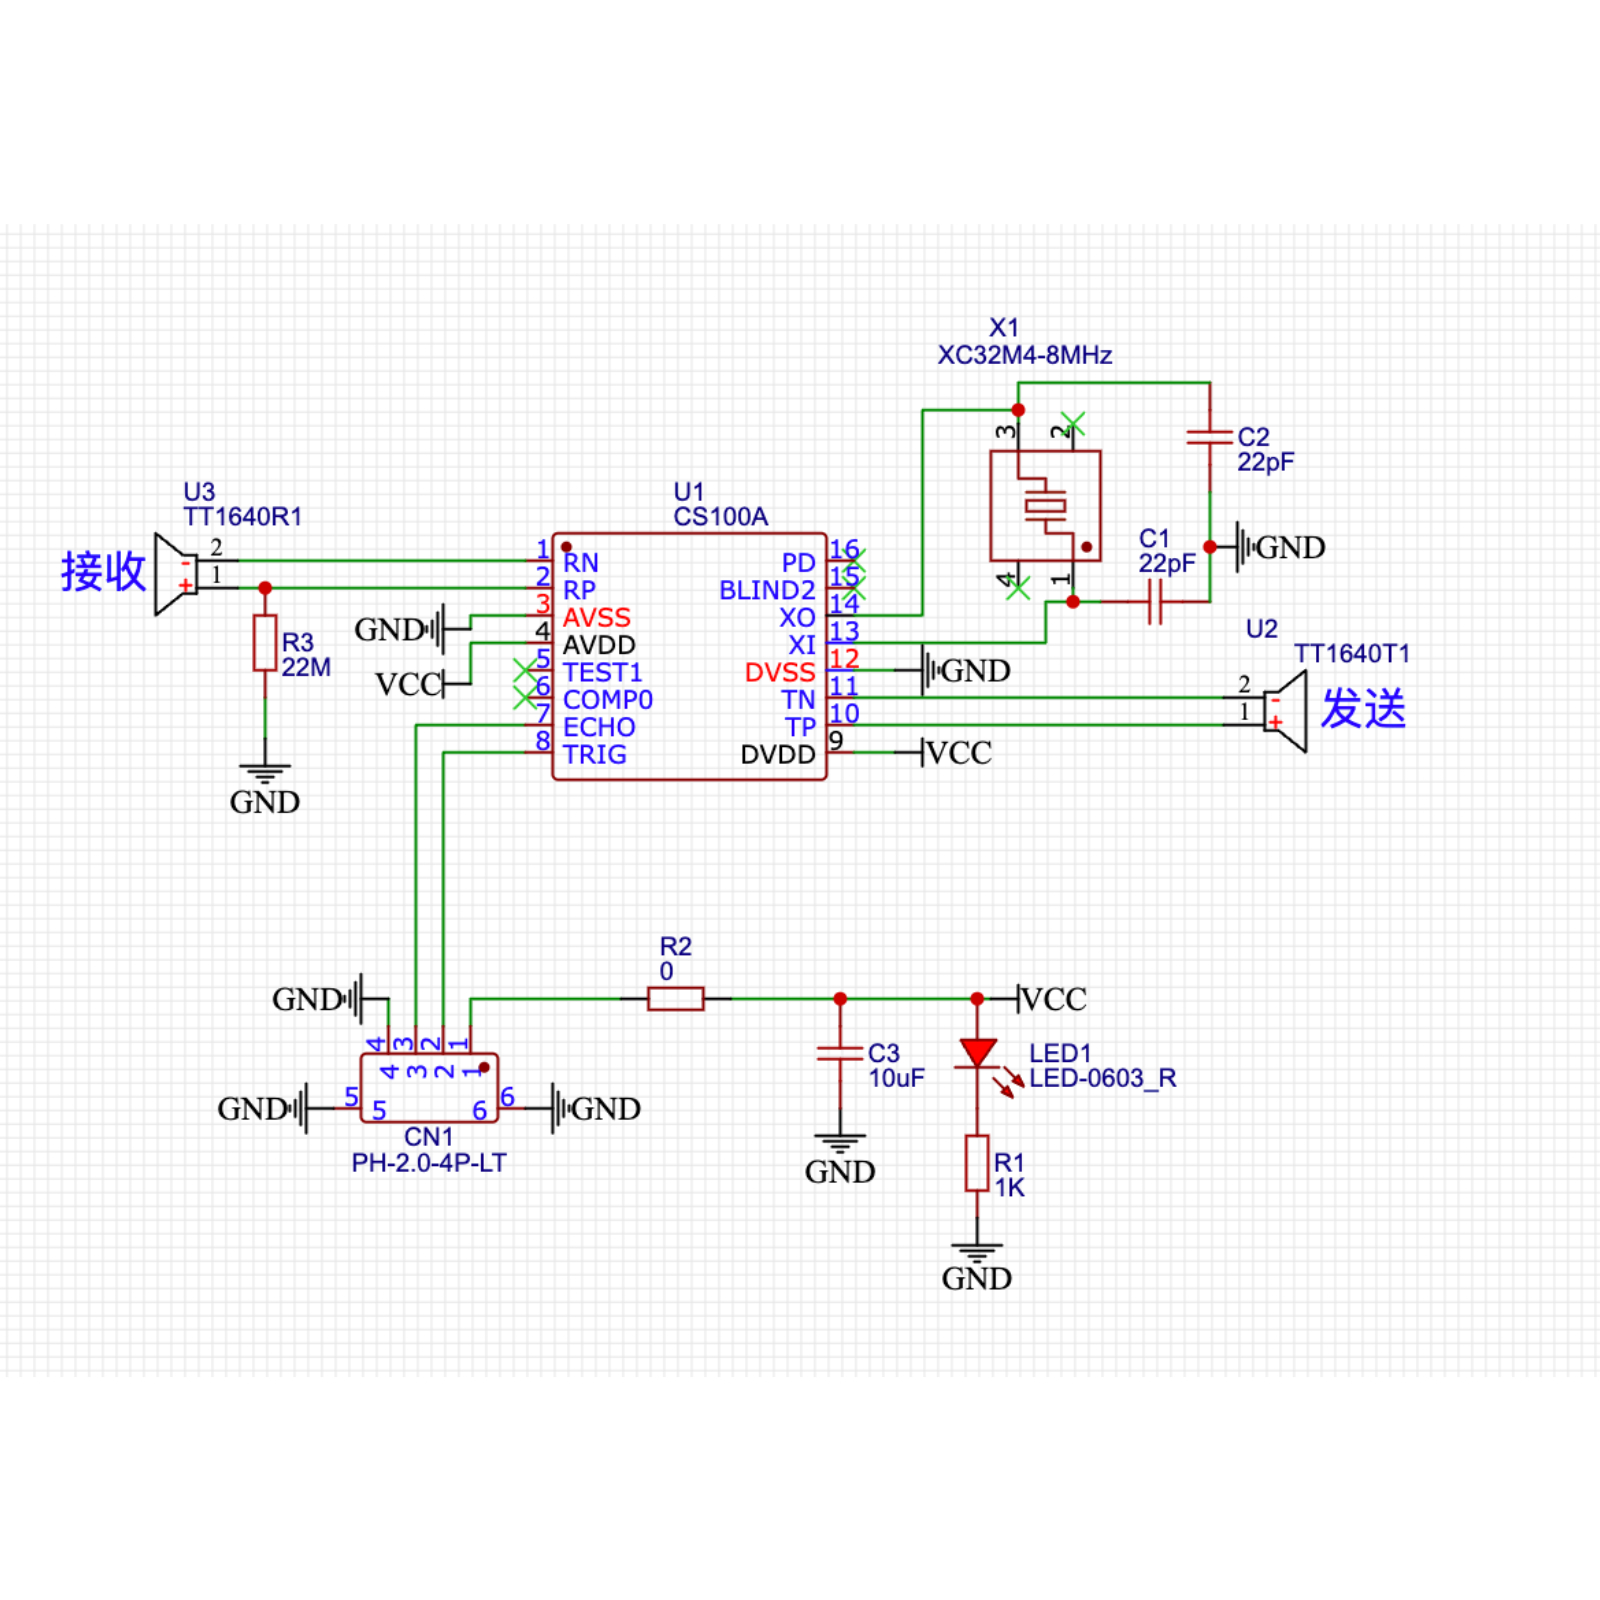
Module Parameters
Pin Name | description |
|---|---|
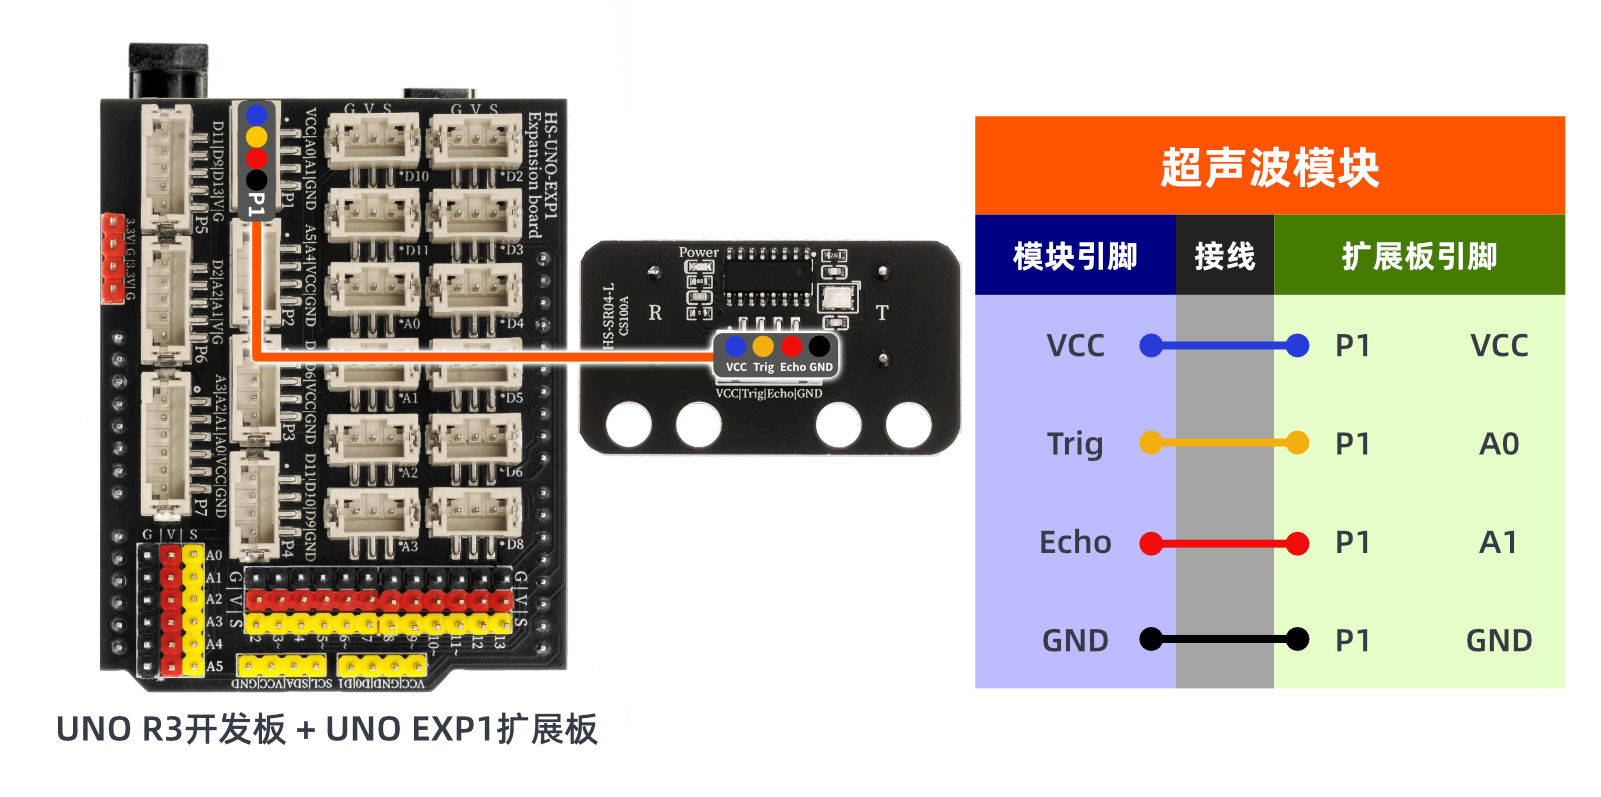
VCC | VCC (Positive Power Input) |
TRIG | Control End |
ECHO | Receiver |
GND | GND (Negative Power Input) |
Power Supply Voltage: 3.3V / 5V
Connection method: PH2.0 terminal wire
Installation method: Screw fixed / Lego construction
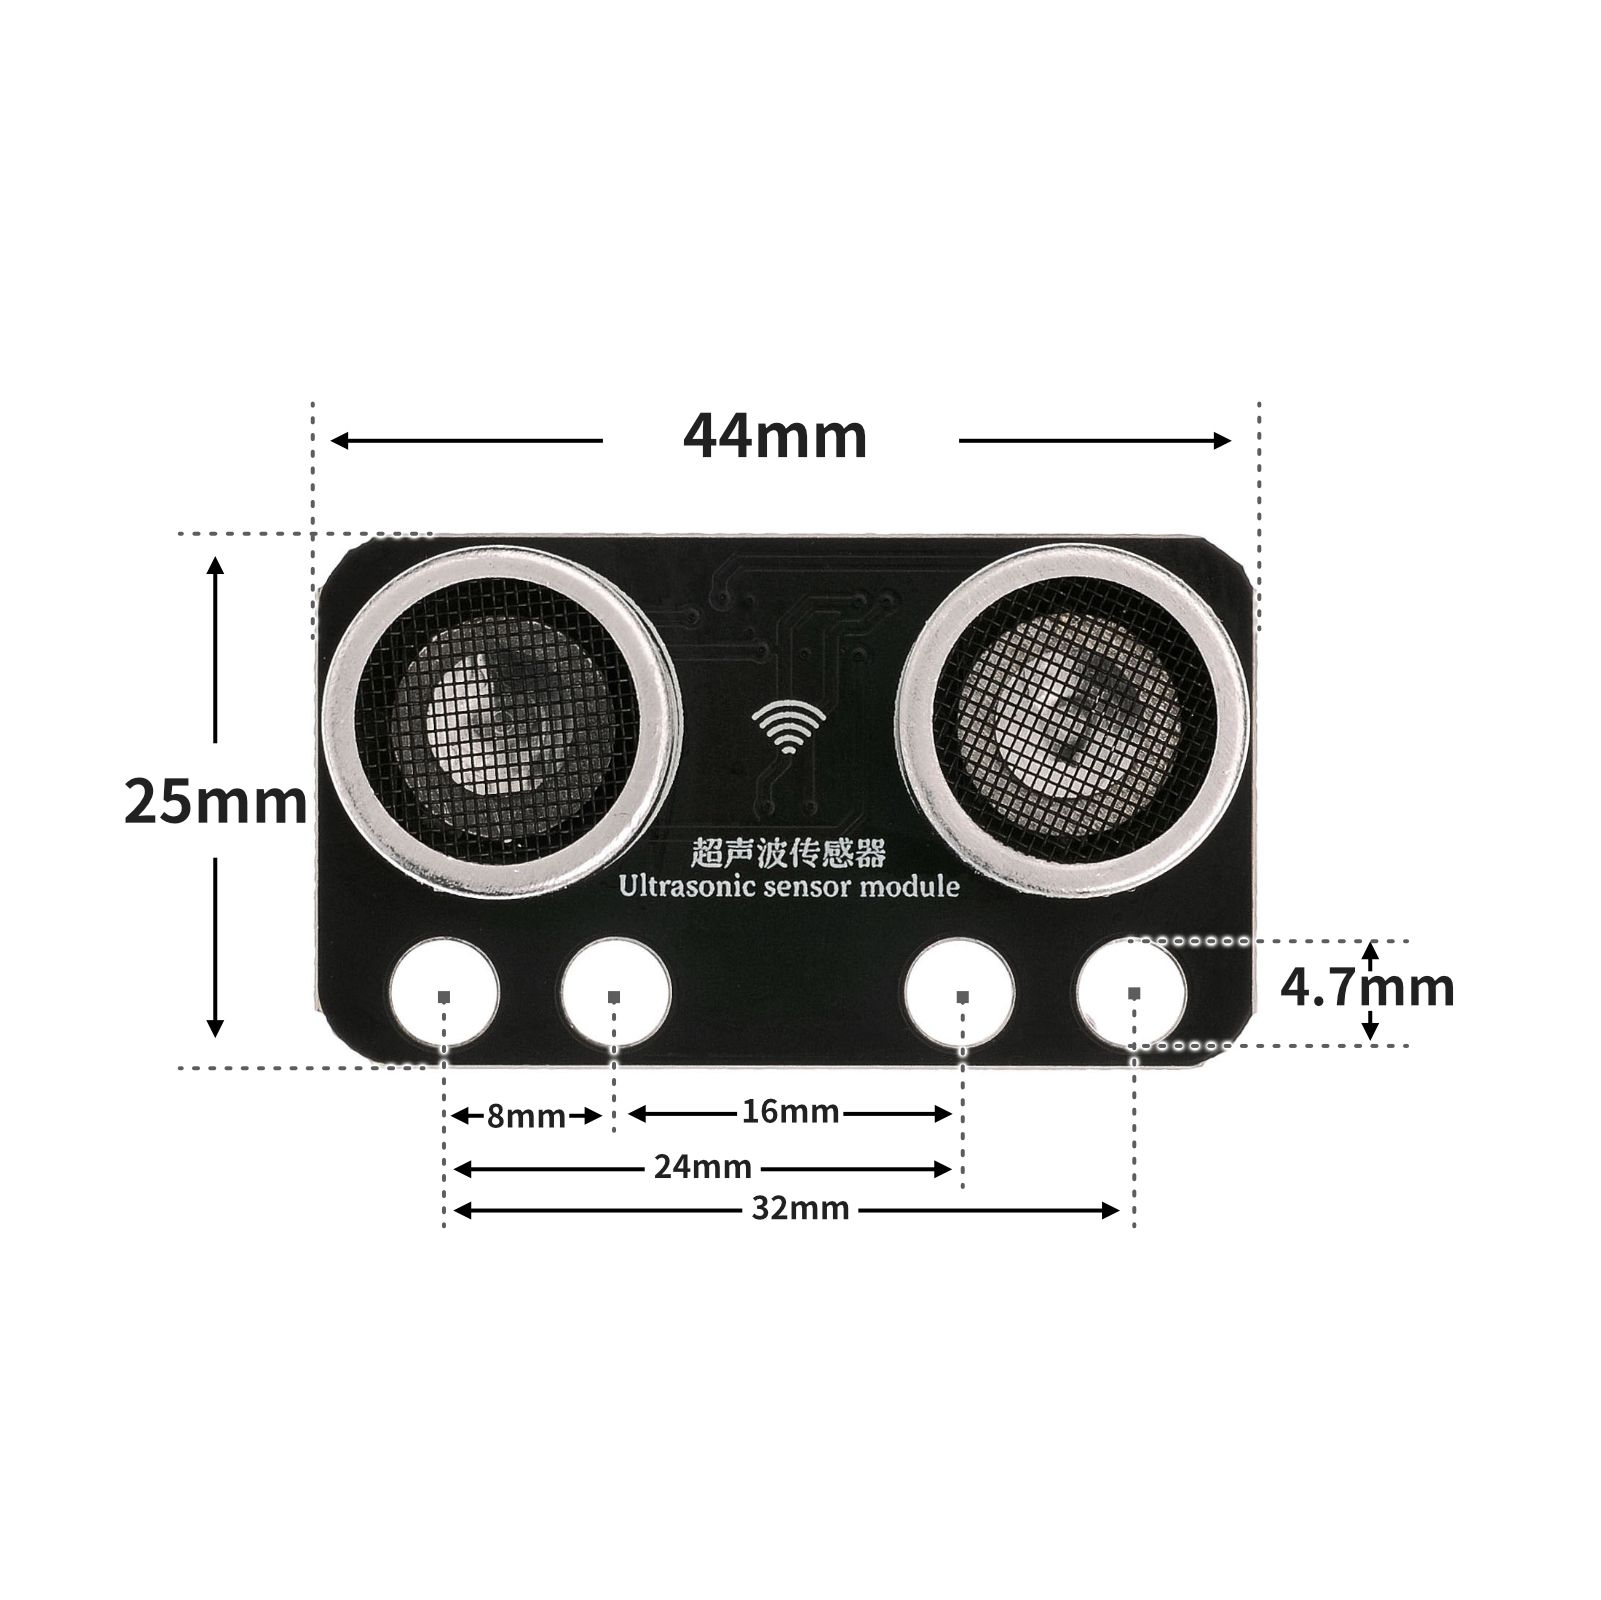
4, Circuit Board Size
5 of Arduino IDE example program
Arduino UNO Graphical Example Program:
volatile int csb;

float checkdistance_A0_A1() {
  digitalWrite(A0, LOW);
  delayMicroseconds(2);
  digitalWrite(A0, HIGH);
  delayMicroseconds(10);
  digitalWrite(A0, LOW);
  float distance = pulseIn(A1, HIGH) / 58.00;
  delay(10);
  return distance;
}

void setup(){
  Serial.begin(9600);
  csb = 0;
  pinMode(A0, OUTPUT);
  pinMode(A1, INPUT);
}

void loop(){
  delay(200);
  csb = checkdistance_A0_A1();
  Serial.println(csb);

}
ESP32 Python Example (for Mixly IDE / Micskit)
(Choose the Python ESP32 [ESP32 Generic(4MB)] to switch to code mode upload):
import machine
import sonar
import time
while True:
print(sonar.Sonar(32,33).checkdist())
time.sleep_ms(200)
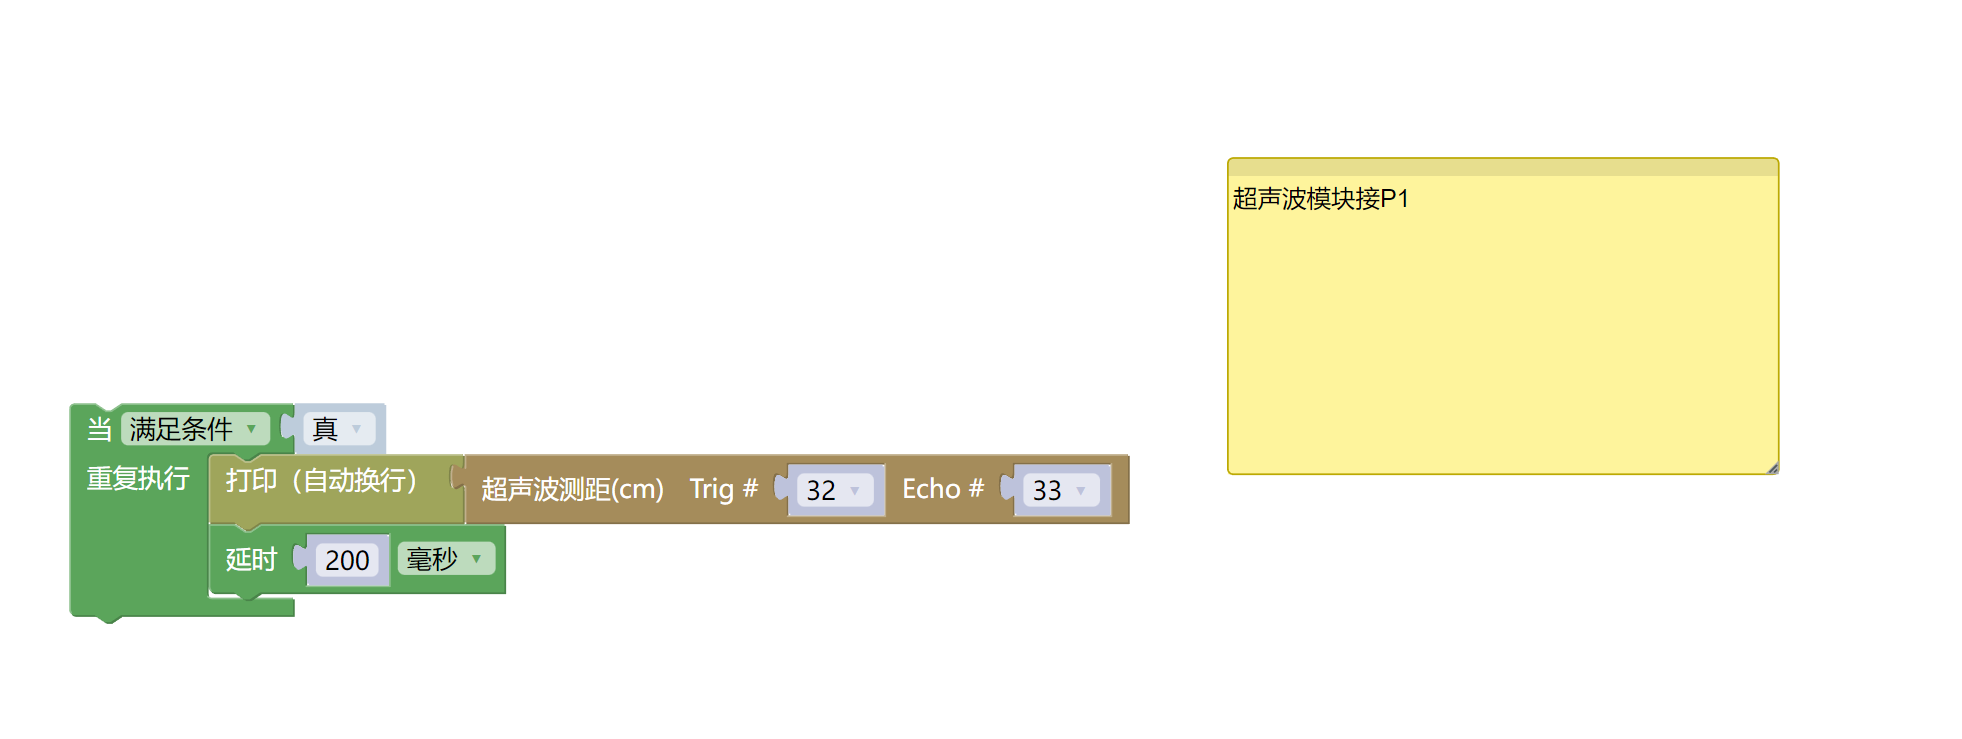
6, Miciqi Mixly Example Program (Graphical Language)
Arduino UNO Graphical Example Program:Click to download

ESP32 Python Graphical Example Program:Click to download
7, Test Environment Setup
Arduino UNO Test Environment Setup
Prepare Components:
HELLO STEM UNO R3 DEVELOPMENT BOARD *1
HELLO STEM UNO R3 P EXPANSION BOARD *1
USB TYPE-C DATA CABLE *1
Ultrasonic Module (HS-SR04L) *1
PH2.0 4P Double Head Terminal Line *1
Circuit wiring diagram:
ESP32 Python test environment setup
8. Video tutorial
Arduino UNOVideo tutorial:Click to view
ESP32 Python Video Tutorial:
9. Test conclusion
Arduino UNO Test Conclusion:
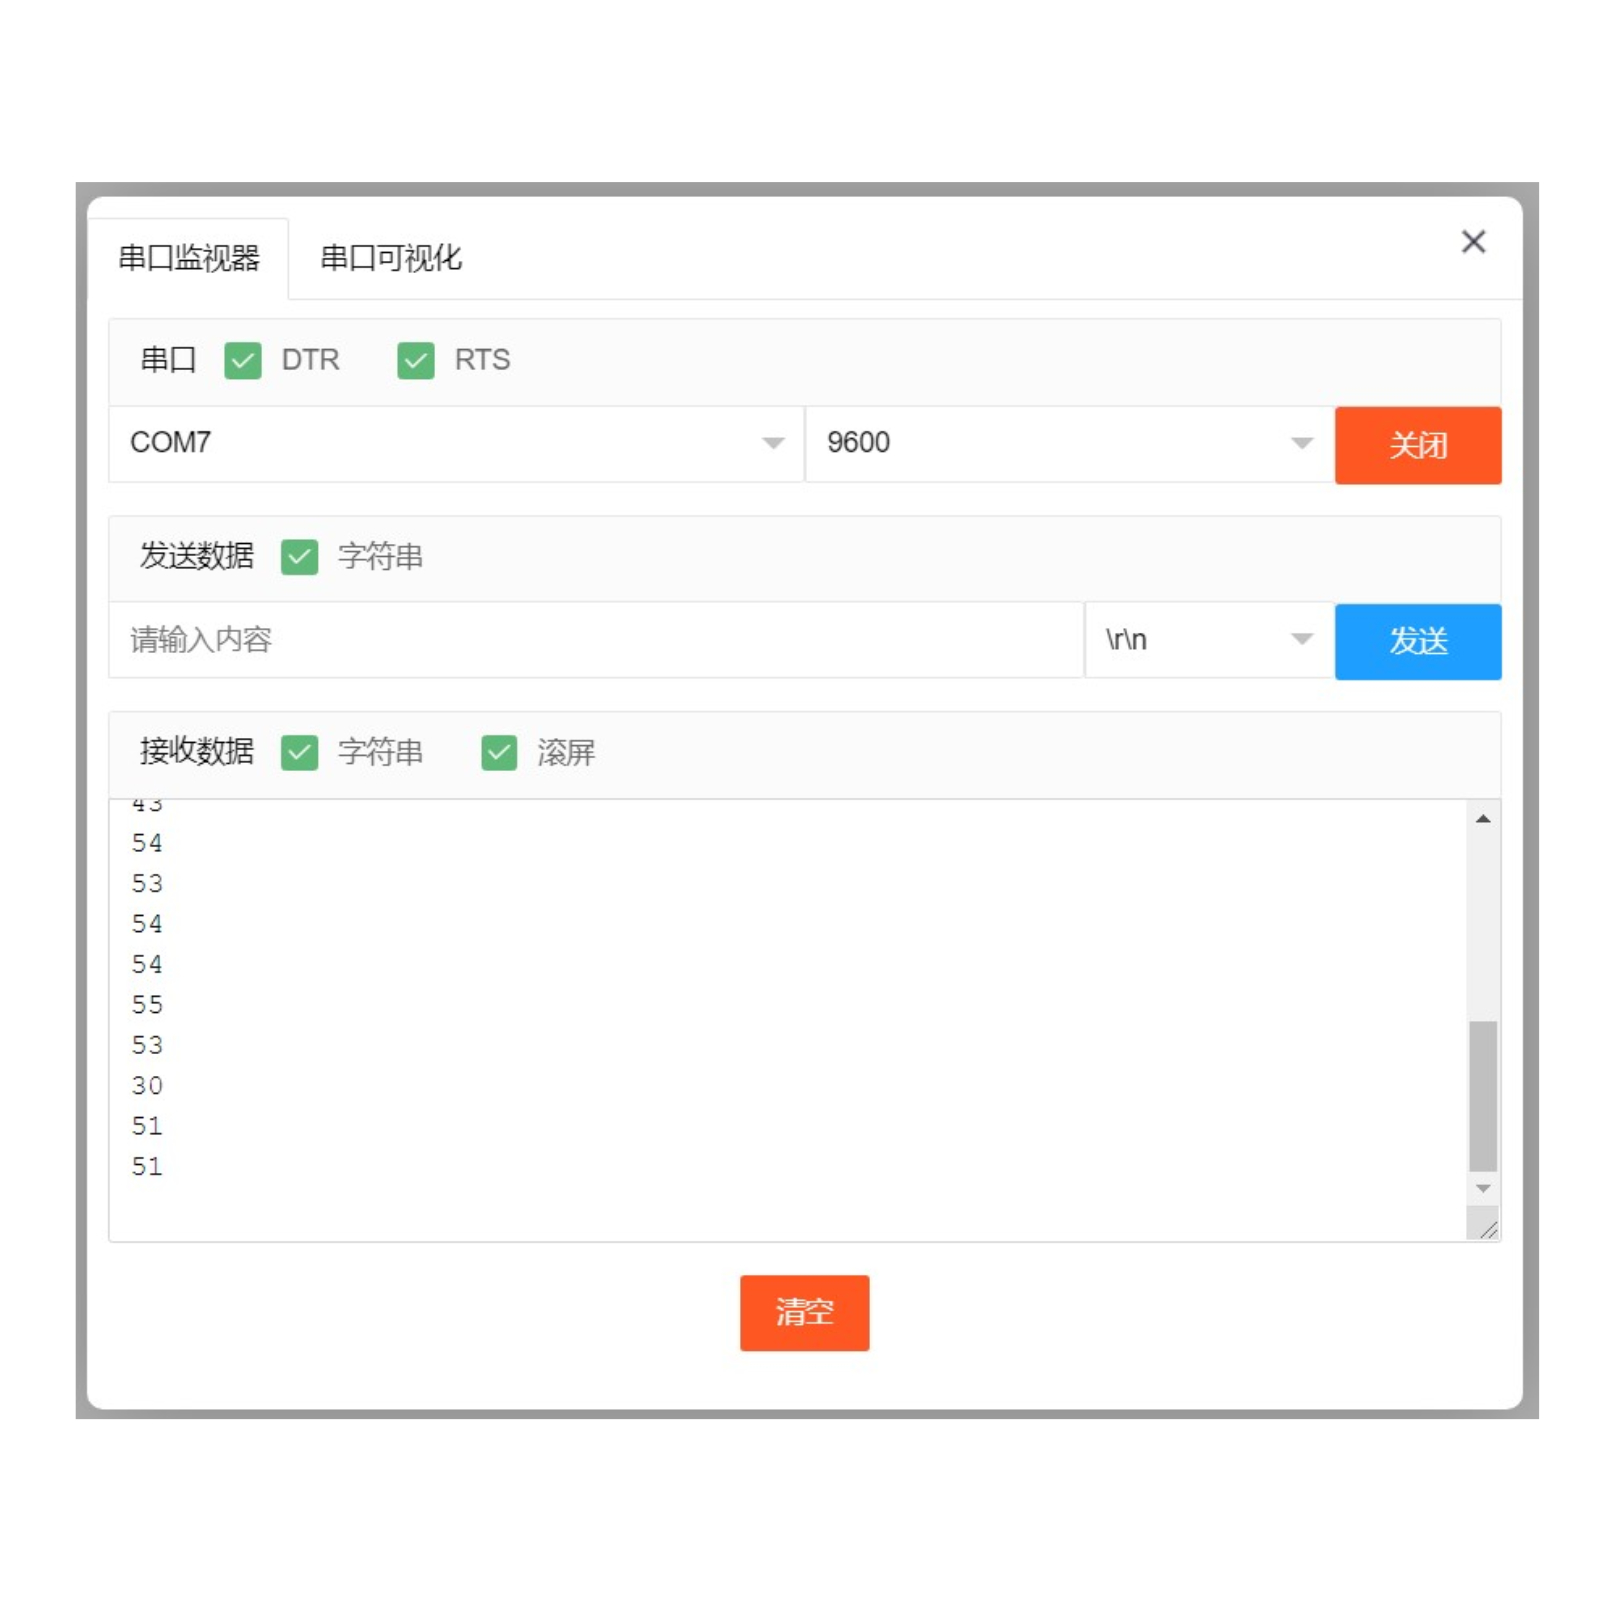
After connecting the device to the wire, burn the above program to the Arduino UNO development board, open the serial monitor, and set the baud rate to 9600.We place the obstacle in front of the ultrasonic module, and can measure the distance between the ultrasonic module and the obstacle (cm).Change the distance between the ultrasonic module and the obstacle, and you will find that the distance value displayed on the serial port changes.
ESP32 Python test conclusion:After connecting the device and lines, after flashing the above program to the ESP32 development board, open the serial monitor and set the baud rate to 9600.We place the obstacle in front of the ultrasonic module, which can measure the distance between the ultrasonic module and the obstacle (cm).Change the distance between the ultrasonic module and the obstacle, and you will find that the distance value displayed on the serial port changes.