1. Introduction
A mist sensor is a digital and analog signal sensor that can be used with a microcontroller to make simple rain sensors and liquid switches.When the humidity on the surface of the sensor rises, the output voltage will increase.In addition to detecting rain, it can also detect mist or act as a touch switch.Note: Adjusting the potentiometer on the back of the sensor with a screwdriver can control the sensitivity of the fog detection.The connector part is not waterproof, please note not to immerse the connector directly in water.
2. Schematic
Humidity Sensor-HS-S10A SchematicClick to view
Module Parameters
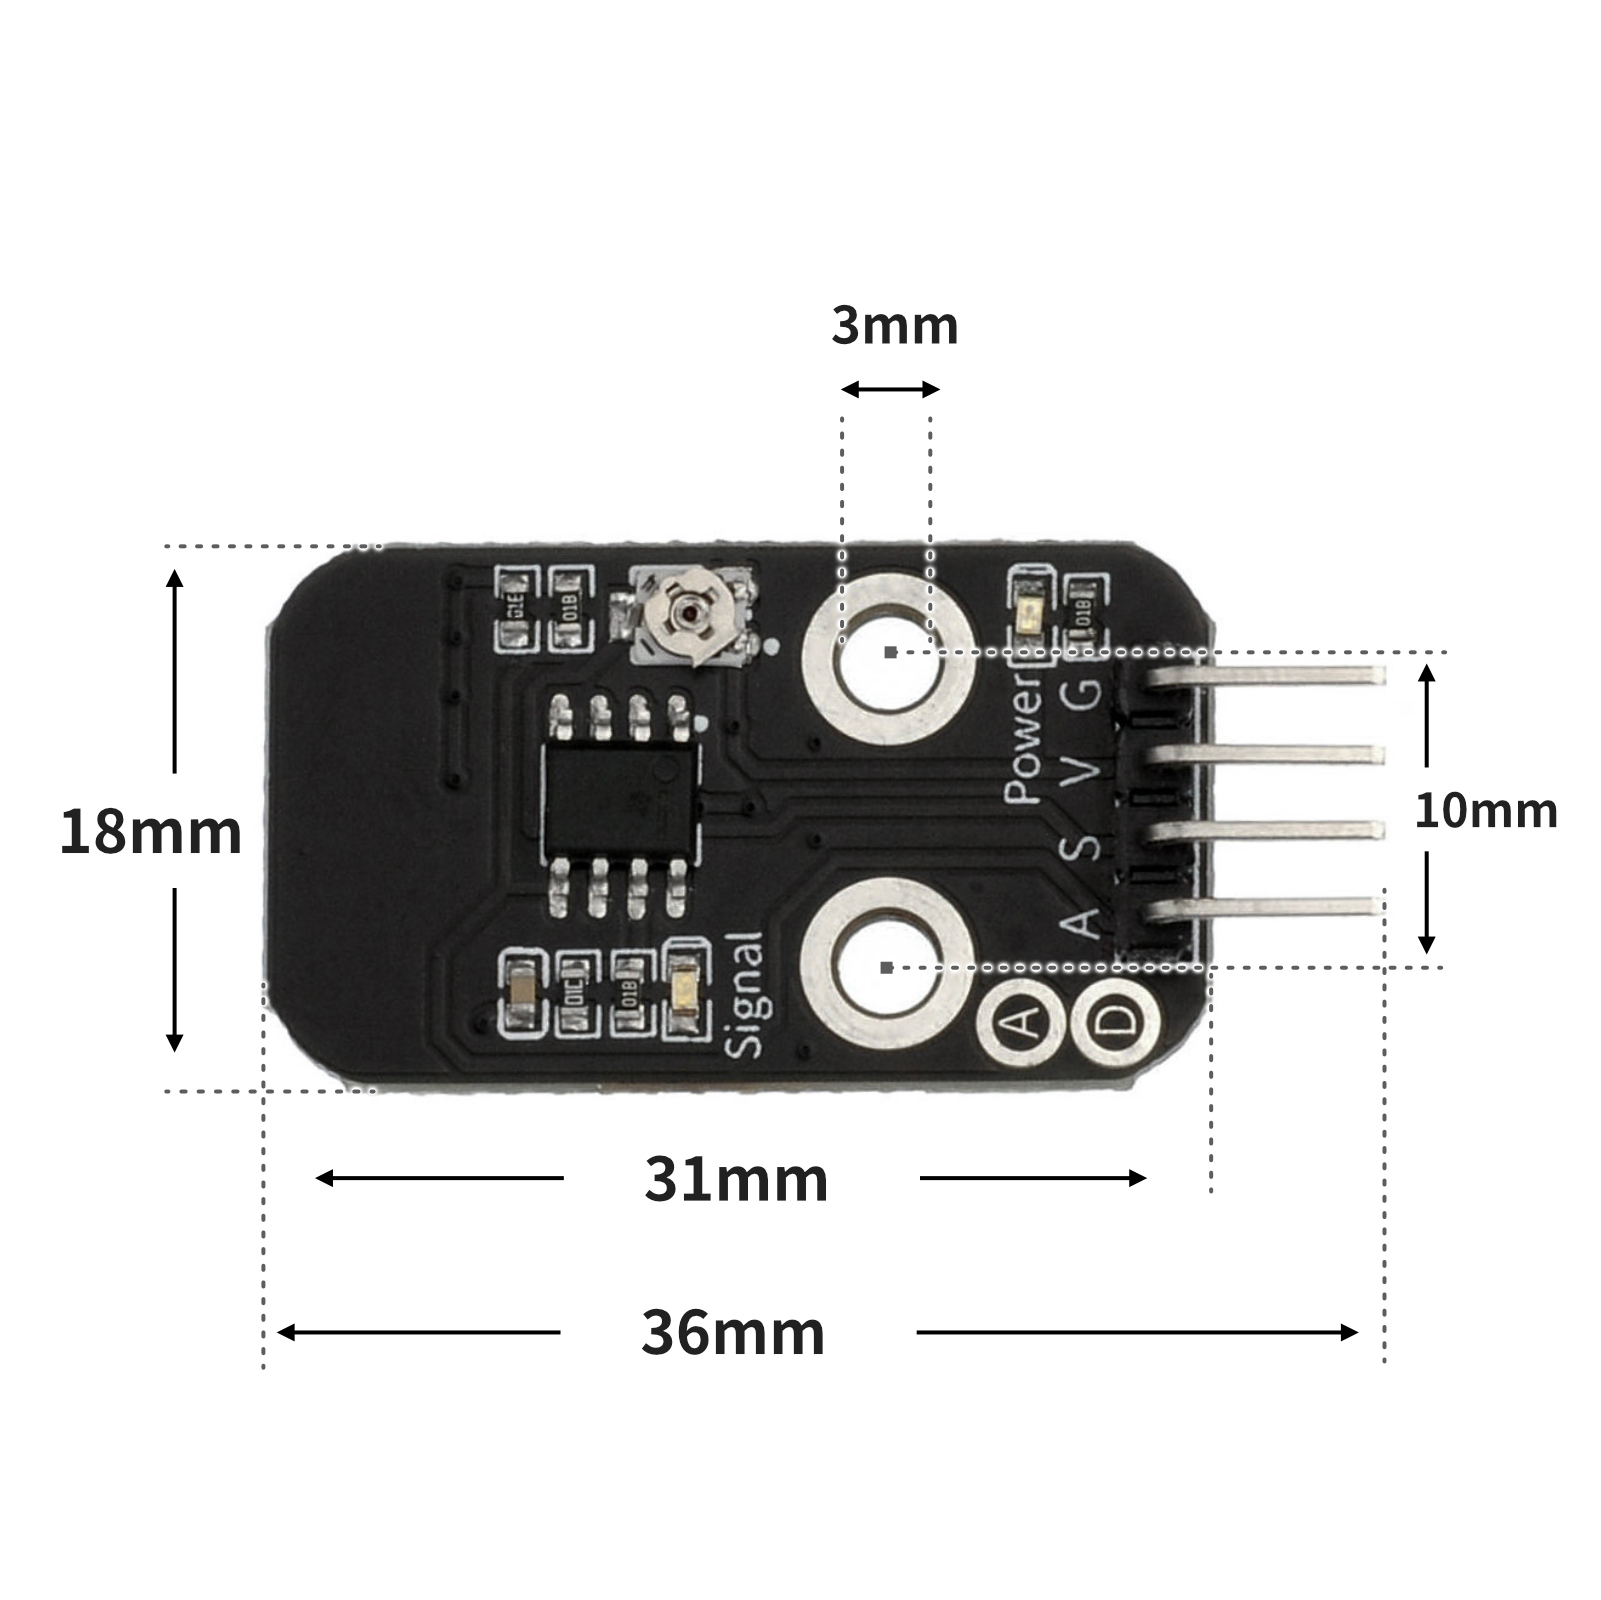
Pin Name | description |
|---|---|
G | GND (Negative Power Input) |
V | VCC (Positive Power Input) |
S | Digital Signal Pin |
A | Analog Signal Pin |
Power Supply Voltage: 3.3V / 5V
Connection Type: 2.54mm Header
Installation Method: Double Screw Fixed
4, Circuit Board Size
5 of Arduino IDE example program
Attention: If prompted with an error message about the library file during program upload, please import the library file first!
Arduino IDE Library Download and Import Tutorial:Click to view
Example program (UNO development board):
void setup(){
 Serial.begin(9600);
 pinMode(3, INPUT);
 pinMode(6, OUTPUT);
}
void loop(){
 //雾气传感器接开发板D3,LED灯接6;调节模块电位器至信号指示灯熄灭,
 //当检测到雾气时,输出高电平(1),模块信号指示蓝灯亮起;
 //否则输出低电平(0),模块信号指示蓝灯熄灭。
 if (digitalRead(3) == HIGH) {
 digitalWrite(6,HIGH);
 } else {
 digitalWrite(6,LOW);
 }
 Serial.println(digitalRead(3));
}
6, ESP32 Python Example (for Mixly IDE/Misashi)
Choose the development board Python ESP32 [ESP32 Generic(4MB)] and upload in code mode
Attention: If prompted with an error message about the library file during program upload, please import the library file first!
Download and import tutorial for Mixly IDE ESP32 library:Click to view
Example program (ESP32-Python):
import machine
pin2 = machine.Pin(2, machine.Pin.IN)
pin4 = machine.Pin(4, machine.Pin.OUT)
while True:
if pin2.value() == 1:
pin4.value(1)
else:
pin4.value(0)
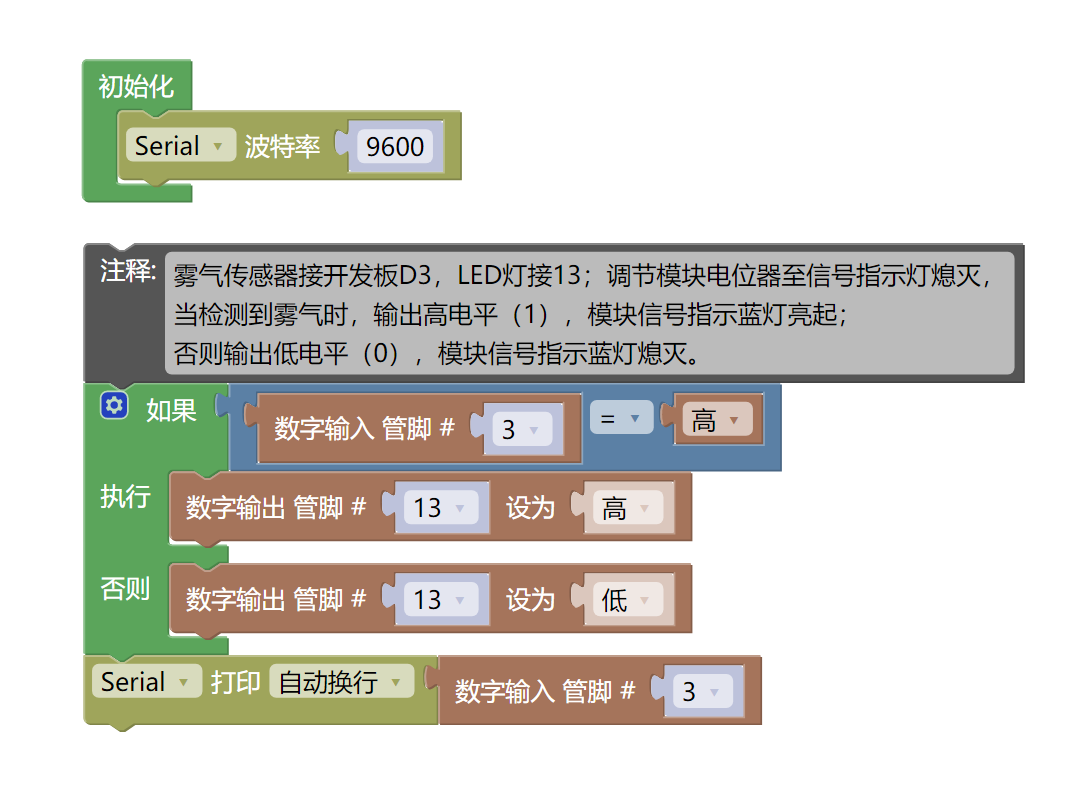
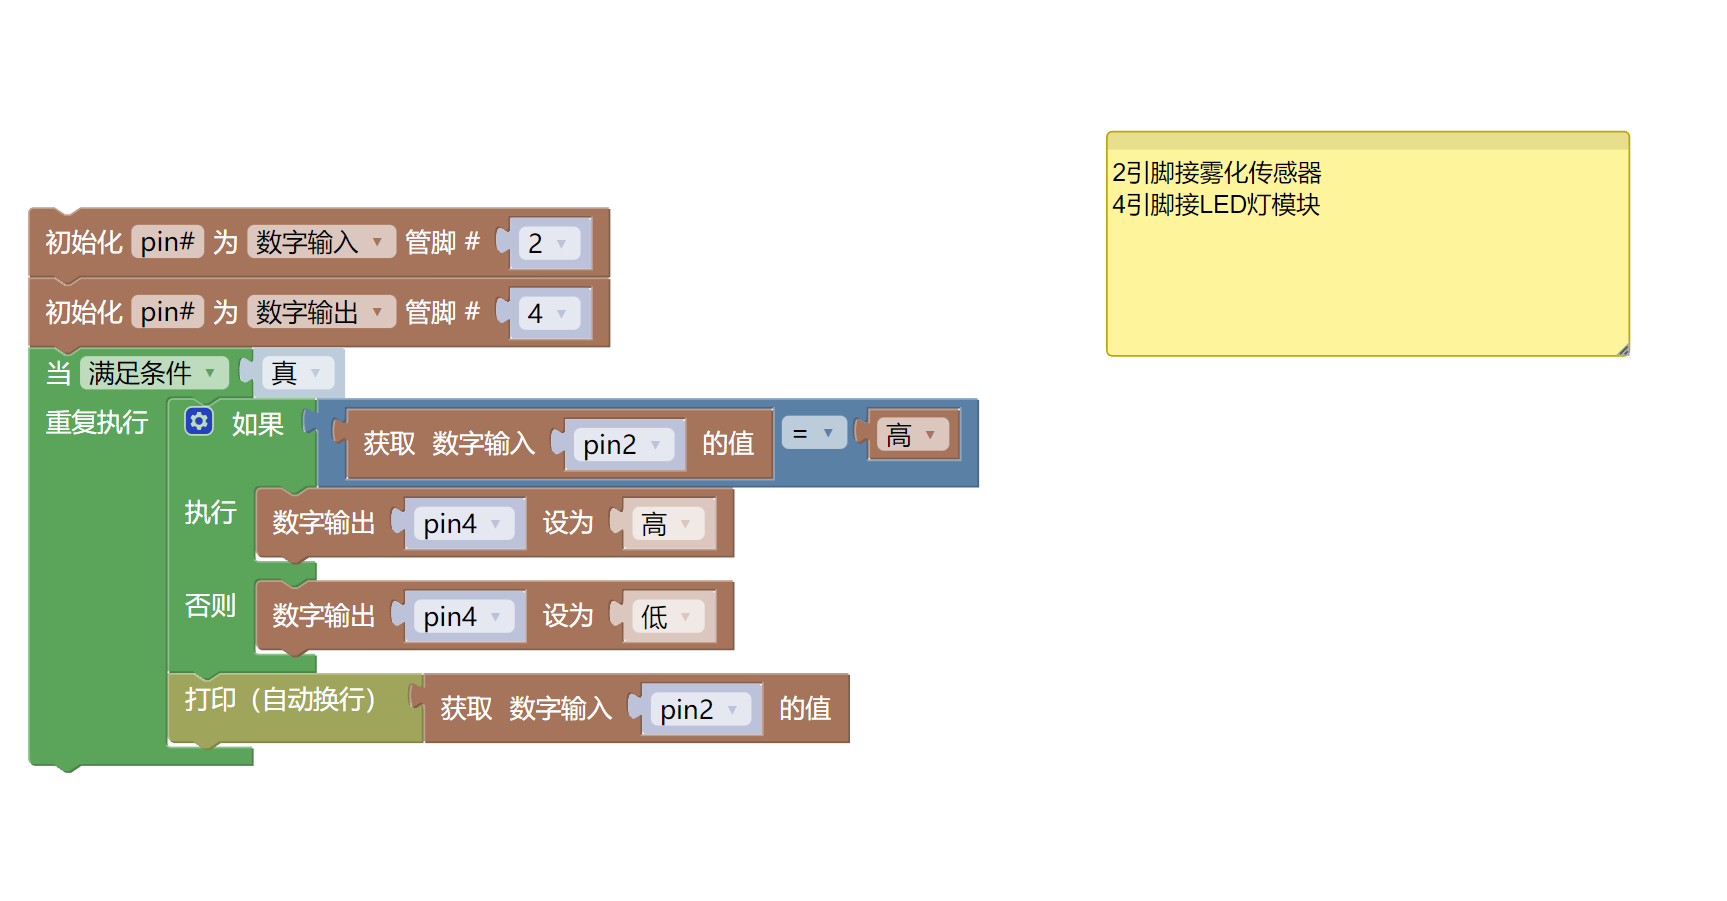
print(pin2.value())7, Mixly example program (graphical language)
Example program (UNO development board):Click to download
Attention: If prompted with an error message about the library file during program upload, please import the library file first!
Download and import tutorial of Mixly IDE Arduino library:Click to view
Example Program (ESP32 Development Board):Click to download
Attention: If prompted with an error message about the library file during program upload, please import the library file first!
Download and import tutorial for Mixly IDE ESP32 library:Click to view
8. Setting up the Test Environment
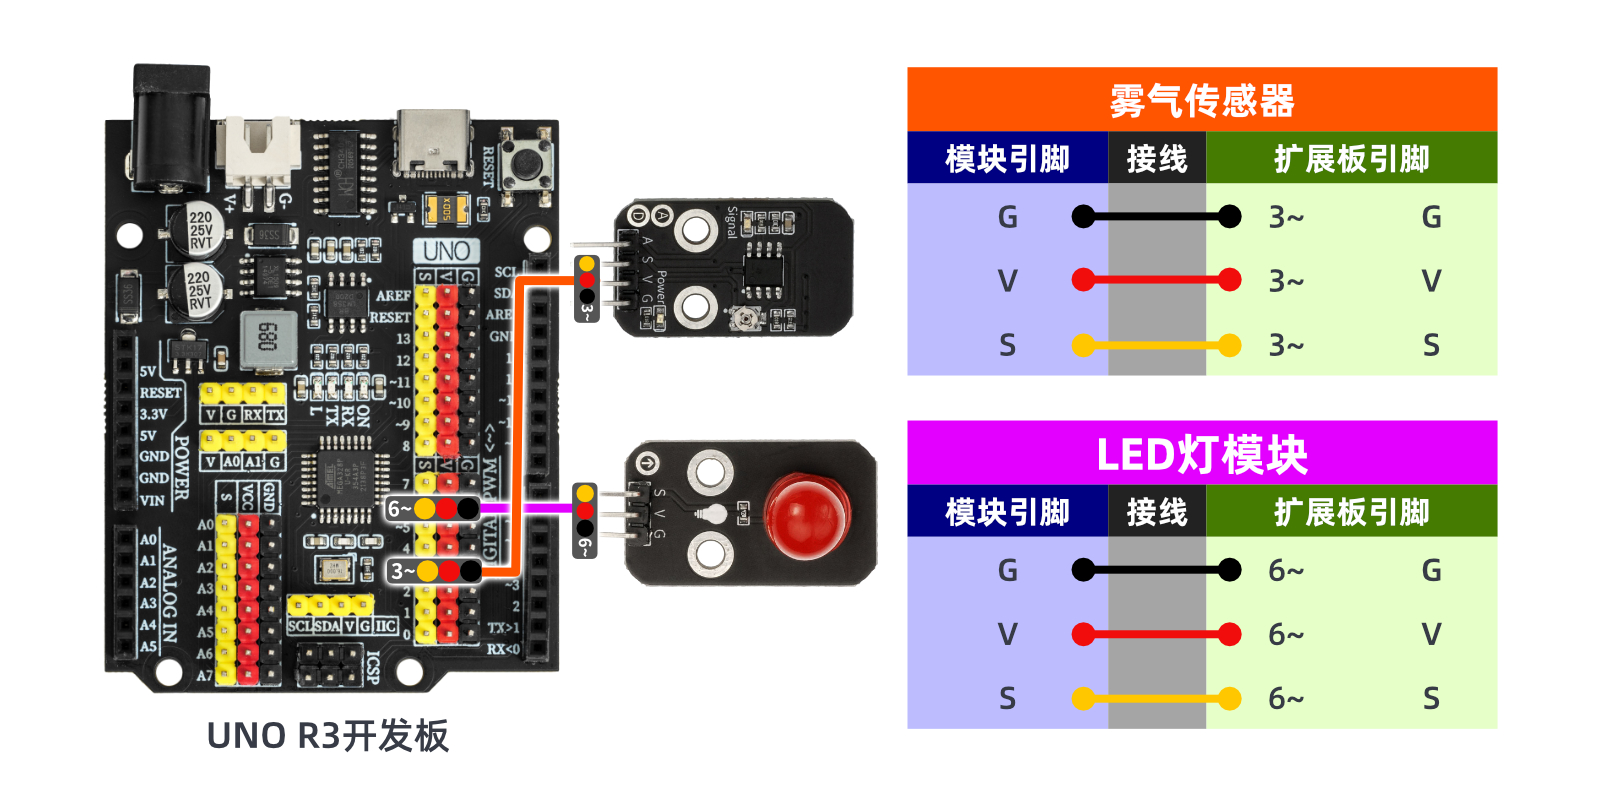
Arduino UNO Test Environment Setup
Prepare Components:
HELLO STEM UNO R3 PRO DEVELOPMENT BOARD *1
USB TYPE-C DATA CABLE *1
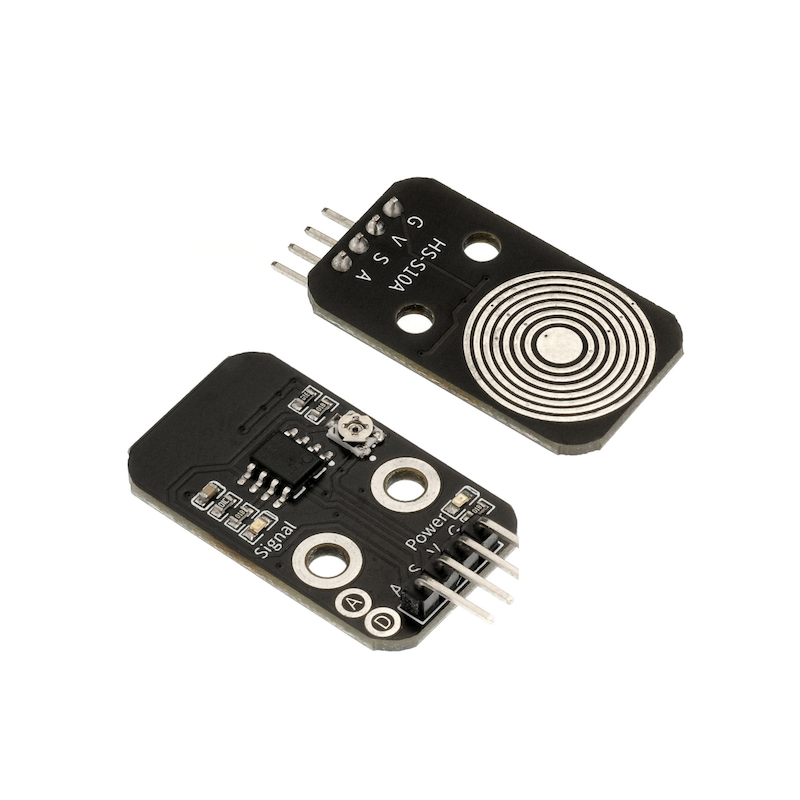
Mist Sensor (HS-S10A) *1
LED lamp module (HS-F08A) *1
1P female to female Dupont wire *6 pieces or 3P female to female Dupont wire *2 pieces
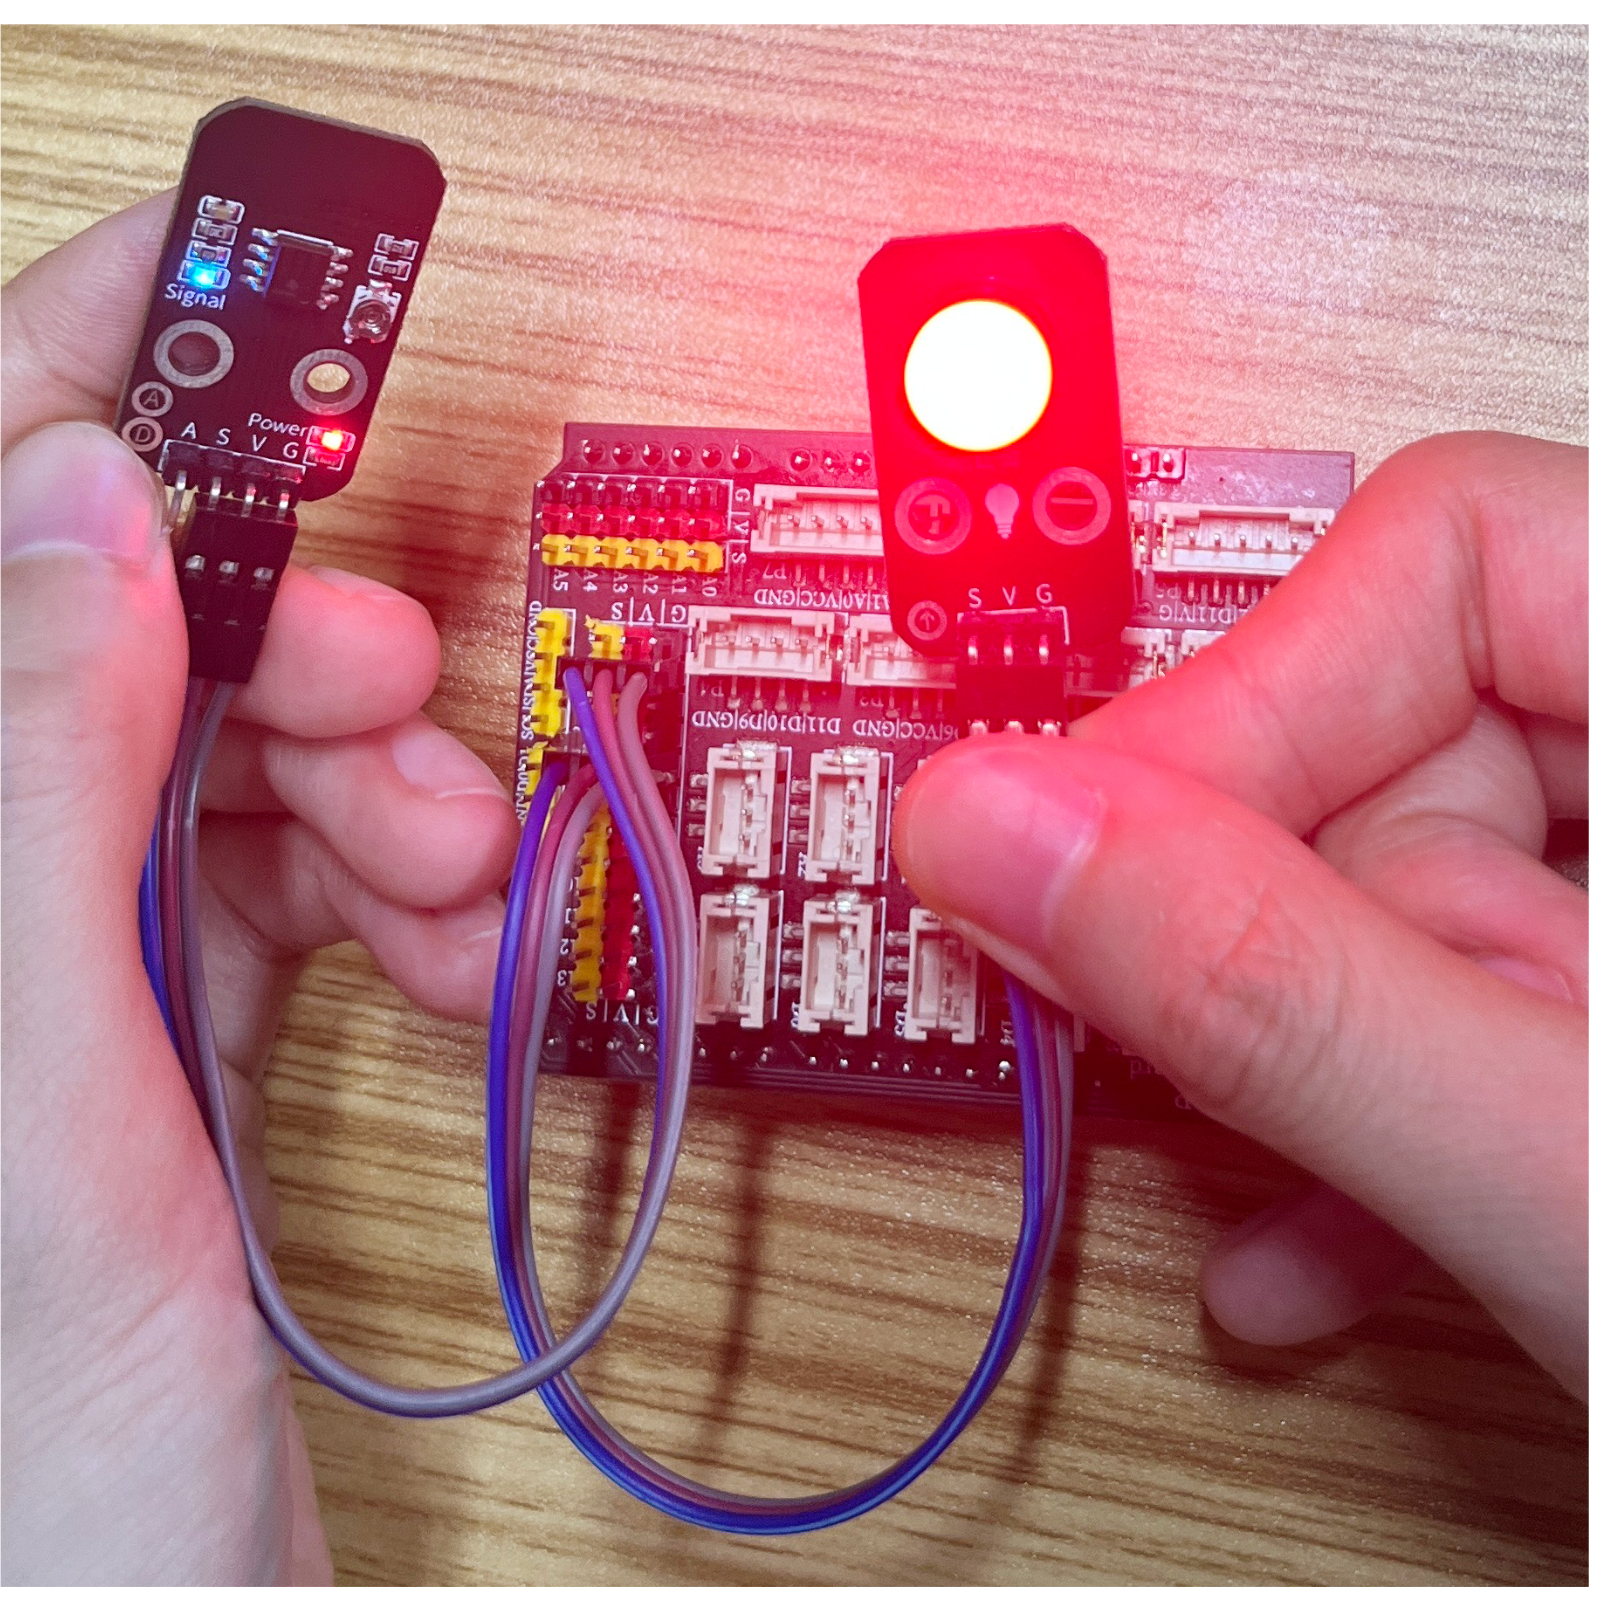
Circuit wiring diagram:
ESP32 Test Environment Setup
Prepare Components:Pending update...
Circuit wiring diagram:Pending update...
9, Video tutorial
Video tutorial:Click to view
10, Test results
Arduino UNO test results:
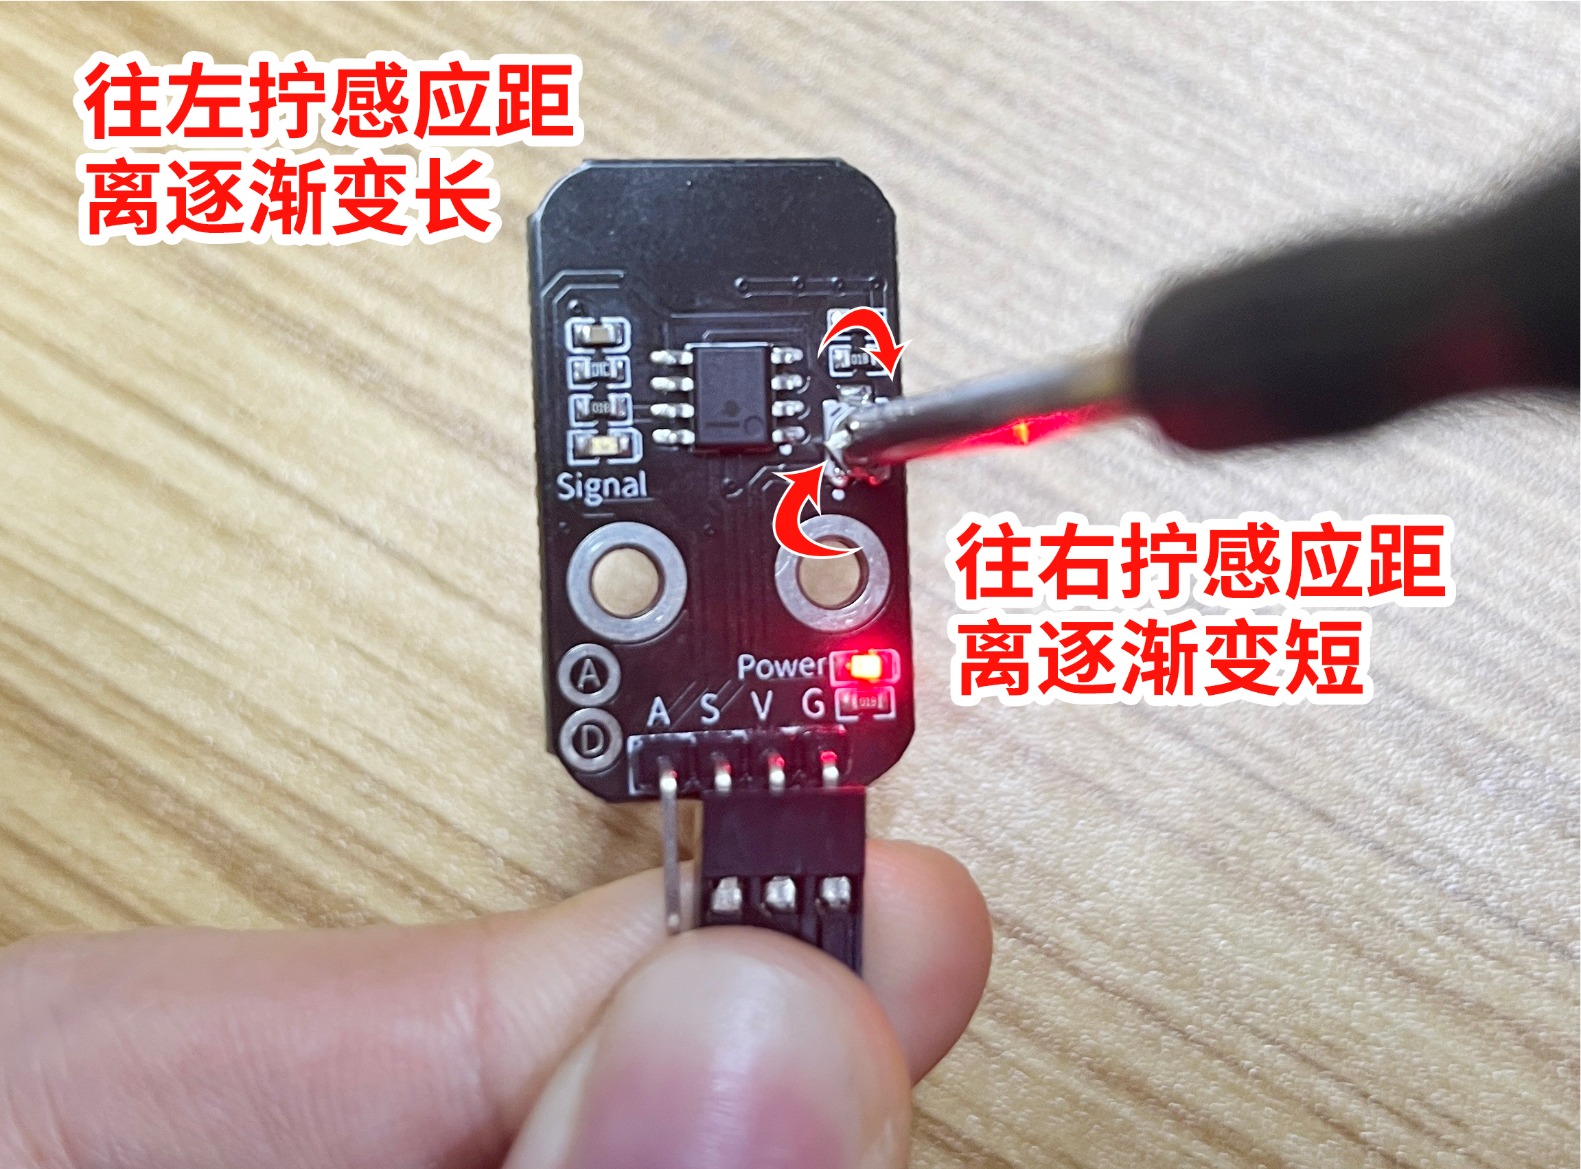
In the case of the HS-S10A mist sensor being powered on, adjusting the potentiometer of the HS-S10A mist sensor with a small screwdriver can set the sensing threshold. Turning it to the left gradually increases the sensing distance, and turning it to the right gradually shortens the sensing distance.
After connecting the device lines, burn the above program to the (Arduino Uno development board), open the serial monitor, and gently adjust the potentiometer on the back of the fog module with a screwdriver until the blue indicator light goes out.Touch your finger to the fog sensor, and you can read data changes on the serial port.When fog is detected, output high level (1), module signal indicates the blue light turns on and the led lights up; otherwise, output low level (0), module signal indicates the blue light turns off and the led goes out.