1. Introduction
2. Schematic
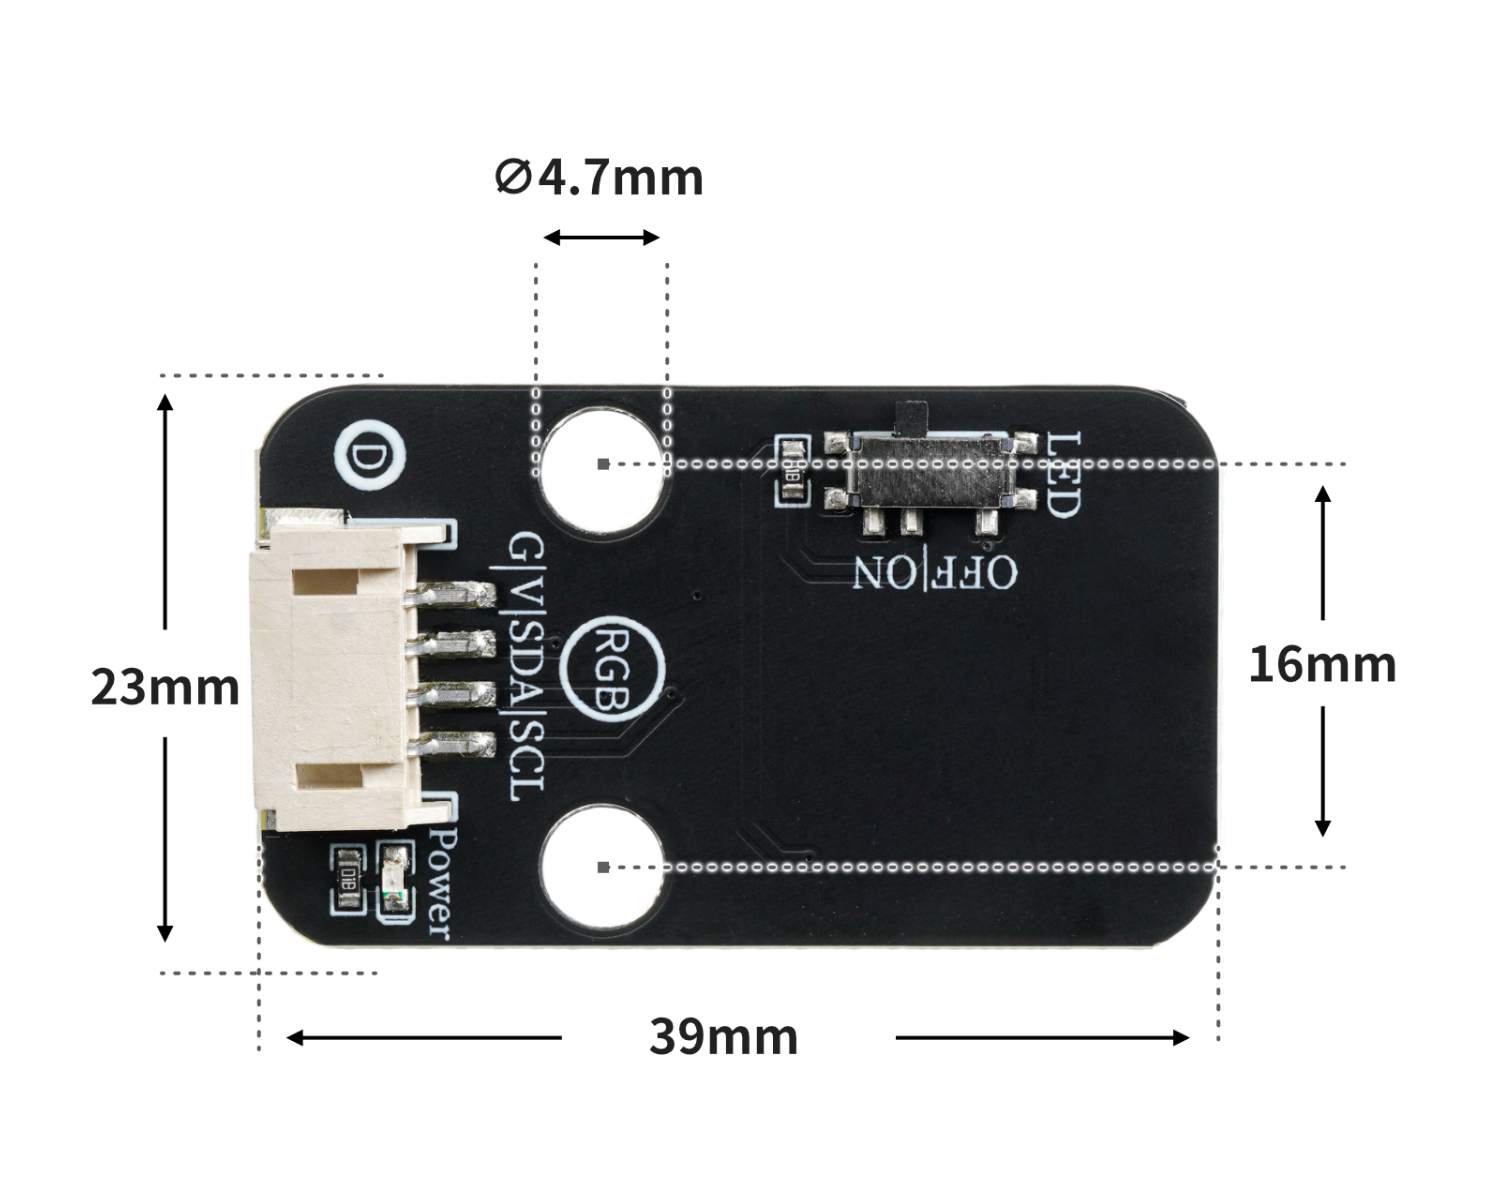
Module Parameters
Pin Name | description |
|---|---|
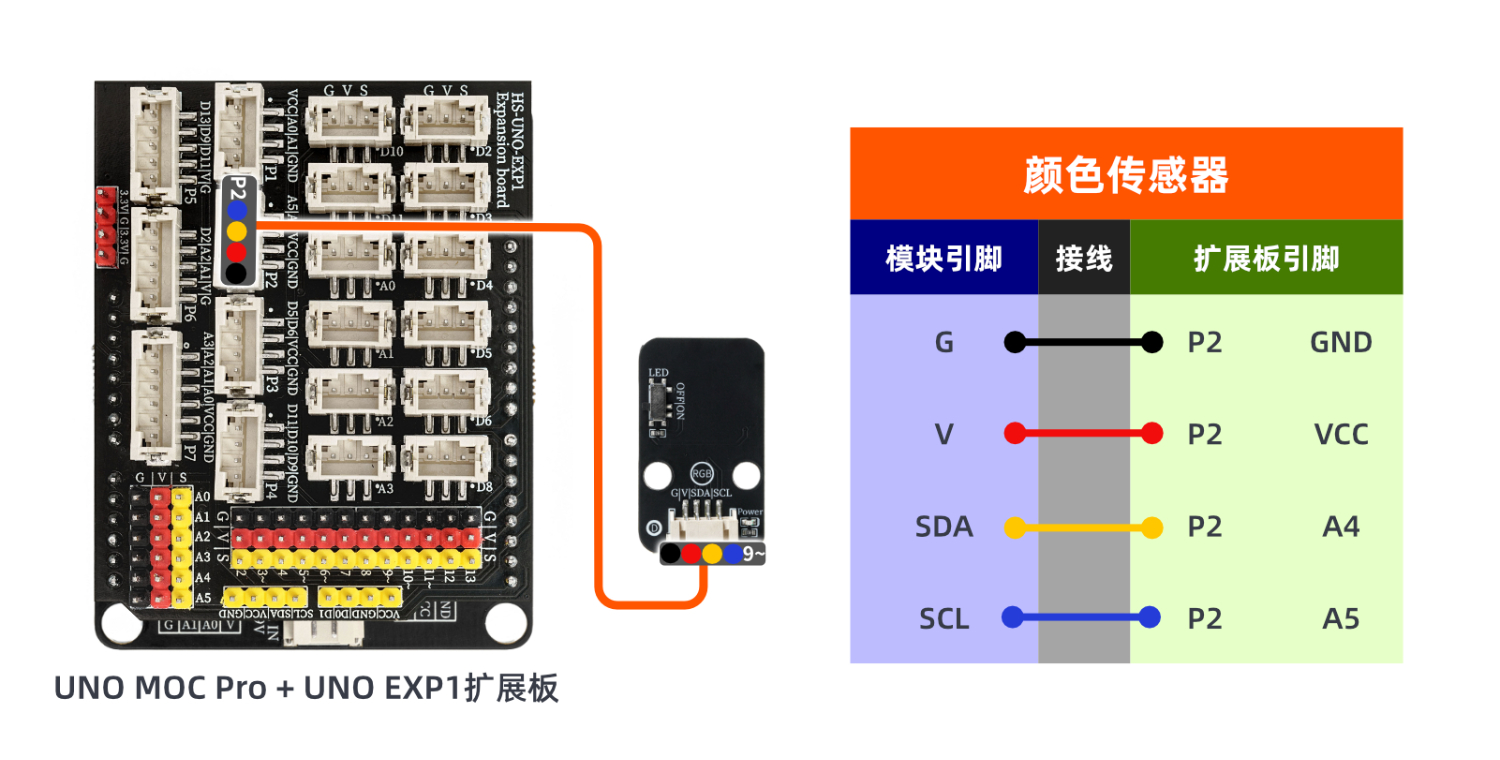
G | GND (Negative Power Input) |
V | VCC (Positive Power Input) |
SDA | Data pin |
SCL | clock pin |
Supply voltage: 3.3V-5V
Connection method: PH2.0 4P terminal wire
Installation method: Lego assembly
4, Circuit Board Size
Add Arduino Library File
Reference here if you don't know how to use library files:Install and use library files
Library file download: Click to download
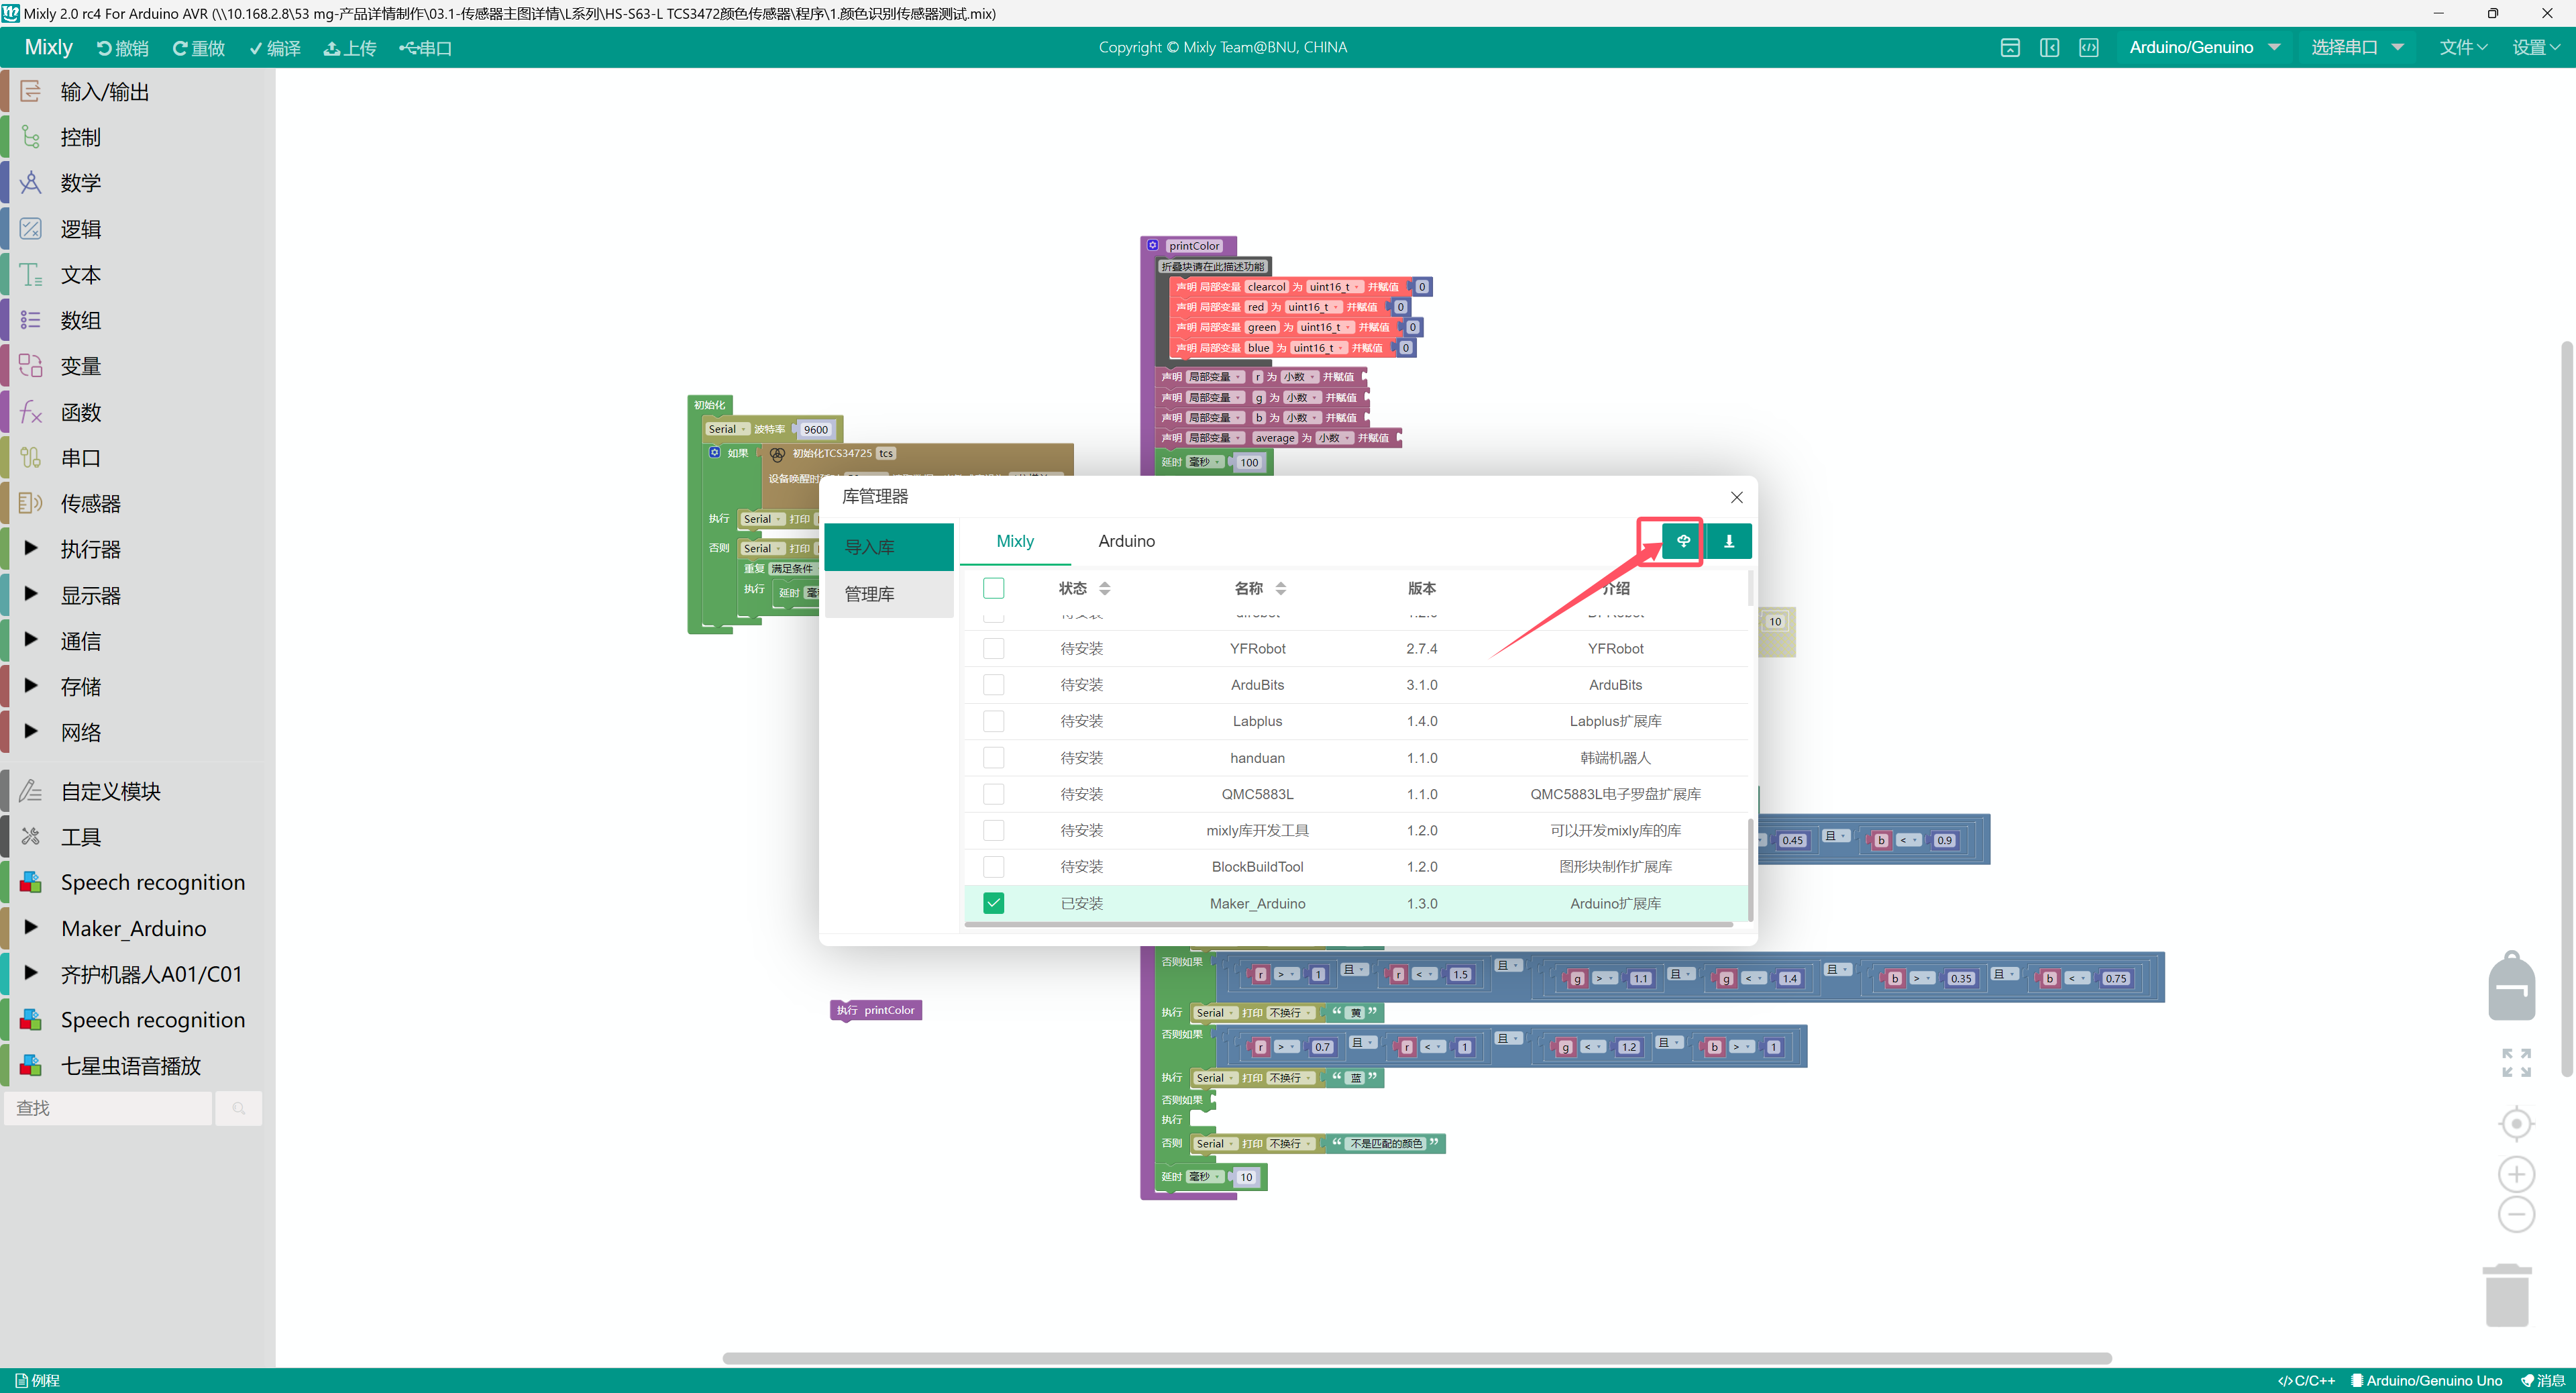
MiSiC library download steps (download MiSiC library before using the code):
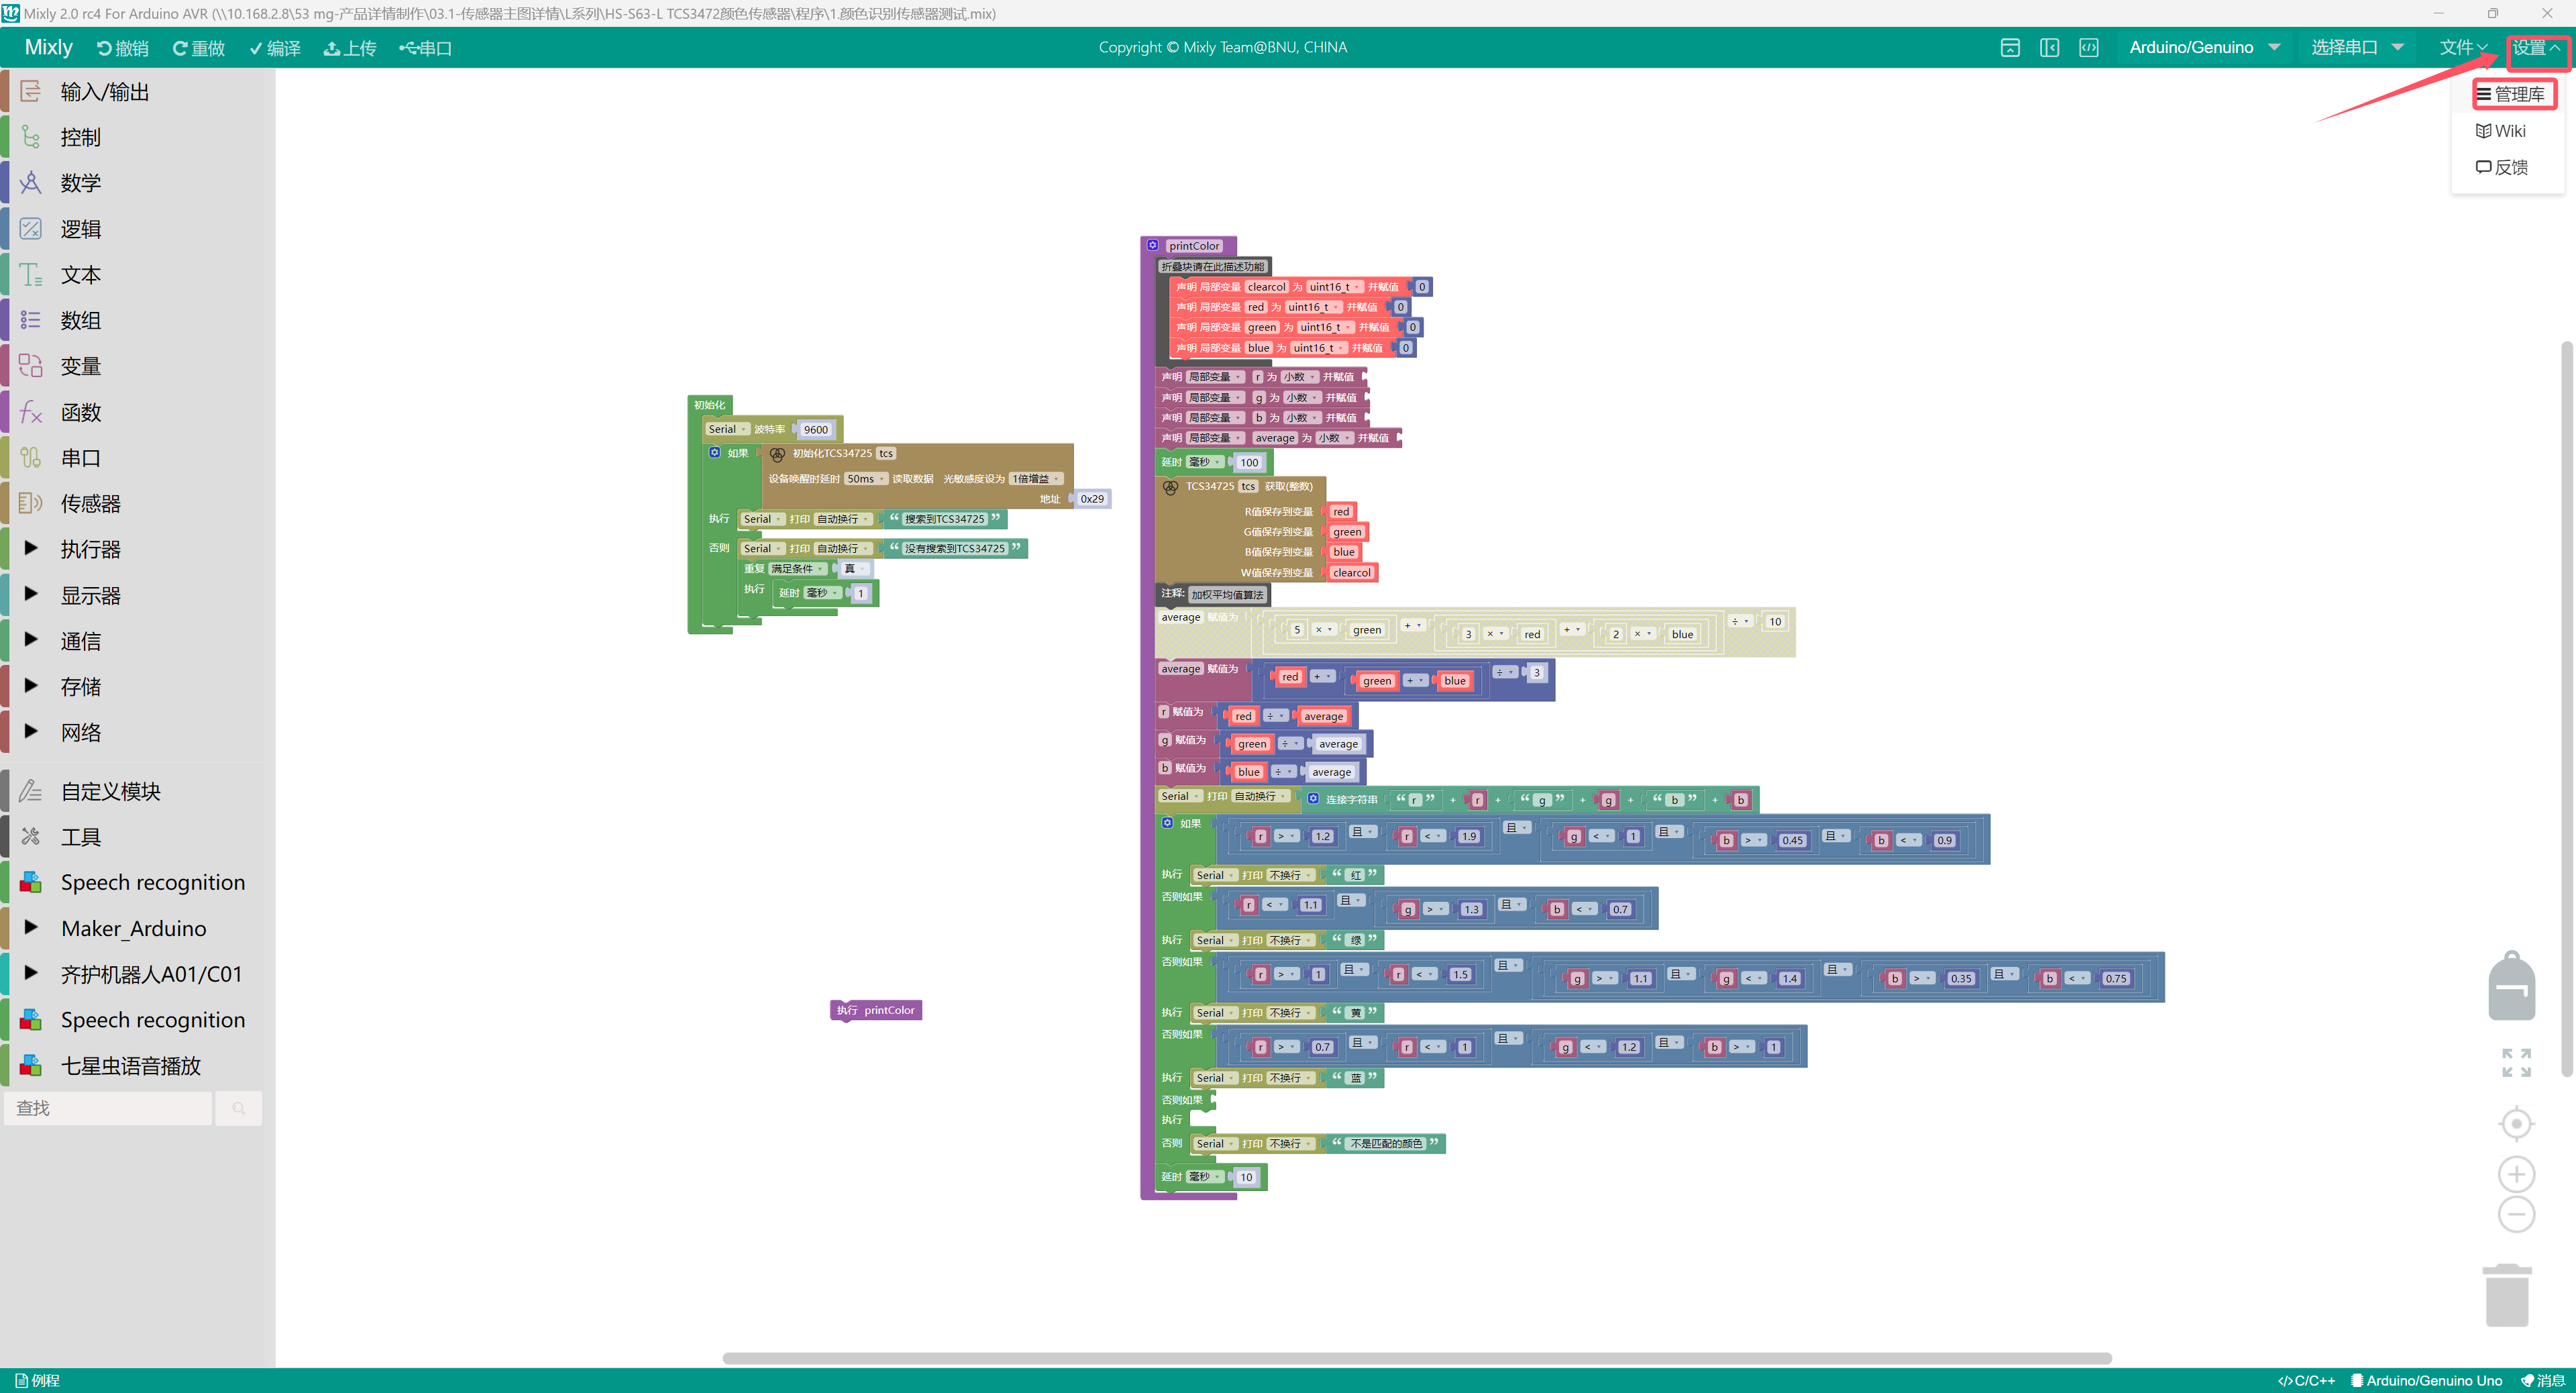
Step 1: Find the library file
Click Settings, then click Manage Libraries
Second step: Find the corresponding library and check it
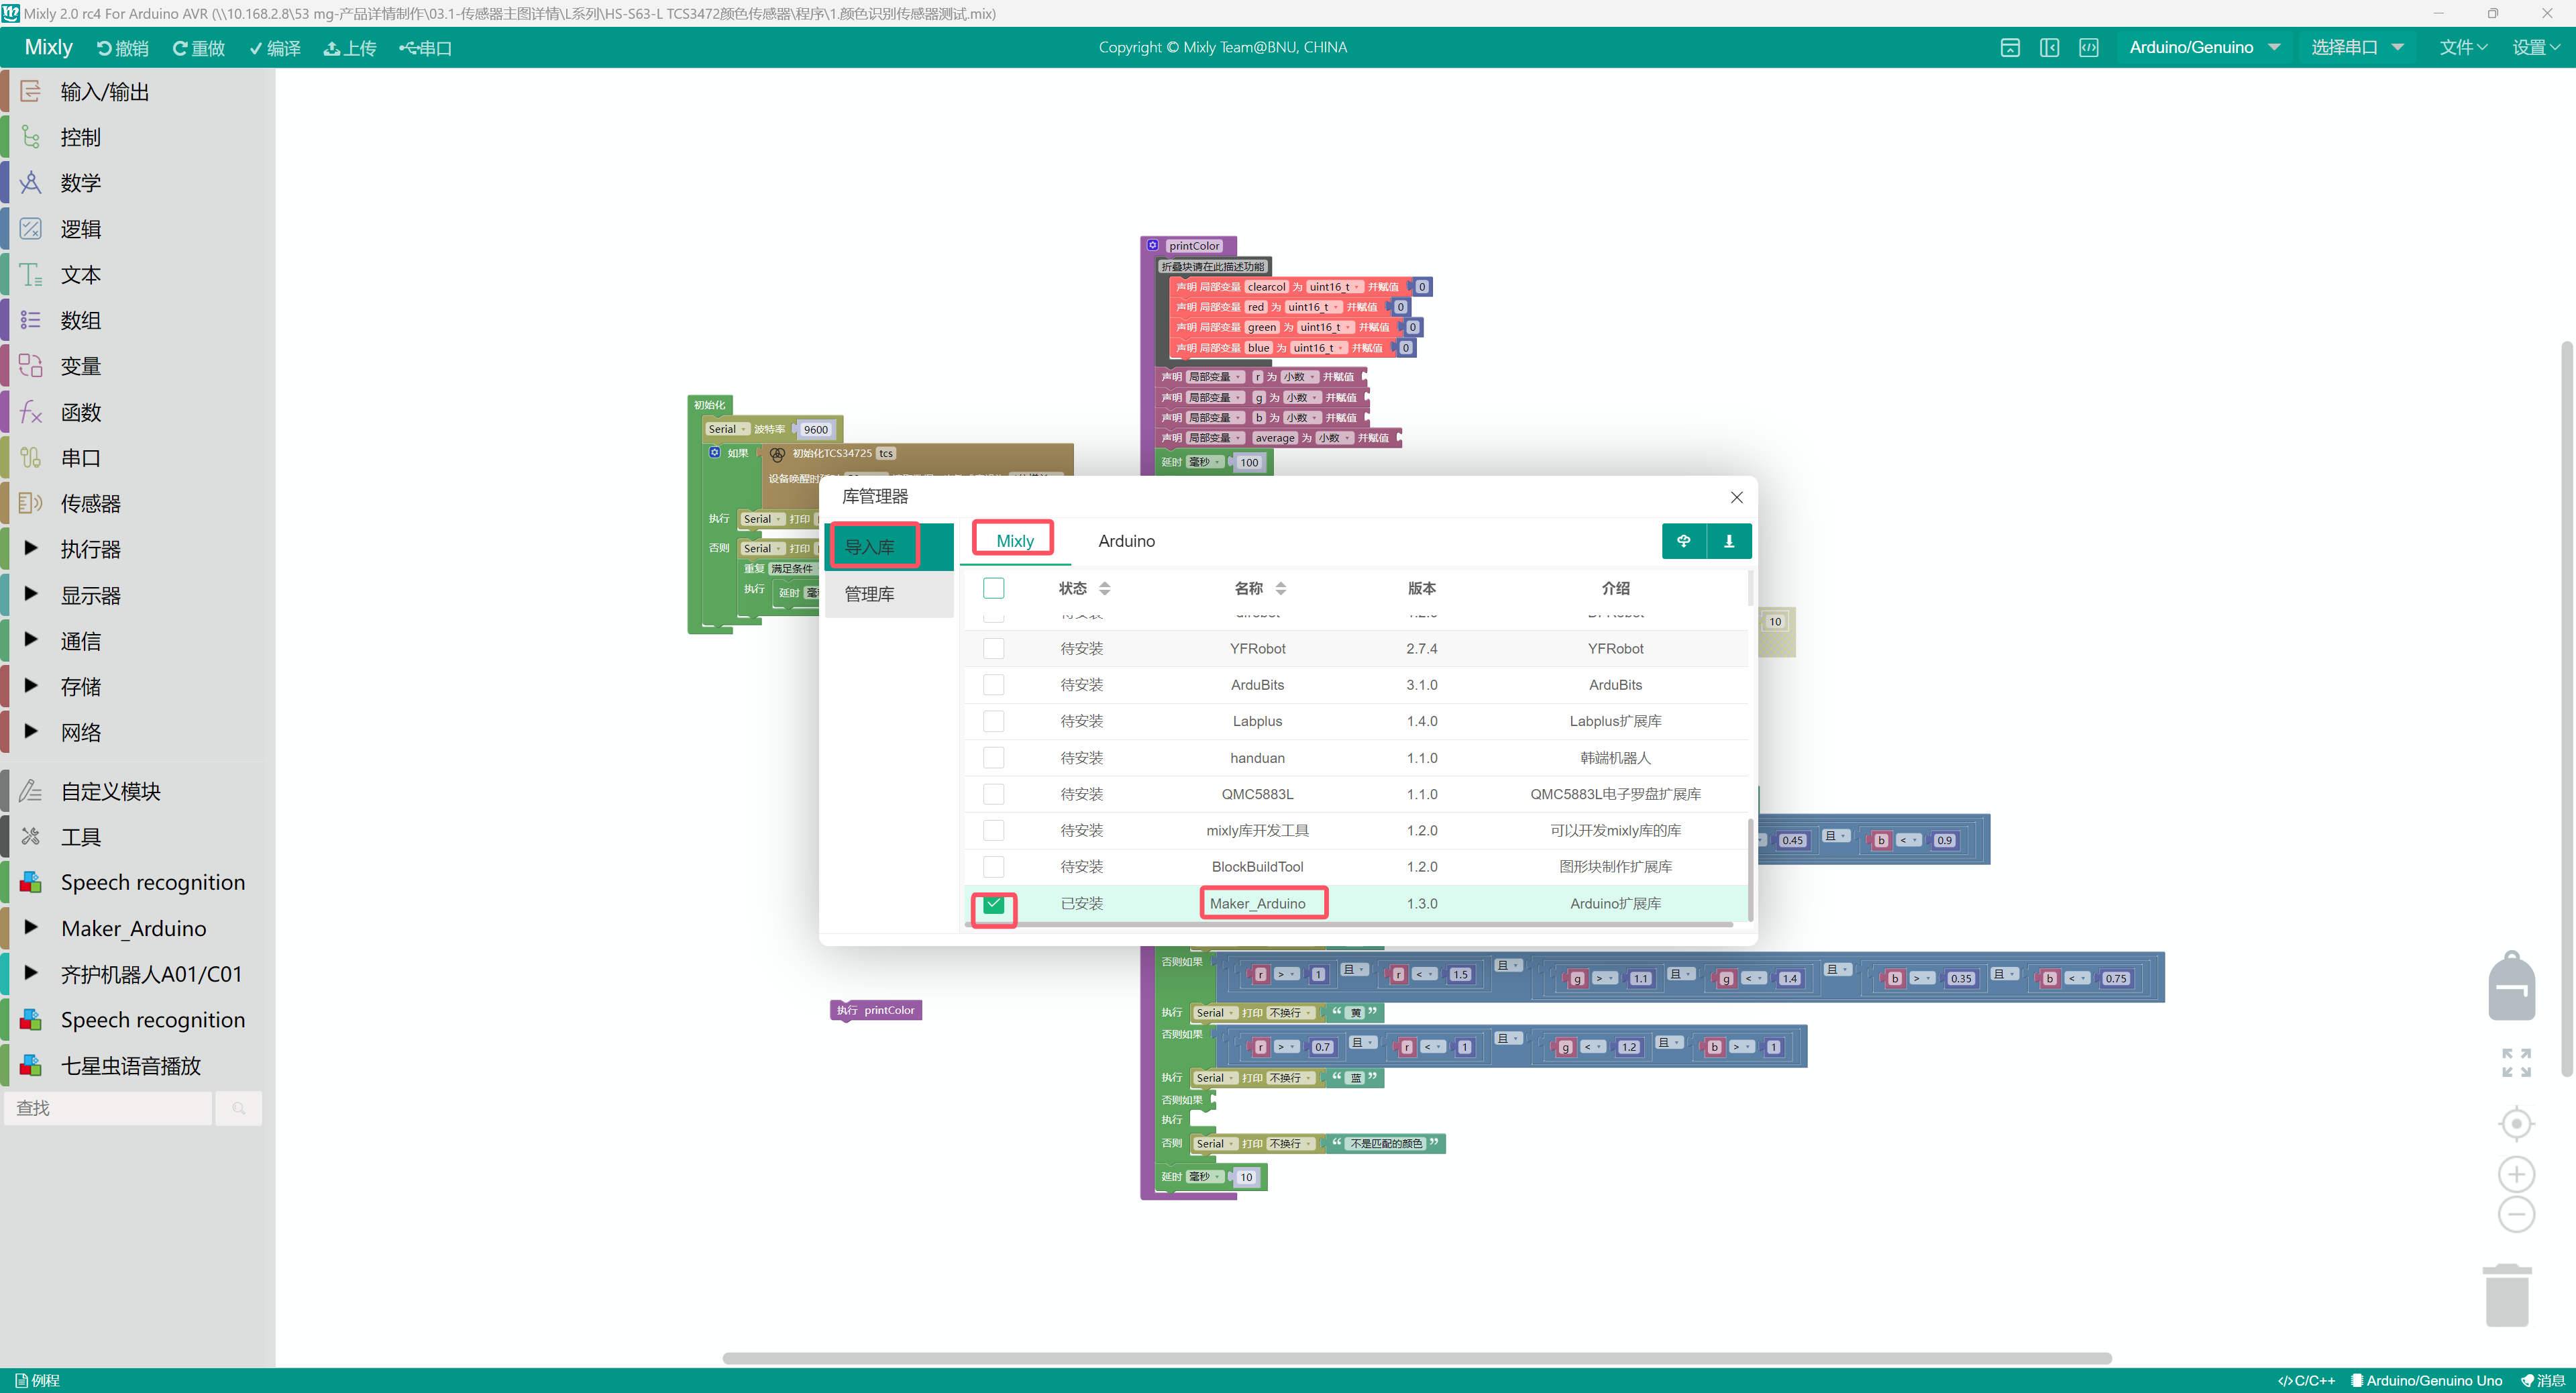
Third step: Click import
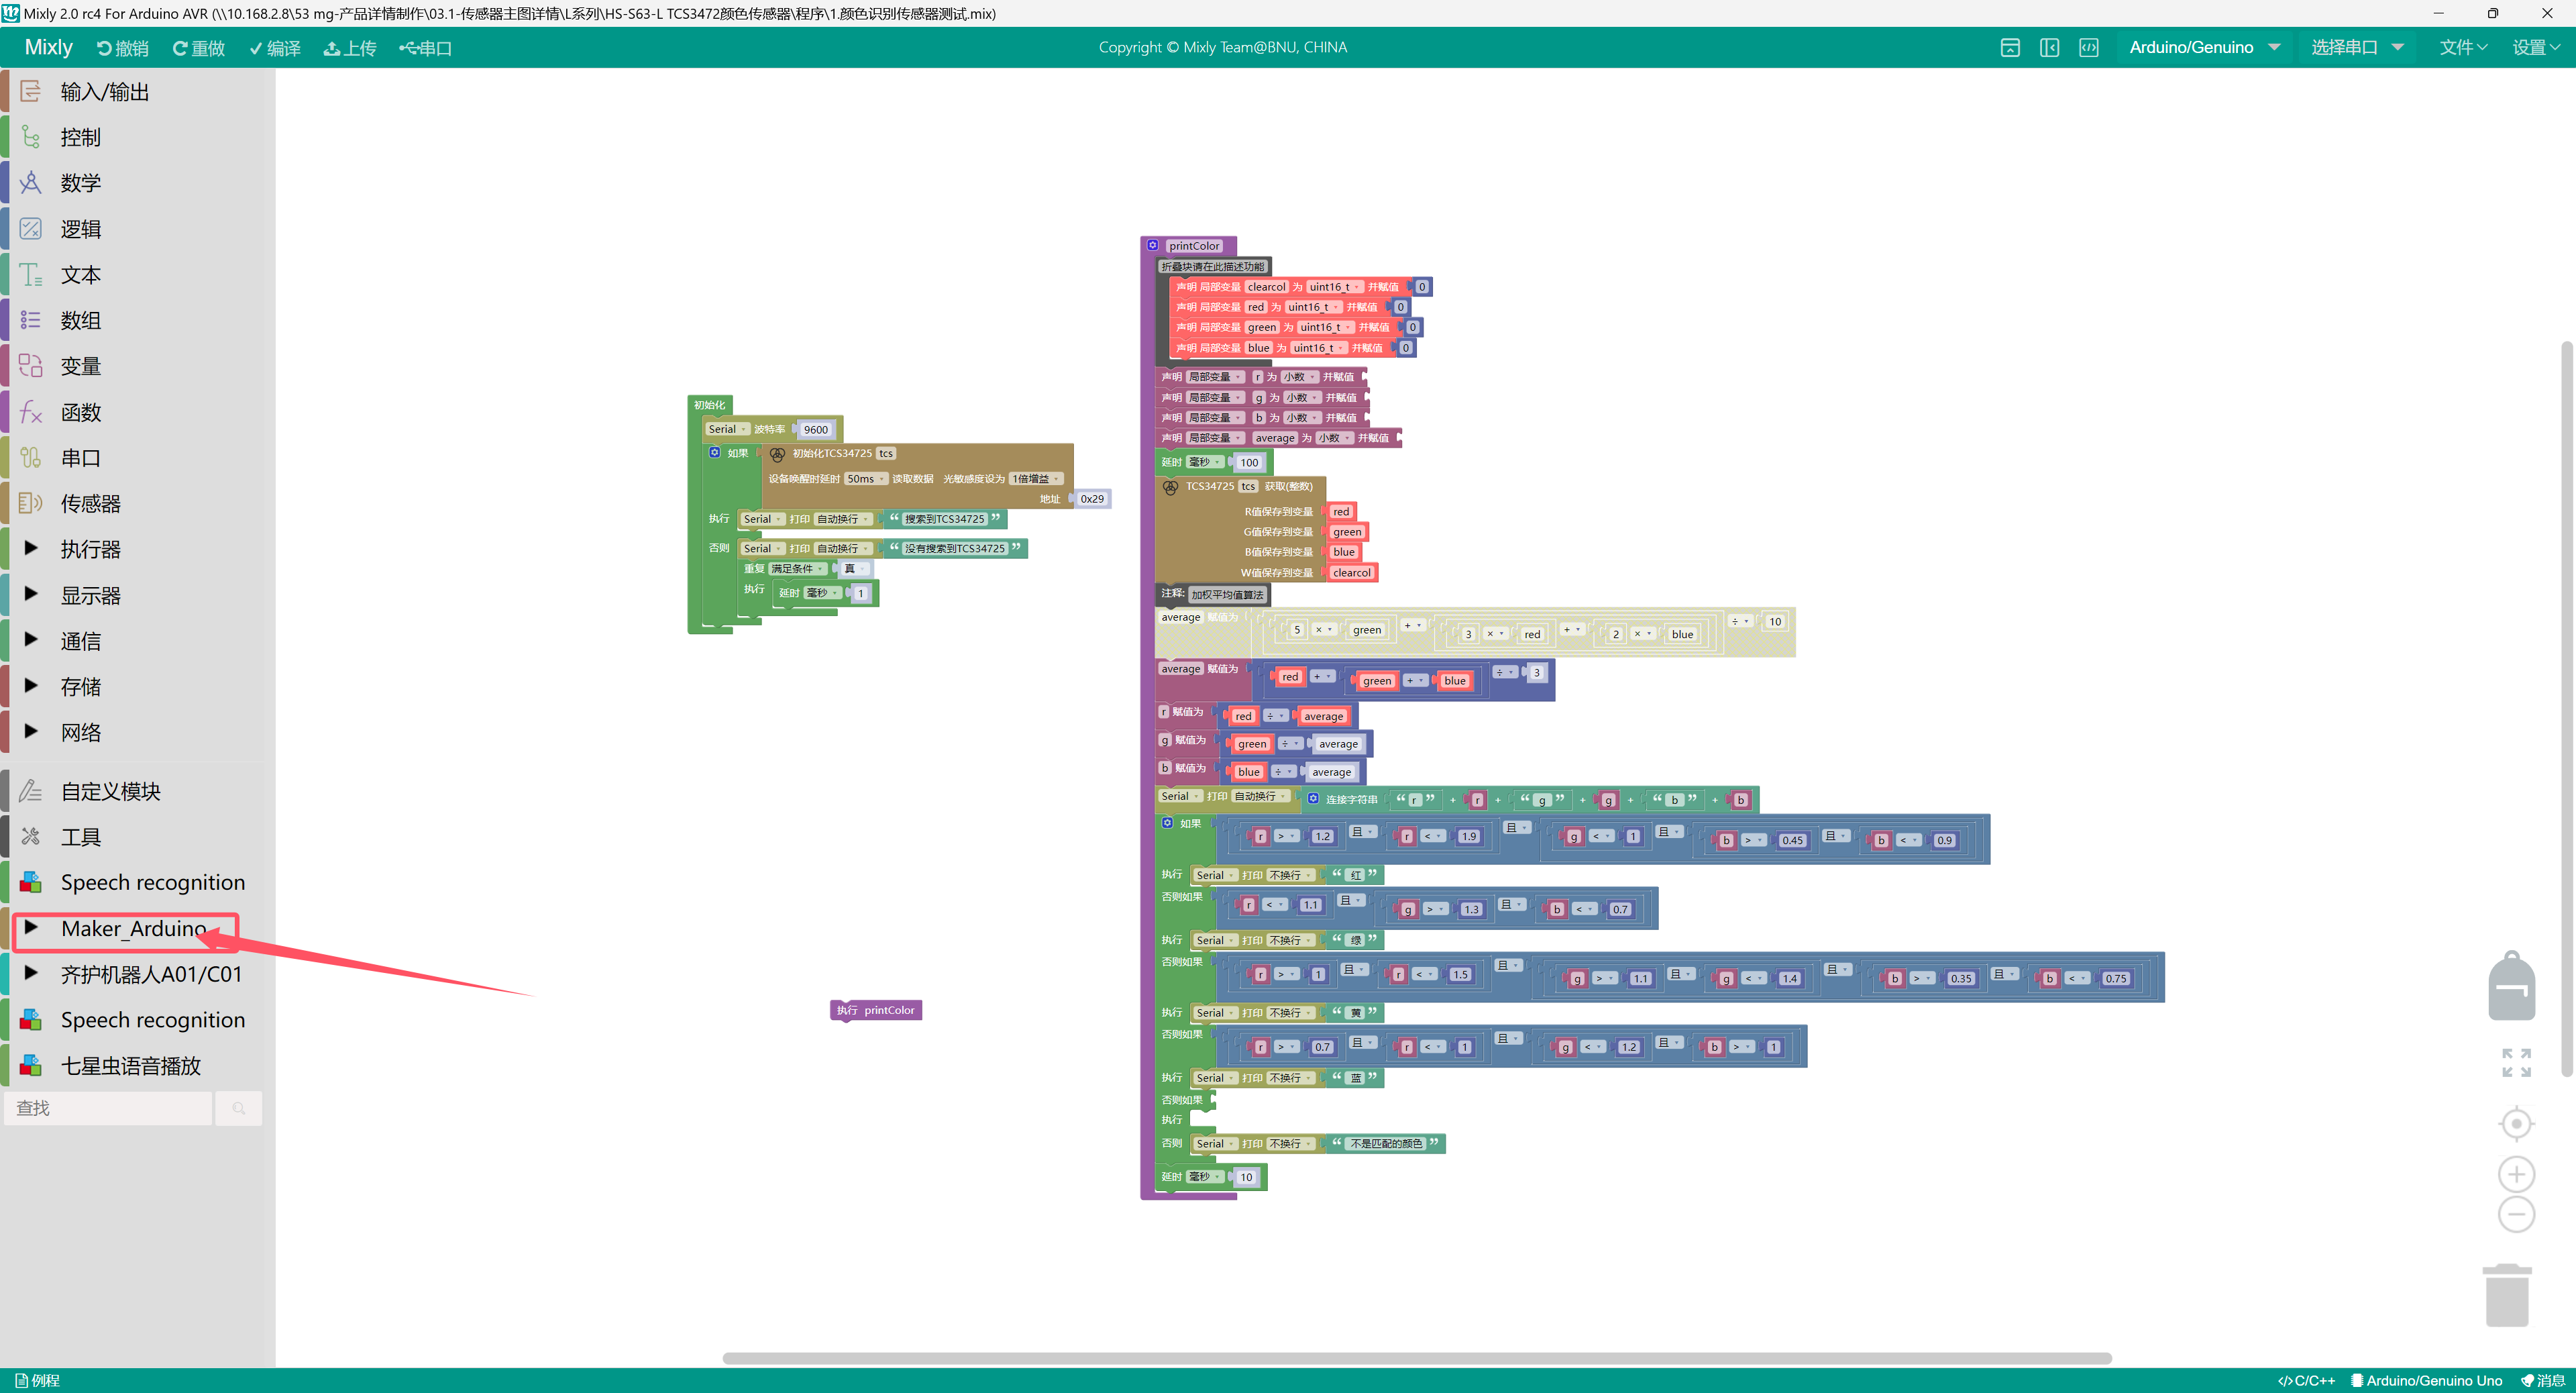
Final step: Check if the addition is successful, if successful as shown in the figure below, if not, check if the above steps are incorrect.
6, Add MicroPython environment library file
Please click here if you cannot install library files:Reference link
7. Arduino IDE example program
Example Program (UNO Development Board):Click to download
#include <Wire.h>
#include "Adafruit_TCS34725.h"
Adafruit_TCS34725 tcs = Adafruit_TCS34725(TCS34725_INTEGRATIONTIME_50MS, TCS34725_GAIN_1X);
void printColor() {
uint16_t clearcol = 0;
uint16_t red = 0;
uint16_t green = 0;
uint16_t blue = 0;
float r = 0;
float g = 0;
float b = 0;
float average = 0;
delay(100);
tcs.getRawData(&red, &green, &blue, &clearcol);
//加权平均值算法
average = (red + (green + blue)) / 3;
r = red / average;
g = green / average;
b = blue / average;
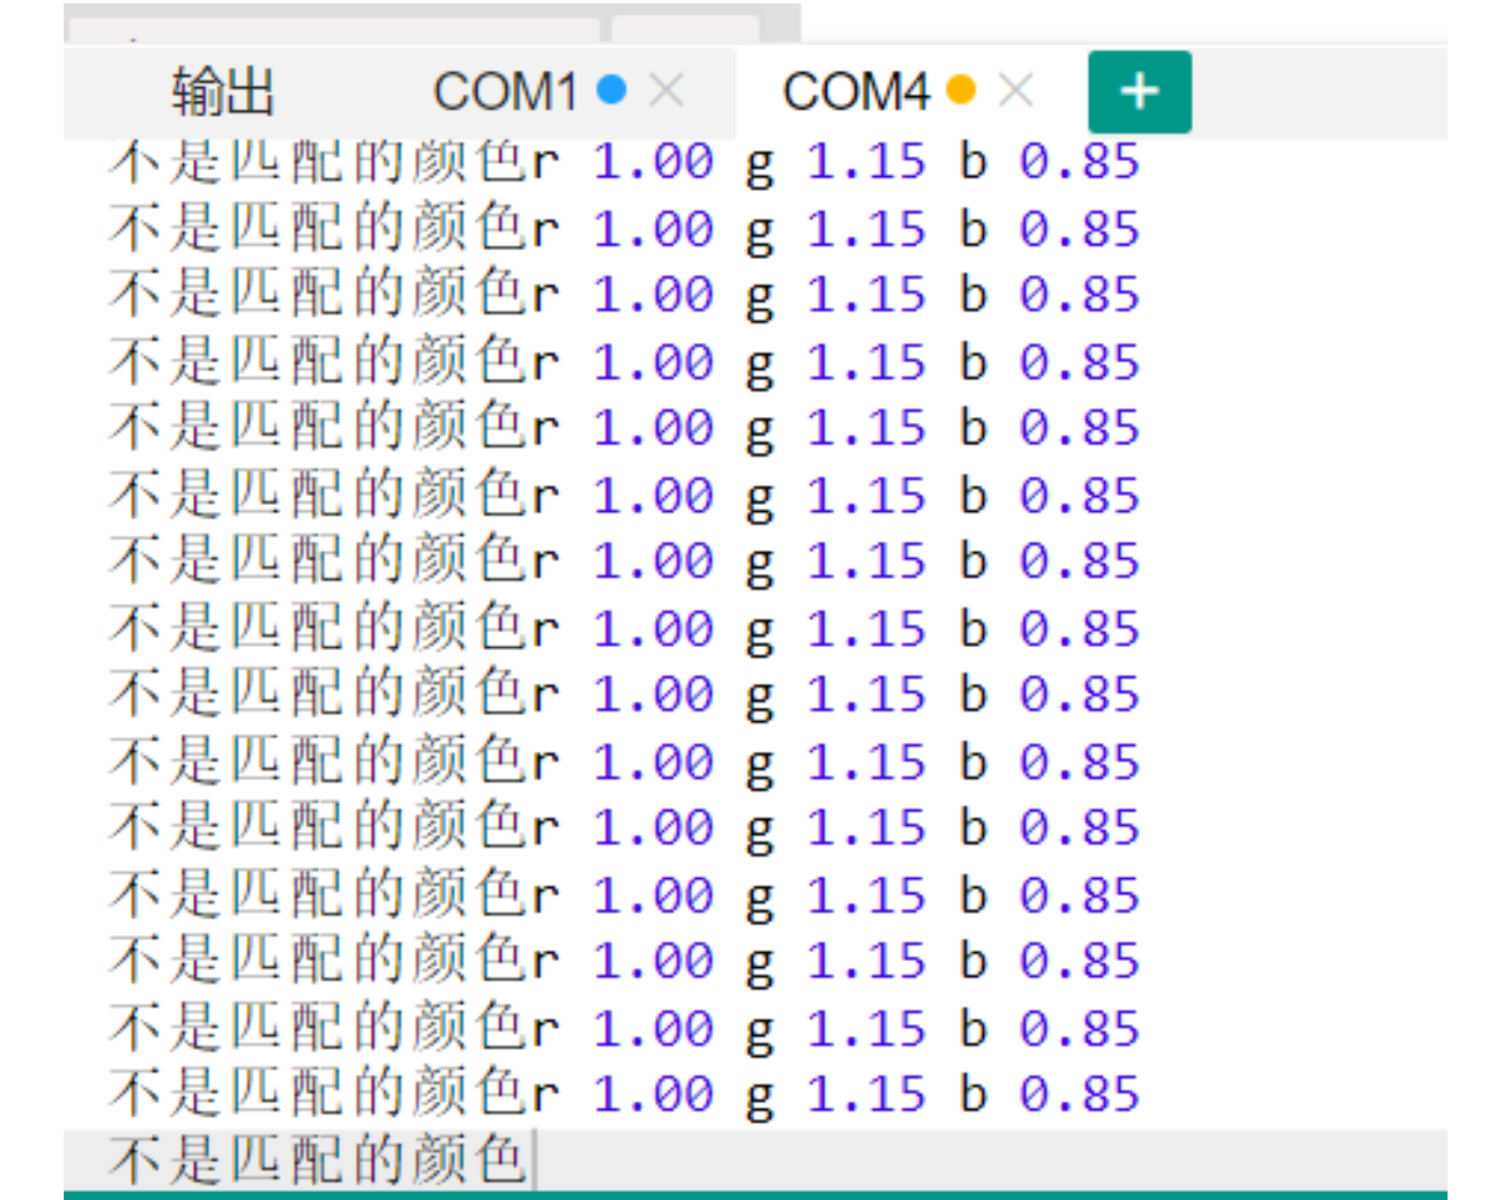
Serial.println(String("r ") + String(r) + String(" g ") + String(g) + String(" b ") + String(b));
if ((r > 1.2 && r < 1.9) && (g < 1 && (b > 0.45 && b < 0.9))) {
Serial.print(" 红");
} else if (r < 1.1 && (g > 1.3 && b < 0.7)) {
Serial.print(" 绿");
} else if ((r > 1 && r < 1.5) && ((g > 1.1 && g < 1.4) && (b > 0.35 && b < 0.75))) {
Serial.print(" 黄");
} else if ((r > 0.7 && r < 1) && (g < 1.2 && b > 1)) {
Serial.print(" 蓝");
} else if (false) {
} else {
Serial.print(" 不是匹配的颜色");
}
delay(10);
}
void setup(){
Serial.begin(9600);
if (tcs.begin(0x29)) {
Serial.println("搜索到TCS34725");
} else {
Serial.println("没有搜索到TCS34725");
while (true) {
delay(1);
}
}
}
void loop(){
printColor();
}Example Program (ESP32 Development Board):
import machine
import time


from machine import Pin,I2C
from tcs34725 import TCS34725
import time

# 创建I2C对象
i2cObj = I2C(1,scl = Pin(22),sda = Pin(21),freq = 400000)
# 打印扫描出的I2C对象
print("I2C Bus Scan: ", i2cObj .scan(), "\n")
# 创建tcs34725颜色识别模块对象
tcs = TCS34725(i2cObj ,0x29)
# 创建RGB颜色计算函数
def Colour():
    try:
        red,green,blue,colour = tcs.read(True)  # 读取颜色值

        if colour != 0:  # 如果colour不等于0
            Red   = int((red / colour) * 32)  # 计算红色的值
            Green = int((green / colour) * 32)  # 计算绿色的值
            Blue  = int((blue / colour) * 32)  # 计算蓝色的值
            return Red,Green,Blue
        else:
            return 0,0,0
    except :
        print("数据异常!")
        RuntimeError
RGB = [0, 0, 0]
while True:
    print('(r,g,b)对应是',end ="")
    # 获取颜色R,G,B函数
    print(Colour())
    time.sleep_ms(10)
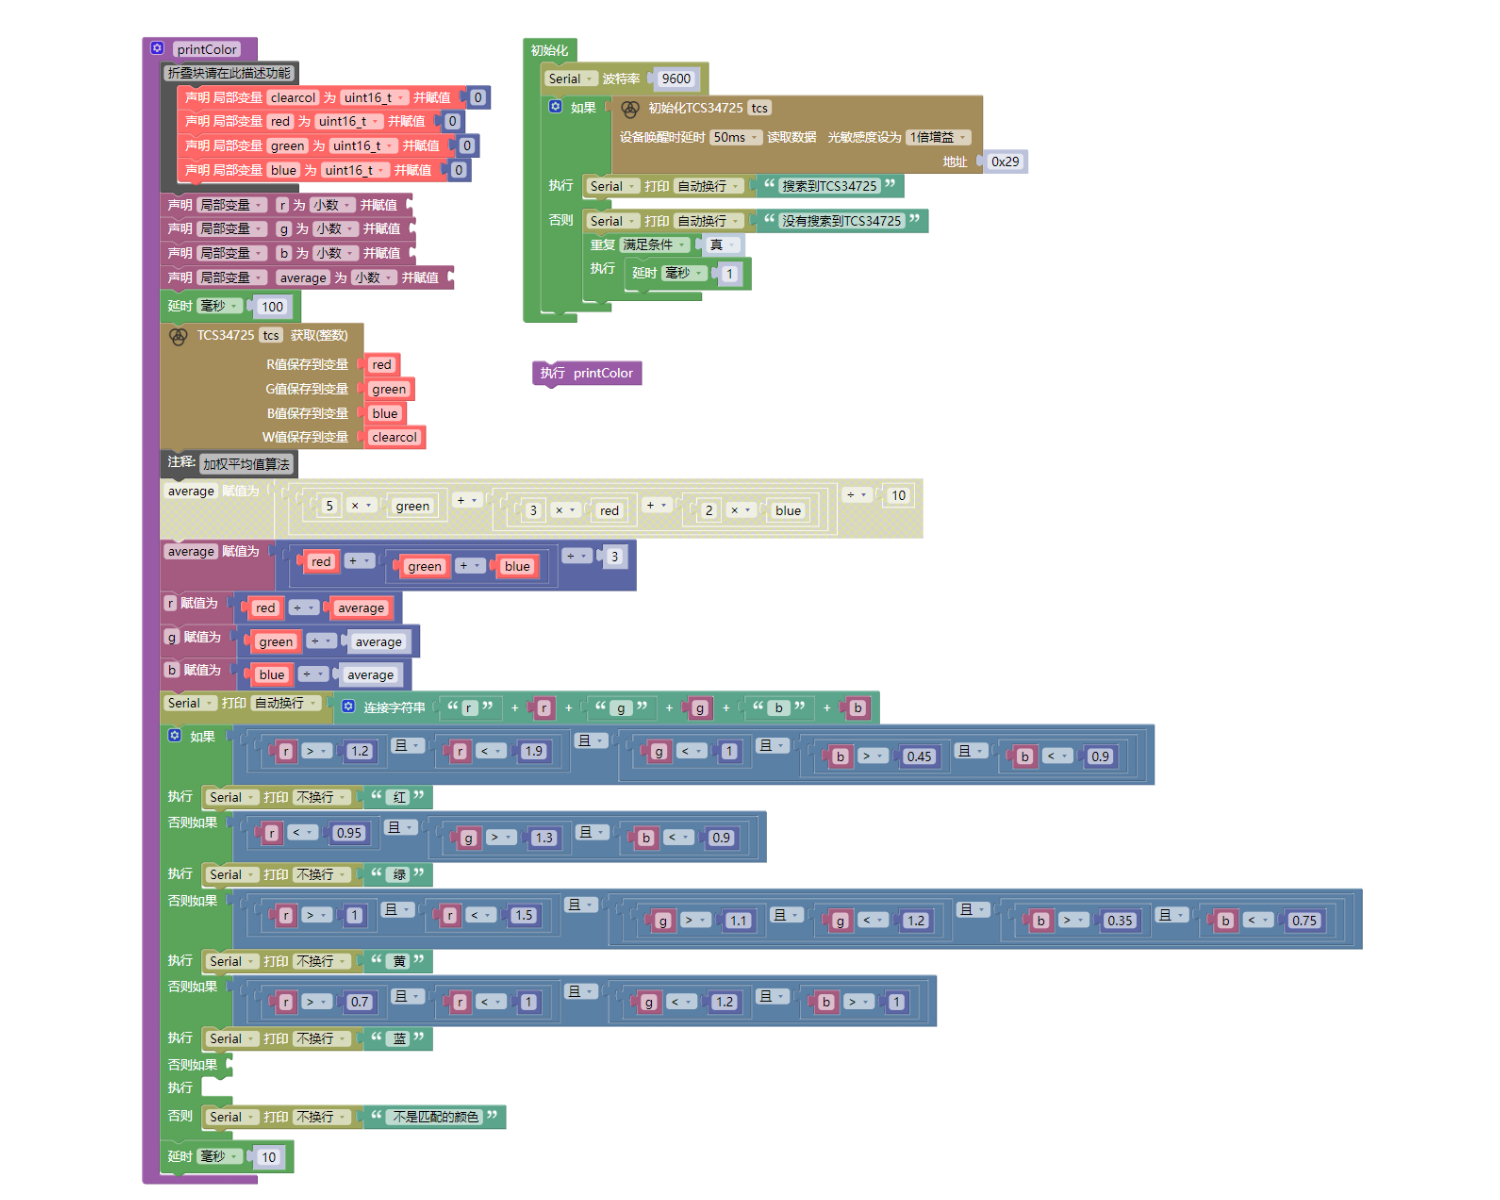
8, Mixly Example Program (Graphic Language)
Example Program (UNO Development Board):Click to download
Example Program (ESP32 Development Board):Click to download
9. Setting up the Test Environment
Arduino UNO Test Environment Setup
Prepare Components:
UNO-R3 development board *1
UNO-R3 Expansion Board *1
USB TYPE-C DATA CABLE *1
TCS3472 color sensor*1
PH2.0 4P Double Head Terminal Line *1
Circuit wiring diagram:
ESP32 Python test environment setup
10, video tutorial
Arduino UNO video tutorial: Click to view
ESP32 Python Video Tutorial:
11. Test Conclusion
Arduino UNO Test Conclusion:
Enter the code, then align the module with the color board.
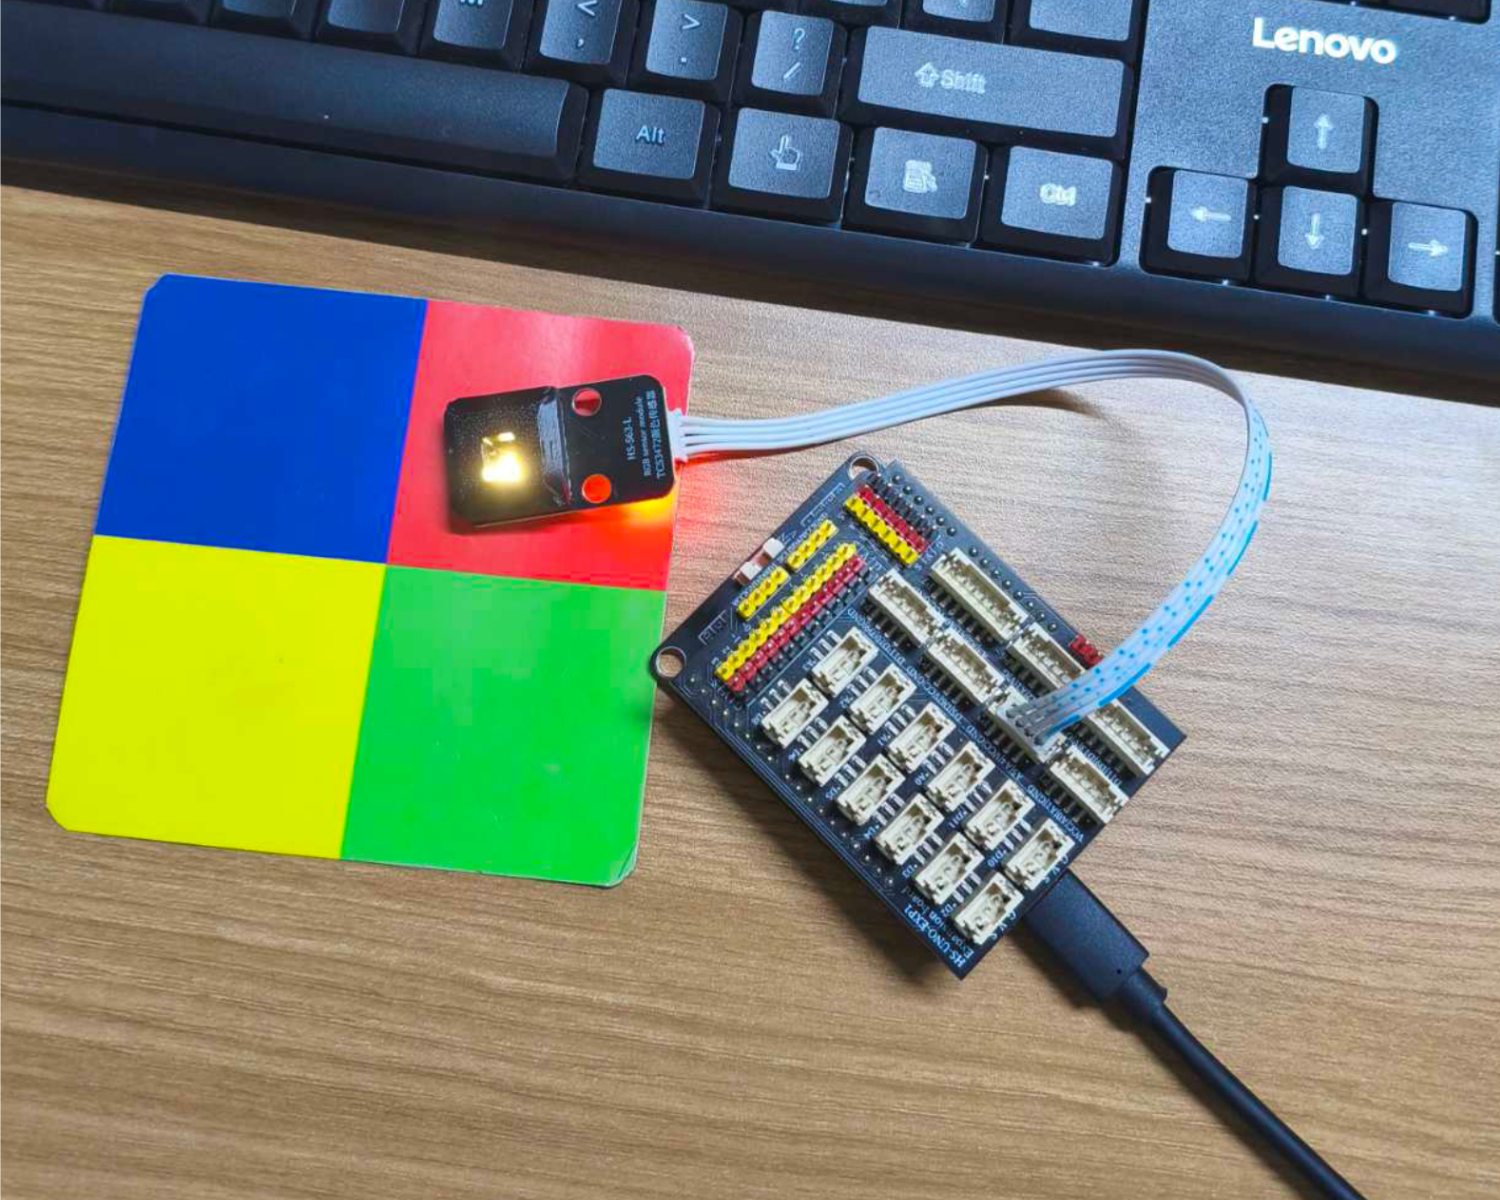
Aiming at different colors, you can observe different r, g, b values printed by the computer serial port.