
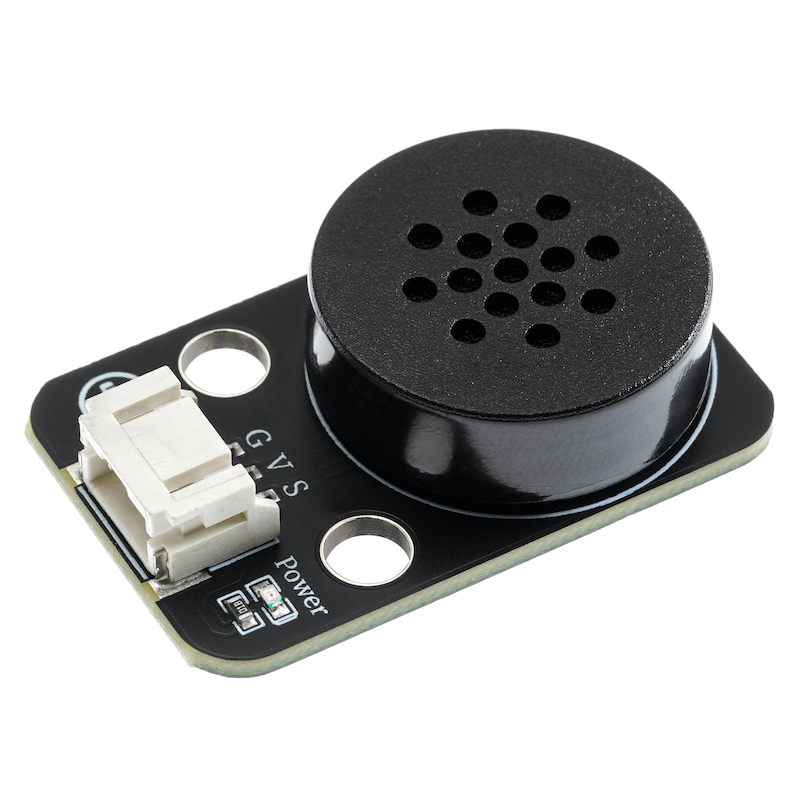
1、소개
음성 발표 모듈 사용 설명:다운로드 클릭
2、시뮬레이션 그래프
3、모듈 매개변수
핀 이름 | 설명 |
|---|---|
G | GND(전원 입력 부정极) |
V | VCC(전원 입력 정극) |
S | 데이터핀 |
전원전압: 3.3V / 5V
연결 방식: PH2.0 3P 표시선
설치방식: 더블스크루 고정
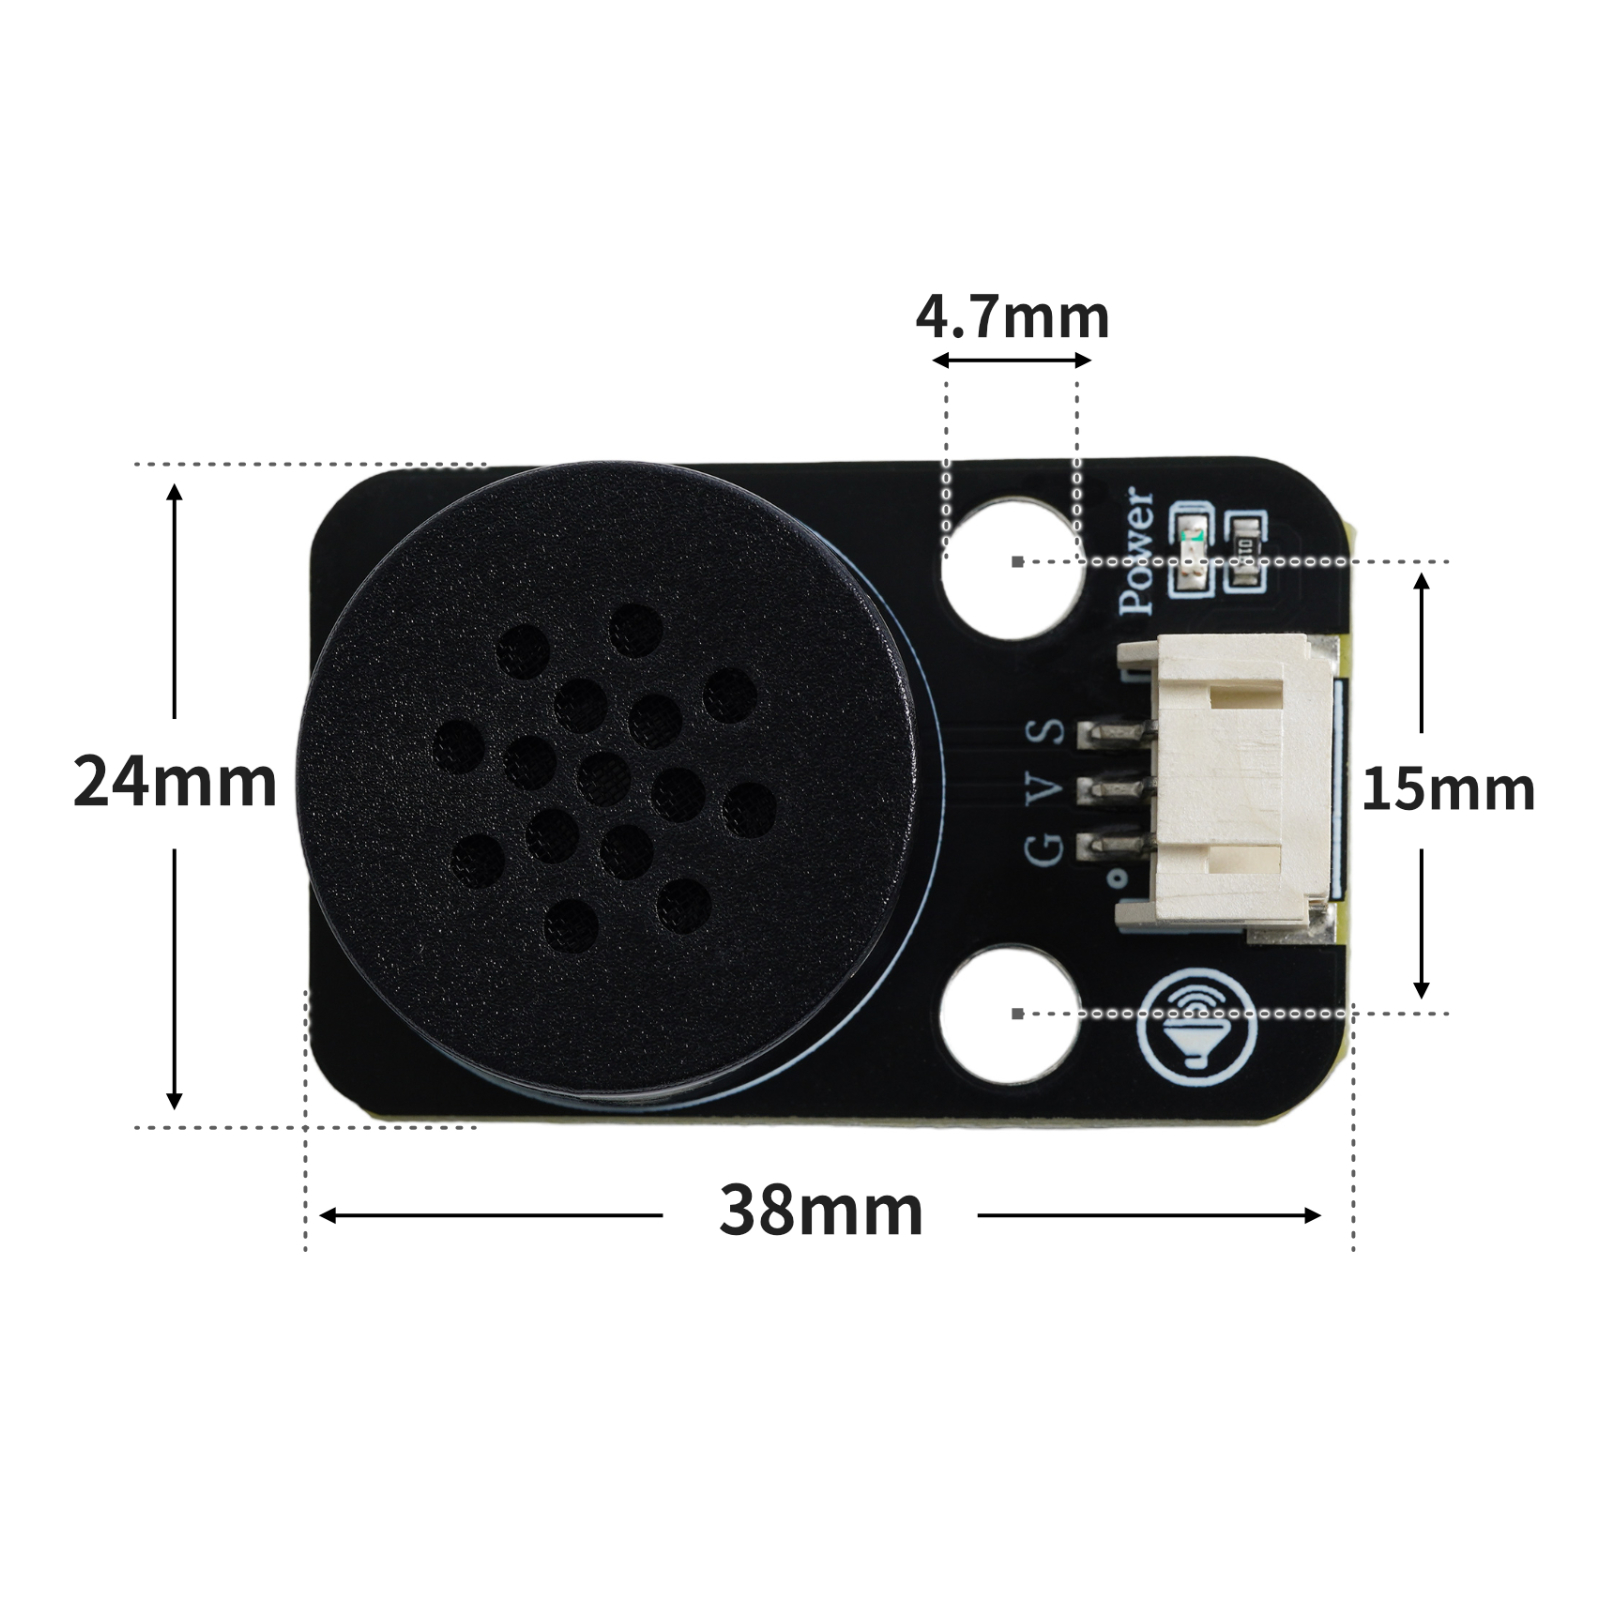
4、회로판 크기
5、미시치가 UNO 라이브러리와 파이썬 라이브러리를 추가합니다
Arduino UNO 라이브러리 추가:
미시치가 제공하는 라이브러리는 추가할 필요가 없습니다
ESP32 마이크로 파이썬 라이브러리 추가:
라이브러리 파일 설치하려면 여기를 클릭하세요:참고 링크
6、아두이노 IDE 예제 프로그램
Arduino UNO 그래픽 예제 프로그램:
void send_data(int addr) {
  int i;
  digitalWrite(8, LOW);
  delay(3); //>2ms
  for (i = 0; i < 8; i++) {
    digitalWrite(8, HIGH);
    if (addr & 1) {
      delayMicroseconds(2400); //>2400us
      digitalWrite(8, LOW);
      delayMicroseconds(800);
    } //>800us
    else {
      delayMicroseconds(800); //>800us
      digitalWrite(8, LOW);
      delayMicroseconds(2400);
    } //>2400us
    addr >>= 1;
  }
  digitalWrite(8, HIGH);
}

void setup(){
  pinMode(8, OUTPUT);
}

void loop(){
  send_data(0x10); //volume control 0xE0-E7;
  delay(1000);
  send_data(0x11); //volume control 0xE0-E7;
  delay(1000);
  send_data(0x12); //volume control 0xE0-E7;
  delay(1000);
  send_data(0x13); //volume control 0xE0-E7;
  delay(1000);

}
ESP32 Python 예제(Mixly IDE / 미스키에 적용됨)
(개발 보드를 선택한 Python ESP32 【ESP32 Generic(4MB)】를 코드 모드로 전환하여 업로드 ):
import machine
import time
def voice_broadcast(Pin, directives, delay):
    Pin.value(0)
    time.sleep_ms(5)
    for i in range(0, 8, 1):
        if ((directives>>i)&0x01) == 0:
            Pin.value(1)
            time.sleep_us(800)
            Pin.value(0)
            time.sleep_us(2400)
        elif ((directives>>i)&0x01) == 1:
            Pin.value(1)
            time.sleep_us(2400)
            Pin.value(0)
            time.sleep_us(800)
    Pin.value(1)
    time.sleep_ms(delay)

Pin4 = machine.Pin(4, machine.Pin.OUT)
Pin4.value(1)
time.sleep_ms(10)


voice_broadcast(Pin4, 0x10,1000)
voice_broadcast(Pin4, 0x11,1000)
voice_broadcast(Pin4, 0x12,1000)
voice_broadcast(Pin4, 0x13,1000)
7、미스키 Mixly 예제 프로그램(그래픽 언어)
Arduino UNO 그래픽 예제 프로그램:다운로드 클릭
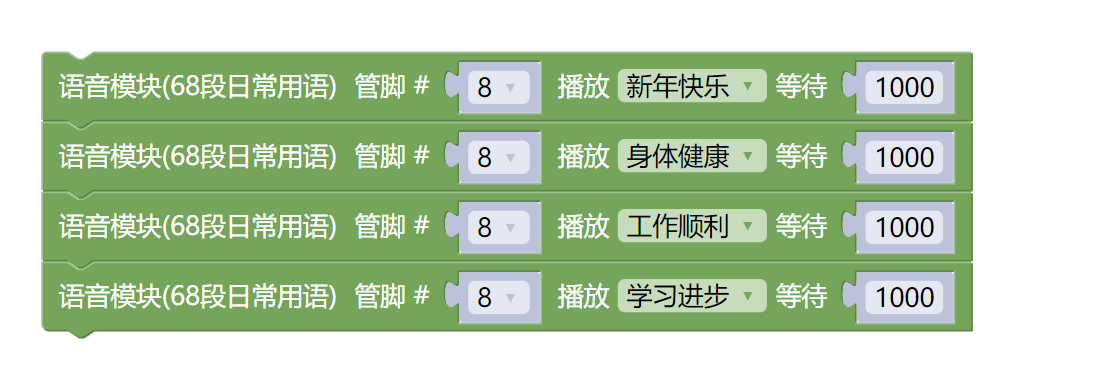
ESP32 Python 그래픽 예제 프로그램:다운로드 클릭

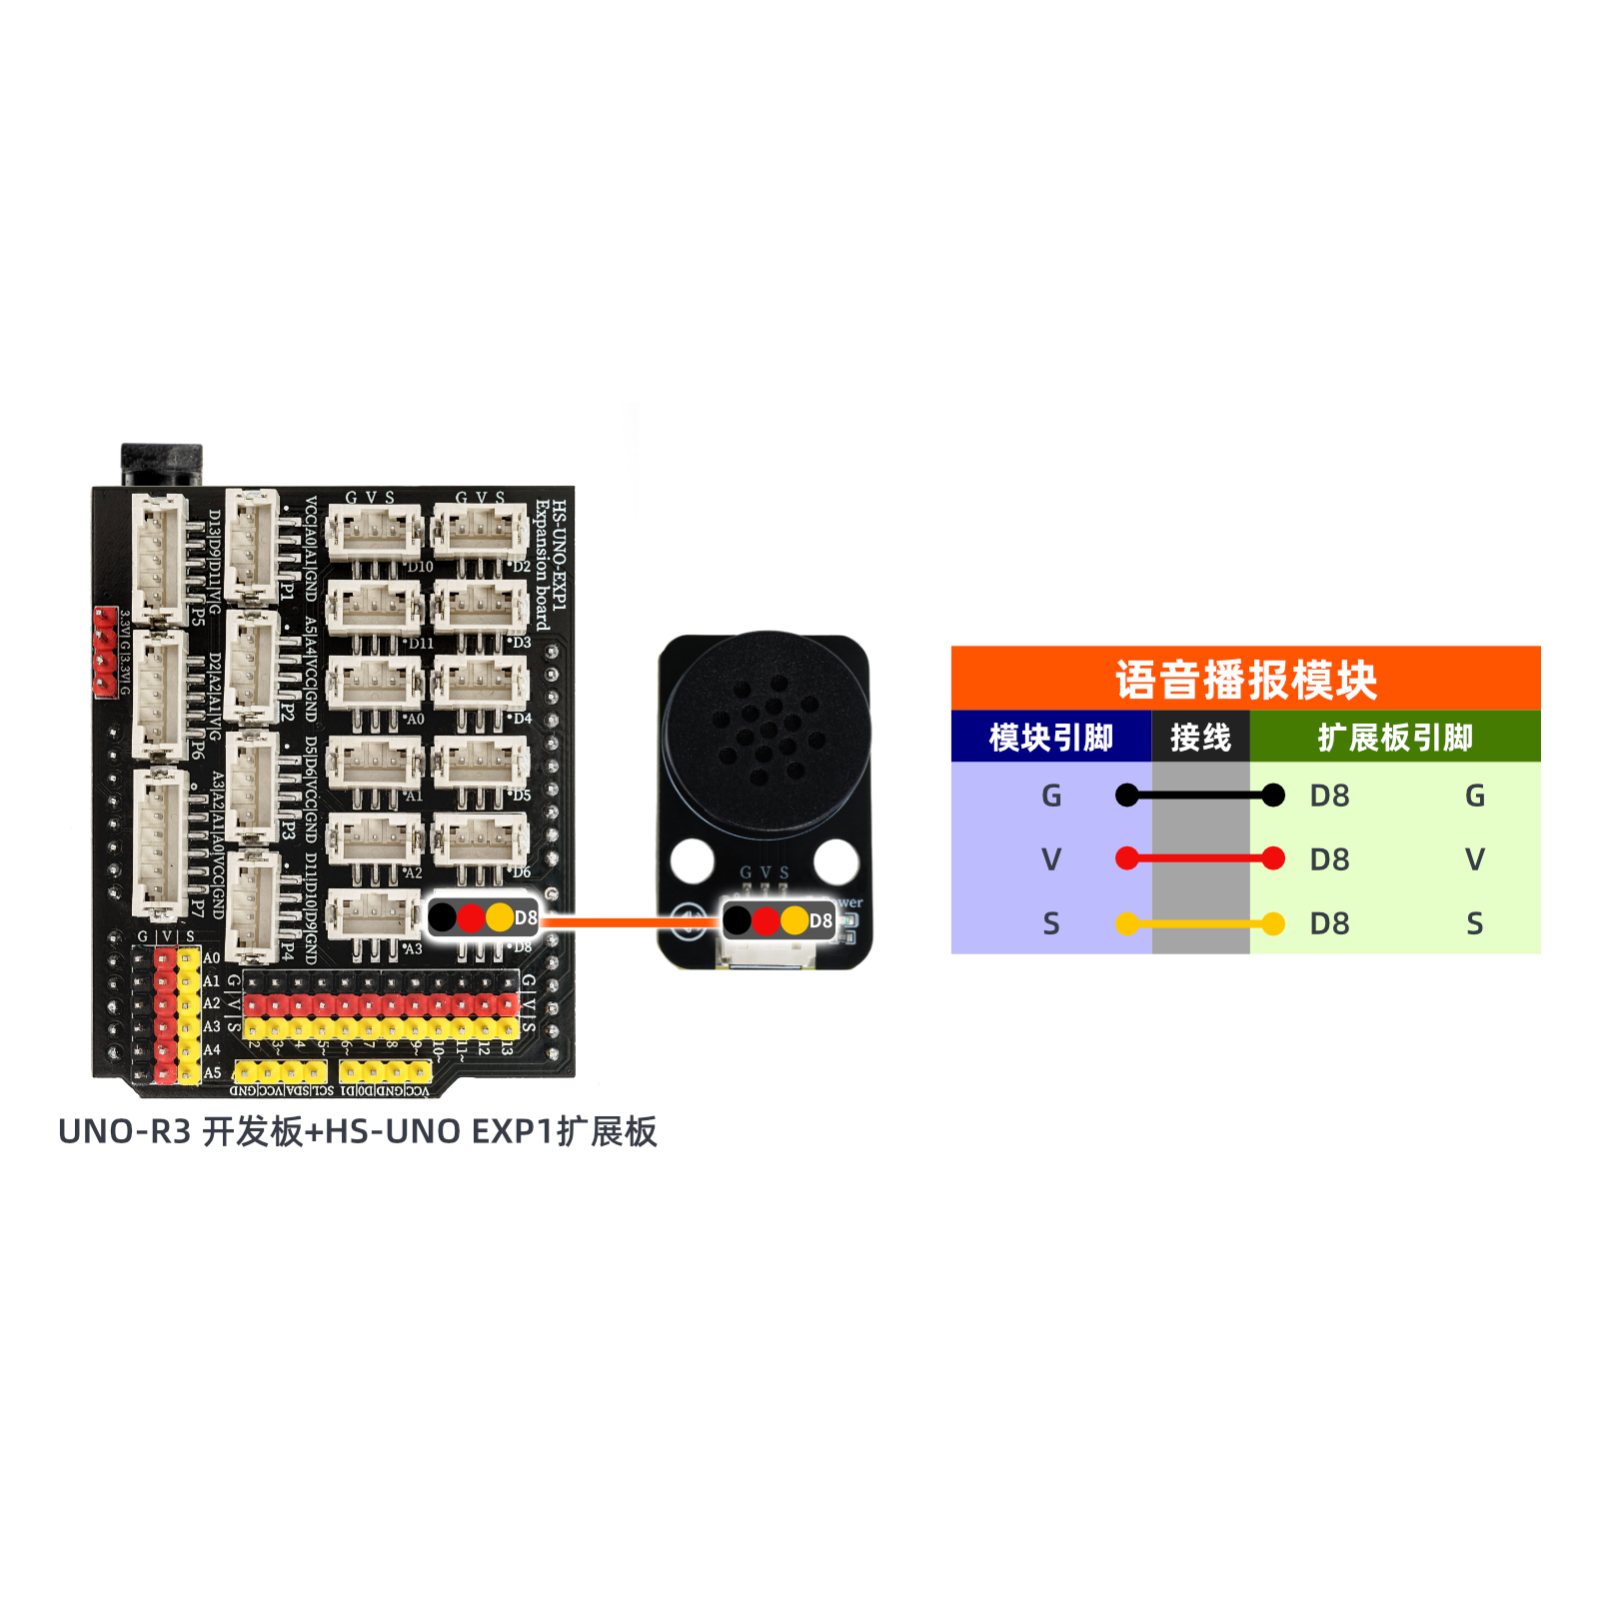
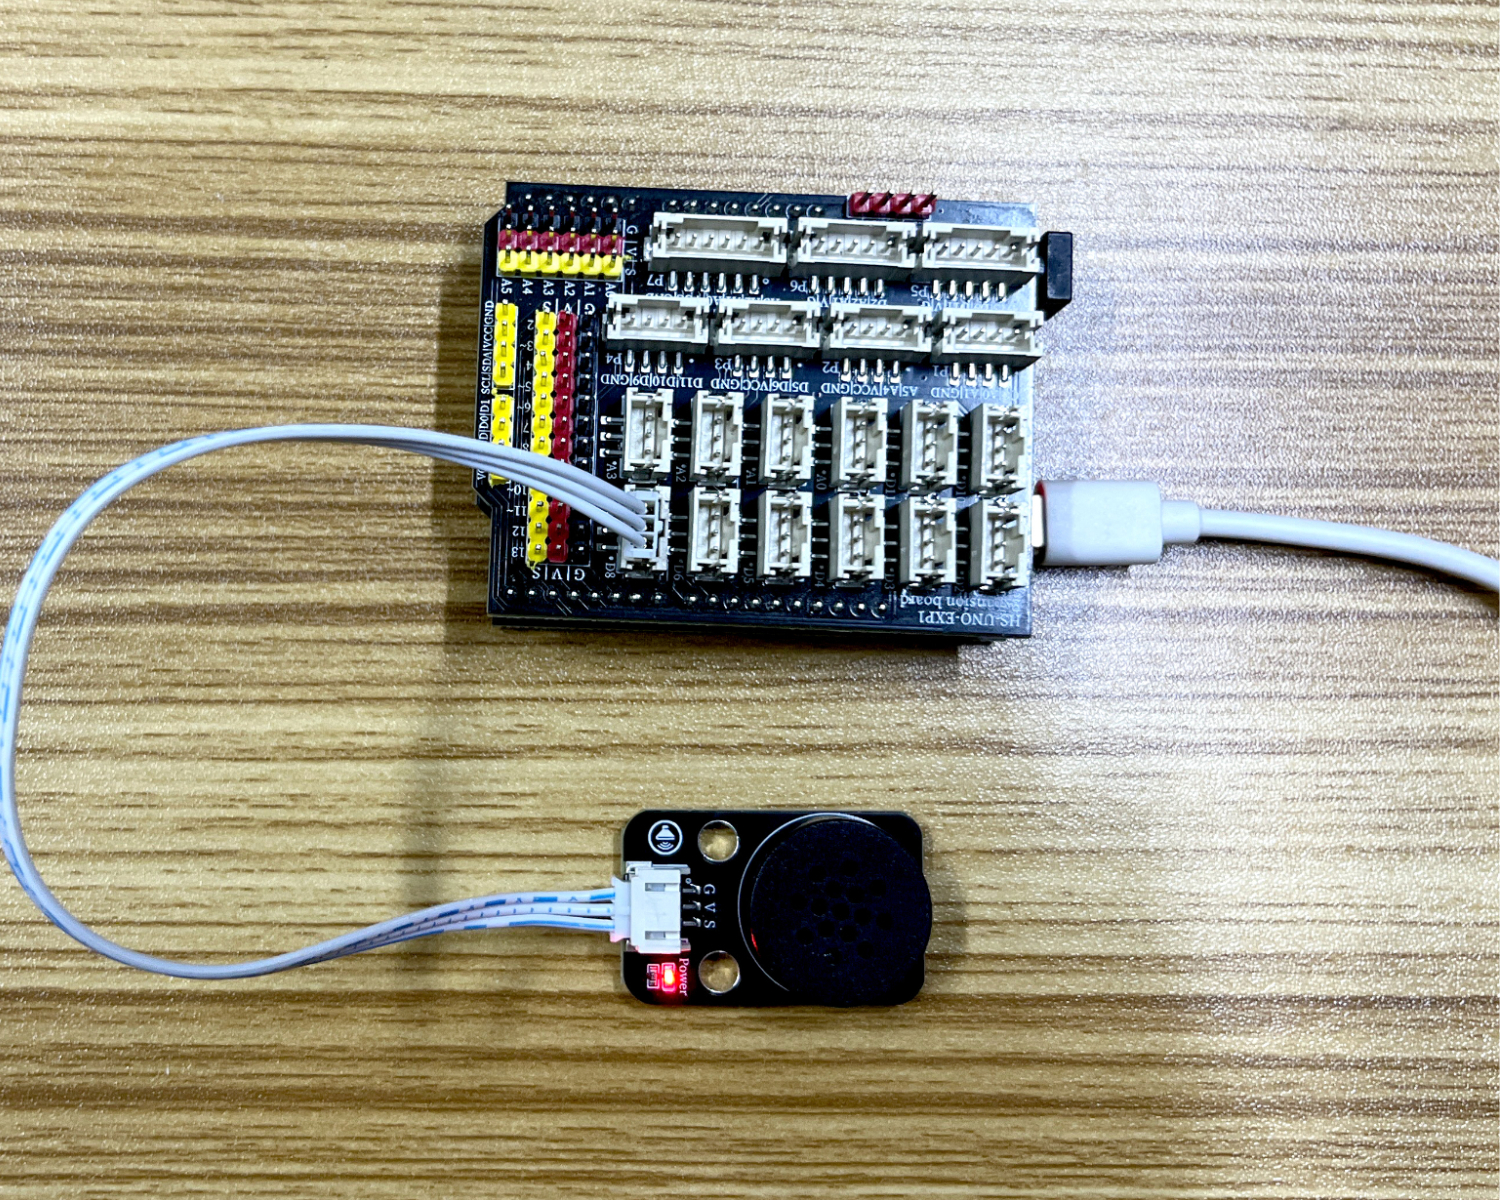
8、테스트 환경 구축
Arduino UNO 테스트 환경 구축
부품 준비:“
UNO-R3 개발 보드 *1
UNO-R3 P 확장판 *1
USB type-c 데이터 케이블 *1
오디오 발표 모듈(HS-F26L)*1
PH2.0 4P둘쪽 머리 끝 케이블 *1
전기 연결도):
ESP32 Python 테스트 환경 구축
9、비디오 강의
Arduino UNO 비디오 강의:시각화 클릭
ESP32 Python 비디오 강의:
10, 테스트 결과
Arduino UNO 테스트 결과:
선을 연결한 장치를 통해 Arduino UNO 개발판에 프로그램을 업로드하면, 음성 발표 모듈이 프로그램에 설정된 문장을 반복적으로 재생됩니다。
ESP32 Python 테스트 결과: